Are you struggling to take apart your trundle bunk bed without damaging it? You’re not alone.
Whether you need to move, store, or simply rearrange your space, knowing the right way to disassemble your trundle bunk bed can save you time, frustration, and money. In this guide, you’ll discover simple, step-by-step instructions that anyone can follow—even if you’re not handy with tools.
Keep reading, and you’ll soon have your bed apart quickly and safely, ready for whatever comes next.
Tools Needed
Gathering the right tools makes taking apart a trundle bunk bed easier and safer. Each tool plays a key role in removing screws, bolts, and panels without damage.
Prepare your workspace with good light and space. Keep tools within reach. This helps avoid interruptions during the process.
Wrench Or Socket Set
A wrench or socket set fits most bolts holding the bed frame. Choose the correct size to avoid stripping bolts. This tool loosens and tightens nuts quickly.
Screwdriver
A screwdriver removes screws securing slats or panels. Use a Phillips or flathead depending on the screw type. A magnetic screwdriver helps hold screws steadily.
Rubber Mallet
A rubber mallet taps parts apart without scratching wood. It gently loosens joints stuck from tight fits or glue. Avoid metal hammers to protect the bed’s finish.
Allen Keys (hex Keys)
Allen keys fit hex bolts common in bunk beds. A set with different sizes covers all bolts. These keys allow precise turning in tight spaces.
Measuring Tape
Measure bed parts before disassembly to keep track. Mark pieces for easier reassembly or storage. Accurate measurements prevent confusion later.
Prepare The Area
Preparing the area is the first step to take apart a trundle bunk bed safely. Clearing space helps avoid accidents and makes the process smooth. You need enough room to move parts and tools freely.
Take time to organize the space before starting. This preparation saves time and reduces stress during disassembly.
Clear The Surrounding Space
Remove any furniture or objects near the bed. This prevents damage and gives you enough room to work. Clear at least three feet around the bed.
Protect The Floor
Lay down a soft blanket or rug under the bed area. This protects the floor from scratches and catches small parts that may fall. It also cushions the bed frame during disassembly.
Gather Necessary Tools
Collect all tools needed before starting. Common tools include screwdrivers, Allen wrenches, and pliers. Having tools ready avoids interruptions and speeds up the process.
Remove Bedding And Mattress
Removing the bedding and mattress is the first step in taking apart a trundle bunk bed. This step makes the bed lighter and easier to handle. It also protects the mattress from damage while you work.
Start by stripping off all sheets, blankets, and pillows. Fold them neatly and set them aside. Keep them in a safe place to avoid losing any pieces.
Next, carefully lift the mattress off the trundle bed. Mattresses can be heavy, so ask for help if needed. Place the mattress on a flat surface to keep it clean and safe.
Check the mattress and bedding for any stains or damage. This is a good time to clean or air them out before storing.
Clear The Bedding Completely
Remove every layer of bedding from the mattress. Check under the bed for any hidden items or dust. Clearing everything helps you work faster.
Lift The Mattress Safely
Use your legs, not your back, to lift the mattress. Get help if the mattress is too heavy. Place it gently on the floor or another bed.
Store Bedding And Mattress Properly
Fold bedding neatly to save space. Store the mattress flat to avoid damage. Keep them in a dry, clean area until needed again.

Credit: www.justbunkbeds.com
Detach The Trundle Frame
Detaching the trundle frame is a key step in putting apart a trundle bunk bed. This part slides under the main bed frame and holds the mattress for the lower bunk. Removing it carefully makes the whole disassembly process easier and safer.
Start by clearing any bedding or mattresses from the trundle. This prevents damage and gives clear access to the frame. The trundle usually rests on small wheels or casters, which help it slide in and out smoothly.
Locate The Trundle Frame Locks Or Stops
Check the sides of the trundle frame for locks or stops. These keep the trundle from rolling out unintentionally. Some models have clips or latches that hold the frame in place. Gently release these before trying to pull out the frame.
Slide The Trundle Frame Out Carefully
Hold the trundle frame firmly on both sides. Pull it straight out along the track. Avoid tilting or forcing it, as this can damage the wheels or bed frame. If it feels stuck, double-check for hidden locks or screws.
Disconnect Any Attached Hardware
Look for bolts or screws that connect the trundle frame to the main bed. Use the right tools to unscrew them slowly. Keep the hardware in a safe place for reassembly later. This step frees the trundle completely from the bunk bed.
Store The Trundle Frame Safely
After detaching, place the trundle frame on a flat surface. Keep it away from heavy objects to avoid bending. Store it in a dry area to prevent rust or damage. Proper storage ensures the frame stays in good condition.
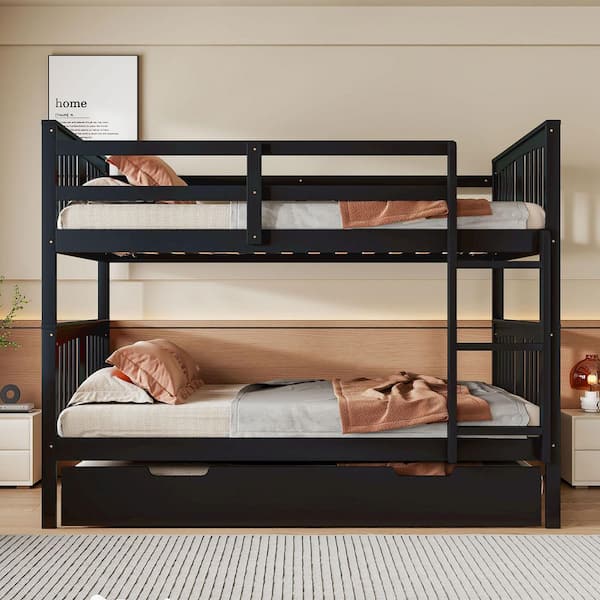
Disassemble The Bunk Bed Frame
Disassembling the bunk bed frame is the first step to put apart a trundle bunk bed. This part needs care to avoid damage. Follow each step slowly and keep all screws safe. Organizing the pieces helps later during reassembly or storage.
Start by focusing on the main parts of the frame. Removing these will make the bed easier to move and store. Each section has its own method. Pay attention to details to prevent mistakes.
Remove Side Rails
Side rails hold the mattress and connect the bed frame. Find the screws or bolts attaching the rails. Use a screwdriver or wrench to loosen them. Keep all hardware in a container. Gently pull the rails away from the frame. Set them aside carefully.
Take Down Guardrails
Guardrails protect the top bunk from falling. Look for screws or clips holding them. Unscrew or unclip these parts carefully. Lift the guardrails off the frame. Place them in a safe spot to avoid damage.
Separate Ladder
The ladder connects to the bunk bed frame. Check how it is fastened. Unscrew bolts or remove hooks attaching it. Pull the ladder away slowly. Store it flat to save space and prevent bending.
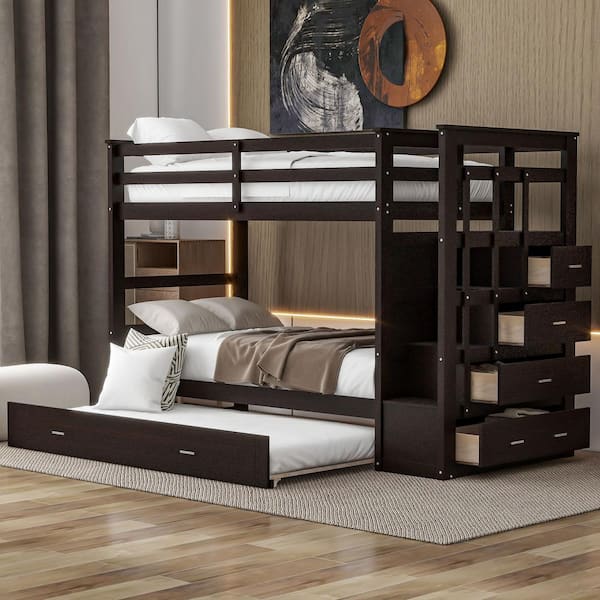
Credit: www.homedepot.com
Organize And Store Parts
After taking apart a trundle bunk bed, organizing and storing the parts is important. Proper storage keeps everything safe and easy to find. It also prevents damage and lost pieces.
Sorting the pieces carefully helps when you need to put the bed back together. Follow simple steps to keep parts neat and ready for future use.
Separate Small And Large Parts
Group screws, bolts, and nuts together. Use small containers or bags to hold these items. Label each container to know which parts belong to the bed.
Keep large parts like bed frames, slats, and panels separate. Place them in a clean, dry area to avoid scratches or warping.
Label All Parts Clearly
Write clear labels for every bag or box. Use easy words like “screws,” “side rails,” or “drawer pieces.”
Labels save time during reassembly. They help find the right parts quickly and avoid confusion.
Store Parts In A Safe Place
Choose a dry spot away from moisture and direct sunlight. This protects wooden and metal parts from damage.
Stack boxes carefully to prevent crushing fragile items. Keep heavy parts at the bottom and lighter ones on top.
Safety Tips
Start by clearing the area around the bunk bed to avoid tripping. Gently pull out the trundle bed, watching for sharp edges or pinch points. Use both hands and ask for help if the bed feels heavy or hard to move.
Wear Protective Gloves
Wear gloves to protect your hands from splinters and sharp edges.
They also help you hold parts firmly and avoid slips.
Clear The Area
Remove toys, rugs, and furniture near the bed.
This creates space and reduces the risk of tripping or falling.
Use Proper Tools
Use the right tools like screwdrivers and wrenches for disassembly.
Using the wrong tools can cause damage or injury.
Work With A Partner
Ask someone to help you lift and separate heavy parts.
Two people can manage the bed safely and quickly.
Follow Instructions Carefully
Read the manual before starting to avoid mistakes.
Follow steps one by one to keep the process safe.
Lift Correctly
Bend your knees and keep your back straight when lifting.
This prevents back injuries and helps you carry weight safely.
Keep Small Parts Safe
Put screws and bolts in a container to avoid losing them.
Keep them out of children’s reach to prevent choking hazards.
Credit: www.homedepot.com
Frequently Asked Questions
How Do I Safely Disassemble A Trundle Bunk Bed?
Start by removing all bedding and mattresses. Unscrew bolts and screws using the correct tools. Keep hardware organized. Gently separate the frame parts to avoid damage. Follow the manufacturer’s instructions for best results.
What Tools Are Needed To Take Apart A Trundle Bunk Bed?
You typically need a screwdriver, Allen wrench, and possibly a wrench. Some beds require a drill with screwdriver bits. Check the assembly manual to identify specific tools required for your model.
Can I Store A Trundle Bunk Bed After Disassembly?
Yes, disassembled parts can be stored in a dry, clean space. Wrap metal parts to prevent scratches. Keep small hardware in labeled bags. Proper storage extends the bed’s lifespan and ease of reassembly.
How Long Does It Take To Disassemble A Trundle Bunk Bed?
Disassembly usually takes 30 minutes to 1 hour. Time depends on bed complexity and your experience. Having the right tools and instructions speeds up the process. Take your time to avoid damage.
Conclusion
Taking apart a trundle bunk bed is easier than it seems. Follow the steps carefully and keep your tools ready. Work slowly to avoid damage or losing pieces. Organize parts in a safe place for reassembly or storage. This simple process saves space and helps during moves.
Enjoy your clear room and extra space now.