Are you tired of searching for the perfect vanity cabinet that fits your style and space? What if you could create one yourself—custom-made exactly to your needs?
Building a custom vanity cabinet isn’t as hard as it sounds. With the right guidance, you can design a piece that matches your bathroom perfectly, saves you money, and gives you a sense of pride every time you see it.
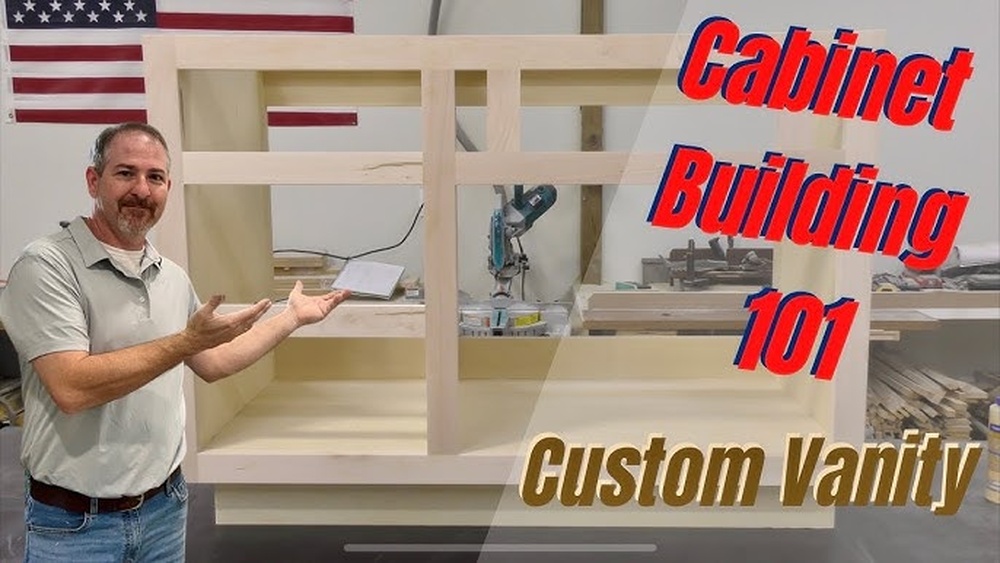
You’ll discover simple steps and insider tips to help you build your own beautiful vanity cabinet from start to finish. Ready to transform your bathroom with a project you’ll love? Let’s get started!
:strip_icc()/modern-graphic-bathroom-natural-vanity-af5a8dee-ee59fe31171d4a52a3452c28851bee09.jpg)
Credit: www.bhg.com
Planning Your Vanity Cabinet
Planning your vanity cabinet is the first step to a successful project. It helps you avoid mistakes and saves time. Careful planning ensures your cabinet fits perfectly and looks great. Consider size, materials, and design before starting. Each choice affects the final outcome and functionality.
Choosing The Right Size
Measure the space where the vanity will go. Think about how much room you need for storage and movement. The cabinet should not block doors or drawers. Choose a size that fits your bathroom well. Too big or too small can cause problems later.
Selecting Materials
Pick materials that last long and resist water. Solid wood is strong but may cost more. Plywood is a good balance of price and strength. Avoid particleboard as it can swell with moisture. Consider finishes like paint or sealant for extra protection.
Designing The Layout
Plan the cabinet’s internal layout carefully. Decide on the number of drawers and shelves. Think about what items you want to store. Easy access is important. Keep plumbing space clear for pipes and drains. A well-planned layout makes daily use simple and neat.
Gathering Tools And Supplies
Before starting to build a custom vanity cabinet, gather all tools and supplies. Having everything ready saves time and avoids interruptions. Good preparation helps you work smoothly and safely. Here is a guide to the tools, materials, and safety gear needed.
Essential Tools
Start with basic woodworking tools. A measuring tape and pencil help mark cuts accurately. A saw is needed to cut wood pieces. Use a drill to make holes and drive screws. Clamps hold parts together while gluing or screwing. A screwdriver, level, and square ensure precise assembly. Sandpaper or a power sander smooths surfaces and edges.
Recommended Materials
Choose quality wood like plywood or hardwood for durability. Wood glue strengthens joints. Use screws and nails to secure parts firmly. Finish with paint, stain, or sealant to protect the cabinet. Hinges and handles complete the vanity’s look and function. Select materials that match your bathroom style and size.
Safety Equipment
Wear safety glasses to protect eyes from dust and debris. Use ear protection while operating loud tools. A dust mask prevents inhaling wood particles. Gloves protect hands from splinters and sharp tools. Ensure a clean workspace to reduce accidents. Safety gear keeps you safe during every step.
Preparing The Workspace
Preparing the workspace is the first step in building a custom vanity cabinet. A clean and organized area helps you work safely and efficiently. Setting up a good workspace can make the entire project easier and more enjoyable.
Clearing The Area
Remove any furniture or items from the workspace. Clear the floor to avoid tripping hazards. A tidy space gives you room to move and work freely. It also reduces dust and debris buildup. Make sure you have enough light to see your tools and materials clearly.
Setting Up Workbench
Choose a sturdy workbench or table to build your cabinet. The surface should be flat and strong enough to hold your materials. Set it at a comfortable height to reduce strain on your back. Place it near power outlets for easy tool access. Secure the workbench so it does not wobble during work.
Organizing Tools
Gather all the tools needed for the project before starting. Arrange them in order of use to save time. Use containers or racks to keep small items like screws and nails. Keep measuring tools handy for quick checks. Having tools organized prevents frustration and speeds up the work.
:strip_icc()/open-simple-blue-vanity-32366fec-cedb074f8ff9499fa7e993416f2d9eb8.jpg)
Credit: www.bhg.com
Cutting And Assembling The Frame
Cutting and assembling the frame is the first major step in building a custom vanity cabinet. This process sets the base for the entire project. Accuracy and careful work here ensure the cabinet will be strong and fit perfectly in your space. Take your time with each step to avoid mistakes and save effort later.
Start by measuring and marking the wood precisely. Then, cut the pieces carefully using the right tools. Finally, join the frame parts securely to create a sturdy structure. Each step matters for a smooth build and lasting result.
Measuring And Marking
Measure twice, cut once. This old saying fits perfectly here. Use a tape measure to get exact dimensions for your cabinet frame. Mark each piece of wood clearly with a pencil. Use a square tool to make straight, right-angle lines. Clear markings prevent mistakes and wasted wood. Double-check all measurements before cutting.
Cutting Wood Pieces
Use a saw suited for your wood type and thickness. A circular saw or miter saw works well for straight cuts. Follow the pencil lines carefully. Cut slowly and steadily to keep edges clean. Smooth rough edges with sandpaper. Keep safety gear on. Good cuts make assembly easier and the frame stronger.
Joining The Frame
Join the cut pieces using wood glue and screws or nails. Apply glue to the edges for a tight bond. Use clamps to hold pieces in place while glue dries. Drill pilot holes before screwing to avoid splitting wood. Check that corners are square as you join them. A strong frame holds the vanity cabinet steady for years.
Building Cabinets And Drawers
Building cabinets and drawers is the heart of creating a custom vanity cabinet. This step shapes the overall look and function. Careful work here ensures strong, smooth, and lasting storage.
Constructing Cabinet Boxes
Start by cutting plywood panels to size. These panels form the sides, bottom, top, and back of the cabinet box. Use wood glue and screws to join the pieces. Make sure corners are square and edges flush. Sand the surfaces smooth for a clean finish.
Reinforce the box with corner braces if needed. This adds strength and keeps the box from warping. Double-check measurements to ensure proper fit in your vanity space.
Creating Drawer Boxes
Drawers need to fit perfectly inside the cabinet box. Cut the drawer sides, front, back, and bottom from quality wood. Assemble using wood glue and nails or screws. Keep joints tight and corners square.
Sand drawer edges to avoid splinters and ensure easy sliding. Measure drawer depth and width carefully. This prevents gaps or tight spots inside the cabinet.
Installing Slides And Hardware
Choose drawer slides that suit the weight and use of your drawers. Attach slides to both the cabinet box and drawer sides. Align them carefully for smooth movement. Test each drawer to check if it opens and closes easily.
Add handles or knobs to drawers and doors. Position hardware consistently for a neat look. Secure screws firmly without over-tightening to avoid damage.
Adding Doors And Finishing Touches
Adding doors and finishing touches brings your custom vanity cabinet to life. This step improves both look and function. It protects the inside and gives a polished feel. Careful attention makes your cabinet stand out and last long.
Attaching Cabinet Doors
Start by aligning the doors with the cabinet frame. Use hinges that fit your door style. Mark hinge spots carefully on both door and frame. Screw hinges tightly to avoid loose doors. Check the door swings smoothly without rubbing. Adjust hinge screws to fix any gaps or unevenness.
Sanding And Smoothing
Sand all surfaces with fine-grit sandpaper. Smooth edges and corners to prevent splinters. Wipe dust off with a clean cloth after sanding. This step prepares the wood for paint or stain. It helps the finish stick better and look even.
Painting Or Staining
Choose paint or stain that fits your bathroom style. Apply thin, even coats with a brush or roller. Let each coat dry fully before the next. Use a sealer for extra protection against water damage. Finish with hardware like knobs or handles for a complete look.
Installing The Vanity Cabinet
Installing the vanity cabinet is a key step in your bathroom project. It sets the foundation for a sturdy and functional space. Proper installation ensures the cabinet fits well and works with your plumbing. Follow clear steps to position, secure, and connect everything smoothly.
Positioning And Securing
Start by placing the cabinet in the desired spot. Check that it fits snugly against the wall. Use a level to make sure it stands straight and even. Mark the wall where the cabinet will attach. Drill pilot holes into wall studs for strong support. Secure the cabinet to the wall with screws. Tighten the screws firmly but avoid damaging the cabinet.
Connecting Plumbing
Turn off the water supply before touching pipes. Connect the sink drain to the cabinet plumbing. Attach the water supply lines to the faucet. Use plumber’s tape on threaded connections to stop leaks. Tighten all fittings carefully to prevent water damage. Test the connections by turning water back on. Watch for any drips or leaks around joints.
Final Adjustments
Check the cabinet doors and drawers for smooth operation. Adjust hinges or slides if they do not close properly. Add silicone sealant around the edges where the cabinet meets the wall. This stops moisture from seeping in. Clean any dust or debris from installation. Your vanity cabinet is now ready for use and looks great.
Maintaining Your Vanity Cabinet
Maintaining your custom vanity cabinet keeps it looking fresh and working well for years. Regular care protects the wood, finish, and hardware from wear and damage. Small efforts make a big difference in durability and appearance.
Cleaning Tips
Use a soft cloth to wipe dust and dirt daily. Choose a mild soap mixed with water for cleaning. Avoid harsh chemicals that can damage the finish. Dry the surface completely after cleaning to stop water marks. Clean spills quickly to prevent stains and warping.
Repairing Minor Damages
Fill small scratches with matching wood filler or touch-up markers. Tighten loose screws or hinges to keep doors and drawers aligned. Sand rough edges gently before applying a finish. Replace damaged hardware to maintain smooth function and appearance. Fix minor damage early to avoid costly repairs.
Extending Cabinet Life
Keep the vanity away from direct water exposure to stop swelling. Use coasters or trays under toiletries to protect the surface. Avoid placing heavy items on the cabinet top. Open doors and drawers gently to reduce stress on joints. Regularly check for signs of wear and fix them promptly.
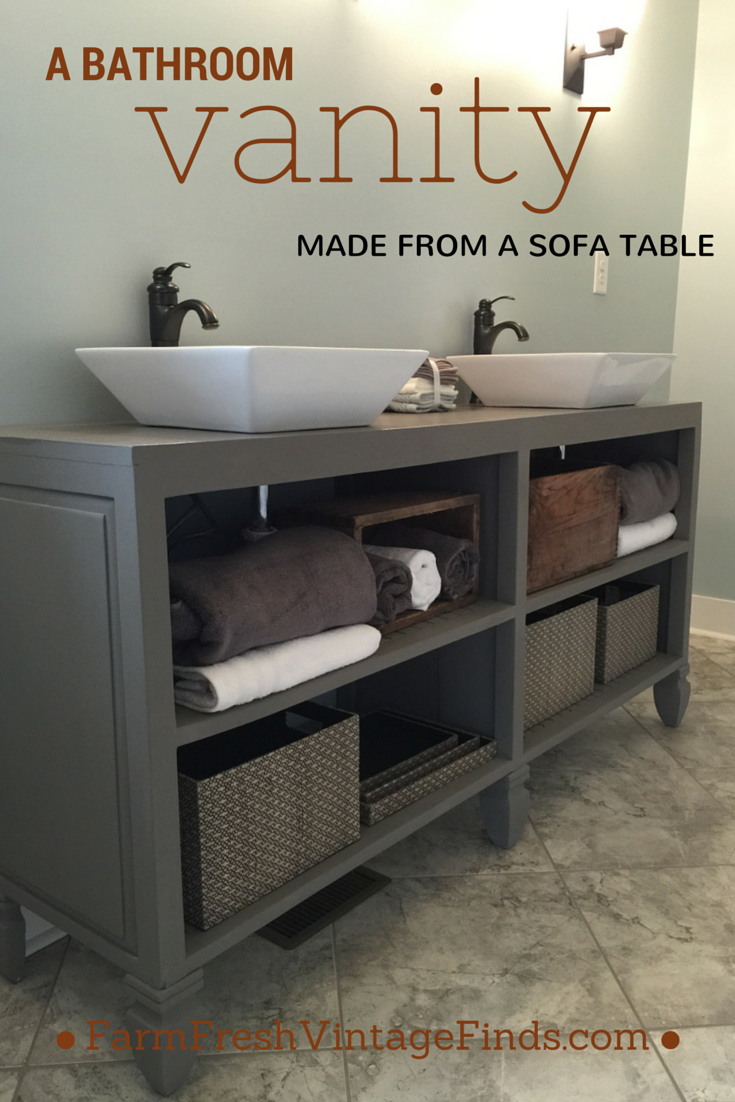
Credit: farmfreshvintagefinds.com
Frequently Asked Questions
What Materials Are Best For Custom Vanity Cabinets?
Solid wood like oak or maple is durable and stylish. Plywood is also a great option for strength and moisture resistance. Avoid particleboard as it can warp easily. Choose materials based on budget, bathroom humidity, and desired finish.
How Do I Measure For A Custom Vanity Cabinet?
Measure the available width, depth, and height space carefully. Include plumbing locations and door clearance. Double-check measurements before ordering or building. Accurate measurements prevent fitting issues and ensure a smooth installation.
What Tools Are Needed To Build A Custom Vanity Cabinet?
Essential tools include a saw, drill, screwdriver, measuring tape, and clamps. Sandpaper and wood glue help with finishing and assembly. Having the right tools ensures precision and a professional-looking result.
How Can I Waterproof My Custom Vanity Cabinet?
Use water-resistant paint or sealant on all surfaces. Apply a clear polyurethane finish for extra protection. Ensure edges and joints are sealed properly to prevent moisture damage in bathrooms.
Conclusion
Building a custom vanity cabinet takes time and patience. You choose the size, style, and materials that fit your space. Each step adds to your skills and confidence. The result is a unique piece that suits your needs perfectly. Enjoy the satisfaction of using something you made yourself.
This project saves money and adds value to your home. Try it out, and see how rewarding it feels to create your own furniture.


