
Do you have an old dresser sitting unused in your home? What if you could turn it into a stylish bookshelf that saves space and adds character to your room?
Repurposing a dresser into a bookshelf is easier than you think, and it gives your furniture a new life. In this guide, you’ll discover simple steps to transform that dresser into a unique storage solution. Ready to create something beautiful and practical?
Keep reading—you’ll be surprised how quickly you can make this happen.
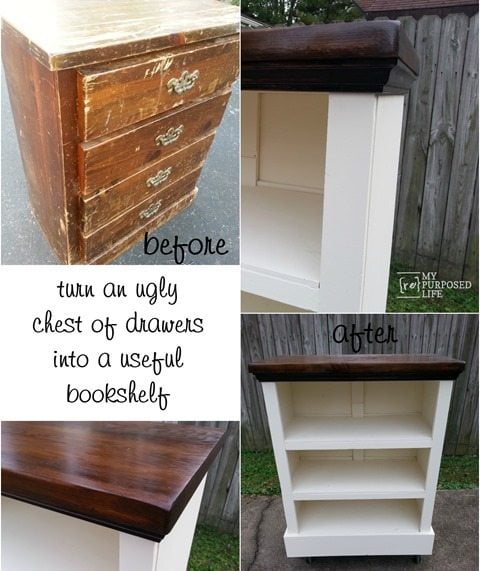
Credit: www.myrepurposedlife.com
Choosing The Right Dresser
Choosing the right dresser is the first step to create a beautiful bookshelf. Not all dressers work well for this project. Some fit better based on size, shape, and material. A good dresser makes the transformation easier and more durable.
Assessing Size And Shape
Start by measuring the dresser’s height, width, and depth. A tall dresser offers more vertical space for books. Wide dressers give room for larger book collections.
Look for a shape that suits your room. A slim dresser fits tight spaces. A boxy dresser provides stable shelves. Avoid dressers with curved fronts or sides. They can be hard to adjust into shelves.
Material And Condition Check
Wood dressers are best for bookshelves. Solid wood holds weight well and lasts long. Avoid particleboard or cheap plywood. They may sag under book weight.
Check the dresser’s condition carefully. Look for cracks, loose joints, or water damage. Fixing these issues takes extra work. Choose a dresser with sturdy, clean surfaces.
Tools And Materials Needed
Repurposing a dresser into a bookshelf needs the right tools and materials. Having these ready makes the project easier and safer. Start by gathering all items before you begin work.
Some tools are basic and common in most homes. Others might be specific for this type of project. Knowing what you need saves time and effort.
Basic Tools List
- Screwdriver (flathead and Phillips)
- Hammer
- Measuring tape
- Level
- Hand saw or jigsaw
- Sandpaper or sanding block
- Drill with drill bits
- Clamps
Additional Supplies
- Wood glue
- Wood filler
- Paint or wood stain
- Paintbrush or foam brush
- Protective gloves
- Drop cloth or old newspaper
- Masking tape
- Safety goggles
Preparing The Dresser
Preparing the dresser is the first step in turning it into a bookshelf. This stage makes sure the piece is ready and safe to use. Good preparation helps the final product look neat and last longer.
Start by cleaning and sanding the dresser. This removes dirt and old finish. Then, decide which drawers or shelves to remove. This creates space for your books and gives the dresser a new shape.
Cleaning And Sanding
Begin by wiping the dresser with a damp cloth. Remove dust, dirt, and grime. Use mild soap if needed. Let it dry completely before sanding.
Sand the entire surface with medium-grit sandpaper. This removes old paint or varnish. It also smooths rough spots. After that, use fine-grit sandpaper for a smooth finish. Wipe away dust with a clean cloth.
Removing Drawers Or Shelves
Decide how many drawers or shelves to remove. This depends on how big you want the bookshelf sections. Use a screwdriver to take out drawer handles and knobs first.
Pull out the drawers carefully. If the dresser has shelves, remove them gently. Keep the removed parts safe for future use or recycling. Check the dresser’s inside and edges for loose nails or screws. Remove or tighten them as needed.
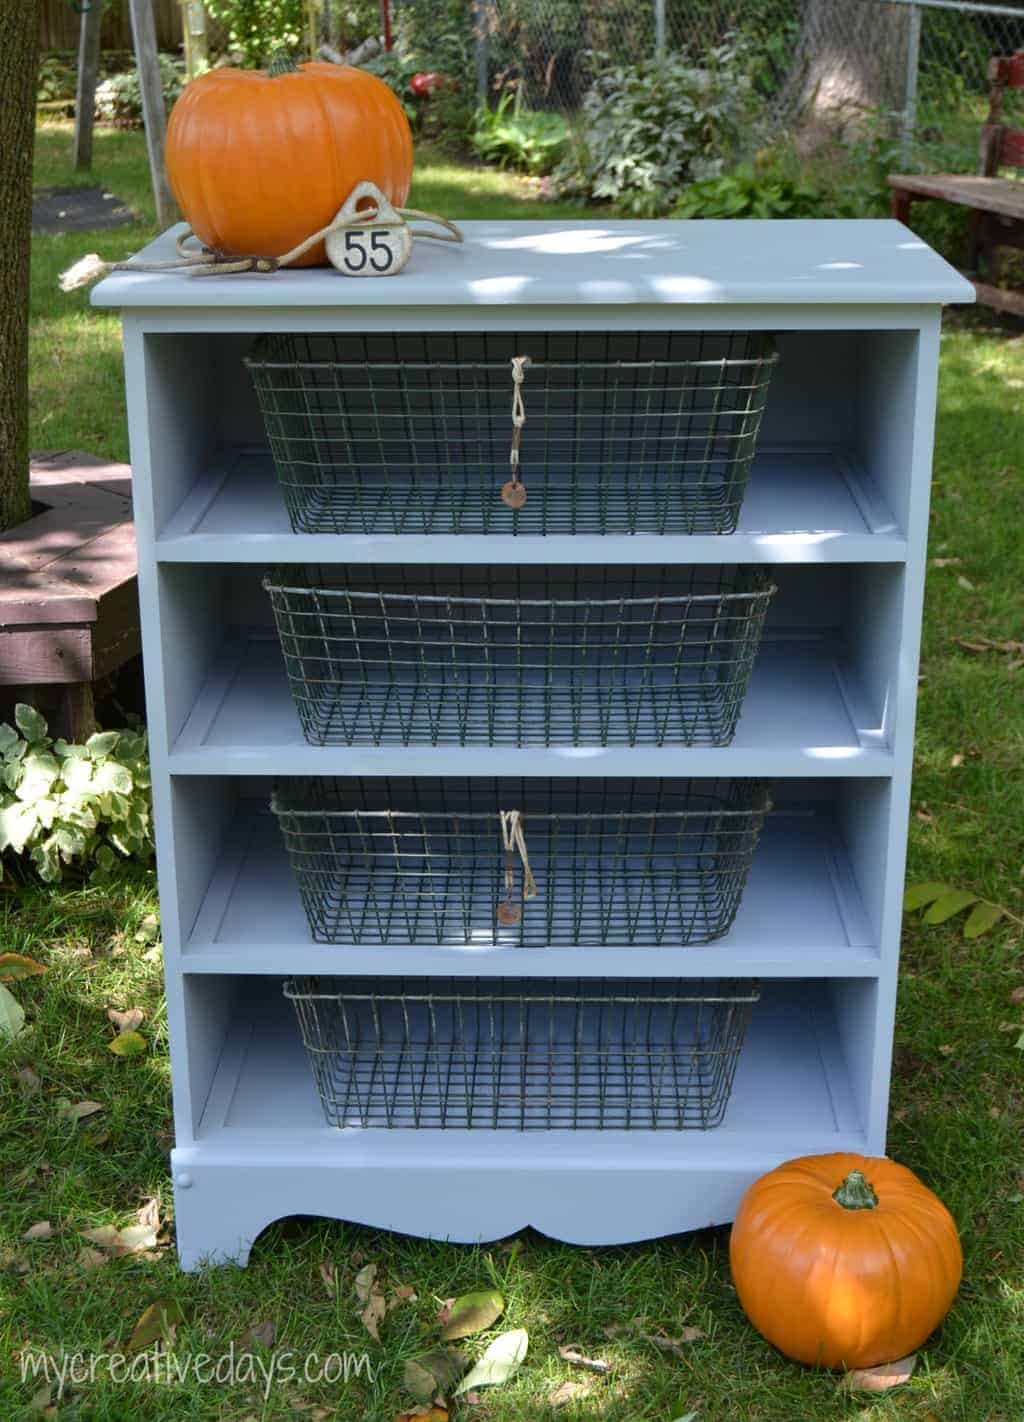
Credit: www.mycreativedays.com
Designing Your Bookshelf
Transforming a dresser into a bookshelf requires thoughtful design. This step shapes how functional and beautiful your new piece will be. Focus on shelf space, style, and finish to match your room’s look.
Good design balances storage needs with aesthetic appeal. It should fit the room size and your book collection. Planning carefully helps avoid costly mistakes and creates a unique bookshelf.
Planning Shelf Placement
Start by measuring the inside of each dresser compartment. Decide how many shelves you want and their height. Books come in different sizes, so vary shelf heights for flexibility.
Consider leaving some space for decorative items. Adjustable shelves add versatility. Use strong supports to hold heavy books safely. Mark shelf spots with a pencil before drilling.
Customizing With Paint Or Stain
Choose paint or stain to fit your room’s style. Paint offers bright colors and smooth finishes. Stain shows wood grain and gives a natural look.
Sand the dresser well before applying. Use primer if painting for better adhesion. Apply thin, even coats and let dry fully. Finish with a clear sealant to protect your work.
Building And Assembly
Building and assembling your dresser into a bookshelf is an exciting step. It turns old furniture into a useful new piece. Careful planning helps create a sturdy and attractive bookshelf. Focus on adding shelves and securing stability to ensure durability. Follow simple steps to make your project a success.
Adding Shelves Or Dividers
Measure the inside height and width of the dresser. Cut wood pieces to fit as shelves or dividers. Use plywood or hardwood for strong support. Place shelves evenly to hold books without sagging. Attach shelves with screws or brackets for firm hold. Sand edges smooth to avoid splinters. Paint or stain shelves to match the dresser.
Securing Structural Stability
Check the dresser frame for any weak spots. Reinforce corners with metal brackets or wood blocks. Tighten all screws and nails to prevent wobbling. Add a back panel if missing to increase strength. Use wood glue along joints for extra hold. Place the bookshelf against a wall and anchor it for safety. Test stability by placing a few books before full use.
Finishing Touches
Finishing touches bring your dresser-turned-bookshelf to life. They enhance both look and durability. Thoughtful details make your project unique and lasting.
Decorative Elements
Choose decorations that match your room’s style. Add small plants or framed photos on the shelves. Use bookends to keep books tidy and add charm.
Consider painting the edges in a contrasting color. Or add wallpaper to the back of the shelves for a pop of pattern. These small changes create a fresh, inviting look.
Protective Coating
Apply a clear protective coat to guard against scratches and dust. Polyurethane or a water-based varnish works well for wood surfaces. Use a brush to spread the coating evenly.
Let the first layer dry fully, then add a second coat. This step ensures your bookshelf stays beautiful and strong over time. It also makes cleaning easier and keeps the wood safe.
Styling Your New Bookshelf
Styling your new bookshelf is the final step to make it both useful and beautiful. It transforms your repurposed dresser into a unique piece of furniture. The way you arrange books and decor can set the mood of the room. Proper maintenance keeps it looking fresh and inviting for years.
Arranging Books And Decor
Start by sorting your books by size or color for a neat look. Place taller books on one side and shorter ones on the other. Mix in decorative items like small plants, photo frames, or candles. Balance is key. Avoid crowding one shelf while leaving others empty. Leave some space to let the items breathe.
Stack some books horizontally to create levels and add interest. Use the dresser’s drawers for hidden storage to keep clutter away. Change the display seasonally to keep the style fresh and exciting. Personal items make the shelf feel unique and warm.
Tips For Maintenance
Dust your bookshelf regularly to keep it clean and bright. Use a soft cloth to avoid scratches on the wood. Check the shelves for loose screws or weak spots often. Tighten screws to keep the structure strong and safe. Avoid placing the bookshelf in direct sunlight to prevent fading.
Use coasters or mats under plants to catch water and protect the wood. Clean spills immediately to avoid stains. Keep heavy items evenly distributed to prevent warping. Maintaining your bookshelf will extend its life and beauty.

Credit: www.youtube.com
Frequently Asked Questions
How Do I Prepare A Dresser For Conversion?
Start by removing all drawers and hardware. Clean the dresser thoroughly to remove dust and grime. Sand the surfaces lightly to help paint or stain adhere well.
What Tools Are Needed To Repurpose A Dresser?
You will need sandpaper, paint or stain, brushes, a screwdriver, wood glue, and optional decorative elements. Safety gear like gloves and masks is also recommended.
Can I Adjust Drawer Sizes For Bookshelf Shelves?
Yes, you can remove drawer fronts and use the drawer boxes as shelves. Alternatively, remove drawers entirely and add wooden boards to create open shelves.
How Do I Ensure The Bookshelf Is Sturdy?
Secure shelves with screws or brackets inside the dresser frame. Reinforce joints with wood glue. Ensure the dresser is placed on a flat surface to prevent wobbling.
Conclusion
Repurposing a dresser into a bookshelf saves money and reduces waste. It gives old furniture a fresh, useful life. You only need some basic tools and creativity. This project adds charm and storage to any room. Try different paint or stain to match your style.
Small changes can make a big difference in your space. Enjoy the satisfaction of building something with your own hands. Start your dresser-to-bookshelf project today and see the results!