Are you looking for a unique and budget-friendly way to add more storage to your room? Turning an old dresser into a stylish bookshelf might be exactly what you need.
Imagine transforming a piece of furniture you already own into something new and useful, giving your space a fresh look without spending a fortune. In this guide, you’ll discover simple steps that make this project easy and fun, even if you’re not a DIY expert.
Ready to create a beautiful bookshelf that fits your style and needs? Keep reading, and you’ll learn how to bring your vision to life.
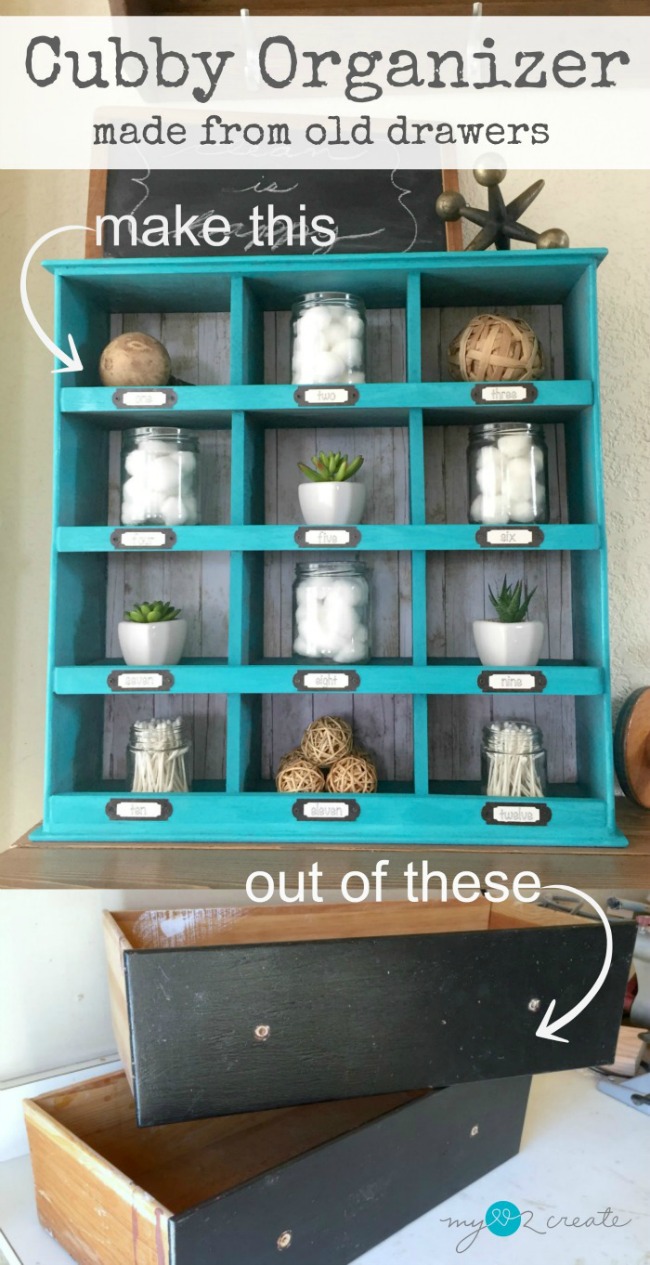
Credit: www.mycreativedays.com
Choosing The Right Dresser
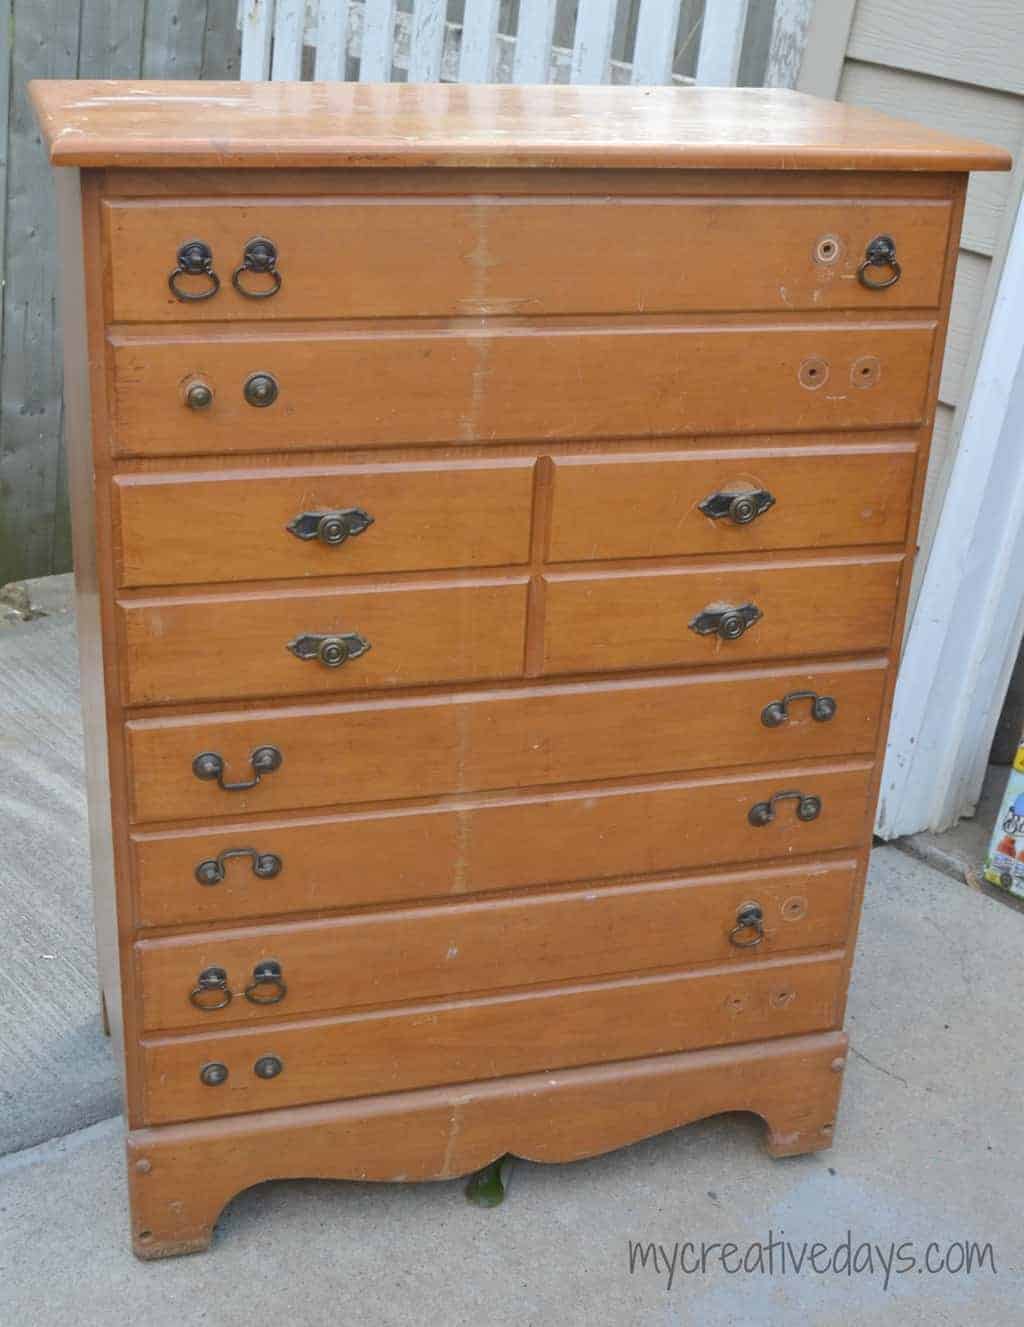
Choosing the right dresser is the first step in turning it into a beautiful bookshelf. The dresser’s size, shape, material, and condition affect how well it will work. A good dresser provides strong support for books and fits your space perfectly. Here are key points to consider before starting your project.
Size And Shape Considerations
Pick a dresser tall enough to hold many books. A wider dresser gives more shelf space. Check the dresser’s depth; it should fit standard book sizes easily. Avoid dressers with very narrow or curved drawers. Straight lines and flat fronts make better shelves. Think about the room where you will place it. Measure the space carefully to ensure the dresser fits well.
Material Types
Wood dressers work best for bookshelves. Solid wood is strong and lasts long. Plywood or MDF can work but may not hold heavy books well. Avoid particleboard as it can break easily. Painted or stained wood dressers add charm and style. Choose a material that matches your room decor and feels sturdy under weight.
Condition And Durability
Check the dresser for damage before buying or using it. Look for cracks, loose joints, or broken parts. Make sure drawers open and close smoothly. The dresser should feel stable and not wobble. A sturdy dresser supports heavy books without bending. Repair any minor damage to keep the bookshelf safe and strong.
Gathering Tools And Materials
Gathering the right tools and materials is the first step to turn a dresser into a bookshelf. This stage sets the base for a smooth project. Having everything ready saves time and avoids frustration. It helps to know exactly what you need before starting.
Below is a clear list of essential tools and some extra supplies that make the work easier. Prepare these before you begin your project.
Essential Tools Checklist
- Screwdriver (manual or electric)
- Hammer
- Measuring tape
- Level tool
- Power drill
- Sandpaper or electric sander
- Clamps
- Paintbrush or roller
- Safety goggles
- Dust mask
Additional Supplies Needed
- Wood screws
- Wood glue
- Primer and paint or wood stain
- Painter’s tape
- Wood filler
- Drop cloth or old newspaper
- New shelf boards or planks
- Decorative knobs or handles (optional)
Preparing The Dresser
Preparing the dresser is the first step to turning it into a bookshelf. This step ensures the dresser is clean, smooth, and ready for new use. Proper preparation makes the project easier and the final product stronger.
Cleaning And Sanding
Start by wiping the dresser with a damp cloth to remove dust and dirt. Use a gentle cleaner if there is grease or sticky residue. Let the dresser dry completely before sanding.
Sand the entire surface with medium-grit sandpaper. This removes old paint or varnish and smooths rough areas. Finish with fine-grit sandpaper for a smooth touch. Wipe off the dust with a clean cloth after sanding.
Removing Drawers And Hardware
Take out all the drawers carefully. Set them aside for later use or modification. Remove knobs, handles, and other hardware using a screwdriver. Keep the hardware if you plan to reuse it.
Empty dresser frames work best for bookshelves. Removing drawers creates open space for shelving. Make sure to keep all screws and small parts in a safe place.
Designing Your Bookshelf
Designing your bookshelf from an old dresser is a fun and creative task. It lets you turn something old into something new and useful. The design decides how good your bookshelf looks and how well it works for your needs. Thoughtful design makes the project easier and the result better.
Start by thinking about the space where you will place the bookshelf. Measure the area to know how big your bookshelf can be. Consider what you want to store on the shelves. Books, decorations, or both? This helps decide the size and number of shelves. Your design should balance style with function for the best outcome.
Planning Shelf Placement
Look at the dresser’s original structure. Some drawers can become shelves. Remove the drawer fronts for open space or keep some for hidden storage. Plan shelf height based on your items. Tall books need more space. Small items fit in shorter shelves. Think about how to support the shelves. Use strong wood or brackets to hold weight safely.
Customizing For Style And Function
Choose a style that matches your room. Paint or stain the dresser to refresh its look. Add trim or molding for a polished finish. Consider open shelves for display or closed spaces for neatness. Mix and match shelf sizes for variety. Add hooks or small baskets for extra storage. Customize knobs or handles for a personal touch. This makes your bookshelf unique and practical.
Building The Shelves
Building the shelves is the key step to transform your dresser into a sturdy bookshelf. This process involves careful measuring, cutting, and securing each shelf. Taking time here ensures your new bookshelf holds all your favorite books safely.
Measuring And Cutting Wood
Start by measuring the space where the shelves will go. Use a tape measure and write down exact numbers. Cut wood pieces to fit these measurements. Use a saw to make straight cuts. Sand edges smooth to avoid splinters.
Installing Support Brackets
Support brackets hold the shelves in place. Choose brackets strong enough for your shelf size. Mark the wall or dresser sides where brackets will go. Use a drill to make holes. Screw brackets tightly for firm support.
Attaching Shelves Securely
Place each shelf on the brackets carefully. Check if the shelf is level using a spirit level. Screw the shelf into the brackets from underneath. Tighten screws so shelves do not move or wobble. Test by pressing gently on shelves.
Credit: mylove2create.com
Finishing Touches
Finishing touches bring your bookshelf to life. They make it look complete and stylish. These final steps give your project a polished, professional feel. Let’s explore some easy ways to finish your dresser bookshelf.
Painting And Staining Options
Paint adds color and personality to your bookshelf. Choose a color that matches your room’s style. Light colors brighten small spaces. Dark colors make a bold statement.
Staining shows the wood’s natural beauty. Pick a stain that suits the wood type. Use a clear coat for extra shine and protection. Sand lightly between coats for smooth results.
Adding Decorative Elements
Decorative touches add charm and uniqueness. Try new handles or knobs on the drawers. Add wallpaper or fabric inside shelves for a pop of color. Attach molding or trim for a classic look.
Use stencils or decals for patterns and shapes. Small plants or books also enhance the shelf’s look. These details make your bookshelf truly yours.
Safety And Stability Tips
Safety and stability are key when turning a dresser into a bookshelf. A sturdy setup prevents accidents and keeps your books secure. Follow these tips to make your new bookshelf safe and strong.
Securing To Walls
Attach the dresser firmly to the wall. Use brackets or straps made for heavy furniture. This stops tipping, especially if children or pets are around. Find studs in the wall for the strongest hold. Screws alone in drywall are not enough.
Weight Distribution Advice
Place heavy books on the lower shelves. Lighter items go on top shelves. This balance keeps the dresser steady and stops it from leaning forward. Avoid overloading any shelf. Check weight limits of the dresser materials. Spread out the weight evenly for best results.
Creative Styling Ideas
Creative styling transforms a simple dresser into a unique bookshelf. It helps blend function with beauty. Styling makes your space inviting and organized. Use ideas that highlight your personality and room style. Small touches bring big changes.
Organizing Books And Decor
Place books by size or color for a neat look. Mix horizontal stacks with vertical rows. Add small plants or candles to fill gaps. Use baskets or boxes in open drawers for extra storage. Keep frequently read books within easy reach. Combine personal items with decor for a warm feel.
Incorporating Lighting
Add LED strip lights under each shelf for soft glow. Use small clip-on lamps to brighten dark corners. Fairy lights create a cozy, magical atmosphere. Lighting highlights your books and decor pieces. Choose warm light to make space feel comfortable. Proper lighting helps find books quickly at night.
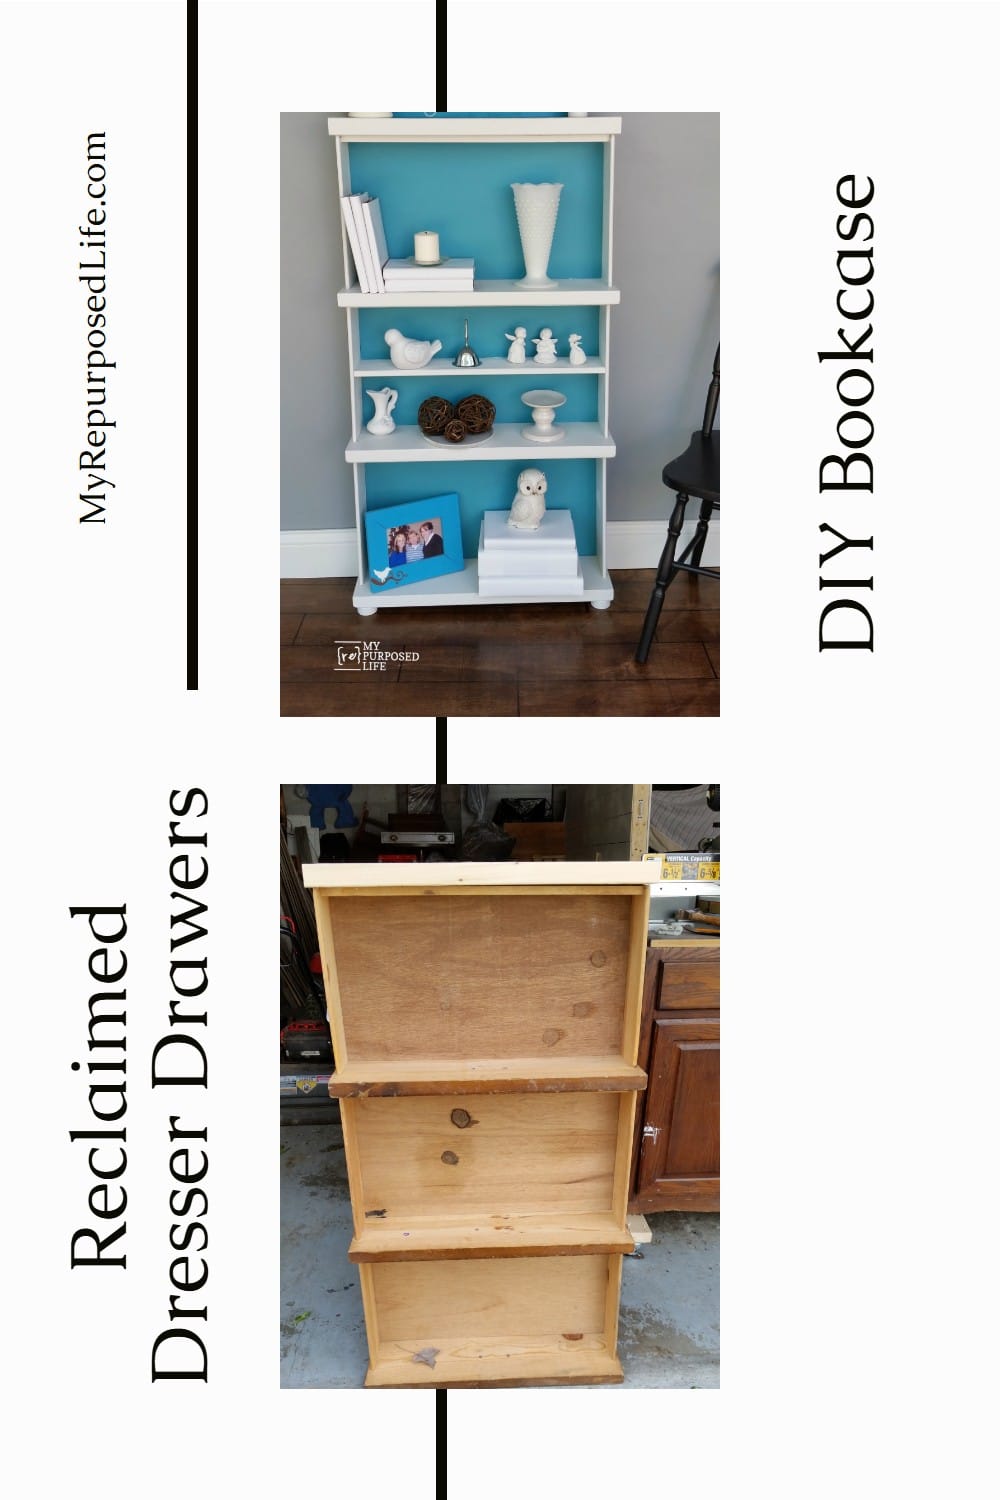
Credit: www.myrepurposedlife.com
Frequently Asked Questions
How Do I Convert A Dresser Into A Bookshelf?
To convert a dresser into a bookshelf, remove the drawers and add shelves. Sand and paint the dresser for a fresh look. Secure shelves firmly for stability. This DIY project saves money and creates unique storage.
What Tools Are Needed To Make A Bookshelf From A Dresser?
You need a screwdriver, saw, measuring tape, sandpaper, paintbrush, and drill. These tools help you remove drawers, cut shelves, smooth surfaces, and assemble the bookshelf safely and efficiently.
How Much Does It Cost To Make A Dresser Bookshelf?
Costs vary but typically range from $20 to $100. Using an old dresser reduces costs. Additional expenses include paint, wood for shelves, and hardware. DIY projects can be budget-friendly and customizable.
How Long Does It Take To Build A Bookshelf From A Dresser?
The project usually takes 4 to 6 hours. Time depends on your skill level and dresser condition. Allow extra time for drying paint and assembling parts carefully.
Conclusion
Transforming a dresser into a bookshelf saves money and space. You get a unique piece that fits your style well. The steps are simple and fun to follow. This project gives old furniture a new life. Enjoy organizing your books in a fresh way.
Try it out and see the difference yourself. Your room will feel cozier and more personal. A little effort brings big rewards. Why not start today?