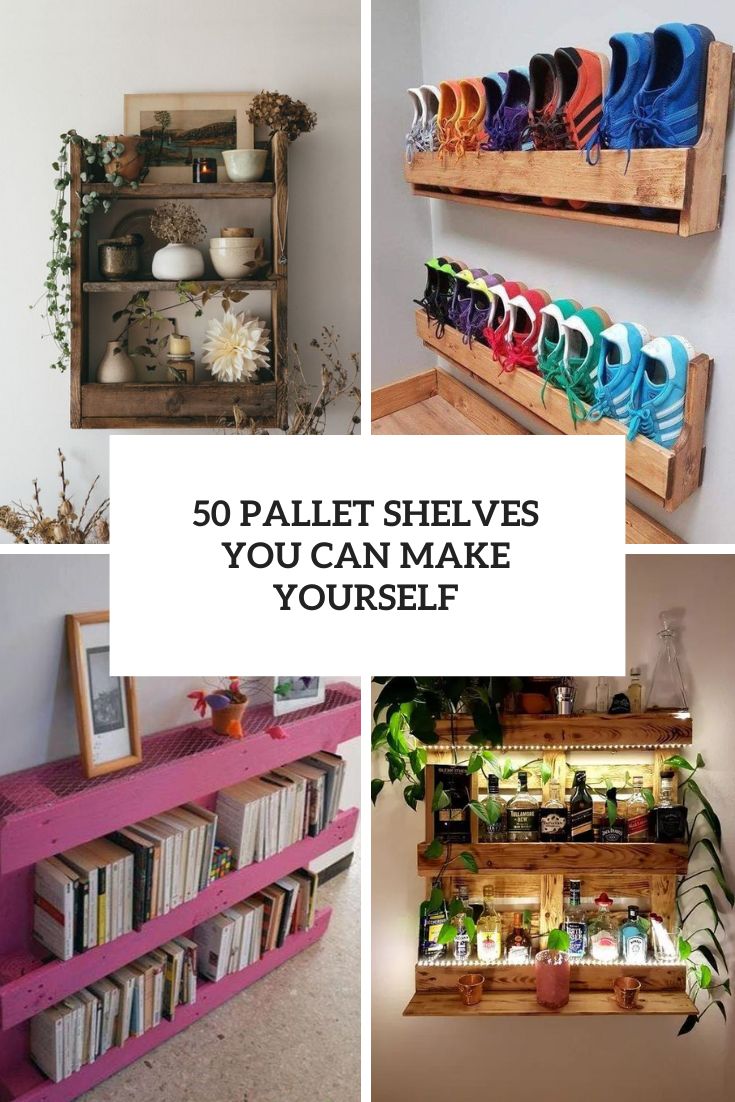
Have you ever thought about turning something simple into a stylish piece for your home? Making a bookshelf out of a pallet is a smart and creative way to add storage without spending a lot of money.
Imagine having a unique bookshelf that not only holds your favorite books but also adds a rustic charm to your space. In this guide, you’ll discover easy steps to transform a basic pallet into a functional and beautiful bookshelf. Ready to create something amazing with your own hands?
Let’s get started!
Credit: www.shelterness.com
Choosing The Right Pallet
Choosing the right pallet is the first step to making a sturdy bookshelf. The pallet’s quality affects the shelf’s strength and look. Not all pallets are suitable for indoor furniture. Some pallets are treated with chemicals or are too weak to hold books. Picking the best pallet ensures your project lasts long and looks great.
Types Of Pallets
There are several types of pallets. Wooden pallets are common and good for furniture projects. Plastic pallets exist but are less useful for bookshelves. Look for hardwood pallets. They are stronger and last longer than softwood ones. Avoid pallets with many cracks or broken boards.
Inspecting For Quality
Check the pallet carefully before using it. Look for signs of damage like splinters, cracks, or missing pieces. Make sure the boards are thick and sturdy. Test the pallet by pressing down to see if it feels solid. A strong pallet will support the weight of books without bending.
Safety Considerations
Not all pallets are safe for indoor use. Some are treated with chemicals that can be harmful. Find pallets marked with “HT” for heat-treated, which are safer. Avoid pallets with stamps like “MB” that means chemical treatment. Wear gloves while handling pallets to avoid splinters and dirt.
Gathering Materials And Tools
Gathering the right materials and tools is the first step to build a sturdy pallet bookshelf. Preparation helps make the project smooth and enjoyable. Knowing what to collect saves time and avoids interruptions later.
Collecting everything before starting also keeps your workspace safe and organized. Below is a clear list of what you need to begin.
Essential Tools List
- Hammer or nail gun
- Saw (hand saw or power saw)
- Measuring tape
- Drill with bits
- Screwdriver
- Sandpaper or electric sander
- Safety gloves and goggles
- Clamps (optional but helpful)
Additional Supplies
- Wood screws or nails
- Wood glue
- Wood stain or paint
- Brush or cloth for finishing
- Wood filler for gaps
- Pallet wood (clean and dry)
Work Area Setup
Choose a flat, stable surface to work on. A large table or sturdy floor space works well. Ensure good lighting to see details clearly.
Keep tools and materials close but organized. This saves time and reduces accidents. Wear safety gear to protect your eyes and hands.
Preparing The Pallet
Preparing the pallet is the first step to make a sturdy bookshelf. This step ensures the wood is safe and smooth for use. It also removes dirt, nails, and damaged parts that can weaken the structure. Proper preparation helps the bookshelf last longer and look better.
Cleaning And Sanding
Start by cleaning the pallet well. Use a brush to remove dirt and dust. Wash with water and mild soap to remove stains. Let it dry completely before sanding.
Sanding smooths the wood and removes splinters. Use medium-grit sandpaper first, then fine-grit for a soft finish. Sand all surfaces to avoid rough spots.
Removing Unwanted Parts
Remove nails, screws, and staples carefully. Use pliers or a hammer to pull them out. Check for broken or loose boards and remove them. This makes the pallet safer and easier to work with.
Repairing Damages
Inspect the pallet for cracks and holes. Fill small holes with wood filler and let it dry. Replace or reinforce weak boards with extra wood pieces. Tighten loose joints with screws or nails. This step strengthens the pallet for your bookshelf project.
Designing Your Bookshelf
Designing your bookshelf is the first step in creating a useful and attractive piece. It helps to plan carefully before starting the build. A good design saves time and materials. Think about the space where the bookshelf will go. Consider what you want to store on it. These ideas guide your design choices.
Keep your design simple and practical. Focus on making a sturdy and functional bookshelf. This section breaks down key design steps for your pallet bookshelf.
Measuring And Planning
Start by measuring the pallet size. Note its length, width, and height. Measure the space where the bookshelf will stand. Check for any space limits or obstacles. Draw a rough sketch of your bookshelf. Mark dimensions on your sketch. This helps visualize the final product. Plan for some extra space for books and decorations.
Customizing Shelf Sizes
Decide how many shelves you want. Adjust shelf heights based on book sizes. Taller shelves for large books or magazines. Shorter shelves for small books or knick-knacks. Make sure shelves are wide enough to hold items safely. Customize shelf widths to match your needs. Use your measurements to cut the pallet parts accordingly.
Adding Support Structures
Strong support keeps the bookshelf stable and safe. Add vertical supports between shelves for strength. Use extra wood pieces from the pallet or new wood. Attach supports firmly with screws or nails. Reinforce corners with brackets if needed. Check the structure for wobbling. Proper support prevents sagging and damage over time.
Assembling The Bookshelf
Assembling the bookshelf from a pallet is a simple and rewarding step. This part turns your raw wood into a useful piece of furniture. You will shape, join, and secure the wood to build a sturdy shelf. Follow each step carefully for the best results.
Cutting The Pallet
First, measure the size you want for the bookshelf. Mark the pallet wood with a pencil. Use a saw to cut along the marks. Cut the wood into shelves and side panels. Smooth the edges with sandpaper to avoid splinters. Cutting well helps the pieces fit perfectly together.
Joining Pieces Together
Arrange the cut pieces on a flat surface. Place the shelves between the side panels. Check the distance between shelves for your books. Use clamps to hold the pieces in place. This step keeps the wood steady while you work. Make sure everything lines up evenly.
Securing With Nails And Screws
Use nails or screws to fasten the pieces. Screws hold better and last longer. Start by drilling small pilot holes to stop the wood from splitting. Drive screws or nails through the side panels into the shelves. Use a hammer or screwdriver for this task. Check the shelf for stability after securing. Tight connections make the bookshelf strong and safe.
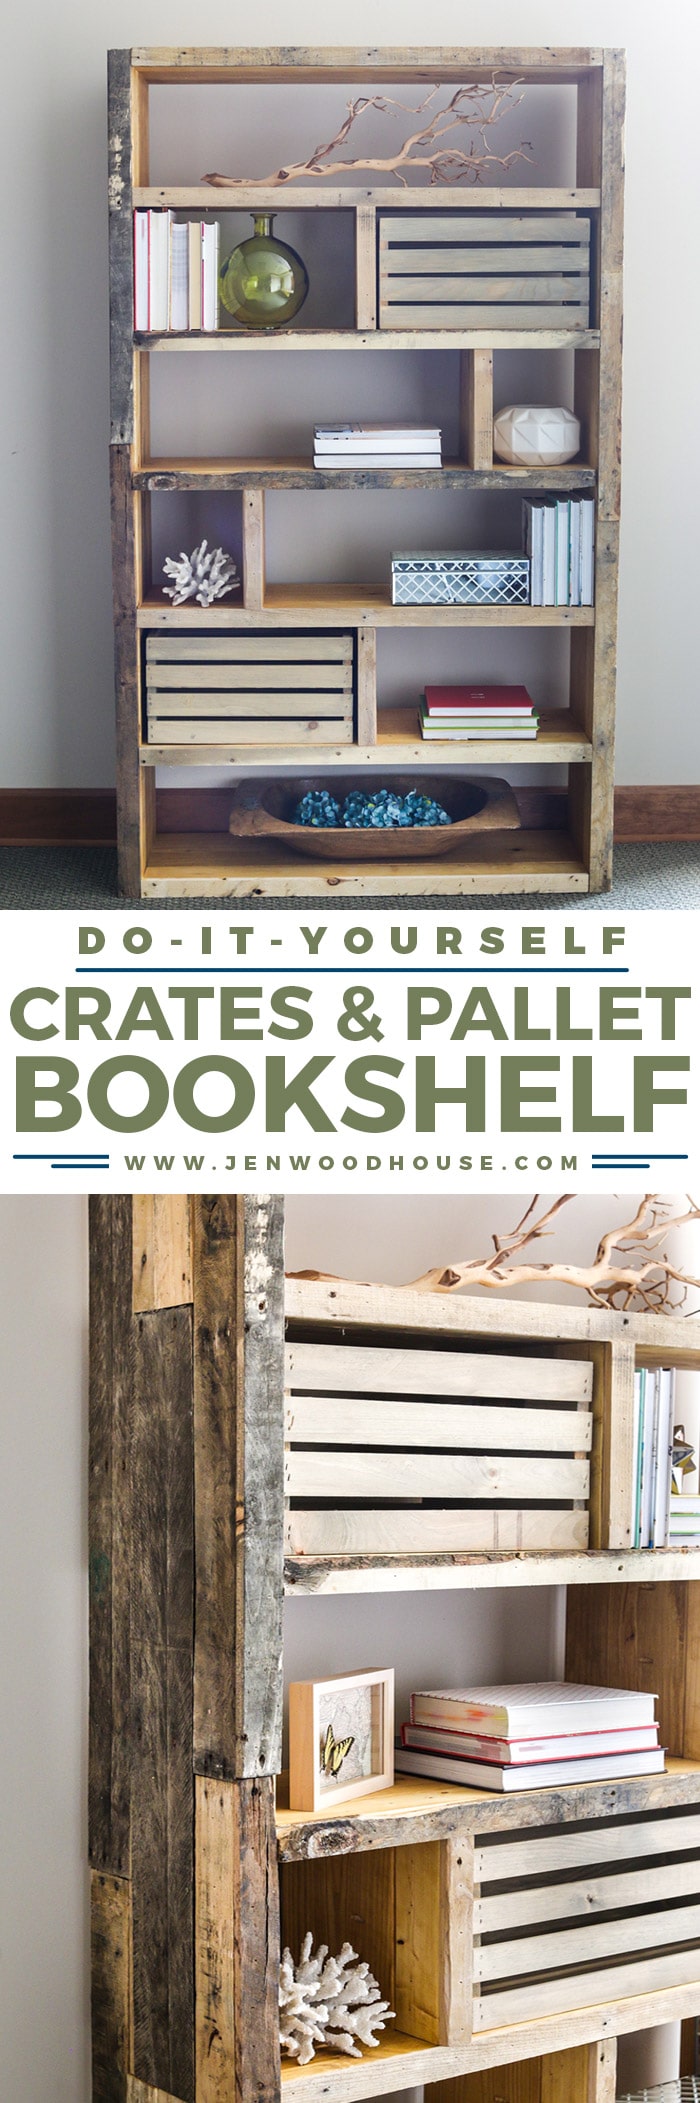
Credit: jenwoodhouse.com
Finishing Touches
Finishing touches bring your pallet bookshelf to life. They protect the wood and make it look great. Simple steps can transform rough wood into a beautiful piece for your home.
Painting And Staining
Choose paint or stain to change the pallet’s color. Paint offers many bright color options. Stain shows the wood’s natural grain and texture. Use a brush to apply evenly. Let it dry fully before the next step.
Sealing For Durability
Seal the wood to protect it from wear and moisture. Clear sealants keep the natural look. Polyurethane adds a shiny, tough layer. Apply thin coats and let each dry well. This step helps your bookshelf last longer.
Adding Decorative Elements
Make your bookshelf unique with small decorations. Attach hooks for hanging keys or small items. Add stencils or decals for patterns and shapes. Use small plants or lights to brighten the shelves. These touches make the bookshelf personal and inviting.
Maintaining Your Bookshelf
Maintaining your pallet bookshelf keeps it strong and looking good. Regular care helps it last longer. You can enjoy your handmade shelf for years with simple steps.
Cleaning Tips
Dust your bookshelf often with a soft cloth. Use a dry or slightly damp cloth to remove dirt. Avoid harsh chemicals that can damage the wood. Clean spills quickly to stop stains from setting in. A gentle brush helps remove dust from corners and cracks.
Preventing Wear And Tear
Place the bookshelf away from direct sunlight to stop fading. Keep it away from moisture to avoid wood warping. Use coasters under heavy items to protect the surface. Avoid overloading shelves with too many books or heavy objects. Move the shelf carefully to prevent scratches and dents.
Repairing Minor Damages
Fill small cracks with wood filler and smooth it out. Sand rough spots lightly to keep the surface even. Tighten loose screws or nails to keep the shelf stable. Replace broken boards with similar wood pieces. Touch up scratches with matching wood stain or paint.
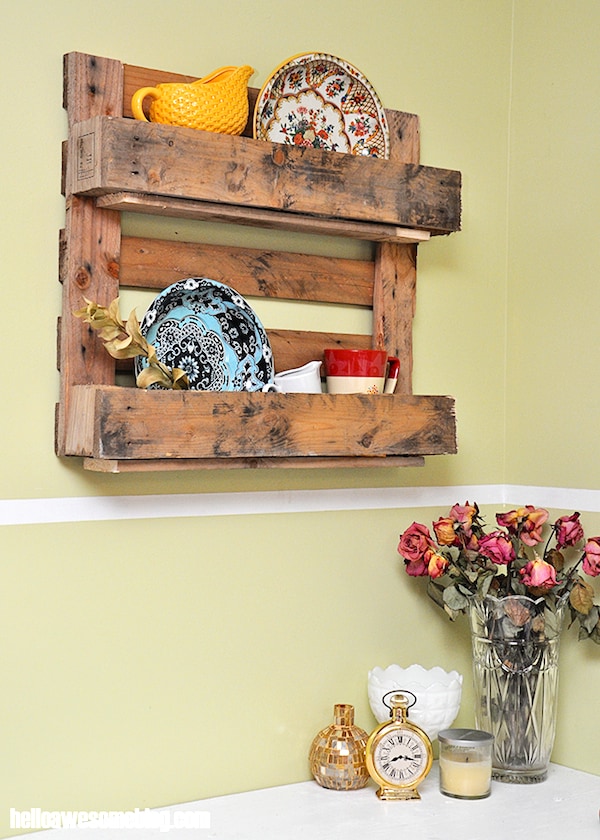
Credit: diycandy.com
Frequently Asked Questions
What Materials Are Needed To Make A Pallet Bookshelf?
You need a wooden pallet, sandpaper, nails or screws, wood glue, paint or varnish, and basic tools. These materials ensure a sturdy and attractive bookshelf.
How Long Does It Take To Build A Pallet Bookshelf?
Building a pallet bookshelf typically takes 2 to 4 hours. Time depends on your skill level and the design complexity.
Is It Safe To Use Pallets For Indoor Furniture?
Yes, if you choose heat-treated pallets, not chemically treated ones. Proper sanding and sealing make them safe for indoor use.
Can I Customize The Size Of My Pallet Bookshelf?
Absolutely. You can cut and arrange pallet boards to fit your desired dimensions and storage needs.
Conclusion
Building a bookshelf from a pallet is simple and fun. It saves money and adds a personal touch to your space. You only need basic tools and some creativity. Pallet shelves suit many rooms and styles. Start with a clean, sturdy pallet and follow easy steps.
This project lets you recycle wood and reduce waste. Enjoy your new, handmade bookshelf that fits your needs well. Try it and see how satisfying DIY can be.
