Looking for a creative way to organize your books and add a personal touch to your space? Making a crate bookshelf might be exactly what you need.
It’s simple, affordable, and lets you customize the look to fit your style. Imagine turning plain wooden crates into a sturdy, eye-catching shelf that holds your favorite reads and decor. Ready to learn how you can build one yourself? Keep reading, and you’ll discover easy steps to create a unique bookshelf that’s both functional and stylish.
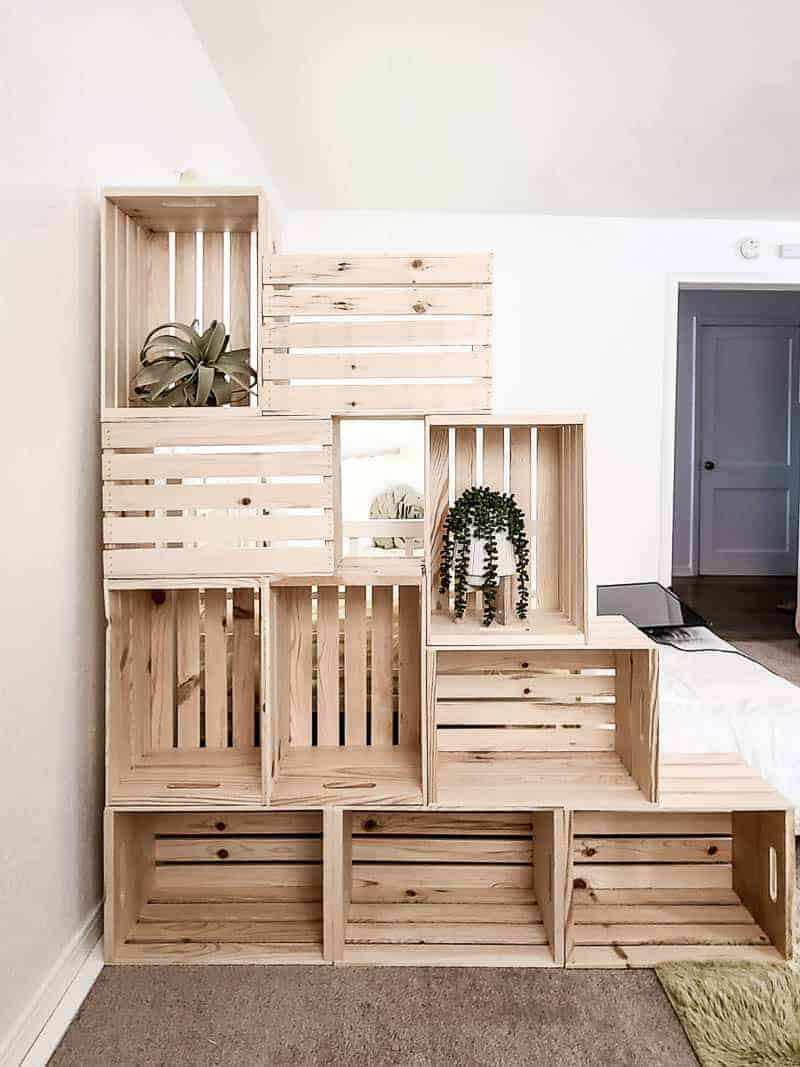
Credit: www.makingmanzanita.com
Choosing The Right Crates
Choosing the right crates is the first step to make a strong and stylish crate bookshelf. The crates must fit your space and hold your books safely. Picking the right size, type, and material matters a lot. It also helps the shelf look good and last long.
Types Of Crates
Wooden crates are popular for their classic look. They are strong and hold many books. Plastic crates are lighter and easy to clean. They come in many colors but may not hold heavy books well. Metal crates offer a modern style and are very durable. Each type has its own style and strength. Choose one that matches your room and needs.
Selecting Size And Material
Choose crate sizes based on your available space. Small crates fit in tight areas but hold fewer books. Large crates hold more but need more room. Wood is the best material for heavy books. It looks warm and natural. Plastic suits light books and easy moves. Metal works for a tough, industrial look. Think about weight and style before deciding.
Where To Buy Or Source
Check local stores for new wooden or plastic crates. Sometimes craft stores have good options. Online shops offer many styles and sizes. Used crates can be found in thrift shops or markets. They often cost less and add character. Make sure used crates are clean and sturdy before buying. Choose a place that offers the best price and quality.
Planning Your Bookshelf Design
Planning your crate bookshelf design is the first step to a successful project. Careful planning helps make sure your bookshelf fits your space and needs. It also keeps your bookshelf strong and useful for many years.
Determining Shelf Dimensions
Start by measuring the space where you want the bookshelf. Note the height, width, and depth available. Decide how tall and wide you want each shelf. Think about the size of books or items you will store. Make shelves deep enough to hold large books easily. Use these measurements to choose crate sizes or to build custom crates.
Arranging Crate Layout
Think about how to stack or arrange your crates. You can place them side by side or stack them vertically. Try different layouts on paper before building. A staggered layout adds visual interest. A simple grid keeps things neat and organized. Make sure the design matches your room style and storage needs.
Considering Weight And Stability
Crates can hold heavy books and objects. Check the strength of each crate before use. Use screws or brackets to secure crates together. Add support boards if needed for extra strength. Place heavier crates at the bottom for balance. Stability keeps your bookshelf safe and steady over time.
Preparing Your Workspace
Preparing your workspace is the first step to building a crate bookshelf. A clean and organized area helps you work faster and safer. You need enough room to move around and place all your tools and supplies. This section covers how to gather what you need and set up your work area properly.
Gathering Tools And Supplies
Start by collecting all the tools required for the project. You will need a drill, screws, a screwdriver, sandpaper, wood glue, and the crates themselves. Keep a tape measure and pencil nearby for precise measurements. Having everything ready stops interruptions and keeps your focus on building.
Setting Up A Safe Work Area
Choose a flat surface with good lighting to set up your workspace. Clear away clutter and anything that can cause tripping. Use safety goggles and gloves to protect your eyes and hands. Ensure power cords are not in your walking path. A safe area helps prevent accidents and makes the job easier.
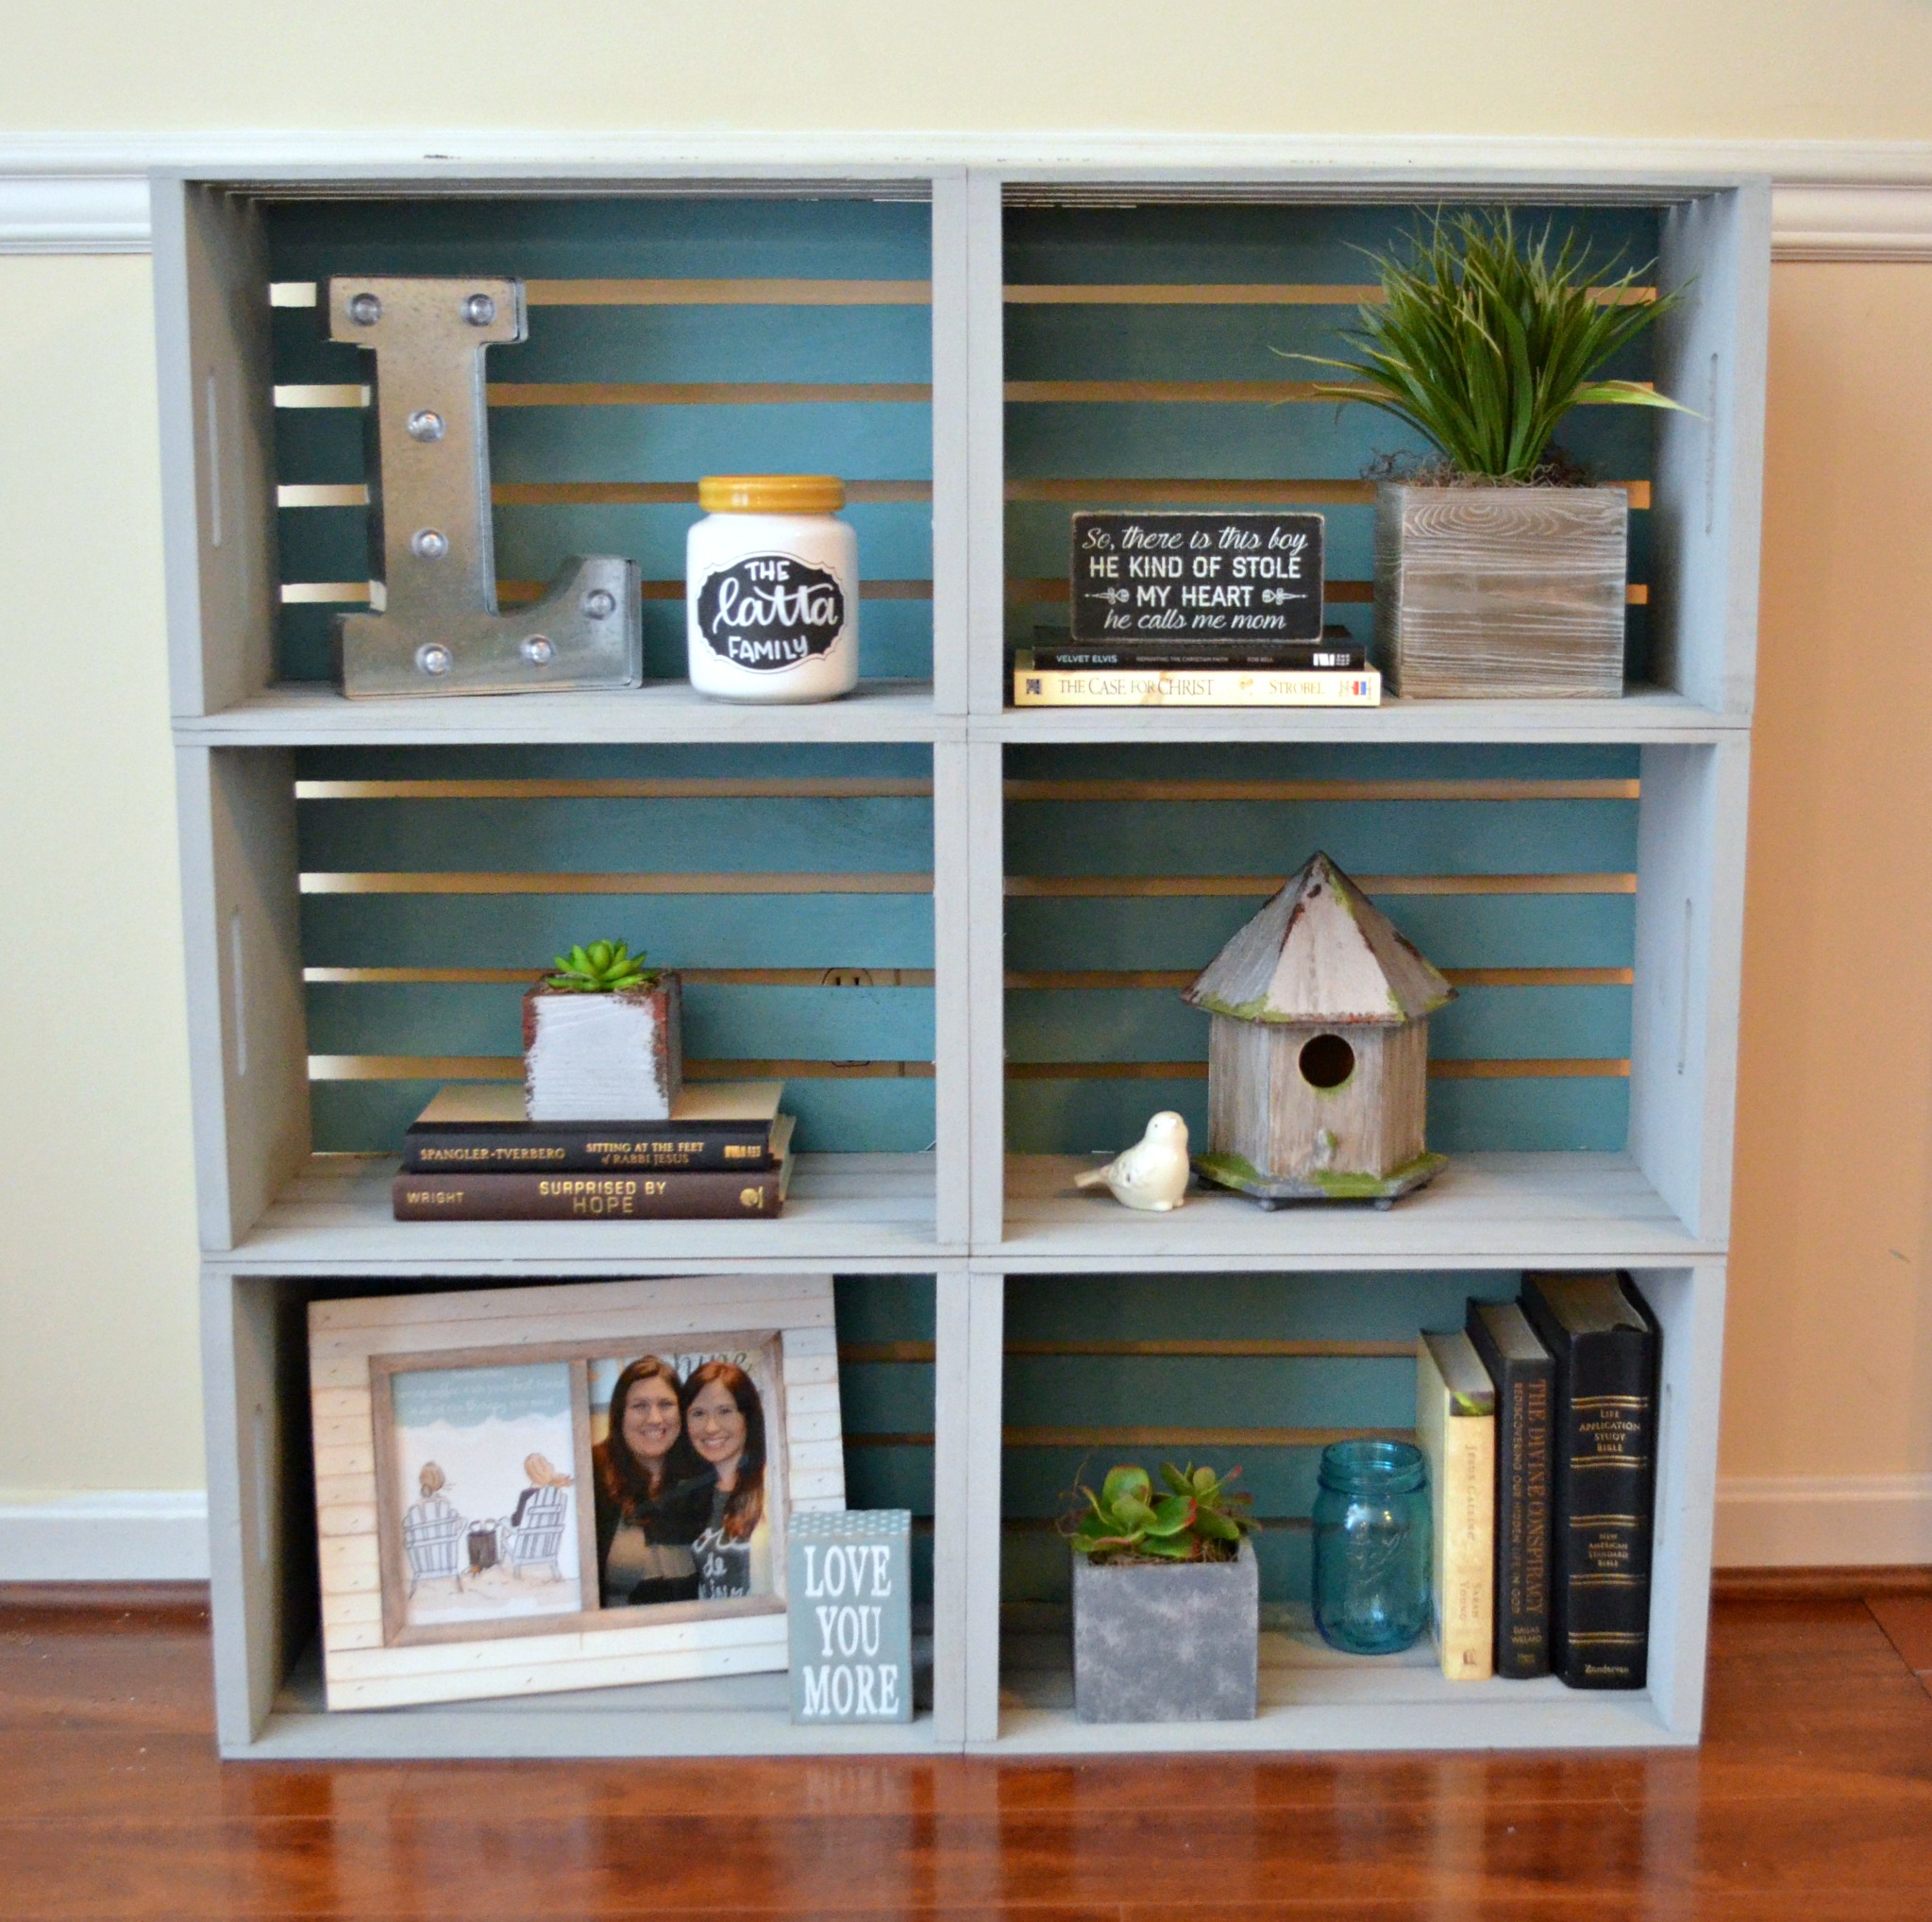
Credit: www.amylattacreations.com
Assembling The Crate Bookshelf
Assembling the crate bookshelf is an exciting part of the project. This step turns loose crates into a sturdy, functional shelf. Careful assembly ensures your bookshelf lasts long and looks great. Follow clear, simple steps to join and secure the crates perfectly.
Cleaning And Sanding Crates
Start by cleaning each crate to remove dust and dirt. Use a damp cloth and mild soap. Let the crates dry completely before moving on. Sand the rough edges and surfaces using medium-grit sandpaper. Smooth surfaces prevent splinters and give a neat finish. Pay special attention to corners and any splintered wood. Sanding also helps paint or stain stick better.
Joining Crates Together
Arrange the crates in your chosen layout on a flat surface. Align edges carefully to keep the shelf balanced. Use wood glue on the contacting edges for extra hold. Clamp the crates together to secure the bond while drying. For stronger joints, screw the crates together using wood screws. Drill pilot holes first to avoid splitting the wood. Check the alignment again before tightening screws.
Securing The Structure
Reinforce the bookshelf by adding corner braces or metal brackets inside. Attach these with screws for added stability. Fix the entire shelf to the wall using brackets or straps for safety. This prevents tipping, especially if the shelf is tall or loaded with books. Double-check all screws and joints to ensure they are tight. A secure structure keeps your bookshelf safe and durable.
Finishing Touches
Finishing touches make your crate bookshelf look complete and last longer. These final steps protect the wood and improve its style. Small details can change the whole appearance and function of your shelf.
Painting Or Staining
Choose paint or stain to match your room’s style. Paint gives bright colors and covers all wood marks. Stain shows the wood grain and adds a natural look. Use smooth, even strokes for the best finish. Let each coat dry well before adding another. Light sanding between coats creates a smooth surface.
Adding Protective Coating
Protective coating guards your shelf from scratches and spills. Use clear polyurethane or varnish for a strong finish. Apply thin layers with a brush or cloth. Allow each layer to dry fully before the next. This step helps your bookshelf stay beautiful for years.
Attaching Feet Or Wall Mounts
Add feet to raise the shelf off the floor. This keeps it clean and adds style. Choose simple wooden blocks or metal legs. Secure them tightly to the bottom corners. For extra safety, attach wall mounts. These prevent the shelf from tipping over. Use screws and anchors suitable for your wall type.
Styling And Organizing Books
Styling and organizing books on your crate bookshelf makes it more than storage. It turns the space into a display that reflects your personality. A well-arranged shelf invites you to explore your collection.
Neat organization also helps you find books quickly. It keeps your shelf tidy and pleasing to the eye. You can use simple techniques to create an attractive and functional bookshelf.
Arranging Books Creatively
Place books both vertically and horizontally to add variety. Stack a few books flat to create small platforms. Use these platforms to highlight special books or objects. Arrange books by color or size for a neat look. Group similar genres or authors together for easy access.
Incorporating Decorative Items
Add small plants to bring life and color to the shelf. Place photo frames or art pieces between books. Use decorative boxes to hide clutter and keep items organized. Mix textures like wood, metal, or glass for interest. Keep decorations balanced without overcrowding shelves.
Maintaining Your Bookshelf
Regularly dust your shelves and books to keep them fresh. Check for damaged books and repair or remove them. Rotate books and decorations to refresh the look. Avoid overloading crates to keep the structure safe. Keep a small cloth or brush nearby for quick cleaning.

Credit: smokymountainfarmhouse.com
Frequently Asked Questions
What Materials Are Needed For A Crate Bookshelf?
You need wooden crates, screws, a drill, sandpaper, wood stain, and a sealant. Optional items include brackets and paint. These materials make assembly easy and durable.
How Do I Assemble A Crate Bookshelf?
Stack crates in your desired arrangement. Secure them together using screws and a drill. Sand and finish for a smooth look. Attach brackets for extra stability if needed.
Can I Customize The Size Of My Crate Bookshelf?
Yes, you can customize the size by using more or fewer crates. Arrange crates horizontally or vertically. Adjust spacing to fit your space and storage needs.
How Do I Finish The Crate Bookshelf For Durability?
Sand the crates smooth to avoid splinters. Apply wood stain or paint for color. Seal with a clear coat to protect against moisture and wear.
Conclusion
Building a crate bookshelf brings style and function to your space. It saves money and lets you use your creativity. Each step is simple and fun to follow. You can paint or stain the crates to match your room. This project fits any corner or wall.
Enjoy organizing your books with a unique shelf. Try making one today and see the difference it makes. A small project with big results.