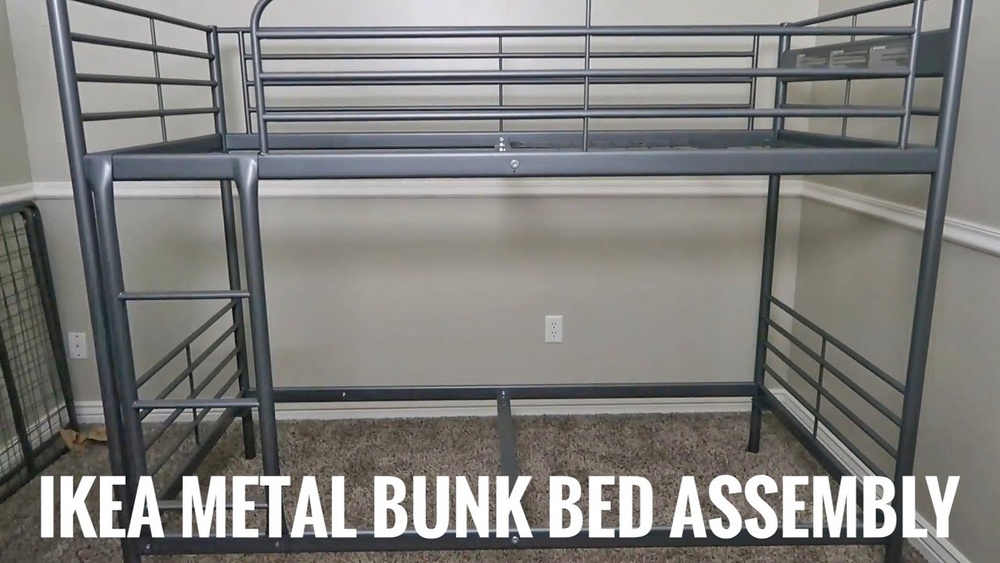
Taking down a metal bunk bed might seem tricky, but you can do it with the right steps. If you want to move, rearrange your room, or just need some extra space, knowing how to safely and quickly take apart your bunk bed is a must.
In this guide, you’ll find simple instructions that anyone can follow—no special tools or skills needed. Keep reading, and you’ll discover how to make the whole process smooth and stress-free. Your next room setup starts here!
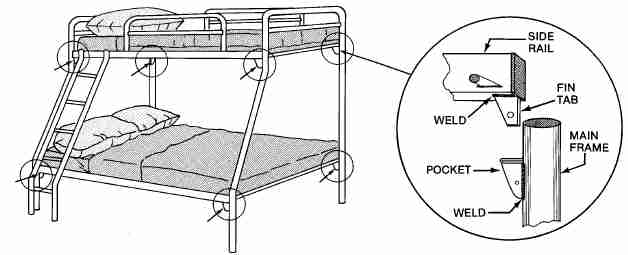
Credit: www.cpsc.gov
Gather Necessary Tools
Gathering the right tools is the first step to take down a metal bunk bed safely. Having everything ready saves time and avoids frustration. The right tools help you work faster and prevent damage to the bed parts.
Essential Tools For Dismantling
You will need a wrench or a socket set to remove bolts and nuts. A screwdriver, usually Phillips or flat-head, is necessary for screws. Pliers can help hold bolts or pull out nails. A rubber mallet can gently tap parts loose without damage. Keep a flashlight nearby to see small screws or dark corners.
Optional Items For Convenience
Gloves protect your hands from sharp edges and metal. A small container keeps screws and bolts in one place. A power drill with screwdriver bits speeds up the process. A step stool helps reach the top bunk easily. A soft cloth helps clean parts during disassembly.
Prepare The Area
Preparing the area is the first step to take down a metal bunk bed safely. It helps avoid accidents and damage. A clean, organized space makes the task easier and faster.
Clear Surrounding Space
Remove all furniture and items near the bunk bed. This gives you room to move and work freely. Clear space prevents tripping or knocking things over. Keep tools and parts within easy reach.
Protect Floors And Walls
Metal parts can scratch floors and walls during disassembly. Lay down a soft blanket or cardboard under the bed. Use painter’s tape on walls to avoid marks. Protecting surfaces saves you from extra cleaning or repairs.
Remove Mattresses And Bedding
Removing mattresses and bedding is the first step to safely take down a metal bunk bed. Clearing the top and bottom beds gives you space to work. It also prevents damage to the mattress and bedding during disassembly.
Start by taking off all pillows, blankets, and sheets. Fold or roll them neatly and set them aside. This keeps the area tidy and avoids tripping hazards.
Next, carefully lift the mattresses off the bed frames. Metal bunk beds can have thin slats or wire supports, so support the mattress well to avoid bending or breaking these parts.
Place the mattresses in a safe spot. Avoid stacking them where they can fall or get dirty. This protects your bedding and keeps the workspace clear.
Clear Pillows And Blankets
Remove all pillows, blankets, and comforters from the bunk beds. Fold each item neatly to save space. Keep bedding away from the bed frame to avoid snagging on metal edges.
Strip The Sheets And Covers
Take off all fitted and flat sheets carefully. Fold or roll them to keep from wrinkling. Store sheets separately to keep them clean and ready for later use.
Lift Mattresses Safely
Support the mattress from underneath while lifting. Avoid bending the mattress, which can damage its shape. Move the mattress slowly to prevent accidents.
Store Mattresses Properly
Place mattresses flat on a clean surface. Avoid leaning them against walls, which can cause warping. Keep them away from moisture and dirt during the disassembly process.
Disassemble Safety Rails
Safety rails keep bunk beds secure, especially for children. Removing them needs care to avoid damage or injury. Focus on each step to ensure smooth disassembly.
Take your time and work in a clear space. Organize tools and parts to make the process easier.
Locate Fasteners
Find all screws, bolts, or clips holding the safety rails. Check along the sides and where rails meet the bed frame. Use a flashlight if needed for better visibility. Knowing exact fastener locations speeds up removal.
Remove Rails Carefully
Loosen fasteners gently with a screwdriver or wrench. Support the rail with one hand while loosening to prevent it from falling. Take out all fasteners before trying to lift the rail. Place removed rails safely aside to avoid scratches or dents.
Take Apart The Ladder
Taking apart the ladder is an important step in dismantling a metal bunk bed. The ladder is usually attached firmly for safety. Removing it carefully prevents damage and injury. Follow clear steps to detach the ladder smoothly.
Identify Attachment Points
Look closely at where the ladder connects to the bunk bed frame. These are the attachment points. They can be screws, bolts, or hooks. Use a flashlight if needed to see well. Mark each point mentally or with a small sticker. Knowing these spots helps you remove the ladder correctly.
Detach Ladder Safely
Use the right tools, like a screwdriver or wrench, to loosen screws or bolts. Hold the ladder firmly as you work. Work on one attachment point at a time. Avoid pulling or forcing the ladder off. This keeps you safe and protects the bed parts. Place removed screws in a container to avoid loss.

Credit: www.youtube.com
Dismantle Upper Bed Frame
Taking apart the upper frame of a metal bunk bed needs care and patience. This part holds the mattress and supports the sleeper. Removing it safely helps avoid damage and injury.
Start by loosening all the screws and bolts that keep the frame tight. Keep tools handy. Work step-by-step to keep the process smooth and safe.
Unscrew Frame Bolts
Find the bolts that join the metal pieces of the upper frame. Use a wrench or screwdriver to turn them counterclockwise. Do this slowly to avoid stripping the bolts.
Keep all bolts in a small container. This stops them from getting lost. Check if any bolts are hidden under paint or stickers.
Separate Frame Components
After removing the bolts, gently pull apart the frame parts. Metal can be sharp. Wear gloves to protect your hands.
Lay the pieces flat on the floor. This makes them easier to carry and store. Check each part for damage before storage or reuse.
Disassemble Lower Bed Frame
Disassembling the lower bed frame is the first step to safely take down a metal bunk bed. This process involves carefully removing the parts that hold the mattress and the frame sections. Doing this right helps prevent damage and makes the whole bed easier to move.
Remove Support Slats
Start by taking out the support slats under the mattress. These slats hold the mattress firmly in place. Use a screwdriver or wrench to unscrew the bolts or clips. Keep the hardware in a small container to avoid losing them. Lift each slat gently and set them aside. This clears the bed base and prepares it for the next step.
Detach Frame Sections
Next, focus on detaching the main frame sections of the lower bed. Locate the connection points where the frame parts join. Use the right tools to unscrew or unbolt these sections carefully. Separate the side rails, end rails, and any crossbars. Handle each piece with care to prevent bending or scratching. Lay down the frame parts in an organized way for easy reassembly or transport.
Organize And Store Hardware
Organizing and storing hardware is an important step after taking down a metal bunk bed. Keeping screws, bolts, and other parts in order helps you find them easily later. It also prevents losing small pieces. This saves time and effort when you want to reassemble or move the bed.
Proper storage keeps your workspace neat and safe. It stops small parts from rolling away or getting mixed up. With good organization, you avoid frustration and extra trips to the hardware store.
Sort Screws And Bolts
Start by separating screws and bolts by size and type. Group similar pieces together. Check for any damaged or rusty parts and set them aside. This makes reassembly smooth and quick. Sorting also helps identify missing pieces early on.
Use Labeled Bags Or Containers
Place sorted screws and bolts in small bags or containers. Label each container clearly with the size or part name. Use permanent markers or printed labels. This keeps parts organized and easy to find. Store the containers in a safe place to avoid spills or loss.
Tips For Safe Handling
Handling a metal bunk bed during takedown needs extra care. Metal parts can be heavy and sharp. Safety should be your top priority. Use smart methods to avoid injury and keep the process smooth.
Take your time. Follow these simple tips to protect yourself and others around you.
Lift With Care
Always bend your knees before lifting any metal parts. Keep your back straight to avoid strain. Hold the frame close to your body for better control. Lift slowly and steadily. Avoid sudden moves to prevent accidents. Ask for help if the piece is too heavy.
Avoid Pinching Fingers
Metal frames have tight joints and sharp edges. Watch your fingers when separating parts. Use gloves to protect your hands from cuts. Keep fingers away from moving parts. Work slowly to stay safe. Clear the area of obstacles to move freely.
Transport And Storage Suggestions
Transporting and storing a metal bunk bed requires care. Proper planning helps keep parts safe and easy to move. Follow these tips to handle the bed pieces well. Protect the metal parts from damage during transport. Store the components where they stay dry and clean.
Bundle Components Securely
Group similar parts together before packing. Use strong tape or rope to bind metal bars and screws. Wrap sharp edges with cloth or bubble wrap. Keep small pieces in labeled bags to avoid loss. Secure all bundles tightly to prevent shifting during transport.
Choose Proper Storage Location
Pick a dry, cool place for storing the bed parts. Avoid areas with high moisture to stop rust. Use shelves or pallets to keep parts off the floor. Make sure the space is easy to access for future use. Cover the bundles with a cloth to keep dust away.

Credit: www.reddit.com
Frequently Asked Questions
How Do I Safely Disassemble A Metal Bunk Bed?
Start by removing mattresses and bedding. Use the correct tools to unscrew bolts carefully. Keep all hardware in a labeled container. Work slowly to avoid damaging parts or hurting yourself. Follow the manufacturer’s instructions for best results.
What Tools Are Needed To Take Down A Metal Bunk Bed?
You typically need a wrench, screwdriver, and possibly an Allen key. A rubber mallet can help loosen tight parts. Having a toolkit nearby ensures you can handle all fasteners. Always use tools that fit properly to avoid stripping screws.
How Can I Prevent Damage When Dismantling A Bunk Bed?
Remove all bedding and pillows first. Work on a soft surface to protect parts. Avoid using excessive force on screws and bolts. Keep track of all pieces to prevent loss. Handle metal parts carefully to avoid scratches or bends.
Is It Necessary To Label Parts During Disassembly?
Yes, labeling parts helps with reassembly later. It reduces confusion and saves time. Use masking tape and a marker to tag each piece. Group similar screws and bolts separately. This organization keeps your project efficient and stress-free.
Conclusion
Taking down a metal bunk bed is easier with the right steps. Start by removing mattresses and bedding. Keep screws and small parts in a safe place. Use tools carefully to avoid damage or injury. Work slowly and check each part as you go.
This helps keep everything organized and ready for moving or storage. Patience and care make the process smooth. Now, you can take apart your metal bunk bed with confidence and ease.