Are you looking to add a stylish and sturdy bookshelf to your space without spending a fortune? Building a plywood bookshelf might be easier than you think.
With just a few tools and some simple steps, you can create a custom piece that fits perfectly in your room and holds all your favorite books. Imagine the satisfaction of crafting something with your own hands—something that not only organizes your books but also adds character to your home.
Keep reading, and you’ll discover how to turn plain plywood into a beautiful bookshelf that you’ll be proud to show off.
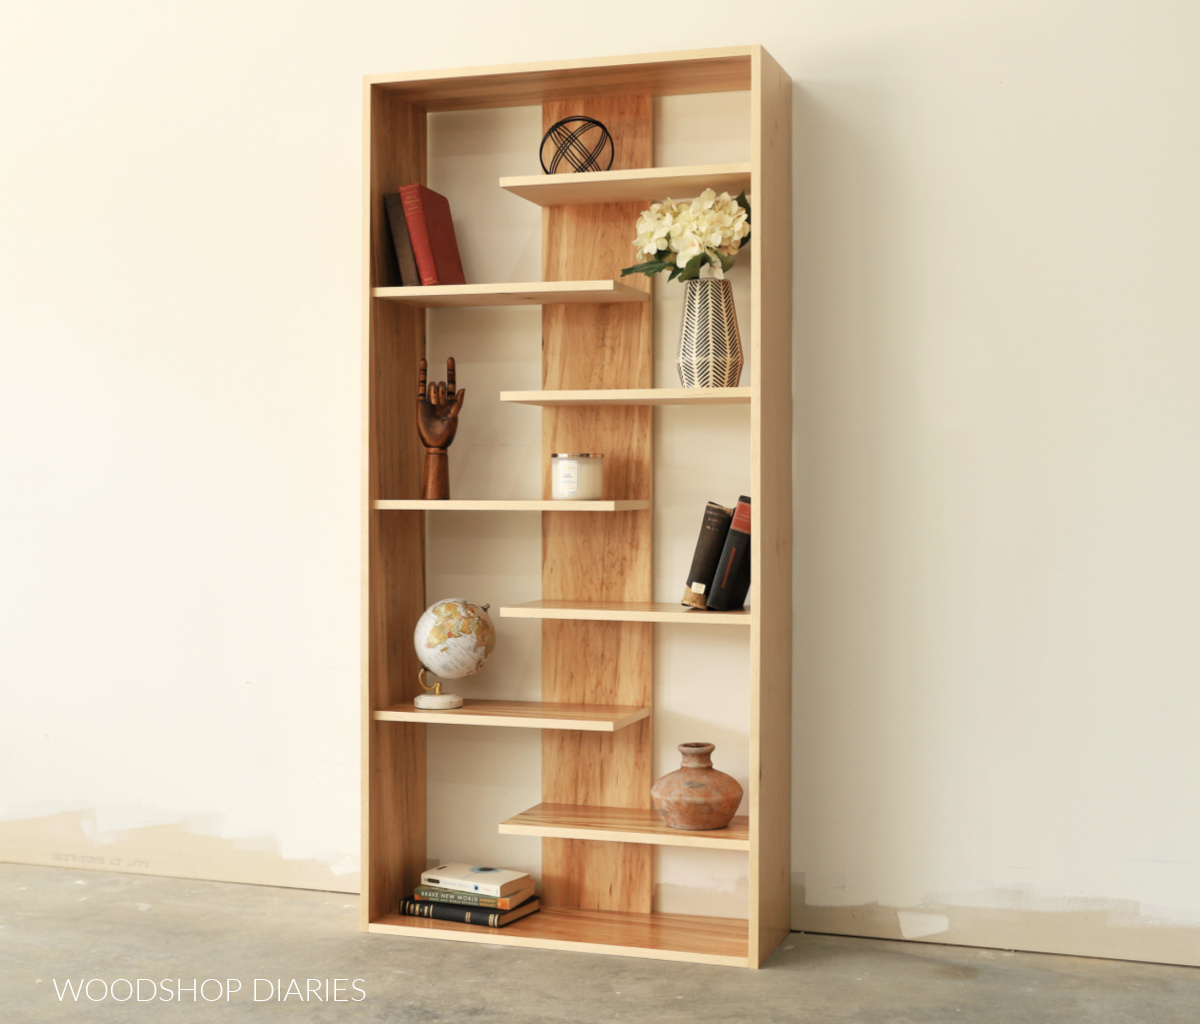
Credit: www.woodshopdiaries.com
Materials And Tools Needed
Building a plywood bookshelf requires the right materials and tools. This section covers what you need to prepare. Having the correct supplies ensures your project goes smoothly. You will save time and avoid mistakes by gathering everything first.
Choosing The Right Plywood
Select plywood that is strong and smooth. Look for hardwood plywood with a thickness of at least 3/4 inch. This thickness supports heavy books without bending. Avoid plywood with many knots or defects. A smooth surface makes painting or staining easier. Baltic birch plywood is a popular choice for durability and appearance.
Essential Tools For The Project
Start with a saw to cut the plywood pieces. A circular saw or table saw works best for straight cuts. Use a drill for making holes and driving screws. Sandpaper or an electric sander smooths edges and surfaces. A tape measure helps with accurate measurements. Clamps hold pieces firmly while you work. A carpenter’s square keeps corners straight and even.
Additional Supplies
Wood screws or nails join the parts securely. Wood glue adds extra strength to joints. Paint or wood stain finishes the bookshelf and protects the wood. Brushes or rollers apply these finishes evenly. Safety gear like goggles and gloves protects your eyes and hands. Sanding blocks help reach tight spots for a perfect finish.
Planning Your Bookshelf
Planning your plywood bookshelf carefully sets the foundation for success. This phase helps avoid mistakes and saves time during building. Clear planning ensures the bookshelf fits your space and needs.
Determining Size And Dimensions
Measure the space where the bookshelf will stand. Decide the height, width, and depth based on available room. Consider how many books or items you want to store. Keep enough space for future additions. Think about the shelf height to fit different book sizes.
Design And Style Options
Choose a design that matches your room style. Simple, modern, or rustic looks all work with plywood. Decide if you want open shelves or ones with backs. Think about adding doors or drawers for extra storage. Keep the design easy to build and sturdy.
Creating A Cutting List
Make a list of all plywood pieces needed. Include shelves, sides, top, and bottom panels. Write down exact measurements for each piece. Plan cuts to use the plywood efficiently and reduce waste. Double-check your list before buying materials.
Preparing The Plywood
Preparing the plywood is the first key step in building a sturdy bookshelf. It involves careful measurement, precise cutting, and smooth finishing. These tasks help ensure the plywood fits perfectly and looks clean.
Taking time to prepare the plywood well saves trouble later. It creates a strong base for your bookshelf. Follow these steps to get started.
Measuring And Marking
Start by measuring the plywood accurately. Use a tape measure and a pencil. Mark the lines clearly for each shelf and side panel.
Check your measurements twice to avoid mistakes. Mark straight lines with a ruler or square. Clear markings guide your cuts and keep the pieces uniform.
Cutting Techniques
Use a saw suitable for plywood, like a circular or jigsaw. Cut along the marked lines slowly and steadily. Keep the blade straight to avoid splintering the wood.
Support the plywood fully while cutting to prevent bending. Take safety precautions, such as wearing goggles and gloves. Clean cuts make assembly easier and the bookshelf stronger.
Sanding And Smoothing Edges
Sand all cut edges with medium-grit sandpaper first. This removes rough spots and splinters. Then use fine-grit sandpaper to smooth the surface.
Pay extra attention to corners and edges. Smooth edges prevent injuries and give the bookshelf a polished look. A well-prepared plywood base improves the final result.
Assembling The Frame
Assembling the frame is a key step in building a plywood bookshelf. This part gives the bookshelf its shape and strength. Getting the frame right makes the whole project easier. Take your time to join the pieces carefully. Use the right tools and materials for a solid build.
Joining Side Panels To Shelves
Start by placing the side panels upright. Align the shelves between them at the marked spots. Hold the shelves steady against the panels. Check that the edges line up perfectly. This step forms the basic structure of the bookshelf. Make sure each shelf fits snugly to avoid gaps.
Using Screws And Wood Glue
Apply wood glue to the edges where the shelves meet side panels. The glue adds extra strength to the joints. Next, drill pilot holes to prevent the wood from splitting. Use screws to secure the shelves firmly. Tighten screws just enough to hold pieces without cracking the plywood. The combination of glue and screws creates a durable frame.
Ensuring Square And Level Assembly
Check that the frame is square by measuring diagonals. Both diagonal lengths should be equal. Use a carpenter’s square to verify corners are at 90 degrees. Place the frame on a flat surface to check for levelness. Adjust the shelves or panels if needed. A square and level frame keeps the bookshelf steady and balanced.
Adding Backing And Supports
Adding backing and supports is an important step in building a plywood bookshelf. It helps keep the bookshelf strong and steady. A good backing panel stops the shelves from wobbling. Shelf supports hold the wood firmly in place. Extra reinforcement makes the whole unit last longer and carry more weight.
Attaching The Back Panel
Choose a thin plywood sheet for the back panel. Cut it to match the bookshelf’s height and width. Place the panel flush against the back edges. Use wood glue along the edges for extra hold. Then, nail or screw the panel to the sides and shelves. Make sure it fits tightly to avoid gaps. The back panel keeps the bookshelf square and stable.
Installing Shelf Supports
Shelf supports hold the shelves securely in place. Use small wooden strips or metal brackets as supports. Attach them along the inside walls of the bookshelf. Measure carefully to keep shelves level. Screw the supports firmly into the plywood sides. Place supports on both ends of each shelf. This prevents sagging and keeps books safe.
Reinforcing For Stability
Reinforce the bookshelf at key points. Add corner braces inside the frame for extra strength. Use screws to fix braces tightly to the wood. Check all joints and tighten loose screws. Reinforcements reduce shaking and improve durability. This step ensures your bookshelf stays solid for years.
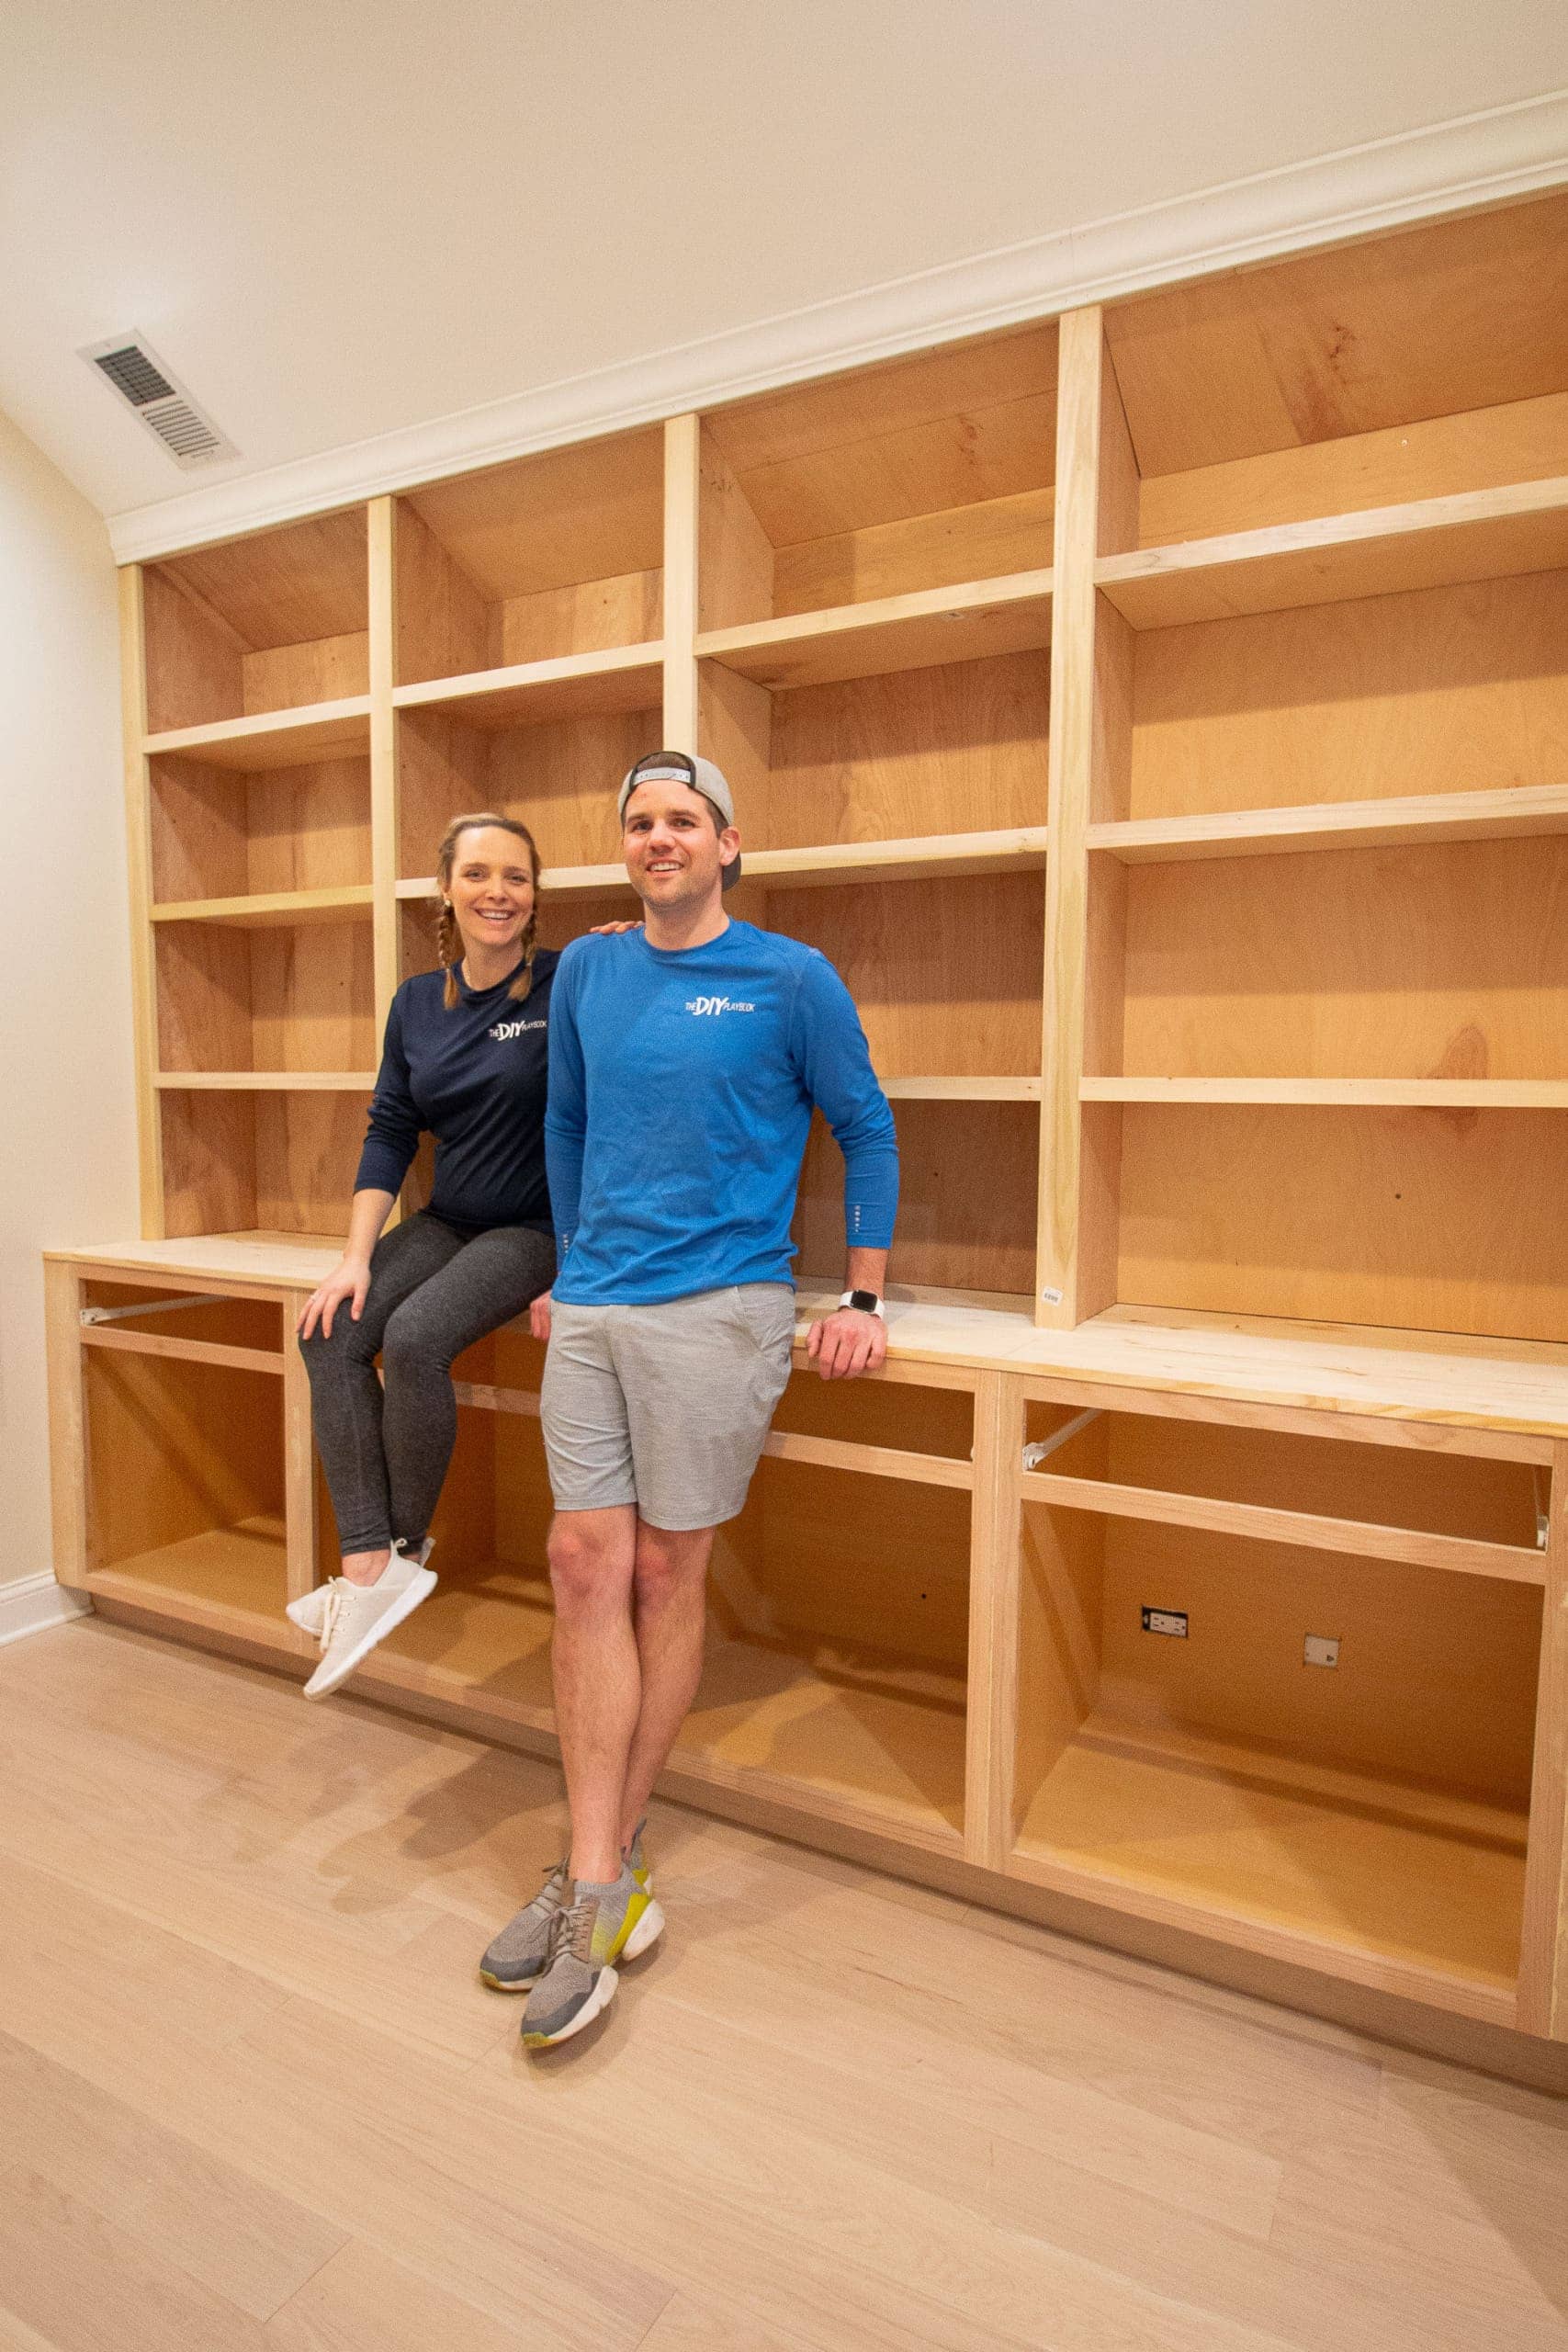
Credit: thediyplaybook.com
Finishing Touches
Finishing touches make your plywood bookshelf look neat and last longer. These steps improve the shelf’s appearance and protect it from damage. Taking time at this stage gives your project a polished look.
Filling Screw Holes And Gaps
Use wood filler to cover screw holes and gaps. Apply the filler with a putty knife for smooth results. Let it dry completely before sanding it flat. Sanding ensures a seamless surface for painting or staining.
Applying Paint Or Stain
Choose paint or stain based on your style preference. Paint gives a solid color and hides wood grain. Stain enhances the natural look of plywood. Apply evenly with a brush or cloth. Allow it to dry fully between coats.
Sealing For Durability
Seal the bookshelf to protect against moisture and wear. Use a clear polyurethane or varnish for best results. Apply thin coats and let each dry well. This step extends your bookshelf’s life and keeps it looking fresh.
Tips For Maintenance And Care
Taking care of your plywood bookshelf keeps it strong and looking good. Simple maintenance helps your shelf last longer and hold your books safely. Follow easy tips to protect it from damage and dirt.
Cleaning Your Bookshelf
Dust your bookshelf often with a soft cloth. Avoid wet wipes or harsh cleaners that can damage the wood surface. Use a dry or slightly damp cloth to clean dirt. Clean spills quickly to stop stains.
Preventing Warping And Damage
Keep the bookshelf away from direct sunlight and moisture. Sunlight can cause the plywood to fade or crack. Moisture makes the wood swell or warp. Place your shelf in a dry, cool place for best results.
Regular Inspections
Check your bookshelf regularly for loose screws or weak joints. Tighten screws when needed to keep it stable. Look for signs of damage like cracks or warping early. Fix small issues to avoid bigger problems later.

Credit: www.reddit.com
Frequently Asked Questions
What Tools Are Needed To Build A Plywood Bookshelf?
You need a saw, drill, screws, measuring tape, clamps, and sandpaper. These tools help cut, assemble, and finish the bookshelf efficiently and precisely.
How Thick Should Plywood Be For A Sturdy Bookshelf?
Use plywood at least 3/4 inch thick. This thickness supports heavy books and prevents sagging, ensuring durability and stability.
How Do You Finish A Plywood Bookshelf For Durability?
Apply a primer, then paint or stain the plywood. Finish with a clear sealant to protect against moisture and wear.
Can I Customize The Size Of My Plywood Bookshelf?
Yes, measure your space and cut plywood accordingly. Adjust height, width, and depth to fit your needs perfectly.
Conclusion
Building a plywood bookshelf is simple and rewarding. Follow the steps carefully and take your time. Use the right tools and measure twice before cutting. You will enjoy having a sturdy, custom shelf. It saves money and fits your space perfectly.
Small efforts lead to great results. Now, you can organize books and decorate your room. Give it a try and see how easy woodworking can be.