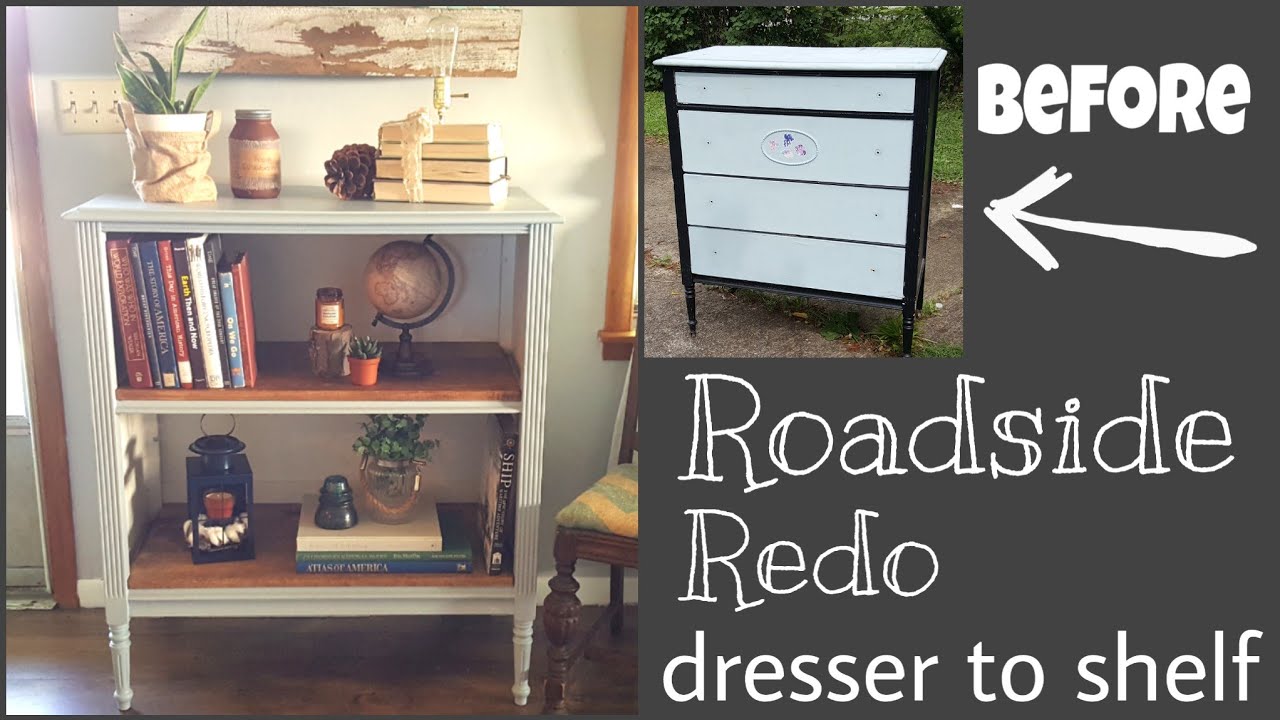
Do you have an old dresser sitting around, taking up space and gathering dust? What if you could turn it into something both beautiful and useful—a bookshelf that showcases your favorite reads and adds charm to your room?
Converting a dresser into a bookshelf is easier than you might think, and it’s a perfect way to refresh your space without spending a lot of money. In this guide, you’ll discover simple steps and clever tips to transform your dresser into a stylish bookshelf that fits your style and needs.
Keep reading, and you’ll be amazed at how a little creativity can make a big difference!
Choose The Right Dresser
Choosing the right dresser is the first step to convert it into a sturdy bookshelf. The dresser must fit the space where you want the bookshelf. It should have the right size and shape to hold your books safely. Careful selection helps create a beautiful and useful piece of furniture.
Assess Size And Shape
Measure the dresser’s height, width, and depth. Make sure it fits the wall space in your room. A tall dresser works well as a bookshelf. Wide dressers can hold many books but take more room. The shape matters too. Flat, straight lines make adding shelves easier.
Check Structural Integrity
Look closely at the dresser’s condition. Check for cracks, loose joints, or weak spots. The dresser must be strong enough to hold heavy books. Test the drawers and frame for stability. Solid wood dressers often last longer and hold weight better than particleboard.
Credit: www.youtube.com
Gather Necessary Tools
Before starting the project, gathering the right tools is important. Having everything ready makes the work easier and faster. It helps to avoid interruptions and keeps the process smooth. This section lists all tools and safety gear needed.
Basic Tools Checklist
- Screwdriver set for removing and attaching parts
- Hammer for small adjustments and nails
- Measuring tape to ensure accurate cuts and placement
- Hand saw or jigsaw to cut shelves or parts
- Sandpaper or electric sander for smooth surfaces
- Drill with bits for making holes and fixing screws
- Wood glue for extra strength on joints
- Clamps to hold pieces while glue dries
- Pencil for marking measurements and cutting lines
Safety Gear Essentials
- Safety goggles to protect your eyes from dust and debris
- Work gloves to keep your hands safe from splinters
- Dust mask to avoid inhaling wood dust
- Ear protection if using loud power tools
- Comfortable clothing that fits well and covers skin
- Sturdy shoes to protect your feet from dropped tools
Prepare The Dresser
Preparing the dresser is the first step to turn it into a beautiful bookshelf. This step helps create a smooth and clean surface for your project. Taking your time here makes the final result look much better.
Start by removing parts you do not need. Then, clean and sand the dresser to get rid of old paint and dirt. These actions make the dresser ready for painting or staining.
Remove Drawers
Take out all the drawers from the dresser carefully. Pull each drawer straight out to avoid damage. Set them aside; you might use them for extra storage later.
Check for any nails or screws holding the drawers in place. Remove these with a screwdriver or hammer. This step clears the space inside the dresser for your new shelves.
Clean And Sand Surfaces
Use a damp cloth to wipe down the dresser. Remove dust, dirt, and grease from all surfaces. Let it dry completely before moving to the next step.
Sand the dresser with medium-grit sandpaper. This removes old paint and smooths rough spots. Focus on edges and corners to prevent splinters.
After sanding, wipe the dust off with a clean cloth. Your dresser is now ready for painting or staining. This preparation helps the finish stick better and last longer.

Credit: www.youtube.com
Modify The Frame
Modifying the frame is a key step in turning a dresser into a bookshelf. The original frame supports drawers, not heavy books. Adjusting the frame ensures the structure holds weight safely and looks right as a shelf.
Start by removing the drawers and any hardware. You want a clean space to work with. The frame may need extra support to hold books without sagging or breaking.
Reinforce Shelves
Books are heavy. Dresser shelves are often thin and not built for weight. Add wooden planks or metal brackets under each shelf for strength. Secure them well with screws. This stops shelves from bending or falling.
Use wood glue along with screws for extra hold. Check the underside of each shelf. Reinforce any weak spots. This makes the shelf stable and safe for books.
Adjust Height And Depth
Dresser shelves can be too shallow or too tall for books. Remove some shelf dividers or supports to make taller spaces. This fits large books or binders.
Change shelf depth by adding boards to the back or front. This prevents books from falling off. Make sure shelves stay balanced after changes. Measure shelf space to match your book sizes.
Add Shelving Boards
Adding shelving boards is a key step to turn your dresser into a bookshelf. These shelves will hold your books and give your piece a new look. Proper shelves make the bookshelf sturdy and useful.
Choose the right materials and install strong supports. These details keep your shelves safe and lasting. Let’s explore how to do this well.
Select Suitable Materials
Pick wood that matches or complements your dresser. Plywood, MDF, or solid wood work well. Thickness should be at least ¾ inch to hold books safely. Avoid thin boards that can bend or break.
Cut boards to fit inside the dresser frame. Measure carefully to get the right length and width. Sand edges smooth to avoid splinters. Paint or stain boards for a clean finish.
Install Secure Supports
Use strong brackets or shelf pins to hold the boards. Brackets should match the shelf length and weight. Drill holes for pins evenly on both sides. This helps balance the shelves well.
Fix brackets or pins tightly to avoid movement. Test each shelf by placing some books on it. Adjust supports if the shelf feels weak or shaky. Secure shelves make your bookshelf safe and durable.
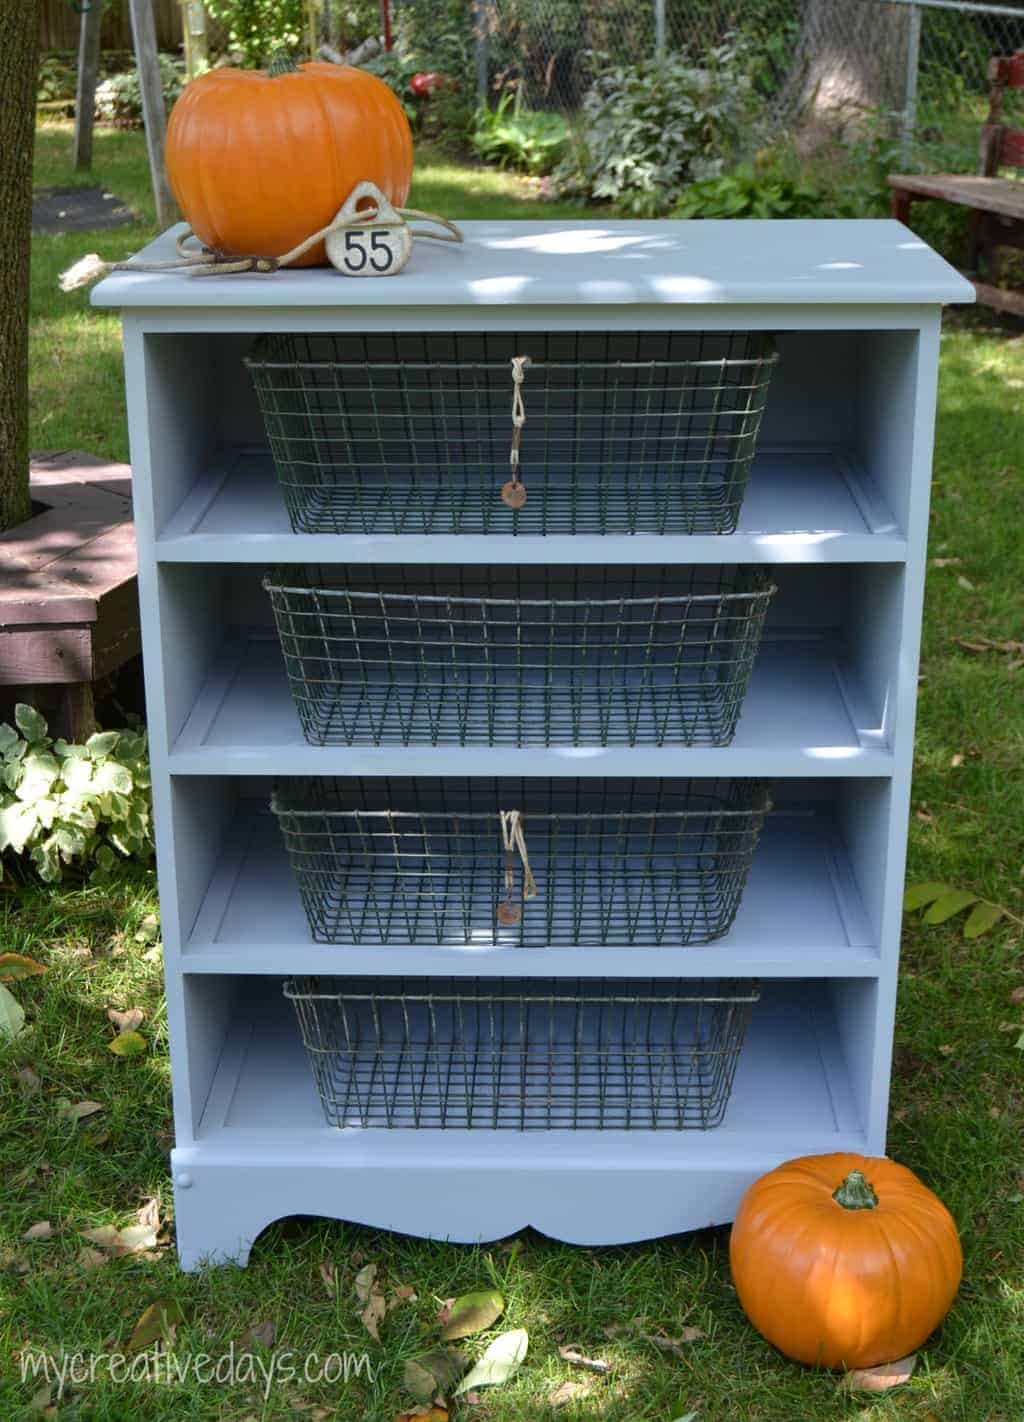
Credit: www.mycreativedays.com
Paint And Finish
Painting and finishing your dresser is a key step in turning it into a beautiful bookshelf. This step protects the wood and gives your project a fresh look. A good paint or finish makes the bookshelf strong and long-lasting.
Choosing the right paint or stain affects how your bookshelf will look. The finish adds style and matches your room’s decor. It also helps protect the wood from dust and damage.
Choose Paint Or Stain
Pick paint for a colorful, solid look. Paint covers imperfections well and offers many color choices. Use latex paint for easy cleanup and durability.
Stain keeps the wood’s natural look. It shows the grain and texture nicely. Choose a stain color that fits your style. Stains work well if you want a classic or rustic feel.
Both paint and stain need a smooth surface. Sand the dresser before applying any finish. This helps the paint or stain stick better.
Apply Protective Coating
Protective coatings keep your bookshelf safe from scratches and spills. Use clear polyurethane or varnish over paint or stain. These finishes add shine and strength.
Apply thin, even coats with a brush or cloth. Let each coat dry fully before adding the next. Two or three coats give the best protection.
Lightly sand between coats to keep the surface smooth. This step helps the finish last longer and look nicer. A good protective coat keeps your bookshelf looking great for years.
Organize Your Books
Organizing your books on a converted dresser can make your new bookshelf both useful and attractive. A tidy arrangement helps you find books quickly. It also makes the space look neat and inviting. You can choose a style that fits your taste and room decor.
Arrange By Size Or Genre
Start by grouping books by size to create a balanced look. Place taller books on one side and smaller ones on the other. This method keeps the shelf stable and pleasing to the eye.
Another way is to sort books by genre. Keep fiction, non-fiction, and hobbies in separate sections. This helps you find your favorite books faster. It also makes your shelf look organized and thoughtful.
Add Decorative Elements
Mix in some decorative items to break the rows of books. Small plants, photo frames, or candles add color and texture. These elements make your shelf feel warm and personal.
Use bookends to keep your books upright. Choose styles that match your room’s theme. Decorations also fill empty spaces, making the shelf more attractive.
Frequently Asked Questions
How Do I Prepare A Dresser For Conversion?
Start by emptying all drawers and removing hardware. Sand the surfaces to smooth imperfections. Clean the dresser thoroughly to ensure paint and glue adhere well.
What Tools Are Needed To Convert A Dresser Into A Bookshelf?
You’ll need a drill, screwdriver, saw, sandpaper, wood glue, and paint or stain. Additional brackets may be required for shelf support.
Can I Use Any Dresser For A Bookshelf Conversion?
Most wooden dressers work, but solid wood is best. Avoid particleboard or damaged pieces for durability and safety.
How Do I Add Shelves Inside The Dresser?
Remove some drawers and measure the space. Cut wooden boards to fit and secure them with brackets or wood glue.
Conclusion
Transforming a dresser into a bookshelf is a fun project. It gives old furniture a new purpose. You save money by reusing what you have. Plus, it adds a unique touch to your room. Just follow the steps carefully and take your time.
Soon, you will have a stylish place for your books. Enjoy your new bookshelf and the satisfaction of your work. Try this project to bring creativity into your home easily.