Have you ever looked at a simple wooden pallet and wondered if it could become something more? Imagine turning that rough stack of wood into a stylish bookshelf that adds character to your space.
You don’t need to be a woodworking expert or spend a fortune. In this guide, you’ll discover easy steps to transform a pallet into a unique bookshelf that fits your style and needs. Ready to give new life to old wood and create something useful?
Keep reading—you’re about to unlock a creative project that’s fun, practical, and perfect for your home.
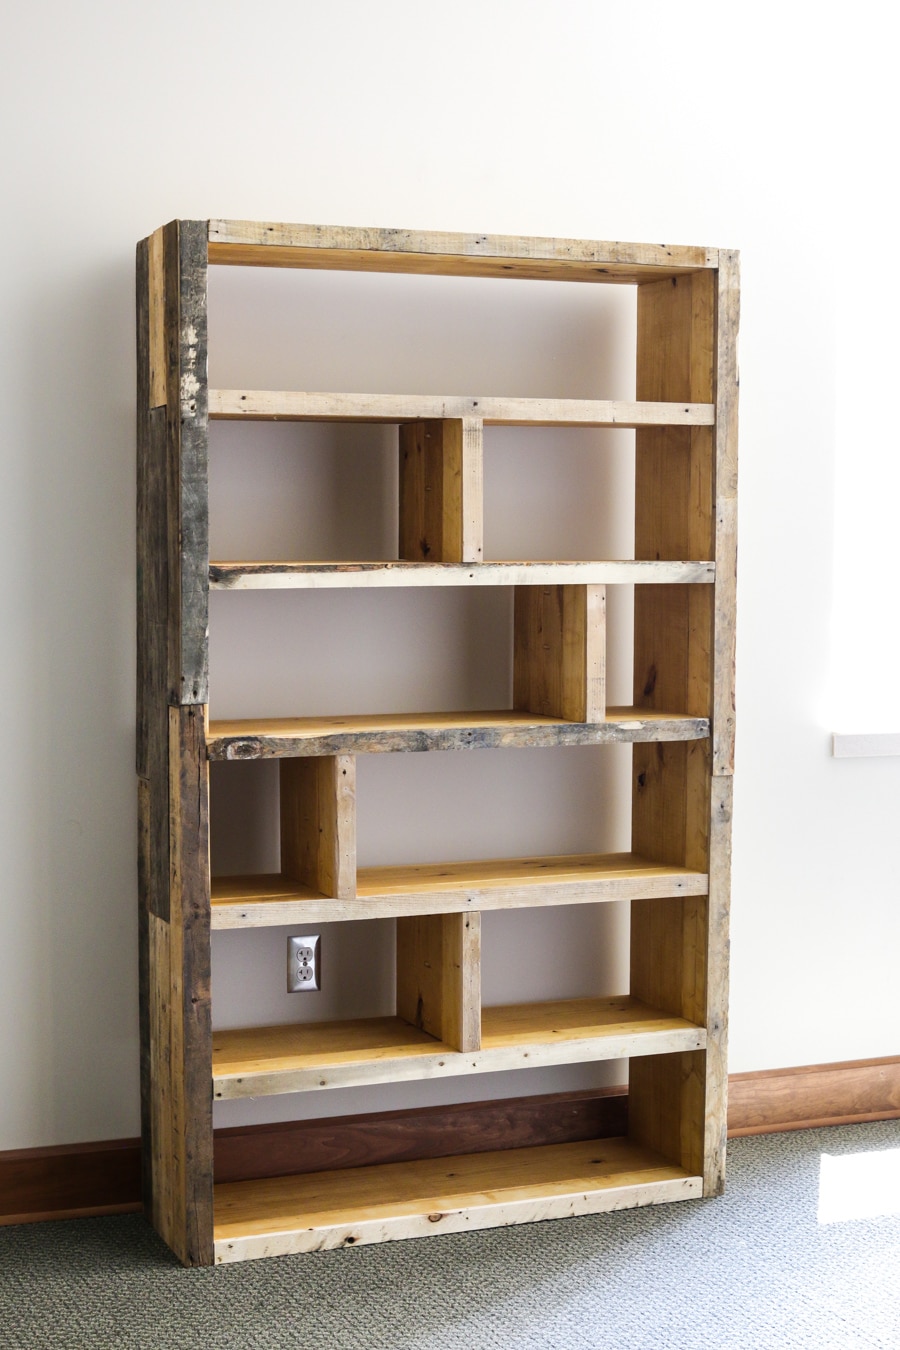
Credit: jenwoodhouse.com
Choosing The Right Pallet
Choosing the right pallet is the first step to build a strong and beautiful bookshelf. Not all pallets work well for this project. Some are too weak or unsafe. Picking the right one saves time and effort. It also keeps your bookshelf safe and durable.
Types Of Pallets
Pallets come in many types. Wooden pallets are the most common for bookshelves. They are sturdy and easy to work with. Plastic pallets are lighter but not as strong. Metal pallets are heavy and hard to cut. Choose wooden pallets with solid boards for best results.
Checking Pallet Condition
Look closely at the pallet before use. Avoid pallets with cracks or broken boards. Check for signs of rot or mold. These make the wood weak and unsafe. Pallets with loose nails or splinters can cause injury. Pick pallets that feel solid and clean.
Safety Considerations
Safety is very important when choosing pallets. Avoid pallets treated with chemicals. They can be harmful for indoor use. Check for stamps or markings that show treatment type. Use gloves to protect your hands when handling pallets. Clean and sand the wood well before building.
Gathering Tools And Materials
Before starting your pallet bookshelf project, gather all needed tools and materials. This step makes the building process smooth and enjoyable. Having everything ready saves time and avoids interruptions.
Essential Tools
First, get basic tools for cutting and assembling wood. A saw helps cut the pallet to size. A drill is needed to make holes and fix screws. Sandpaper or an electric sander smooths rough edges. A tape measure ensures accurate measurements. A hammer and nails help secure parts. Safety gear like gloves and goggles protect your hands and eyes.
Additional Supplies
Besides tools, collect other materials for a sturdy bookshelf. Wood screws hold pieces tightly together. Wood glue adds extra strength to joints. Paint or wood stain can change the pallet’s color. Brushes or rags apply these finishes. Wood filler fixes cracks and holes. A level keeps shelves straight and balanced.
Workspace Setup
Choose a clean, flat area to work on your project. Good lighting lets you see details clearly. Arrange tools and materials within easy reach. Protect surfaces with a drop cloth or old newspaper. Ventilation is important if you use paint or stain. Organize scraps and trash to keep your space tidy.
Preparing The Pallet
Designing your bookshelf is the key step before you start building. It helps you see how the pallet will turn into a useful piece. Planning well saves time and makes the project easier. You get a clear idea of space and style.
Measuring And Planning
Start by measuring the pallet’s length, width, and height. Write down these numbers. Decide how tall and wide your bookshelf should be. Think about where you will place it in your room. Measure the wall space carefully. This step ensures the shelf fits well and looks balanced.
Customizing Shelf Sizes
Choose shelf heights based on the books you want to store. Tall books need taller shelves. Small books fit on shorter shelves. Leave extra space to avoid crowding. You can make shelves uneven for a unique look. Custom sizes make the bookshelf practical and stylish.
Adding Support Structures
Support is important for strength and safety. Add extra wood pieces under each shelf. Use brackets or wooden beams for support. Check that supports are level and secure. Strong supports keep the bookshelf steady and hold heavy books. This step stops shelves from bending or breaking.
Designing Your Bookshelf
Building the bookshelf from a pallet is a fun and simple project. It turns an old pallet into a useful and stylish storage piece. You will work step-by-step to create strong shelves that hold your books safely. This section explains how to assemble, secure, and finish your bookshelf for a great look.
Assembling Shelves
First, detach the pallet boards carefully. Choose the smoothest boards for the shelves. Lay the boards flat and arrange them evenly. Use wood glue to hold the boards together. Let the glue dry completely before the next step.
Next, add support boards underneath the shelves. These supports keep the shelves from bending. Screw the supports to the bottom of the shelves for extra strength. Check that all boards are level and straight.
Securing Components
Stand the pallet frame upright. Place the shelves inside the frame at your chosen heights. Use screws to fix each shelf to the pallet frame. Make sure the screws go deep into the wood. This will keep the shelves stable and safe.
Use a drill for quick and secure screwing. Check the shelves for firmness by pressing gently. Tighten any loose screws to avoid wobbling. The stronger the connection, the longer your bookshelf will last.
Finishing Touches
Sand all rough edges and surfaces smoothly. This step protects your hands and gives a neat look. Wipe off dust with a clean cloth. Apply wood stain or paint to match your room’s style.
Let the finish dry fully before use. Add rubber pads under the bookshelf to protect floors. Your pallet bookshelf is now ready to hold books and decor items.
Building The Bookshelf
Painting and sealing your pallet bookshelf protects the wood. It also improves the look. This step helps your bookshelf last longer. It stops damage from water, dirt, and wear. A good finish makes the wood smooth and nice.
Choosing Paint Or Stain
Pick paint for bright colors and full coverage. Paint hides the wood grain completely. Stain keeps the natural wood look. It adds color but lets the grain show. Choose a water-based paint or stain for easy use. They dry fast and have less smell.
Applying Coating
Start with clean, dry wood. Use a brush or roller to apply paint or stain. Apply thin, even coats for best results. Avoid thick layers that can drip or crack. Let each coat dry before adding the next. Sand lightly between coats for smoothness.
Drying And Curing Tips
Drying means the paint or stain feels dry on the surface. Curing means it fully hardens inside. Let your bookshelf dry in a warm, dry place. Avoid dust and dirt while drying. Wait at least 24 hours before touching. Full curing can take days to weeks. Be patient for the strongest finish.
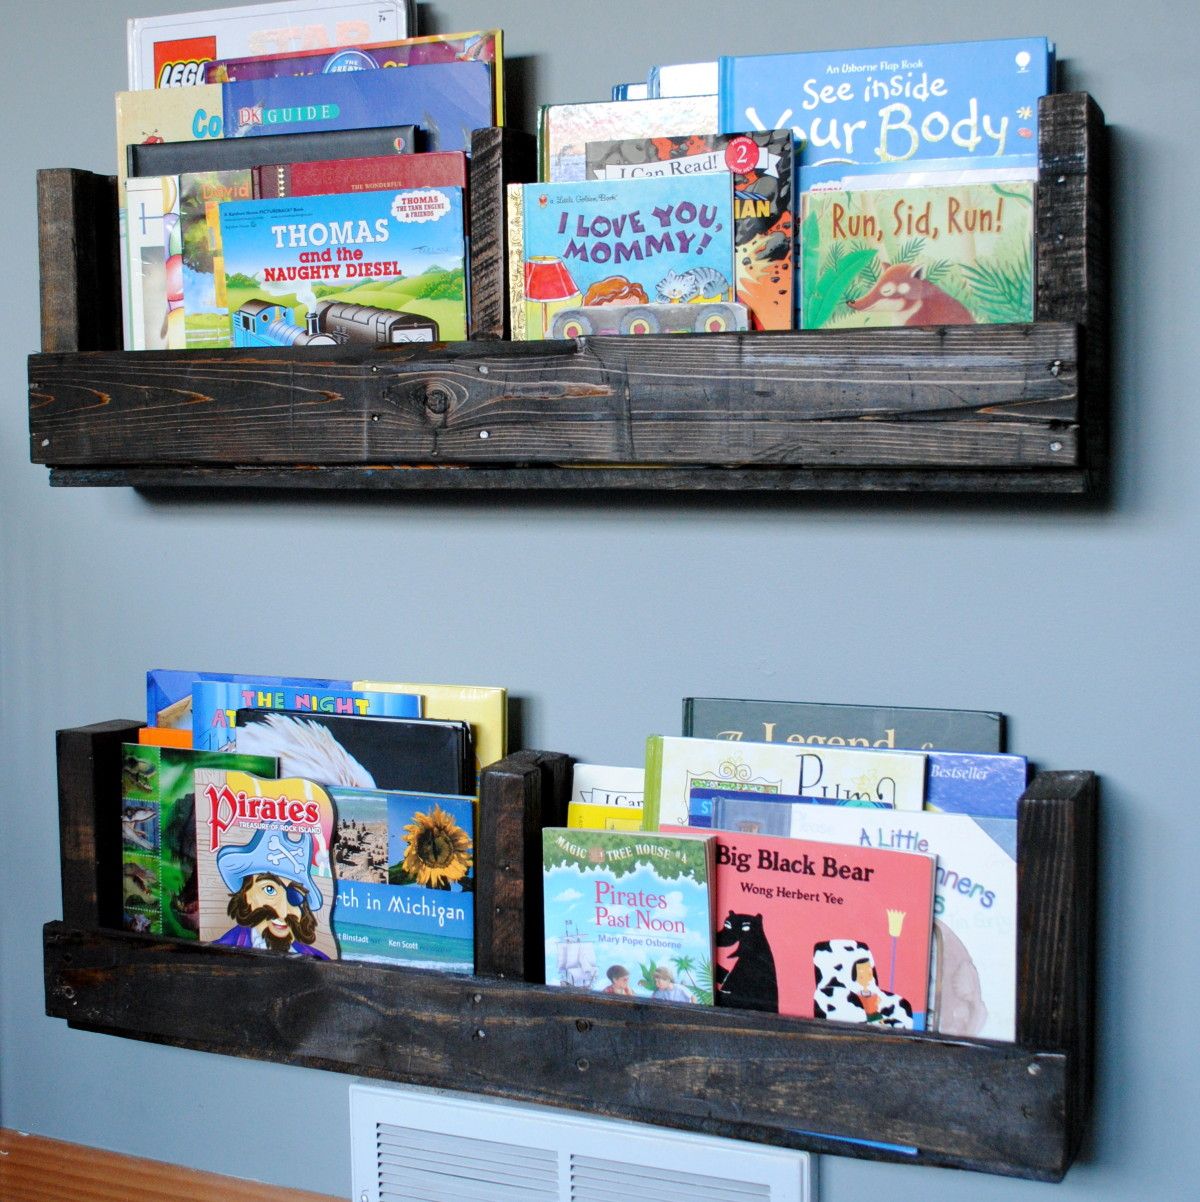
Credit: jennaburger.com
Painting And Sealing
Installing and styling your pallet bookshelf is an important step. It makes the shelf safe and visually appealing. This section guides you through mounting options, decorating ideas, and simple maintenance tips. These help keep your bookshelf sturdy and attractive.
Mounting Options
Choose a mounting style that fits your space. Wall mounting saves floor space and looks modern. Use strong brackets or anchors to secure the pallet. Make sure the pallet is level and stable. Another option is to lean the pallet against a wall. This needs no drilling but may be less stable. For a freestanding shelf, add legs or a base. Check the weight capacity to avoid accidents.
Decorating Ideas
Add personality with paint or stain. Light colors brighten a room, dark ones add warmth. Use stencils or patterns for a unique look. Place books upright or stacked for variety. Mix in plants, candles, or photo frames. These add color and texture. Use baskets or boxes on shelves to organize small items. Keep a balance between decoration and function.
Maintenance Tips
Dust the bookshelf regularly with a soft cloth. Avoid using too much water to prevent wood damage. Tighten screws and brackets every few months. Check for cracks or splinters and sand them down. If painted, touch up chipped areas to keep it fresh. Keep the shelf away from direct sunlight to prevent fading. Proper care extends the shelf’s life and beauty.
Credit: www.upliftingmayhem.com
Frequently Asked Questions
What Tools Do I Need To Turn A Pallet Into A Bookshelf?
You need basic tools like a hammer, nails, screwdriver, sandpaper, saw, and paint or stain. These help you dismantle, smooth, and finish the pallet for a sturdy bookshelf.
How Do I Prepare A Pallet Before Building A Bookshelf?
Start by cleaning the pallet to remove dirt and debris. Sand it thoroughly to avoid splinters and ensure a smooth surface for painting or staining.
Can I Customize The Size Of My Pallet Bookshelf?
Yes, you can cut the pallet to your desired size. Adjust the height, width, and depth to fit your space and storage needs perfectly.
What Is The Best Finish For A Pallet Bookshelf?
Use wood stain or paint for finishing. Stain enhances the natural wood look, while paint adds color and protects against wear and moisture.
Conclusion
Turning a pallet into a bookshelf is simple and fun. You only need a few tools and some patience. This project saves money and helps the environment by reusing wood. Your new bookshelf adds character to any room. Try different paint or stain colors for a unique look.
Anyone can do this, even beginners. Start your DIY pallet bookshelf today and enjoy the satisfaction of making something useful with your own hands. Easy, creative, and practical. Why not give it a try?
