Have you ever looked at a stack of old books and wondered if there’s more you could do with them than just store them on a shelf? What if you could turn those worn pages into something new, useful, and eye-catching?
Making a bookshelf from old books is not only a creative way to recycle but also a unique way to showcase your love for reading. Imagine having a one-of-a-kind piece that tells a story before you even place your favorite novels on it.
Ready to transform your old books into a stunning bookshelf that will impress everyone who sees it? Keep reading, and you’ll discover simple steps that make this project easier than you think.
Choosing The Right Books
Choosing the right books is the first step in making a sturdy bookshelf from old books. The books you pick affect the strength and look of your project. Old books come in many sizes and types. Some are better for building than others. Careful selection makes your bookshelf both strong and beautiful.
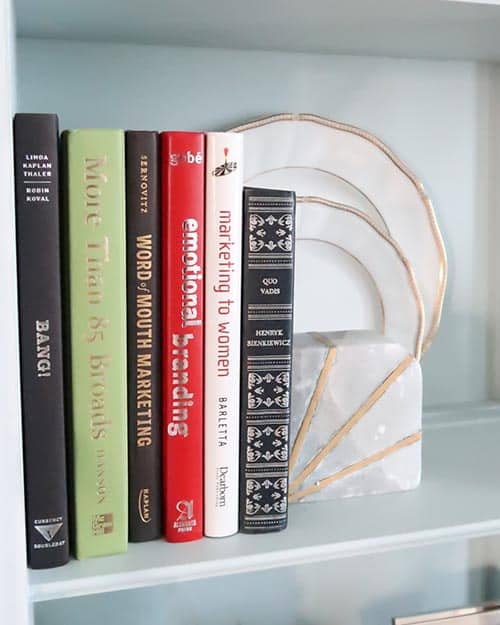
Selecting Sturdy Hardcovers
Hardcover books work best for building a bookshelf. Their thick covers provide a solid base. Softcover books often bend or tear easily. Choose hardcovers with firm, unbroken covers. The spine should be strong and not cracked. These books support weight and keep the shelf steady.
Sorting By Size And Thickness
Sort books by size and thickness before stacking. Similar sizes create a level surface. Thick books add strength to the shelves. Thin books may make the shelf weak and uneven. Group books from tallest to shortest. This helps in planning the shelf layers effectively.

Credit: www.remodelaholic.com
Gathering Materials And Tools
Starting a bookshelf project from old books needs careful preparation. Gather all materials and tools before you begin. This saves time and keeps the work smooth. Choose books that are sturdy and in good shape. Also, find a clean workspace with enough room to build.
Next, collect the tools needed for assembly. Some tools are essential to hold and shape the books. Others help keep the shelf stable and safe. Organize everything so you can reach items easily during the project.
Essential Tools For Assembly
A strong glue is key to hold books together. Use a glue that dries clear and is safe for paper. A ruler or measuring tape helps keep the shelf even. A sharp craft knife or scissors will cut any extra paper or bindings. A pencil marks where to glue or cut. Clamps or heavy objects hold books tight while drying. These basic tools make the assembly steady and neat.
Additional Supplies For Stability
Cardboard or thin wood boards add extra support between rows. Small nails or screws can secure the base for better strength. Sandpaper smooths any rough edges on wood or cardboard. Protective paper or cloth under the shelf stops damage to furniture. These extra supplies make sure the shelf stays firm and lasts long. They help your project look and feel professional.
Preparing Books For Construction
Preparing books for construction is the first step in making a bookshelf from old books. Proper preparation helps the books hold together and look neat. It also makes the shelf stronger and more stable.
Cleaning and reinforcing the books ensures they last longer. This step saves time and effort during assembly. Careful preparation gives your bookshelf a polished and professional look.
Reinforcing Book Spines
Book spines can be weak after years of use. Strengthening them prevents books from falling apart. Use clear tape or strong glue on the spine to add support.
Apply the tape or glue evenly, covering cracks or loose parts. Let it dry fully before using the book. Strong spines keep the bookshelf steady and the books aligned.
Removing Dust And Debris
Old books collect dust and dirt over time. Dust can damage the books and the shelf. Use a soft cloth or brush to clean the book covers and edges gently.
Work in a well-ventilated area to avoid breathing in dust. Cleaning improves the look and feel of the bookshelf. It also keeps the project healthy and safe.
Designing Your Bookshelf Layout
Designing your bookshelf layout sets the foundation for a beautiful and sturdy piece. It helps organize old books into a practical structure. Thoughtful design ensures the bookshelf holds weight and looks good. Planning the layout also saves time during assembly and avoids mistakes.
Stacking Techniques
Stack books in different ways to create strong layers. Lay some books flat to form a solid base. Place others upright to add height and stability. Alternate the direction of the books for better balance. Use heavier books at the bottom to support lighter ones. Check that each layer is even to prevent wobbling.
Creating Functional Compartments
Divide the bookshelf into sections for better organization. Use stacks of books as walls between compartments. Make some spaces larger for tall items or decorations. Smaller compartments suit paperbacks or knick-knacks. Arrange compartments based on what you plan to store. Ensure each section is stable and easy to access.
Assembling The Bookshelf
Assembling your bookshelf from old books is a fun and creative step. This part needs care and patience to make the structure strong. Each book must hold well to form a solid shelf. You will learn how to glue and support the books properly. This helps your bookshelf last longer and look great.
Follow the steps carefully to avoid weak spots. The right method keeps the books from falling apart. Let’s start with gluing the books together.
Gluing And Securing Books Together
Choose a strong glue that works on paper and cardboard. White craft glue or wood glue works well. Apply glue on the sides of the books where they will touch. Press the books tightly together for a few minutes. Use clamps or heavy objects to keep them in place while drying. Drying time is usually a few hours. Do not rush this step. Proper drying makes the bond strong. Repeat this for all books you want to join. Make sure the edges line up evenly for a neat look.
Adding Support Structures
Books alone may not hold heavy items well. Add support inside or at the back for strength. Use thin wooden boards or strong cardboard strips. Attach these supports with glue or small nails. Place them between layers or behind the bookshelf. This stops the shelf from bending or falling. Check the stability by gently pressing on the shelf. Add more supports if it feels weak. Proper support keeps your shelf safe and steady.
Credit: porchdaydreamer.com
Finishing Touches
Finishing touches give your bookshelf a complete, polished look. These small steps protect your work and add style. They help your shelf last longer and fit your room’s decor. Choose finishes and decorations that match your taste and the room’s vibe.
Painting Or Sealing The Bookshelf
Painting the bookshelf can add color and protect the books. Use water-based paint for easy cleanup and less smell. Apply thin coats for a smooth finish. Let each coat dry well before the next.
Sealing is another good option. A clear sealant keeps the book covers safe from dust and moisture. Choose a matte or glossy finish based on your style. Apply sealant with a soft brush to avoid marks.
Decorative Enhancements
Decorations bring personality to your bookshelf. Add small plants or decorative objects on the shelves. Use fairy lights for a warm, cozy glow.
Try stenciling or decals on the sides for extra design. Tie ribbons or lace around the edges for a gentle, vintage feel. Keep decorations simple to avoid clutter.
Creative Variations
Creative variations turn old books into unique shelves. They add style and save space. These ideas blend function with art. They make your room cozy and smart.
Floating Book Shelves
Floating book shelves look light and modern. Attach strong brackets to the wall. Stack books flat or standing on them. The books seem to float in the air. Use colorful or old books for charm. These shelves fit small spaces well. They keep floors clear and rooms open.
Corner Bookshelf Designs
Corner bookshelf designs use room corners well. Build shelves that fit snug in angles. Stack books vertically or horizontally. This saves space and adds interest. Choose old books with thick covers for strength. Paint or varnish for a neat finish. Corners often go unused; these shelves fix that.

Credit: www.youtube.com
Maintenance Tips
Keeping your bookshelf made from old books in good shape takes some care. This section explains simple steps to maintain its look and strength.
Regular upkeep helps your bookshelf last longer and stay attractive. Small efforts make a big difference.
Cleaning And Dusting
Dust gathers quickly on bookshelves. Use a soft cloth or a feather duster to clean gently.
Avoid wet cleaning. Moisture can damage old book covers and pages.
Clean every week to stop dust build-up. This keeps the bookshelf fresh and neat.
Preventing Wear And Tear
Keep the bookshelf away from direct sunlight. Sunlight can fade book covers and weaken glue.
Do not overload shelves. Heavy weight can cause bending or breaking.
Move the bookshelf carefully. Sudden moves might loosen the books or damage the structure.
Frequently Asked Questions
How Do I Choose Books For A Bookshelf Project?
Select sturdy, hardcover books for better support and durability. Avoid fragile or rare books to prevent damage. Use books with similar sizes for a neat, uniform look. Consider the color and theme for aesthetic appeal. This ensures your bookshelf is both functional and stylish.
What Tools Are Needed To Make A Bookshelf From Books?
You’ll need strong adhesive, a utility knife, clamps, and a ruler. Sandpaper helps smooth edges if needed. Optional tools include paint or sealant for finishing touches. These tools ensure your bookshelf is stable and looks polished. Proper tools make assembly easier and safer.
How Can I Make The Bookshelf Sturdy And Safe?
Use strong glue between book spines for firm bonding. Apply clamps until the glue fully dries. Add weight or brackets if necessary for extra support. Choose books with hard covers to enhance stability. This prevents the shelf from collapsing or tipping over.
Can I Customize The Bookshelf Design Easily?
Yes, you can stack books horizontally or vertically. Paint or decorate book covers for a personalized touch. Add LED lights or shelves for extra functionality. Customizing lets you match your bookshelf to any room style. It’s a creative way to reuse old books uniquely.
Conclusion
Making a bookshelf from old books is a fun and creative project. It saves money and gives new life to unused books. The steps are simple and easy to follow. You can customize the shelf to fit your space and style.
Plus, it adds a unique touch to any room. Give it a try and enjoy your handmade bookshelf. A great way to recycle and decorate at once!