Imagine turning a simple space on your bookshelf into a magical little world that sparks your imagination every time you see it. Creating a bookshelf book nook is easier than you think, and it adds a unique charm to your reading corner.
In this guide, you’ll discover step-by-step how to build your own cozy, detailed book nook that brings your favorite stories to life. Ready to transform your bookshelf and make your reading time even more special? Let’s dive in!
Choosing The Right Space
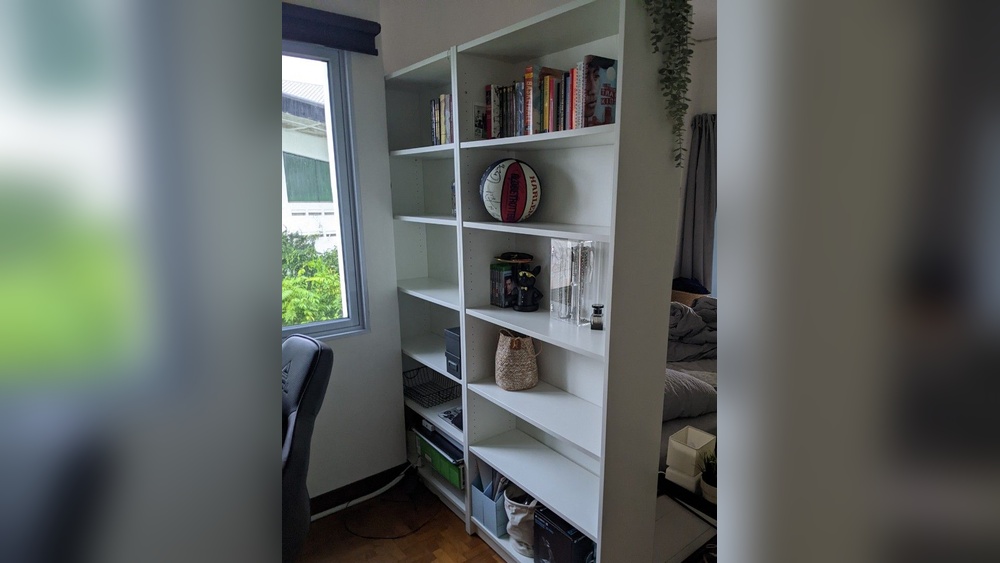
Choosing the right space for your bookshelf book nook is key to a cozy, inviting spot. This space needs to fit your vision and your shelf perfectly. Think about the size, light, and comfort before starting.
Finding the best location helps your book nook stand out. It also makes reading more enjoyable. Let’s explore how to measure and pick the perfect spot.
Measuring Your Bookshelf
Start by measuring the height, width, and depth of your bookshelf. Use a tape measure for accuracy. Write down the numbers to avoid mistakes later.
Check for any obstacles like pipes or vents inside the shelf. They can limit your design options. Knowing exact dimensions helps you plan the nook’s details clearly.
Selecting The Perfect Spot
Choose a spot with good natural or soft lighting. This makes reading easier and creates a warm feel. Avoid direct sunlight to protect your books and decorations.
Pick a shelf area that is easy to reach. This way, you can enjoy your nook without hassle. Also, consider a quiet corner for better focus and peace.

Credit: www.apartmenttherapy.com
Gathering Materials
Starting a bookshelf book nook needs the right materials. Gathering these supplies first makes your work easier and faster. The right tools and items help you build a sturdy and beautiful nook.
Basic Craft Supplies
Begin with essential craft supplies. Cardboard or foam board works well for the structure. Glue sticks and hot glue help join parts firmly. Use scissors and craft knives for cutting shapes. Paints and brushes add color and life to your nook.
Tools You’ll Need
Some simple tools make building safer and neater. A ruler or measuring tape keeps your cuts precise. A pencil helps mark lines before cutting. Cutting mats protect your work surface. Tweezers aid in placing small pieces carefully.
Optional Decorative Items
Decorate your nook with small extras for charm. Miniature lights create a cozy glow. Tiny furniture or figurines add character. Stickers and decals bring detail to walls or floors. Fake plants or moss make a natural touch.
Design Ideas To Inspire
Bookshelf book nooks bring magic to your reading space. They create small, detailed worlds between your books. These tiny scenes make your shelf look special and invite curiosity. Simple ideas can turn a plain shelf into a charming display. Let these design ideas inspire your own creative nook.
Fantasy And Fairy Tale Themes
Imagine tiny castles, dragons, or fairy lights inside your nook. Use small figurines or handmade paper cutouts. Add soft LED lights for a magical glow. Bright colors and whimsical shapes create a fairy tale vibe. This theme adds wonder and sparks imagination while reading.
Miniature Cityscapes
Build little streets, buildings, and parks inside the nook. Use craft materials like cardboard or clay for houses. Paint windows and doors for extra detail. Tiny cars or people figures add life to the scene. Cityscapes bring a modern, lively feel to your bookshelf.
Nature-inspired Scenes
Use natural elements like moss, small stones, or twigs. Create forests, gardens, or beach scenes inside the nook. Soft colors and textures make the space calm and peaceful. Miniature animals or birds add charm. Nature themes connect your nook to the outdoors.
Seasonal And Holiday Designs
Change your nook with seasons or holidays for fresh looks. Snow and tiny lights for winter, flowers for spring. Pumpkins and leaves create a cozy autumn feel. Small decorations for holidays make the nook festive. This idea keeps your bookshelf lively all year round.
Step-by-step Construction
Creating a bookshelf book nook is a fun and creative project. It lets you add a tiny world between your books. Follow these simple steps to build your own book nook. Each step will guide you through the process clearly.
Building The Frame
Start by choosing the right size for your nook. Use wood or thick cardboard for the frame. Cut the pieces carefully to fit your bookshelf space. Assemble the sides, bottom, and top using glue or small nails. Make sure the frame is sturdy and square. Sand the edges for a smooth finish. Painting the frame can give it a polished look.
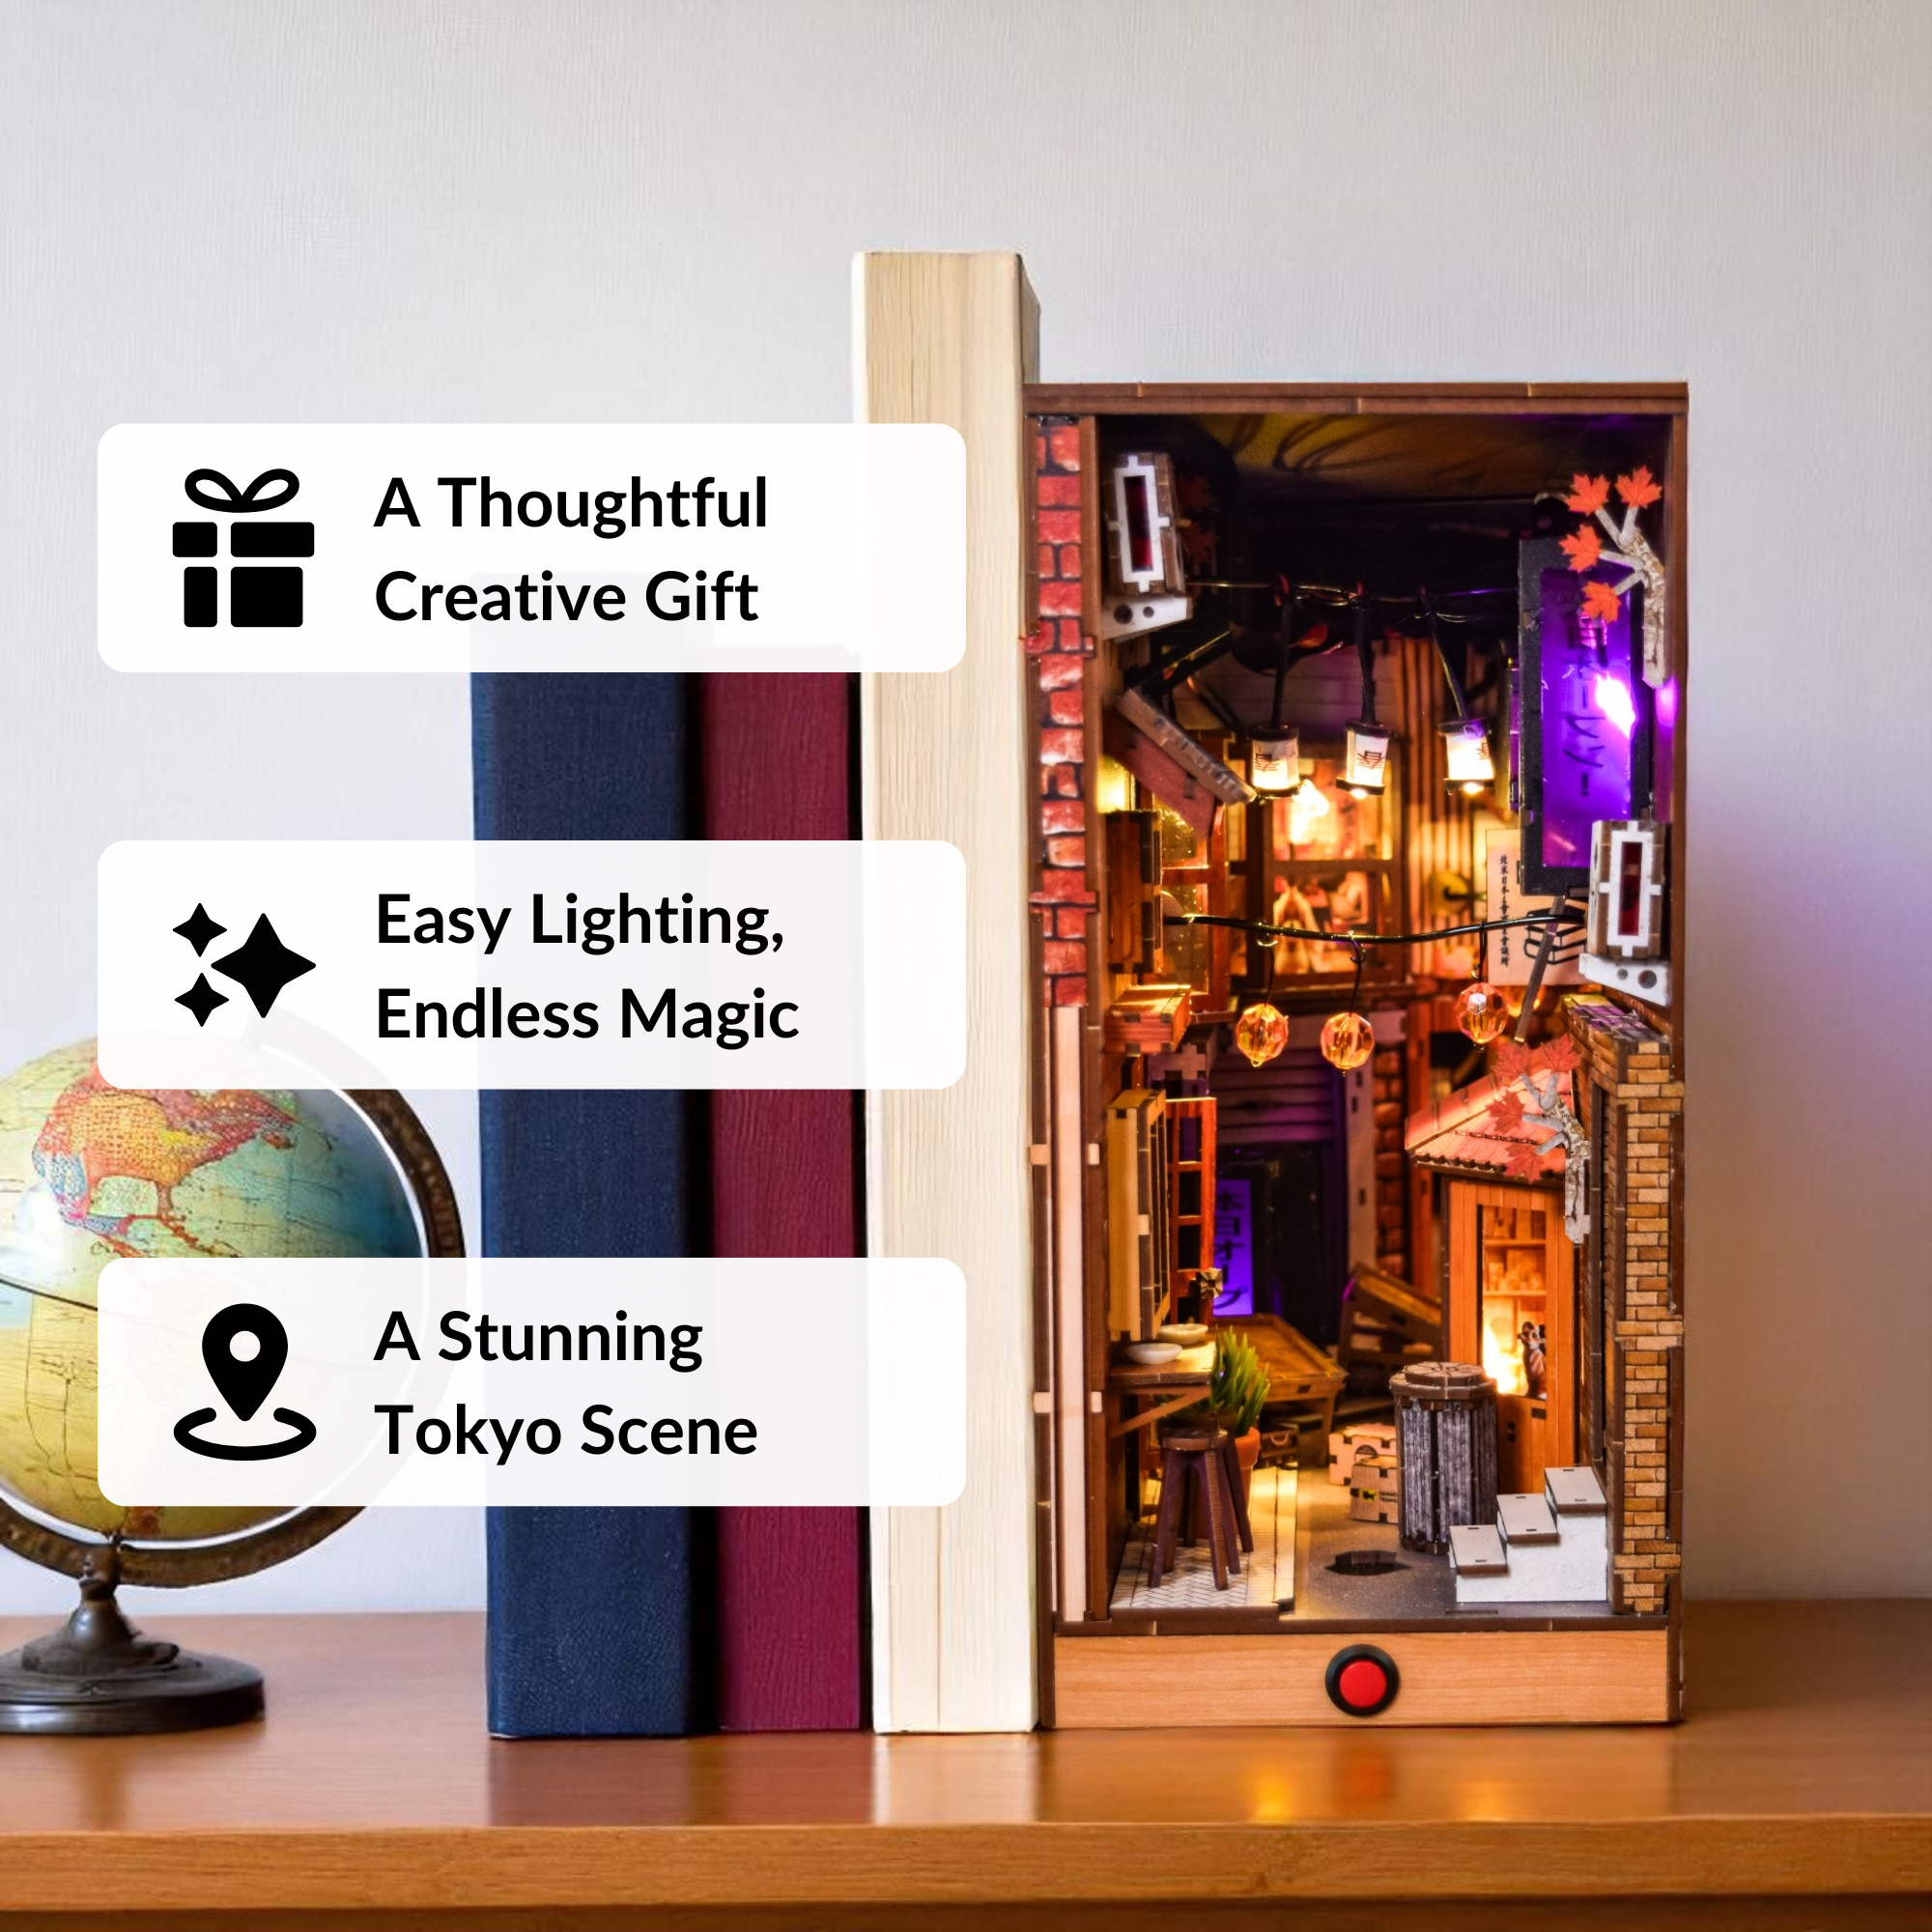
Adding Backgrounds And Lighting
Select a background that matches your theme. You can print a picture or paint a small scene. Attach the background inside the frame securely. Add tiny LED lights to brighten the nook. Place the lights where they highlight the scene best. Use battery-powered lights for easy setup. Test the lighting before fixing everything in place.
Incorporating Details And Miniatures
Choose miniatures that fit your theme and size. Small books, furniture, or plants work well. Arrange the miniatures to create a cozy scene. Use glue to keep items in place. Add extra details like tiny signs or rugs. These small touches bring your nook to life. Take your time to make each detail perfect.
Painting And Finishing Touches
Painting and finishing touches bring your bookshelf book nook to life. This stage adds color, texture, and protects your work. It transforms a simple structure into a cozy and inviting space for your books.
Choosing Paints And Techniques
Pick paints made for wood or craft projects. Acrylic paints work well and dry fast. Use small brushes for details and larger ones for big areas. Try sponging or dry brushing to create soft effects. Layering colors adds interest and variety.
Adding Texture And Depth
Texture makes your nook feel more real and inviting. Use materials like sand, fabric, or modeling paste. Dab paint with a sponge or brush for rough surfaces. Glue tiny objects for a 3D effect. Shadows and highlights add depth to flat spaces.
Sealing And Protecting Your Nook
Seal your nook with clear varnish or sealant. This protects paint from scratches and dust. Choose matte or glossy finish depending on your style. Apply thin layers with a clean brush. Let each coat dry fully for best results.
Credit: bookshelfmemories.com
Creative Lighting Options
Creative lighting makes your bookshelf book nook cozy and inviting. It highlights details and sets the mood. Choosing the right light can turn a simple space into a magical retreat. Different lighting options offer flexibility and style.
Led Strips And Fairy Lights
LED strips are thin, flexible, and easy to install. They fit along shelves and corners, creating a soft glow. Fairy lights add charm with tiny, twinkling bulbs. Both options use little energy and last a long time. They come in warm or cool colors to match your style.
Battery-powered Solutions
Battery-powered lights remove the need for wires. You can place them anywhere without a plug. Small, portable lights work well for tight spaces. They often have switches or remote controls. This option keeps your nook neat and clutter-free.
Solar And Rechargeable Lights
Solar lights use the sun’s energy to recharge during the day. They are eco-friendly and cost-effective. Rechargeable lights work with USB charging. Both types reduce battery waste and save money. Perfect for those who want green and smart lighting choices.
Maintaining Your Book Nook
Maintaining your bookshelf book nook keeps it beautiful and inviting. Regular care helps preserve its charm and detail. A well-kept nook makes reading time even more special.
Cleaning Tips
Dust your book nook gently with a soft brush or cloth. Avoid harsh chemicals that can damage tiny decorations. Use a small vacuum with a brush attachment for hard-to-reach spots. Wipe glass or plastic parts carefully to keep them clear. Check for cobwebs or dirt in corners often.
Updating And Refreshing Designs
Change small items to keep your nook fresh. Swap figurines, lights, or mini plants for a new look. Paint or wallpaper inside can be touched up or replaced. Add seasonal decorations for a cozy feel. Rearrange shelves or books to create a new scene.

Credit: everythingverysmall.com
Showcasing And Sharing
Showcasing and sharing your bookshelf book nook brings your project to life. It lets others see your creativity and effort. Displaying your nook well makes it a focal point in your room. Sharing your work connects you with people who love DIY projects too. This part is fun and rewarding.
Displaying On Your Bookshelf
Place your book nook where it catches the eye. Choose a spot among your favorite books. Make sure the lighting highlights the details. Avoid clutter around it to keep focus. Use a small stand if needed to raise it.
Photography Tips
Take photos in natural light for clear images. Use a plain background to avoid distractions. Capture close-ups to show details and texture. Try different angles to find the best view. Keep your camera steady to avoid blurry shots.
Sharing With The Diy Community
Post your photos on DIY forums and social media groups. Write a short story about your process and ideas. Ask for feedback and share tips with others. Join discussions to learn new tricks and inspire. Celebrate your work and encourage others to create.
Frequently Asked Questions
What Materials Do I Need For A Bookshelf Book Nook?
You need wood or sturdy cardboard, LED lights, miniature decorations, glue, and paint. These help build and decorate your book nook.
How Long Does It Take To Make A Book Nook?
It usually takes 3 to 5 hours, depending on design complexity and detail work. Patience is key for a great result.
Can I Customize The Theme Of My Book Nook?
Yes, you can choose any theme like fantasy, sci-fi, or nature. Custom themes make your nook unique and personal.
How Do I Add Lighting To My Book Nook?
Use small LED strip lights or fairy lights powered by batteries. Proper lighting enhances the nook’s cozy and magical look.
Conclusion
Creating a bookshelf book nook adds charm to any space. It brings stories to life right on your shelf. Small details make it unique and special. You can use simple materials and your creativity. This project is fun and relaxing to build.
Enjoy the cozy feeling it gives your room. Try different designs to fit your style. Your bookshelf will become a magical spot. Start today and watch your nook come alive.