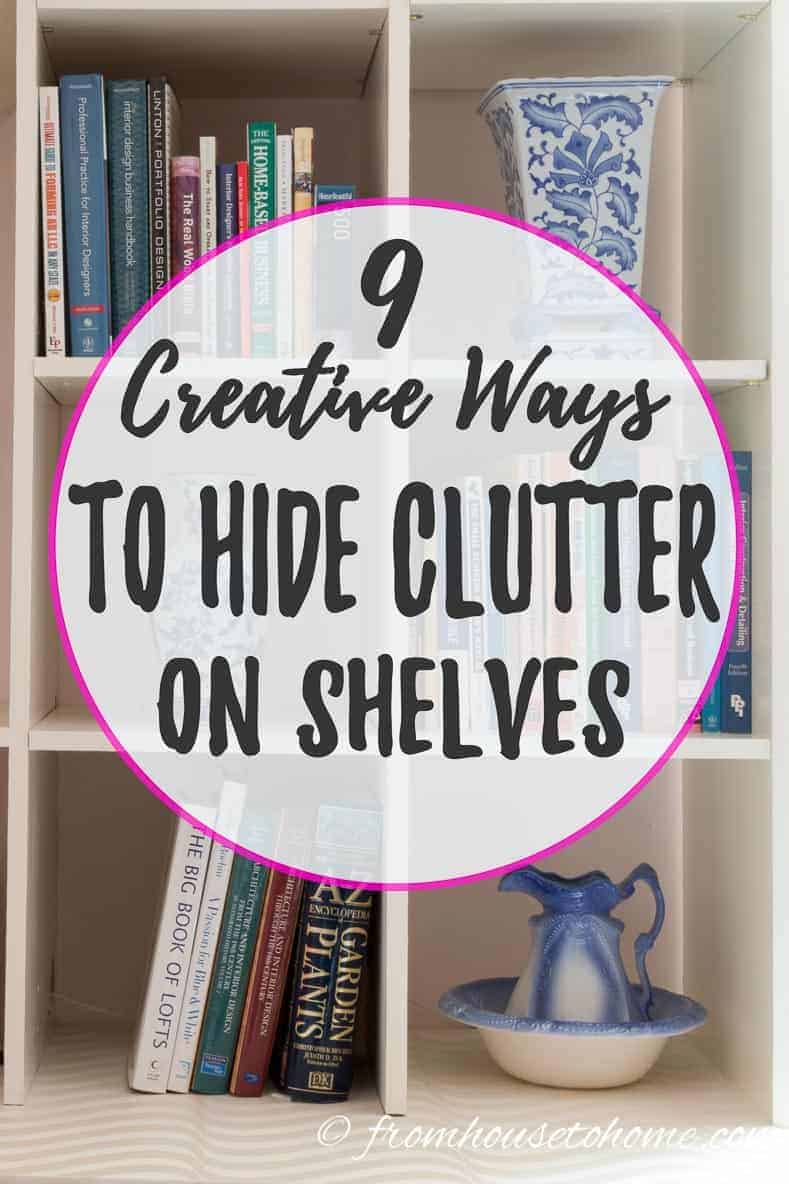
Are you looking for a simple way to give your bookshelf a fresh new look? Making a cover for your bookshelf is easier than you might think.
Whether you want to hide clutter, protect your books from dust, or just add a touch of style, this guide will walk you through every step. By the time you finish reading, you’ll have the confidence and know-how to create a cover that fits perfectly and matches your space.
Let’s dive in and transform your bookshelf together!

Credit: www.youtube.com
Choosing The Right Materials
Choosing the right materials is key to making a great cover for your bookshelf. The materials affect how the cover looks, feels, and lasts. Picking the right type depends on your style and the room’s needs. This guide helps you find materials that fit your project perfectly.
Wood Options
Wood is a strong and classic choice for bookshelf covers. Pine is light and easy to work with. Oak is very durable and has a nice grain. Plywood can be budget-friendly and simple to paint. Each wood type offers a different look and strength. Choose wood that fits your skills and the room style.
Fabric Choices
Fabric covers add softness and color to your bookshelf. Cotton is easy to clean and widely available. Linen gives a natural, textured look. Velvet creates a rich, cozy feel but needs careful care. Choose fabric based on how much you want to clean it and how it matches the room.
Alternative Materials
Other materials can make your bookshelf cover unique. Acrylic sheets give a modern, clear look. Bamboo is eco-friendly and adds a natural touch. Metal panels can create an industrial style but may be hard to cut. These options offer new styles and textures for your cover.
Credit: www.fromhousetohome.com
Measuring Your Bookshelf
Measuring your bookshelf is the first step to making a perfect cover. Accurate measurements help the cover fit well and look neat. Take your time and use a good tape measure. Measure carefully to avoid mistakes. Write down each measurement clearly before starting your project.
Width And Height
Start with the width. Measure from one side of the bookshelf to the other. Measure at the top, middle, and bottom to check for any differences. Use the largest measurement for the cover width.
Next, measure the height. Measure from the bottom to the top edge of the bookshelf. Check both sides and the middle for accuracy. Use the tallest measurement for the cover height. This ensures full coverage.
Depth Considerations
Depth matters for a cover that fits snugly. Measure from the front edge to the back of the bookshelf. Check if there are any objects or trim that add extra depth. Add a little extra space to your measurement for easy fitting.
Remember, depth affects how the cover closes or fits around the shelves. A good fit keeps dust away and looks tidy. Take your time measuring depth carefully.
Simple Fabric Cover Designs
Simple fabric covers offer an easy way to refresh your bookshelf. They protect books from dust and add style to your room. Fabric covers do not need sewing skills. You can choose colors and patterns that match your decor.
Using Curtains
Old curtains can become great bookshelf covers. Cut them to fit the shelf size. Use curtain rods or tension rods to hang the fabric. This method lets you open and close the cover like a curtain. It is simple and fast. Choose lightweight curtains for easy handling.
Diy Slipcovers
Slipcovers fit tightly over the bookshelf edges. Use stretchy or thick fabric for a good fit. Measure your bookshelf before cutting fabric. Sew or glue the edges to create pockets for the shelf sides. Slipcovers look neat and protect the whole front. They are easy to remove and wash.
Wooden Panel Covers
Wooden panel covers give your bookshelf a classic, warm look. They hide clutter and protect books from dust. These covers also add style to any room. Making wooden panel covers is simple with the right steps and tools.
Cutting And Sanding
Start by measuring your bookshelf’s front accurately. Cut wooden panels to fit these measurements precisely. Use a saw that suits your skill level. After cutting, sand the edges smooth. Sanding removes splinters and rough spots. This step ensures a clean, safe finish. Smooth panels also help paint or stain stick better.
Painting And Staining
Choose paint or stain to match your room’s decor. Paint offers solid color and protection. Stain shows the wood’s natural grain. Apply a primer before painting for better coverage. Use even strokes and thin layers. For staining, apply with a cloth or brush. Wipe off extra stain quickly for a smooth look. Let each layer dry completely. Repeat coats for stronger color and durability.
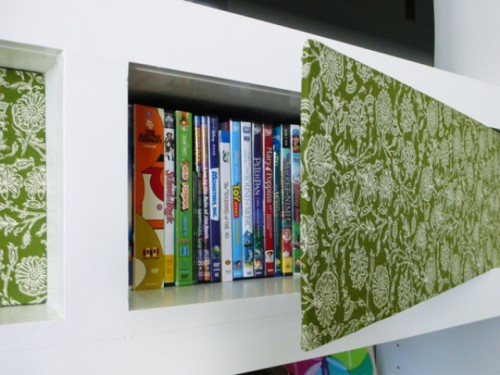
Creative Sliding Door Covers
Creative sliding door covers bring a fresh look to any bookshelf. They save space and add style. Sliding doors slide smoothly, hiding clutter or books.
These covers fit well in small rooms or tight spaces. You can choose wood, glass, or even fabric for the doors. The sliding mechanism keeps doors easy to open and close.
Track Installation
Start by measuring the top and bottom width of your bookshelf. Cut the tracks to the right length. Attach the tracks carefully with screws.
Make sure tracks are straight and level. Use a spirit level for accuracy. Secure the tracks firmly to avoid wobbles.
Top and bottom tracks guide the sliding doors. Check if the doors slide smoothly along the tracks. Adjust if the doors stick or wobble.
Door Assembly Tips
Choose lightweight materials for easy sliding. Cut the door panels to fit the bookshelf height and width. Sand the edges for a smooth finish.
Attach handles or knobs for easy use. Use small hinges if you want foldable doors. Double-check the door fits well in the tracks.
Paint or stain the doors to match your room decor. Let the paint dry fully before installation. Test the sliding motion several times for smoothness.
Using Screens And Room Dividers
Using screens and room dividers offers a simple way to cover a bookshelf. These pieces add style and hide clutter. They also bring texture and color to your space. Screens are easy to move and change. This makes them perfect for renters or those who like to update decor often.
Choosing the right screen or divider ensures a good fit and look. Attaching it to the bookshelf keeps it stable and neat. The process is quick and needs few tools. This method keeps your books safe and your room tidy.
Selecting Suitable Screens
Pick screens that match your room’s style. Wood and bamboo screens add warmth. Metal or fabric screens offer modern looks. Size matters. Choose one tall enough to cover the shelf fully. Lightweight screens are easier to handle.
Consider screens with patterns or solid colors. Patterns can hide books better. Solid colors give a clean, simple look. Check the screen’s foldability. Foldable screens save space when not in use.
Attaching To Bookshelves
Use hooks or clips to attach screens safely. These tools prevent damage to both shelf and screen. Attach the screen at the back or sides of the bookshelf. This keeps the front neat and accessible.
Make sure the screen stands firmly. Avoid gaps between the screen and shelf. Use small weights or brackets for extra support if needed. This keeps the cover stable and prevents tipping.
Decorative Touches
Decorative touches can transform a simple bookshelf cover into a stylish statement. These details add personality and charm to your furniture. Small changes make a big difference in the overall look. Choose decorations that fit your room’s style and colors. Personalizing your bookshelf cover makes it unique and inviting.
Adding Handles And Knobs
Handles and knobs bring both function and style to your bookshelf cover. Choose from metal, wood, or ceramic options to match your decor. Simple round knobs offer a classic look. Sleek metal handles create a modern feel. Attach them carefully for easy opening and closing. These small additions make your bookshelf cover more practical and attractive.
Painting Patterns And Decals
Painting patterns adds color and interest to your bookshelf cover. Use stencils for neat shapes like flowers or geometric designs. Stripes and dots work well for a playful touch. Decals offer an easy way to add designs without painting skills. Peel and stick decals come in many styles and themes. Both options brighten your cover and make it stand out.
Maintenance And Care
Maintaining a bookshelf cover helps keep it looking fresh and new. Proper care extends the life of both fabric and wood materials. Regular cleaning and protection prevent damage from dust, spills, and sunlight.
Cleaning Fabric Covers
Dust fabric covers often using a soft brush or vacuum cleaner. Treat stains quickly with mild soap and cold water. Avoid harsh chemicals that can weaken the fabric fibers. Let the cover air dry completely before placing it back on the shelf. Wash fabric covers gently by hand if machine washing is not recommended.
Protecting Wooden Surfaces
Wipe wooden surfaces regularly with a dry, soft cloth to remove dust. Use a slightly damp cloth for sticky spots, then dry immediately. Apply a wood polish or wax every few months to keep the surface shiny. Avoid placing the bookshelf near direct sunlight or heat sources to prevent cracking. Use coasters or mats under objects to protect wood from scratches.
Credit: www.shelterness.com
Frequently Asked Questions
What Materials Are Best For Making A Bookshelf Cover?
Wood, fabric, acrylic, and plywood are ideal materials. Choose based on durability, appearance, and ease of handling. Fabric offers flexibility, while wood provides sturdiness. Acrylic is great for a modern look.
How Do I Measure For A Bookshelf Cover?
Measure the bookshelf’s height, width, and depth accurately. Add extra space for movement and fitting. Use a tape measure and record dimensions twice to avoid errors.
Can I Customize A Bookshelf Cover Design?
Yes, customization is easy. Use paint, fabric patterns, or wood stains. Add decorative elements like handles or carvings to match your room decor. Custom covers enhance aesthetic appeal.
How Long Does It Take To Make A Bookshelf Cover?
It typically takes 2 to 4 hours for a basic cover. Complex designs or materials may require more time. Preparation and drying time affect the total duration.
Conclusion
Making a cover for your bookshelf can be simple and fun. You only need a few materials and steps. This cover helps protect your books from dust and dirt. It also gives your shelf a neat, fresh look. Try different fabrics or designs to match your room style.
Enjoy creating something useful with your own hands. Your bookshelf will look great and stay clean longer. Give it a try today!