Are you looking for a simple way to organize your books without taking up too much space? A small 2-shelf bookshelf could be the perfect solution for you.
It’s easy to build, fits in tight spots, and adds a touch of style to your room. Imagine having a neat place for your favorite reads right within arm’s reach. In this guide, you’ll discover clear, step-by-step instructions to create your own bookshelf quickly and affordably.
Keep reading, and you’ll be surprised at how satisfying it feels to build something useful with your own hands.
Materials And Tools Needed
Building a small 2-shelf bookshelf requires the right materials and tools. Choosing quality wood and proper hardware ensures a sturdy and lasting piece. Using the correct tools makes the process easier and safer.
This section covers everything you need to start your project confidently.
Wood Selection
Choose wood that is strong and easy to work with. Pine and plywood are great options for beginners. Pine is affordable and has a smooth surface. Plywood is stable and resists warping. Avoid soft woods that can break easily. Pick wood with minimal knots for a clean look.
Hardware And Fasteners
Use screws made for wood to hold pieces tightly together. Wood glue adds extra strength to joints. Small brackets can support shelves and keep them level. Sandpaper helps smooth rough edges and surfaces. Buy screws in various lengths to fit different parts.
Essential Tools
A drill with screwdriver bits is needed for making holes and driving screws. A saw cuts wood to the right size. Measuring tape ensures accurate dimensions. A pencil marks where to cut and drill. A level keeps shelves straight and balanced.
Planning Your Bookshelf
Planning your small 2-shelf bookshelf is an important first step. Good planning helps you build a sturdy and attractive piece. It also saves time and effort during construction. Think about where you will place the bookshelf. Consider the space available and the type of books or items you want to store.
Choosing Dimensions
Start by measuring the space for your bookshelf. Decide on the height, width, and depth. A small bookshelf usually fits in tight corners or narrow walls. The shelves should be wide enough for your books but not too large to waste space. Keep the height low enough for easy reach. Typical dimensions are about 24 inches wide and 30 inches tall. Depth can be around 10 inches to hold books comfortably.
Design And Style Options
Think about the design that fits your room’s style. A simple rectangular shape works well for most spaces. You can choose a modern look with clean lines or a rustic style with natural wood. Consider painting or staining the wood to match your decor. Open shelves show off your books and items clearly. Adding a back panel can give extra support and a finished look. Keep the design practical and easy to build for your first project.
Cutting The Wood
Cutting the wood is the first important step in building your small 2-shelf bookshelf. It shapes the pieces that will hold your books and support the structure. Accurate cuts make assembly easier and the final product stronger.
Take your time during this step. Measure carefully and cut safely for the best results. This section guides you through measuring and marking wood, followed by safe cutting techniques.
Measuring And Marking
Start by measuring the wood pieces according to your bookshelf plan. Use a tape measure for precise length and width. Mark the cut lines clearly with a pencil. Double-check each measurement before marking. Use a square tool to draw straight, even lines. This ensures your cuts are clean and accurate. Good measurements prevent wasted wood and fitting problems later.
Safe Cutting Techniques
Always wear safety glasses and gloves before cutting. Use a stable surface, like a workbench, to place the wood. Secure the wood with clamps to stop it from moving. Choose the right saw for your wood type and size. Cut slowly along the marked lines to keep control. Keep fingers away from the blade at all times. After cutting, smooth edges with sandpaper to avoid splinters. Safety first keeps your project fun and injury-free.
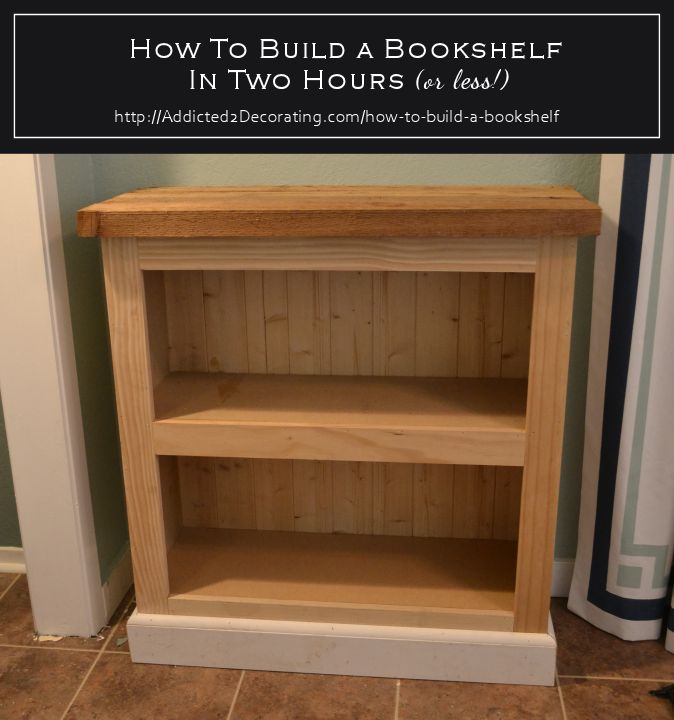
Credit: www.addicted2decorating.com
Assembling The Frame
Assembling the frame is the first step in building your small 2-shelf bookshelf. It sets the base and structure for the entire piece. A strong frame ensures the shelf will hold weight and stay stable over time.
Take your time and follow each step carefully. This will help avoid mistakes and make the assembly smoother. Start with the side panels and then add the shelves.
Joining Side Panels
Place the two side panels upright and parallel to each other. Use clamps to hold them steady if needed. Line up the pre-drilled holes on the edges of the panels.
Insert wood screws or dowels into the holes. Tighten the screws with a screwdriver or drill. Make sure the panels are square and flush at the corners. This keeps the frame even and strong.
Attaching Shelves
Next, fit the shelves between the joined side panels. Position the shelves at the desired height. Use a level to keep them perfectly horizontal.
Secure each shelf by screwing through the side panels into the shelf edges. Use at least two screws per side for good support. Double-check the shelves do not wobble before moving on.
Sanding And Finishing
Sanding and finishing are essential steps in building a small 2-shelf bookshelf. These steps protect the wood and improve its look. Good sanding removes rough spots and sharp edges. Finishing adds color and shields the wood from damage.
Taking time to sand and finish well gives your bookshelf a smooth and polished feel. It makes the project look like it was done by a pro. Below are key tips for smoothing surfaces and painting or staining your bookshelf.
Smoothing Surfaces
Start sanding with medium-grit sandpaper. This removes any roughness on the wood. Sand along the grain, not across it. This prevents scratches. Use fine-grit sandpaper next. It smooths the surface further and prepares it for finishing.
Check corners and edges carefully. Sand until they feel smooth and safe to touch. Wipe off dust using a dry cloth. Dust can stop paint or stain from sticking well. Proper sanding helps the finish last longer.
Painting And Staining Tips
Choose paint or stain that fits your style and wood type. Apply thin, even coats for the best results. Let each coat dry fully before adding another. This avoids drips and uneven color.
Use a brush or cloth to apply stain. Brush strokes should follow the wood grain. For paint, use a soft brush or roller to reduce marks. Light sanding between coats improves smoothness.
Seal the finish with a clear topcoat. This protects the wood from moisture and wear. A well-finished bookshelf looks great and stays strong for years.
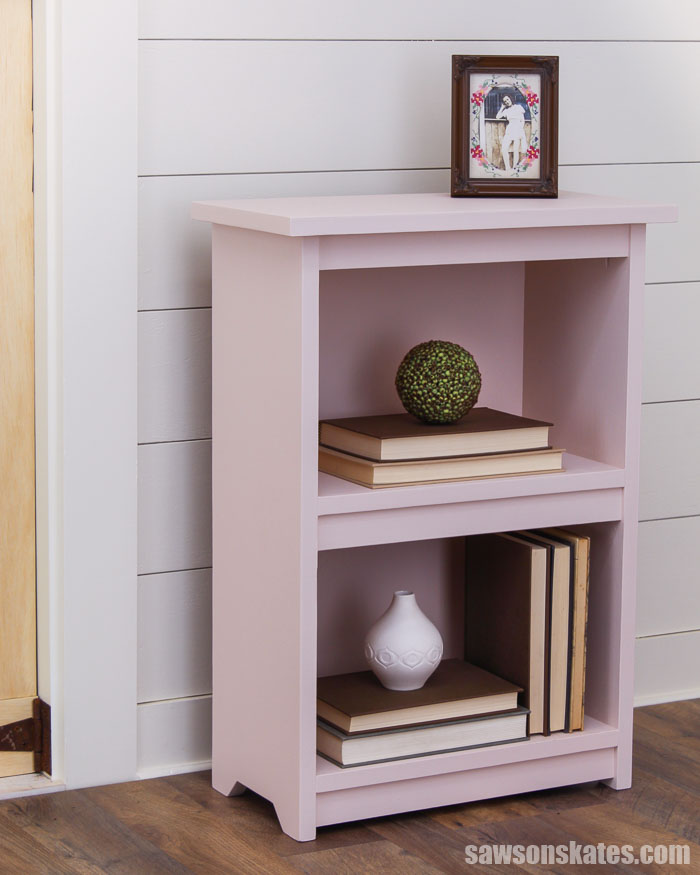
Credit: sawsonskates.com
Final Touches
After assembling the main parts of your small 2-shelf bookshelf, the final touches make it sturdy and lasting. These steps help your bookshelf hold books safely and look neat. Pay close attention to these details for a strong finish.
Adding Support Brackets
Support brackets give extra strength to your shelves. Attach them under each shelf near the wall side. Use small screws to fix brackets tightly. This stops shelves from bending under heavy books. Choose metal or wooden brackets that match your shelf style.
Preventing Shelf Sagging
Shelf sagging happens when shelves carry too much weight. To prevent this, use thicker wood for shelves. You can also add a center support strip under each shelf. Place it between the brackets for better balance. Keep heavy books near the ends, not the middle.
Placement And Use
Once your small 2-shelf bookshelf is ready, placing it well is key. Proper placement helps you get the most use from your new furniture. It also keeps your space neat and cozy.
Think about where you spend time reading or relaxing. Choose spots that suit your daily habits. Placement affects how often you use your bookshelf and how it fits with your room.
Best Locations For Small Bookshelves
Small bookshelves work well in many places. Bedrooms are great for bedtime stories and personal collections. Living rooms can use them for family books and decorations. Hallways offer empty walls that can hold your books without taking floor space.
Near a desk, a small bookshelf keeps study materials close. Kitchens can even use them for cookbooks and small jars. Look for spots with enough light and easy access.
Organizing Your Books
Start by sorting books by size or topic. This method keeps your shelves tidy and simple to use. Place frequently read books on the middle shelf for easy reach.
Use the top shelf for decorative items or less-used books. Group books with similar colors or themes for a neat look. Keep space for small plants or photo frames to add charm.

Credit: www.amazon.com
Frequently Asked Questions
What Materials Do I Need To Build A Small 2-shelf Bookshelf?
You will need wood boards, screws, wood glue, sandpaper, and paint or stain. Basic tools include a saw, drill, screwdriver, and measuring tape.
How Long Does It Take To Make A 2-shelf Bookshelf?
Building a small 2-shelf bookshelf usually takes 2 to 4 hours. Time varies based on your skill level and tools available.
Can I Customize The Size Of The Bookshelf?
Yes, you can adjust the height, width, and depth to fit your space. Just measure carefully and cut wood accordingly.
What Type Of Wood Is Best For A Small Bookshelf?
Pine and plywood are affordable and easy to work with. Hardwood like oak offers durability but costs more.
Conclusion
Building a small 2-shelf bookshelf is simple and fun. You only need a few tools and materials. This project fits well in small spaces and holds books or decorations. Taking your time helps make the shelf strong and neat. Enjoy the feeling of creating something useful with your own hands.
Try different colors or styles to match your room. Start this easy project today and add a personal touch to your space.