Are you tired of searching for the perfect bookshelf that fits your space and style? Imagine having a custom-made shelf that holds your favorite books, decorations, and memories—all built by your own hands.
Building a homemade bookshelf is easier than you think, and it gives you full control over size, design, and finish. In this guide, you’ll discover simple steps and practical tips that make the process smooth and rewarding. Ready to create a beautiful, sturdy bookshelf that’s truly yours?
Let’s get started!
Choosing The Right Materials
Choosing the right materials is the first step to build a strong bookshelf. The materials affect how the bookshelf looks and how long it lasts. Picking the best wood and tools makes the project easier and safer. Understanding what you need helps you avoid mistakes and extra costs.
Types Of Wood
Wood type changes the bookshelf’s strength and style. Pine is soft and cheap. It is easy to cut and good for beginners. Oak is hard and lasts long. It looks great but costs more. Plywood is a good choice for shelves. It is strong and does not warp easily. Choose wood that fits your budget and design.
Tools You’ll Need
Basic tools make building faster and easier. A saw cuts the wood to size. A drill helps to make holes and put screws. Sandpaper smooths rough edges for safety. A measuring tape keeps your cuts accurate. A screwdriver tightens screws firmly. Having the right tools saves time and effort.
Safety Gear Essentials
Safety gear protects you from injuries. Wear safety glasses to shield your eyes from dust and wood chips. Gloves protect your hands from splinters and cuts. Use a dust mask to avoid breathing sawdust. Wear ear protection when using loud tools. Safety comes first in every step of building.
Designing Your Bookshelf
Designing your bookshelf is the first step to a great project. It helps you see what works best in your space. A good design saves time and materials. It makes sure the bookshelf fits perfectly. Planning also helps decide the style and size.
Take your time and think about your needs. Do you want many shelves or just a few? Should it hold heavy books or light items? These questions guide your design. Now, let’s break down the key parts of designing your bookshelf.
Measuring Your Space
Start by measuring the wall or corner for your bookshelf. Use a tape measure for exact numbers. Note the height, width, and depth available. Check for obstacles like doors or windows. Write down your measurements clearly. This step prevents mistakes later.
Selecting Shelf Dimensions
Choose shelf width and height based on your books and items. Standard shelves are 10 to 12 inches deep. Adjust depth for larger books or decorations. Set shelf height to fit your tallest books. Leave some extra space for easy access. Think about how many shelves you want too.
Sketching The Layout
Draw your bookshelf on paper or use a simple app. Start with the outer frame using your measurements. Add shelves inside, spaced evenly or varied by size. Mark where supports or brackets will go. Label each part to avoid confusion. A clear sketch guides your building process.
Preparing The Wood
Preparing the wood is an important step in building a homemade bookshelf. It sets the stage for a strong and attractive piece. Good preparation helps the wood last longer and look better. Take your time to do this right. Properly prepared wood makes assembly easier and the final product more durable.
Cutting To Size
Measure each piece carefully before cutting. Use a saw that fits your skill level. Cut the wood to the exact dimensions needed. Straight cuts ensure the shelf fits together well. Mark the wood clearly to avoid mistakes. Take safety precautions while cutting to protect yourself.
Sanding For Smoothness
Sand all surfaces of the wood after cutting. Start with rough sandpaper to remove splinters. Then use finer grit to smooth the surface. Sand edges and corners to avoid sharp spots. Smooth wood feels better to touch and looks nicer. Clean off dust before moving to the next step.
Applying Wood Conditioner
Apply wood conditioner to prepare the surface for stain or paint. It helps the wood absorb color evenly. Use a brush or cloth to spread the conditioner. Follow the product instructions for drying times. Conditioned wood reduces blotches and uneven finish. This step improves the overall look of your bookshelf.
Assembling The Frame
Assembling the frame is the key step in building your homemade bookshelf. This part creates the basic shape and support for the entire shelf. Taking time to do it right will make your bookshelf strong and long-lasting.
Start by carefully arranging the cut wood pieces. Check that all parts fit well before joining them. Precision here prevents problems later. The frame holds everything together, so it must be solid and square.
Joining Techniques
There are several ways to join wood pieces. You can use wood glue for extra hold. Dowel joints add strength by fitting small wooden pins in holes. Pocket holes hide screws inside the wood for a neat look. Choose a method that suits your tools and skill level.
Using Nails And Screws
Nails are quick and easy to use. They work well for light frames. Screws provide a tighter, stronger hold. Use a drill to make pilot holes before screwing to avoid splitting the wood. Always select screws that match the wood thickness for best results.
Ensuring Stability
Check the frame for square angles with a carpenter’s square. Tighten all joints firmly. Add corner braces or blocks inside corners for extra support. Stability prevents wobbling and keeps your bookshelf safe to use. A strong frame means a sturdy shelf.
Adding The Shelves
Adding the shelves is an important step in building your homemade bookshelf. It gives the structure its main function. Proper shelf placement supports your books and items safely. Careful planning ensures your shelves will last long and look great.
Spacing For Books
Measure the height of your tallest books first. Leave extra space for easy access and air circulation. Standard spacing is 10 to 12 inches between shelves. Adjust spacing to fit different book sizes or decorations. Even spacing looks neat and keeps books organized.
Securing Shelves
Use strong brackets or wooden cleats to hold shelves firmly. Screw them into the side panels for solid support. Check that each shelf stays level before fixing it in place. Proper securing prevents sagging and accidents. Test the shelf strength by placing some weight on it.
Adjustable Vs Fixed Shelves
Fixed shelves are stable and good for heavy books. They do not move but limit flexibility. Adjustable shelves use pegs or tracks for easy height changes. They work well if your book sizes change often. Choose fixed shelves for strength, adjustable for versatility.
:max_bytes(150000):strip_icc()/dominiquegebruinsta-35b11dd4f037417980649e06e17c4027.jpg)
Credit: www.thespruce.com
Finishing Touches
Finishing touches bring your homemade bookshelf to life. They protect the wood and enhance its look. Small details make a big difference. These final steps ensure your shelf lasts and looks great.
Painting Or Staining
Choose paint or stain to match your room style. Paint offers many color options and hides wood imperfections. Stain highlights the natural wood grain for a classic look. Apply thin, even coats with a brush or cloth. Let each coat dry fully before adding another.
Applying Sealant
Sealant protects your shelf from scratches and spills. Use clear polyurethane or varnish for a durable finish. Apply with a brush, covering all surfaces evenly. Sealant also prevents moisture damage. Allow it to dry completely before use.
Decorative Elements
Decorative touches add personality to your bookshelf. Consider adding trim or molding for a polished look. Use stencils or decals for simple patterns. Small knobs or metal accents can create a unique style. Keep decorations balanced and not too crowded.
Maintaining Your Bookshelf
Building a homemade bookshelf is rewarding. Keeping it in good shape needs regular care. Proper maintenance extends your shelf’s life and keeps it looking nice. Simple steps help avoid damage and keep your bookshelf sturdy. Follow these tips to care for your bookshelf well.
Cleaning Tips
Dust your bookshelf regularly using a soft cloth. Avoid wet or damp cloths that can harm wood. Use a dry microfiber cloth for best results. Clean spills immediately to prevent stains. For deeper cleaning, use mild soap mixed with water. Wipe gently and dry the surface right after. Do not use harsh chemicals or abrasive cleaners.
Preventing Damage
Place your bookshelf away from direct sunlight to avoid fading. Keep it away from heat sources like radiators. Avoid placing heavy objects on shelves that exceed weight limits. Use coasters or mats under plants or liquids. Secure the bookshelf to the wall to prevent tipping. Handle the bookshelf carefully when moving it.
Repairing Scratches
Minor scratches can be fixed with a wood touch-up marker. Choose a color close to your bookshelf’s finish. Apply the marker gently and blend with a soft cloth. For deeper scratches, use wood filler or wax sticks. Sand lightly after the filler dries for a smooth finish. Reapply finish or paint if needed for uniform look.
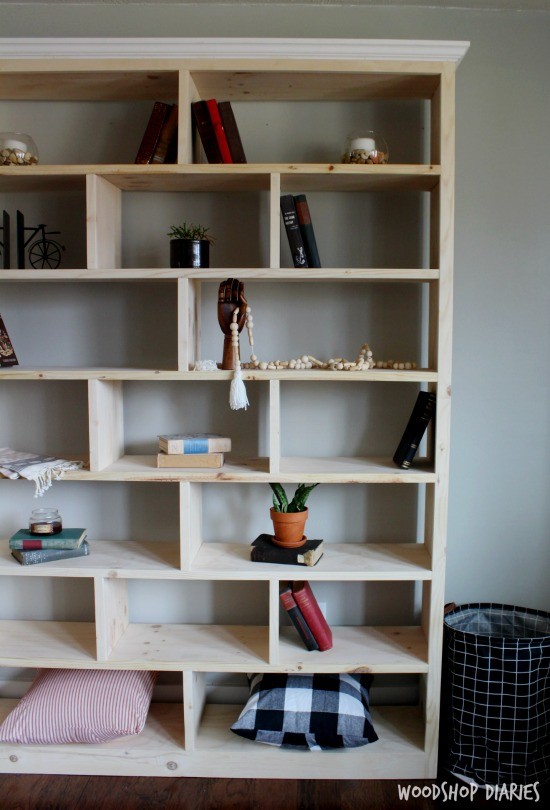
Credit: www.woodshopdiaries.com
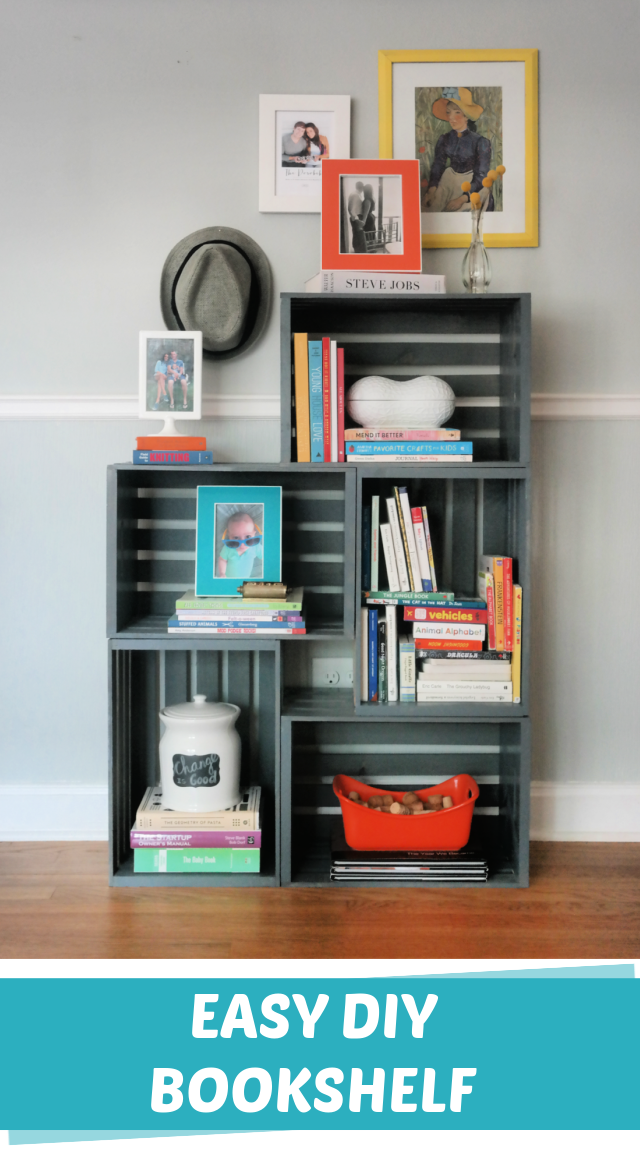
Credit: www.creatingreallyawesomefunthings.com
Frequently Asked Questions
How Long Does It Take To Build A Homemade Bookshelf?
Building a homemade bookshelf typically takes 4 to 6 hours. This depends on your skill level and tools available. Simple designs require less time, while complex shelves take longer. Planning and preparation can also affect the total time needed.
What Materials Are Best For A Sturdy Bookshelf?
Solid wood like pine, oak, or maple is best for durability. Plywood is a budget-friendly alternative but less durable. Use quality screws and brackets for added strength. Proper finishing protects the wood and enhances longevity.
Can I Build A Bookshelf Without Professional Tools?
Yes, basic tools like a saw, drill, screwdriver, and measuring tape are enough. Power tools speed up the process but are not mandatory. Simple designs work well with hand tools. Safety gear is essential regardless of tools used.
How Do I Ensure My Bookshelf Is Level And Stable?
Use a spirit level during assembly to keep shelves even. Attach the bookshelf securely to the wall with brackets. Ensure the base is flat and sturdy. Stability prevents tipping and protects your books and family.
Conclusion
Building a homemade bookshelf can be simple and rewarding. You save money and get exactly what you want. Each step adds to your skills and confidence. A sturdy shelf holds your favorite books with pride. Personal touches make it unique and special.
Start with basic tools and materials you have. Take your time and enjoy the process. Soon, a beautiful shelf will brighten your space. Give it a try—you might surprise yourself.
