Are you ready to transform your toddler’s bedroom into an exciting pirate adventure? Building a pirate ship toddler bed is a fun and creative way to make bedtime something your child looks forward to every night.
Imagine your little one climbing aboard their very own ship, ready to sail the high seas in their dreams. In this guide, you’ll find simple steps and easy tips to create a safe, sturdy, and eye-catching pirate ship bed that fits perfectly in your home.
Keep reading, and you’ll discover how to turn a regular bed into a magical treasure that sparks imagination and makes bedtime a joy for both you and your child.
Materials And Tools Needed
Building a pirate ship toddler bed needs careful planning and the right materials. Gathering everything before you start saves time and avoids delays. You need wood, hardware, painting supplies, and basic tools. Each part plays a key role in creating a safe, fun bed.
Wood And Hardware
Choose strong, smooth wood like pine or plywood. These woods are safe and easy to cut. Get enough wood for the frame, sides, and decorative parts. Use screws and bolts to hold pieces firmly together. Sandpaper helps smooth rough edges for safety.
Painting Supplies
Pick non-toxic paint safe for children’s furniture. Select colors that match your pirate ship theme. Primer helps paint stick better and last longer. Use brushes and rollers for smooth, even coats. Finish with a clear sealant to protect the paint and wood.
Basic Tools
Essential tools include a saw, drill, screwdriver, and measuring tape. A hammer and clamps help hold pieces while working. Use a level to keep the bed straight and even. Safety gear like gloves and goggles protect you during building.

Credit: www.walmart.com
Planning Your Design
Start by sketching your pirate ship bed design on paper. Measure your toddler’s mattress to fit the frame perfectly. Choose safe, sturdy materials for a strong, fun bed.
Choosing Bed Dimensions
Start by measuring the space where the bed will go. Make sure the bed fits well in the room. Consider the toddler’s age and size for comfort. Choose a bed size that allows room to grow. Standard toddler beds are usually 28 by 52 inches. Add a few extra inches for the pirate ship frame. Keep in mind doorways and hallways for moving the bed. Safety is key, so avoid sharp corners or edges.
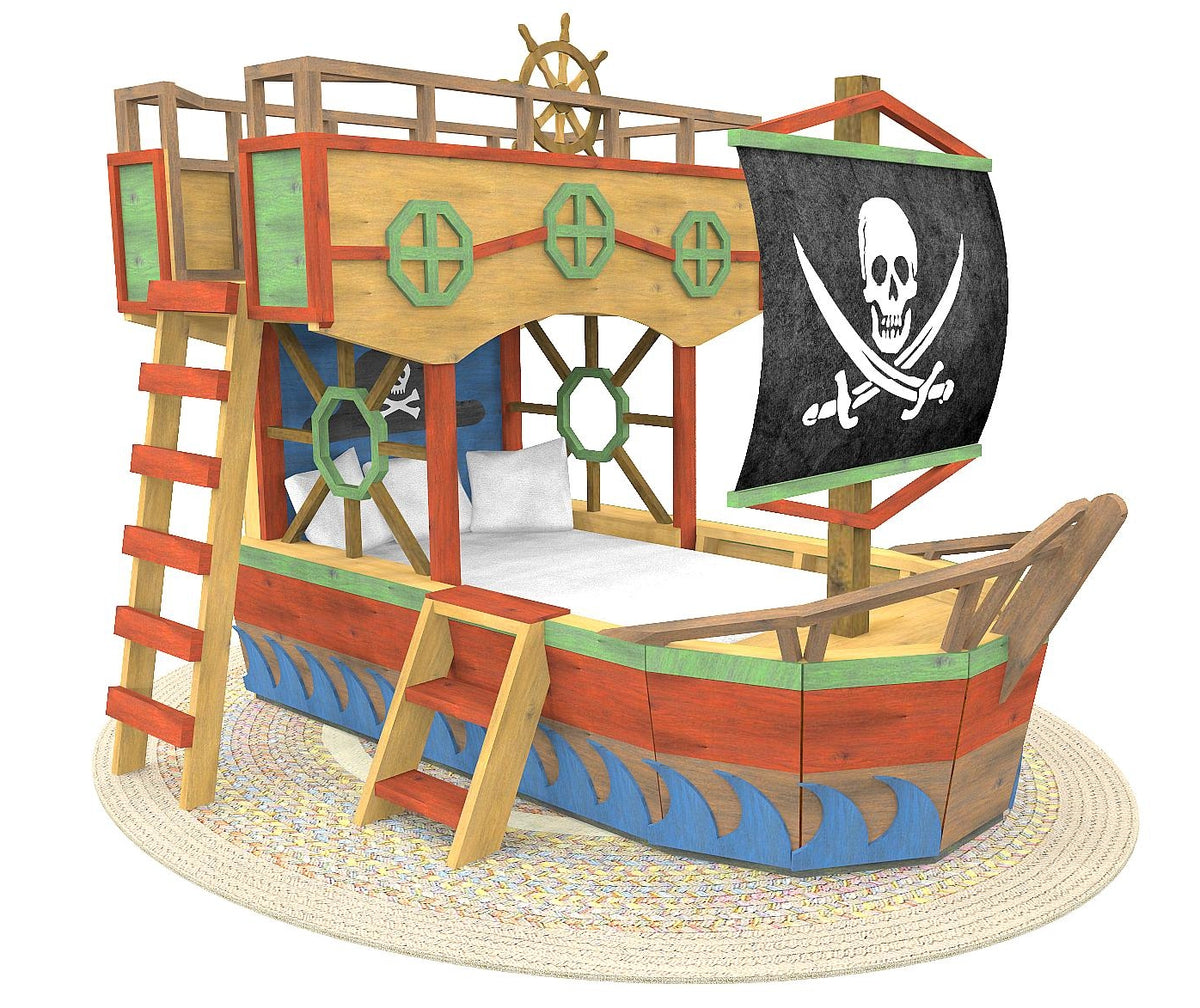
Sketching The Pirate Ship Shape
Draw a simple outline of the pirate ship on paper. Focus on basic shapes like rectangles and triangles. Include parts like the hull, sails, and mast. Keep the design child-friendly and safe. Use bold lines to mark where to cut and assemble. Add details like windows or a steering wheel for fun. This sketch will guide your building process. Keep the design easy to follow and adjust as needed.
Cutting And Preparing Wood
Cutting and preparing wood is an important step in building a pirate ship toddler bed. It shapes the pieces that come together to form the bed. Taking time to measure and cut carefully helps ensure everything fits well. It also keeps the wood safe from splinters and cracks. Preparing the wood right sets a strong base for the whole project.
Measuring And Marking
Start by measuring each piece of wood precisely. Use a tape measure for accuracy. Mark the wood with a pencil where you need to cut. Double-check all measurements before marking. Clear marks guide your cuts and reduce mistakes. Take your time to get this step right.
Safe Cutting Techniques
Wear safety goggles and gloves before cutting wood. Use a saw that fits the type of cut you need. Keep your hands away from the blade at all times. Cut slowly and steadily for clean edges. Support the wood firmly while cutting to avoid slips. Proper safety keeps you safe and your cuts clean.
Credit: paulsplayhouses.com
Assembling The Bed Frame
Assembling the bed frame is the key step in building your pirate ship toddler bed. It forms the strong base that holds everything together. You will create a sturdy frame that looks like a real ship. Follow these simple steps carefully.
Building The Base
Start by cutting the wooden planks to the right size. Arrange them into a rectangular shape for the bed base. Use screws and a drill to join the planks tightly. Make sure the corners are square and the frame is level. Add support beams across the middle for extra strength. Check that the base is solid before moving on.
Constructing The Ship Sides
Next, shape the sides of the ship by cutting curved wooden panels. Attach these panels vertically to the base using screws. Space the screws evenly to keep the sides firm. Sand the edges smooth to avoid splinters. These sides give the bed a real pirate ship look and protect your toddler from falling out.
Adding Pirate Ship Details
Adding details to your pirate ship toddler bed brings the theme to life. It makes the bed more fun and exciting for your child. These details help create a mini adventure space right in your home. Simple touches can turn the bed into a true pirate ship.
Creating The Mast And Sails
Start by making the mast from a smooth wooden pole. Secure it firmly to the bed frame for safety. Use light fabric to create sails. White or cream colors work best for a classic look. Attach the sails with strong strings or hooks. Let the sails hang loosely for a natural effect. Add a small flag at the top for extra charm. This makes the bed look like a real ship ready to sail.
Decorative Elements And Accessories
Use wood paint to add pirate symbols on the bed’s sides. A skull and crossbones or pirate map can be great choices. Attach a small steering wheel near the headboard. This gives a real captain’s feel. Hang rope ladders or nets for climbing fun. Place fake treasure chests or barrels under the bed. These accessories add layers of play and imagination. Keep all decorations safe and child-friendly.
Painting And Finishing Touches
Painting and finishing touches bring the pirate ship toddler bed to life. These steps add color and protect the wood. A well-painted bed invites children to play and dream. The right finish keeps the bed safe and strong for years.
Choosing Colors And Themes
Pick colors that match the pirate theme. Classic choices include red, black, white, and navy blue. Bright colors like yellow or green add fun details. Use pirate symbols like skulls, anchors, or treasure chests. Let your child help choose colors for a personal touch. Use non-toxic paint for safety. Paint in thin layers to avoid drips. Wait for each coat to dry before adding another. Small brushes work well for detailed designs.
Sealing And Protecting The Bed
Seal the painted bed with a clear, child-safe finish. This protects against scratches and spills. Choose water-based sealants for easy cleanup and low odor. Apply two or three thin coats with a brush. Allow each coat to dry fully. Sand lightly between coats for a smooth finish. The sealant also helps keep colors bright. Make sure all edges and corners are covered. This step extends the bed’s life and keeps it safe.
Safety Tips For Kids’ Furniture
Safety is the top priority when building a pirate ship toddler bed. Kids’ furniture must be secure and free from hazards. Parents need to focus on details that protect their child. Simple safety steps can prevent accidents and ensure peaceful sleep.
Smooth Edges And Stability
Sharp edges can cause cuts and bruises. Sand all wooden surfaces until they are smooth. Rounded corners reduce the risk of injury during play or sleep. Check the bed’s stability carefully. It should not wobble or tip easily. Use strong joints and screws to keep the bed firm. A stable bed keeps toddlers safe from falls.
Non-toxic Paints And Materials
Toddlers often touch and mouth furniture. Use paints that are non-toxic and free from harmful chemicals. Look for water-based or natural paints. Avoid materials that emit strong odors or fumes. Safe materials protect your child’s health. Always check labels for safety certifications. This step ensures a healthy and safe sleeping environment.
Maintaining Your Pirate Ship Bed
Maintaining your pirate ship toddler bed keeps it safe and beautiful for years. Regular care protects the wood and paint from wear and tear. It also makes sure the bed stays sturdy for your little sailor’s adventures.
Simple habits can extend the life of your pirate ship bed. Focus on cleaning and fixing small problems early. This helps avoid big repairs later.
Regular Cleaning
Dust the bed every week to stop dirt buildup. Use a soft cloth or a small brush. Wipe the surfaces gently to protect the paint and wood. Avoid wet cloths that can damage the wood. For sticky spots, use a damp cloth and dry it fast.
Check corners and edges where dust hides. Clear any crumbs or debris that may attract bugs. Keep the bed area tidy to reduce dust and dirt around it.
Touch-ups And Repairs
Look for scratches, chips, or loose parts regularly. Fix small scratches with matching paint or markers. Tighten screws and bolts to keep the bed stable. Replace damaged parts quickly to avoid accidents.
Use child-safe paints and finishes for any touch-ups. Sand rough edges to prevent splinters. Repair minor cracks with wood glue or filler. These small actions keep the bed safe and looking good.
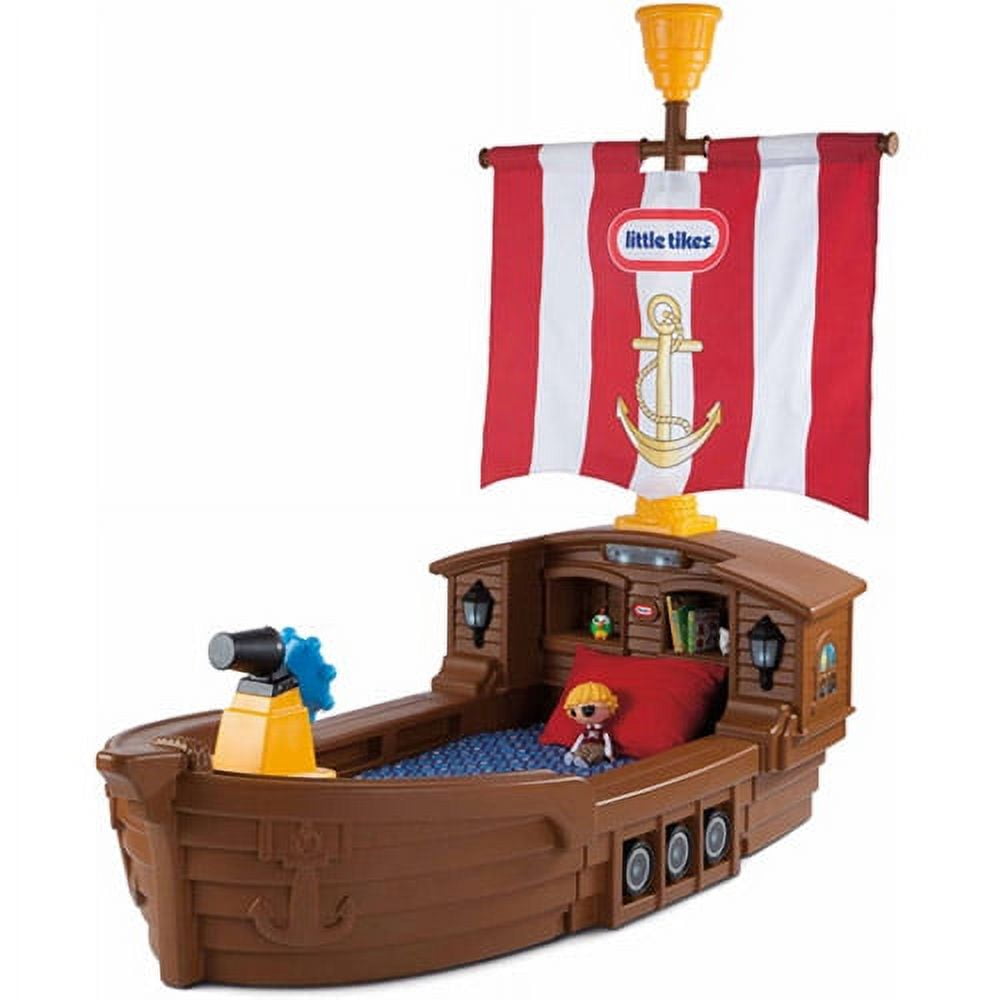
Credit: www.walmart.com
Frequently Asked Questions
How Do I Start Building A Pirate Ship Toddler Bed?
Begin by designing a simple plan with measurements. Gather wood, screws, paint, and basic tools before starting the build. Prioritize safety and durability in your design.
What Materials Are Best For A Pirate Ship Toddler Bed?
Use sturdy wood like pine or plywood for the frame. Choose non-toxic paint and child-safe finishes to ensure safety and durability.
How Can I Make The Bed Safe For Toddlers?
Smooth all edges and corners to prevent injuries. Secure all parts tightly and use non-toxic materials to keep the bed safe.
How Long Does Building A Pirate Ship Toddler Bed Take?
Typically, it takes 1-3 days depending on skill level. Allow extra time for drying paint and assembling parts carefully.
Conclusion
Building a pirate ship toddler bed brings fun and function together. It creates a special space where your child can dream and play. Simple steps and basic tools help you finish the project easily. The bed adds charm to any room and sparks imagination.
Enjoy the process and watch your toddler’s excitement grow. Every child deserves a cozy, fun place to sleep. This DIY project makes that dream real. Start building today and see the joy it brings!