Are you ready to create your very own bookshelf that perfectly fits your space and style? Making a bookshelf yourself is easier than you think, and it gives you the chance to add a personal touch to your home.
Imagine having a sturdy, beautiful shelf that holds all your favorite books and looks just the way you want it. In this guide, you’ll discover simple steps and tips to build a bookshelf from scratch, even if you’ve never done a DIY project before.
Keep reading, and by the end, you’ll have the confidence and know-how to bring your bookshelf idea to life. Your perfect shelf is just a few steps away!
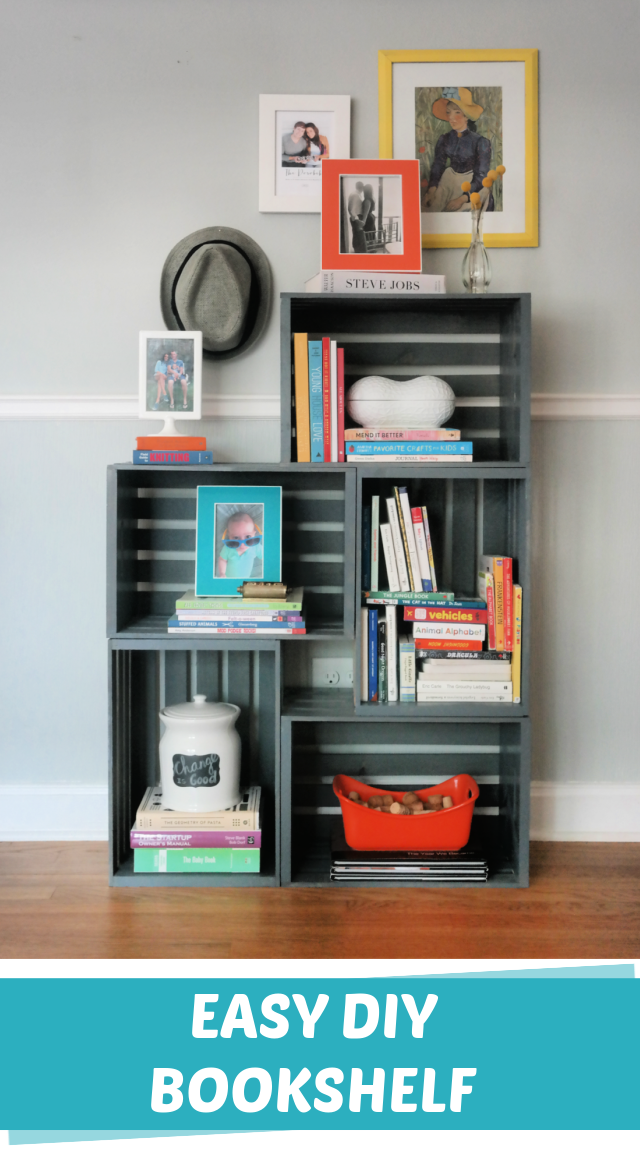
Credit: www.creatingreallyawesomefunthings.com
Choosing The Right Materials
Choosing the right materials is key to building a sturdy bookshelf. The materials affect how strong and attractive the bookshelf will be. Picking good quality wood and the right tools helps the project go smoothly. This step sets the base for a successful DIY bookshelf.
Selecting Wood Types
Wood choice affects the look and strength of the shelf. Pine is soft and easy to work with. It is also affordable. Oak is harder and lasts longer. It has a rich, classic look. Plywood is a budget-friendly option. It is stable and less likely to warp. Choose wood that fits your style and budget.
Gathering Tools And Supplies
Good tools make building easier and safer. You will need a saw to cut the wood. A drill helps make holes for screws. Sandpaper smooths rough edges. Screws hold the pieces tightly. A measuring tape ensures precise cuts. Gather all tools before starting the project to save time.
Planning Your Bookshelf Design
Planning your bookshelf design is the first step to a successful DIY project. Taking time to plan saves effort and materials later. A good plan fits your space and meets your needs.
Start with clear ideas about size, shape, and style. Think about what you want to store and how much space you have. This helps create a bookshelf that works well and looks great.
Measuring Space And Dimensions
Measure the wall or corner where the bookshelf will go. Note the height, width, and depth available. Use a tape measure and write down exact numbers. Check for any obstacles like switches or vents.
Measure the size of books or items you want to store. This helps decide shelf height and depth. Plan for some extra space, so shelves don’t feel cramped. Accurate measurements ensure the bookshelf fits perfectly.
Sketching The Layout
Draw a simple sketch of your bookshelf design on paper. Start with the basic shape, then add shelves and compartments. Mark the dimensions you measured earlier on the sketch.
Think about shelf spacing and how many shelves you need. Draw different layouts to see what looks best. Sketching helps visualize the project and avoid mistakes. It also guides you when cutting and assembling wood.
Cutting And Preparing Wood
Cutting and preparing wood is the first key step to build a strong bookshelf. It shapes the wood to fit your design perfectly. Careful preparation makes assembly easier and the final product look better.
Accuracy in cutting saves time and avoids waste. Safety is crucial to prevent accidents. Smooth surfaces protect your hands and give the shelf a nice finish.
Marking Measurements
Start by measuring the wood pieces with a tape measure. Mark the cut lines clearly with a pencil. Double-check each measurement before cutting. Marking helps keep all pieces the same size. Use a square tool to get straight lines. Clear marks guide the saw and prevent mistakes.
Safe Cutting Techniques
Wear safety goggles and gloves before cutting. Use clamps to hold the wood steady. Cut slowly and follow the marked lines closely. Keep your hands away from the saw blade. Use a saw that matches the type of wood. Always cut on a stable surface to avoid slips.
Sanding Surfaces
Sand all cut edges to remove splinters. Use medium-grit sandpaper first, then fine-grit for smoothness. Sand in the direction of the wood grain. Smooth surfaces prevent scratches and improve paint or stain finish. Check for rough spots by running your hand over the wood. Well-sanded wood looks neat and feels safe to touch.
Assembling The Frame
Assembling the frame is the key step in building your DIY bookshelf. It creates the basic shape and ensures stability. A strong frame holds the shelves and books safely. Take time to align all parts carefully. Use the right tools for tight joints. Let’s break down the process into simple steps.
Joining Side Panels
Start by placing the two side panels upright and parallel. Use clamps to hold them steady. Mark where the shelves will connect on the inside edges. Drill pilot holes to avoid wood splitting. Apply wood glue along the edges that meet the shelves. Screw the side panels together at the marked points. Check the frame for square by measuring the diagonals. Adjust before the glue dries.
Attaching Shelves
Lay the bottom shelf flat between the side panels. Secure it with screws from the outside. Repeat this for each shelf at the marks. Make sure shelves are level using a spirit level. Press shelves firmly against side panels for a tight fit. Wipe away any excess glue quickly. Let the frame dry fully before moving on.
Adding Finishing Touches
Adding finishing touches gives your DIY bookshelf a polished look. These steps protect the wood and enhance its beauty. Simple actions like painting or sealing can change the entire feel of your project.
Pay close attention to these final steps. They make your bookshelf last longer and look great in any room.
Applying Paint Or Stain
Choose paint or stain based on your room’s style. Paint offers bright colors and a smooth finish. Stain shows the natural wood grain and adds warmth. Use a brush or cloth to apply evenly. Let each coat dry fully before adding another. Light sanding between coats makes the surface smooth. This step improves the final appearance of your bookshelf.
Sealing For Durability
Sealing protects your bookshelf from scratches and moisture. Use a clear sealant like polyurethane or varnish. Apply thin coats with a clean brush for best results. Allow drying time between coats to avoid sticky surfaces. Sealing also makes cleaning easier. It keeps your bookshelf looking new for years. This step is essential for long-lasting furniture.
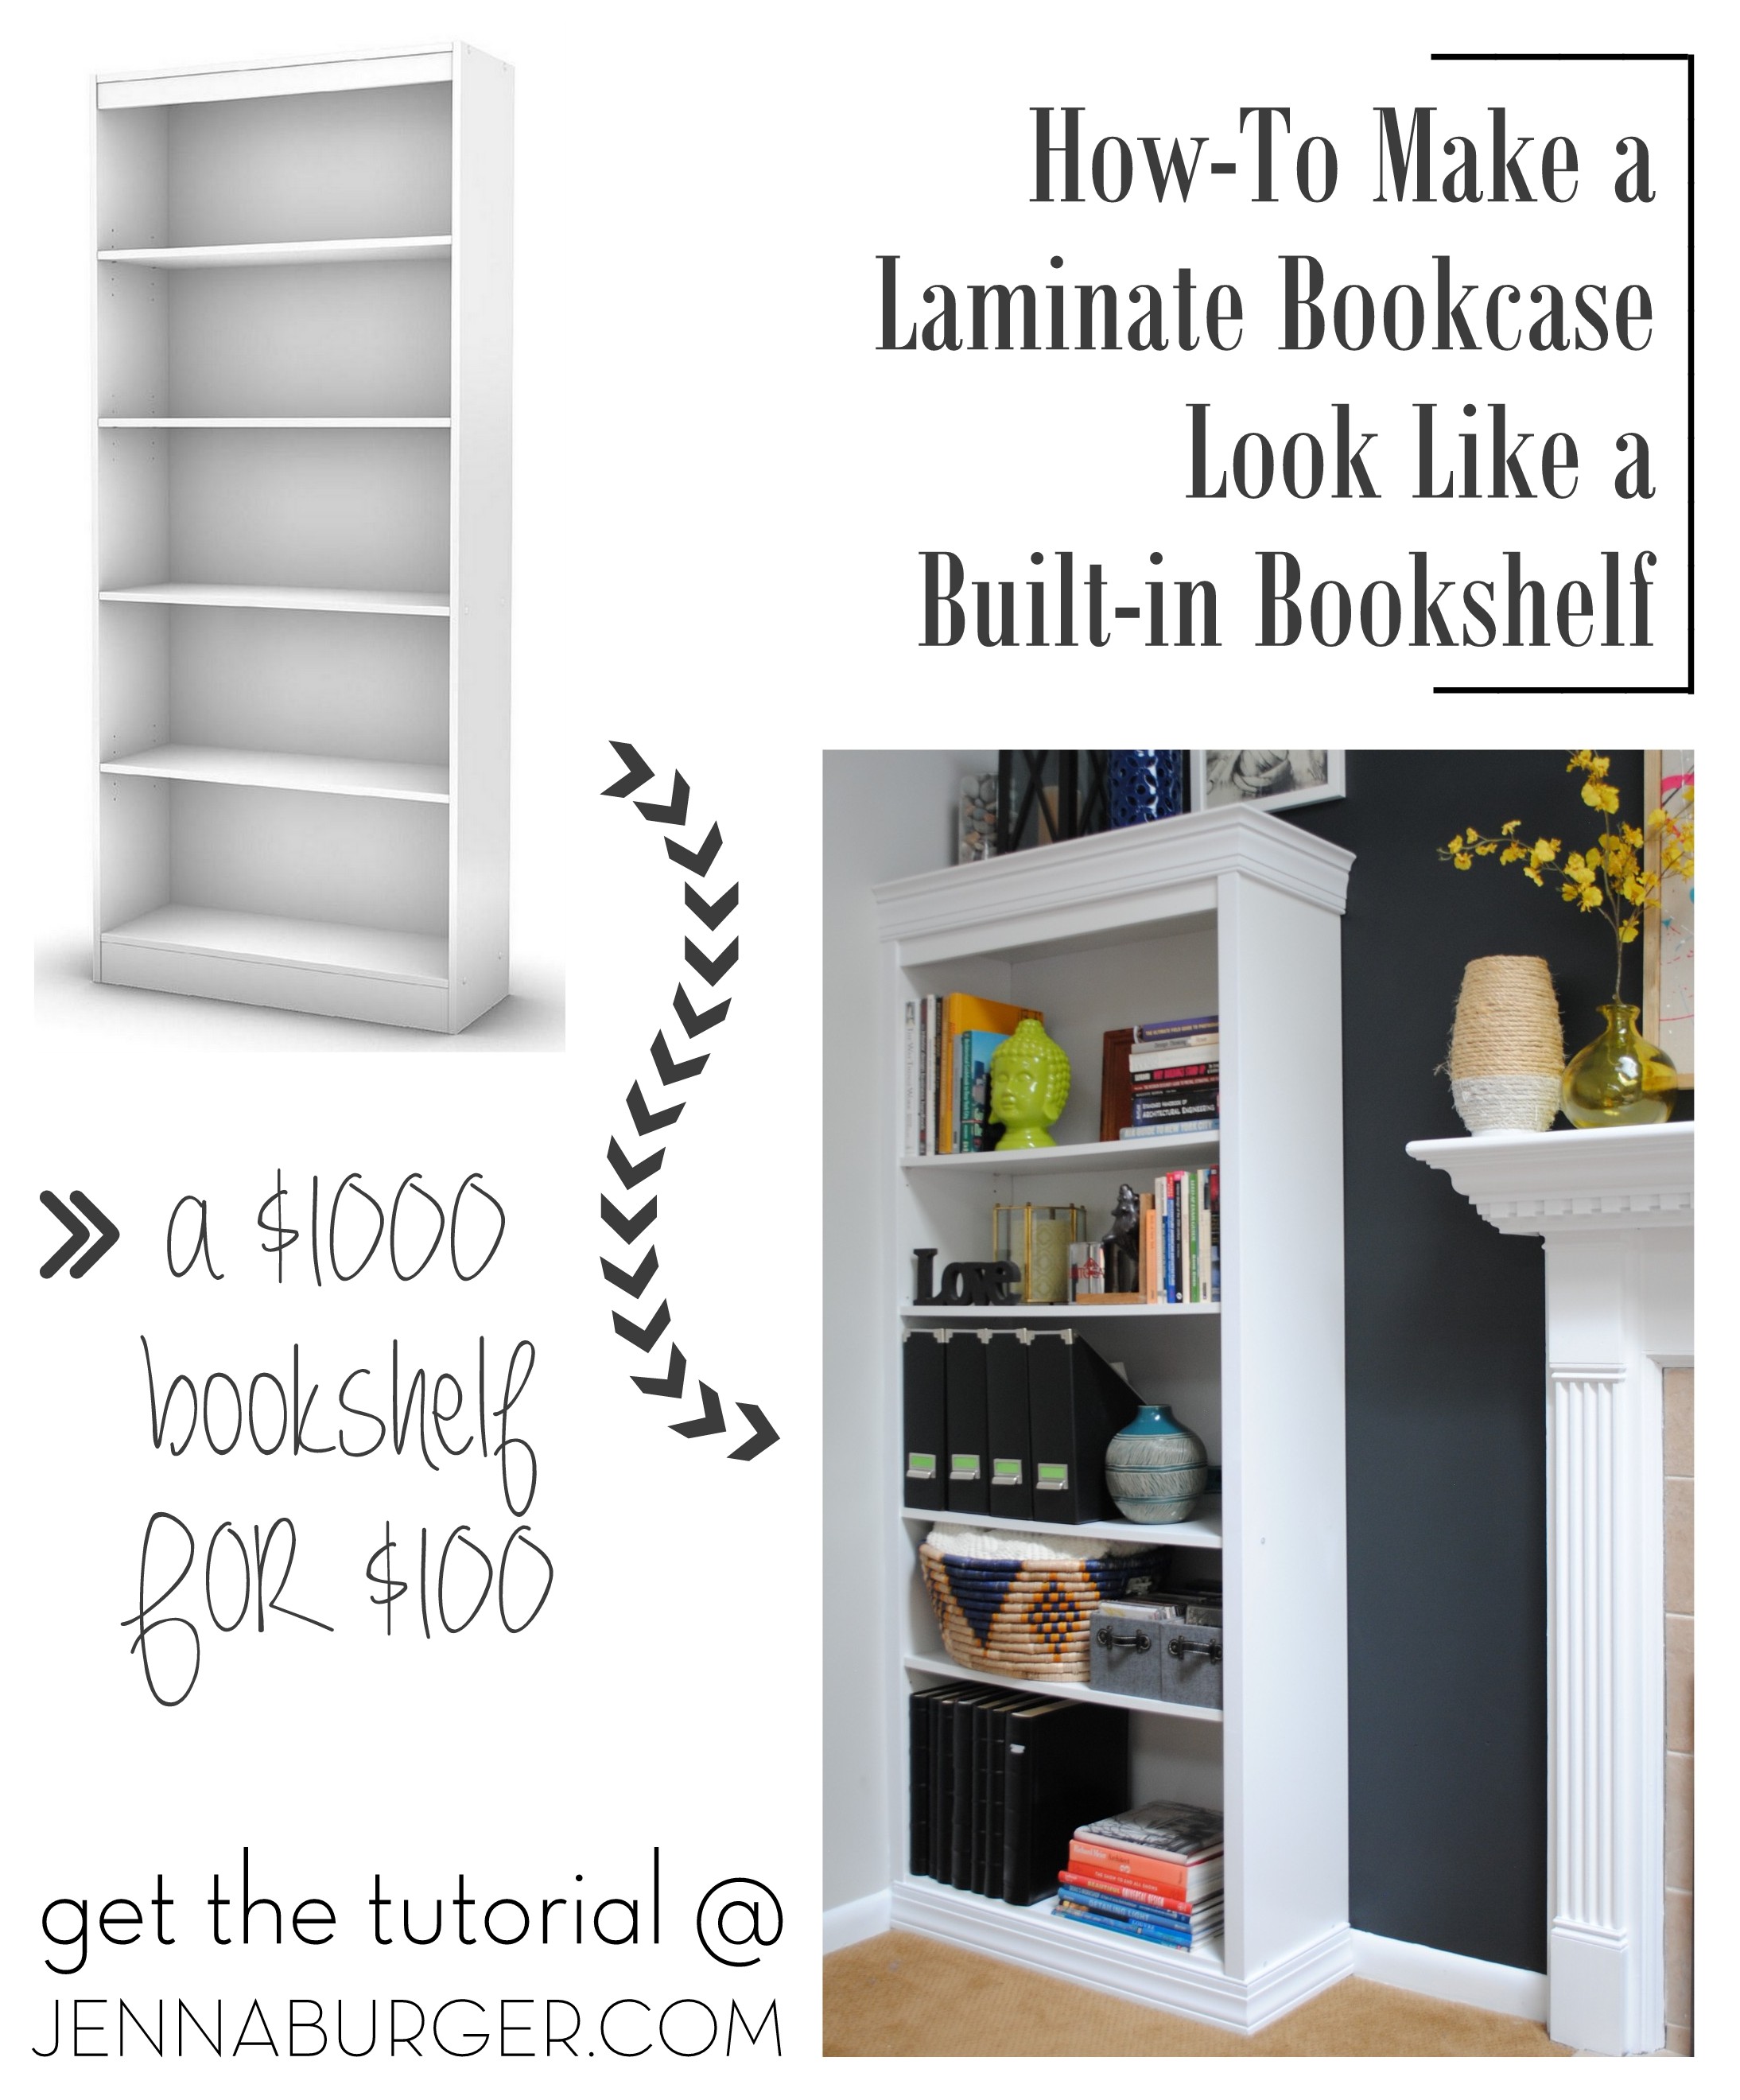
Credit: jennaburger.com
Mounting And Securing The Bookshelf
Mounting and securing the bookshelf is a key step in any DIY project. It keeps the shelf safe and steady. A well-secured bookshelf holds your books without tipping or shaking.
Safety matters most. A loose bookshelf can fall and cause damage or injury. Proper mounting protects your walls and your items.
Wall Anchoring Methods
Choose the right anchors for your wall type. Drywall needs different anchors than brick or concrete. Plastic anchors work for light loads on drywall. Metal anchors hold heavier shelves securely.
Use a stud finder to locate wall studs. Screwing into studs gives the strongest hold. When studs are not available, use toggle bolts or molly bolts. These spread the load inside the wall and prevent damage.
Ensuring Stability
Check the shelf’s level before mounting. Use a spirit level to adjust it. Tighten screws firmly, but do not over-tighten and damage the wall or shelf.
Add brackets or L-braces under the shelf for extra support. These help carry heavy weight and reduce wobbling. Test the shelf by gently pushing it. It should not move or sway.
Tips For Customization
Customizing your DIY bookshelf makes it truly yours. It lets you match your style and needs perfectly. Small changes can create big impacts. Focus on details that highlight your personality and fit your space. Here are some useful tips to help you customize your bookshelf easily.
Incorporating Decorative Elements
Decorative elements add charm and character to your bookshelf. Choose paint colors that brighten your room. Stencils or patterns can bring unique designs to plain wood. Add wallpaper or fabric to the back panel for a pop of color. Use decorative molding or trim to frame the shelves nicely. Small hooks on the sides can hold keys or small items. These touches make your bookshelf stand out and look inviting.
Adjustable Shelf Options
Adjustable shelves let you change the height as needed. This flexibility helps store different sized books or decorations. Use shelf pegs or brackets that fit into pre-drilled holes. Move shelves up or down easily without tools. This option is great for growing collections or changing displays. Adjustable shelves keep your bookshelf useful for many years. It’s a smart choice for practical and versatile furniture.
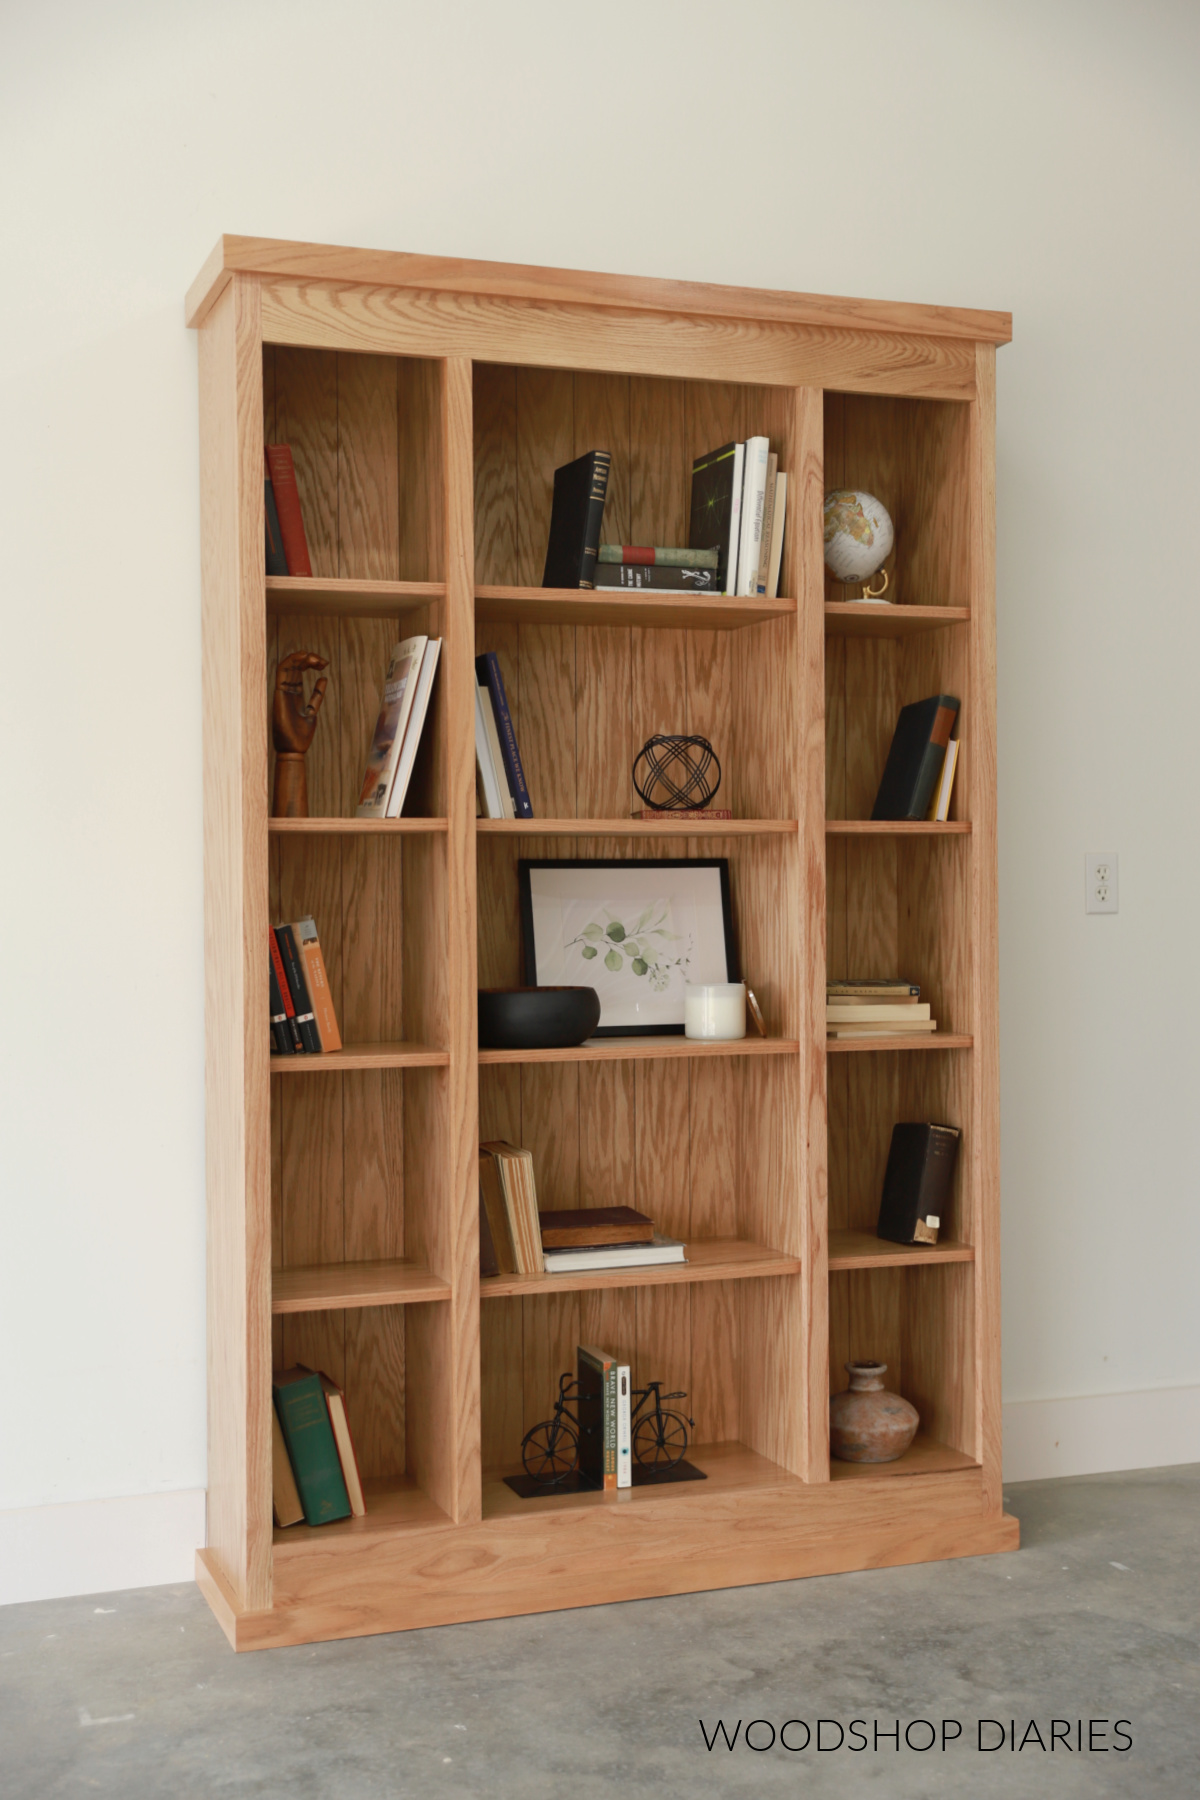
Credit: www.woodshopdiaries.com
Frequently Asked Questions
What Materials Do I Need To Make A Diy Bookshelf?
You need wood boards, screws, wood glue, sandpaper, paint, and a drill. These basic materials ensure a sturdy, customizable bookshelf.
How Long Does It Take To Build A Bookshelf Diy?
Building a bookshelf DIY typically takes 3 to 6 hours. Time depends on design complexity and your experience level.
What Tools Are Essential For A Diy Bookshelf Project?
Essential tools include a saw, drill, screwdriver, measuring tape, and level. These tools help ensure precise cuts and assembly.
Can I Customize The Size Of My Diy Bookshelf?
Yes, you can customize the size to fit your space. Measure your area first to determine the perfect dimensions.
Conclusion
Building a bookshelf yourself saves money and lets you choose the style. The process is simple with basic tools and clear steps. You can make it fit any space in your home. Personal touches make your shelf unique and special.
Enjoy the pride of using something you built. Start small and learn as you go. A DIY bookshelf adds charm and function to any room. Give it a try and see the results yourself.