Are you looking to make your bunk bed more fun and exciting? Adding a slide is a fantastic way to do just that.
Imagine your kids’ faces lighting up as they zoom down right from their bed! But how do you add a slide safely and easily? This guide will walk you through simple steps to transform your bunk bed into a playtime favorite.
Keep reading to discover how you can create a safe, thrilling slide that fits perfectly with your space and style. Your kids will thank you!
Credit: www.etsy.com
Choosing The Right Slide
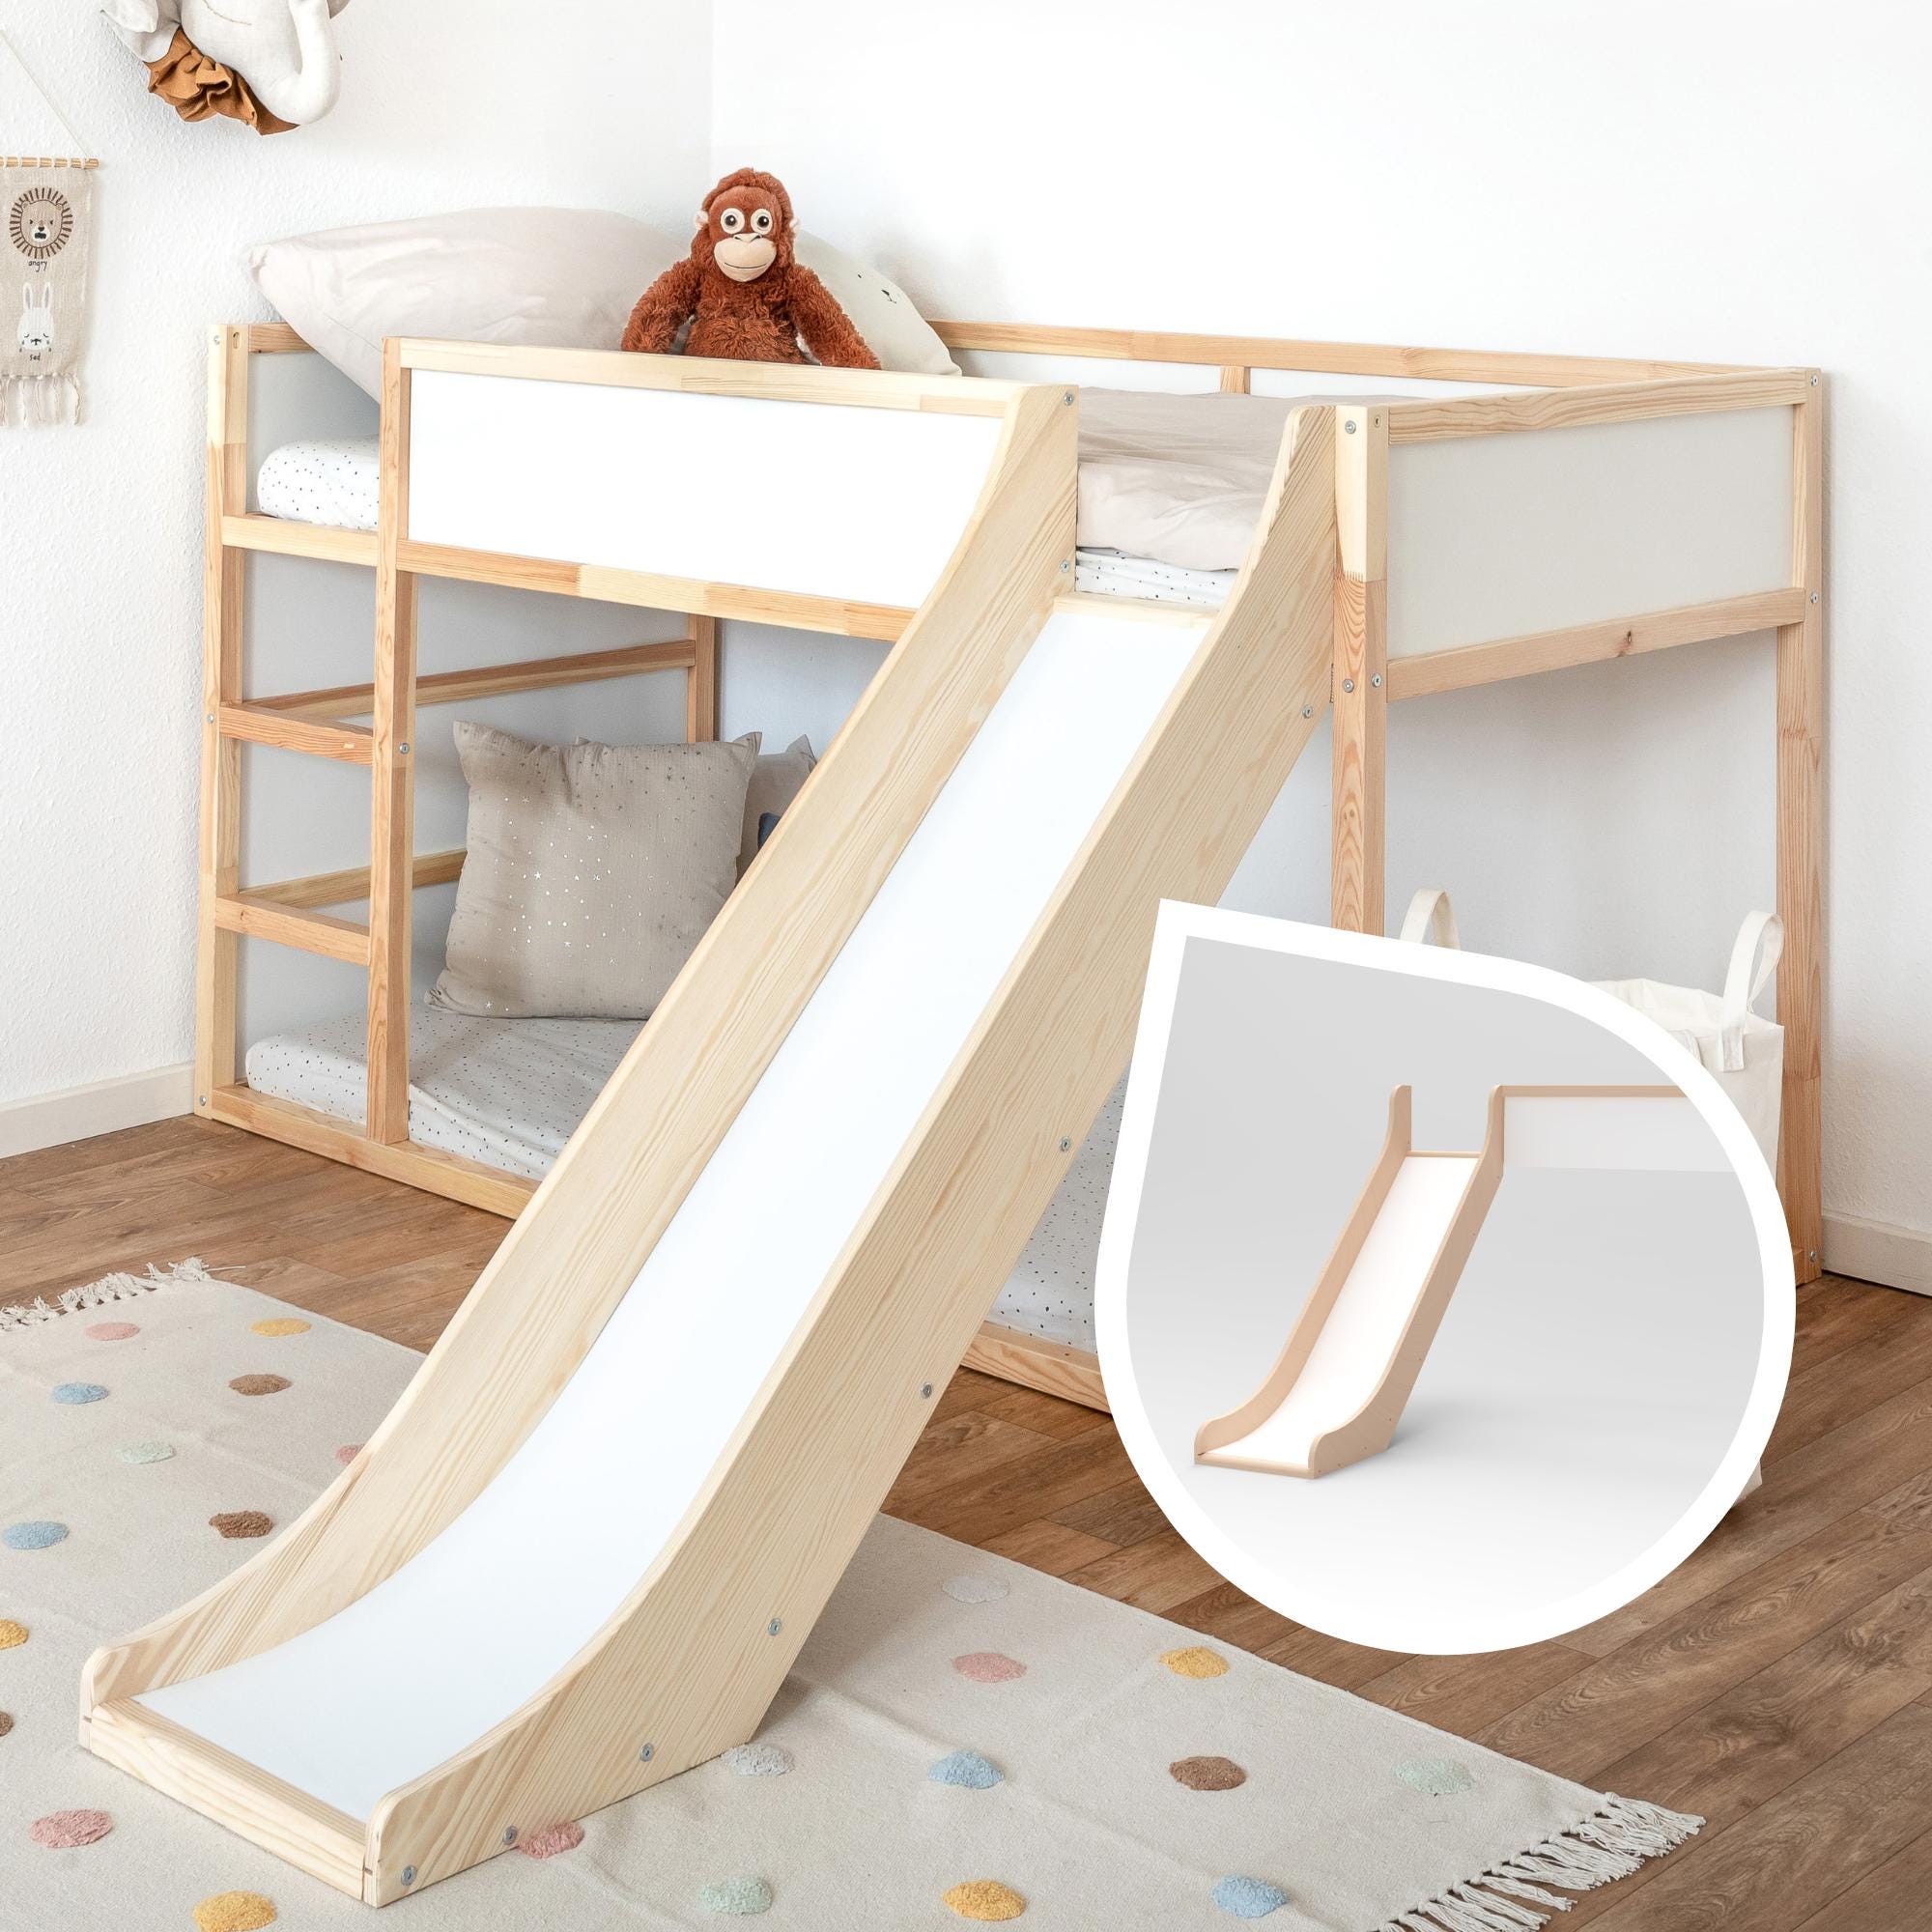
Choosing the right slide for a bunk bed is important for fun and safety. A good slide fits well, is easy to use, and keeps kids safe. This section helps you pick the best slide for your bunk bed. It covers different types, how to measure, and safety features.
Types Of Slides For Bunk Beds
Slides come in many styles. The most common are plastic, wooden, and fabric slides. Plastic slides are smooth and easy to clean. Wooden slides look sturdy and match wooden beds. Fabric slides are soft and foldable for small spaces. Some slides are straight, while others curve for extra fun. Choose a slide that fits your space and style.
Measuring Your Bunk Bed
Measure your bunk bed carefully before buying a slide. Check the height from the bed to the floor. Measure the width of the side where you want to attach the slide. Also, consider the space around the bed for the slide’s length. Accurate measurements help avoid slides that are too big or too small.
Safety Features To Consider
Safety is key when adding a slide. Look for slides with smooth edges to prevent cuts. Make sure the slide has guardrails or sides to stop falls. Check if the slide has a non-slip surface for better grip. The slide should attach firmly to the bunk bed to avoid wobbling. These features keep children safe during play.

Credit: www.maxtrixkids.com
Gathering Tools And Materials
Before starting the installation of a slide on your bunk bed, gather all necessary tools and materials. Having everything ready helps the process go smoothly. It saves time and avoids unnecessary trips to the store.
Organizing your tools and materials also improves safety. You will work more confidently and efficiently. Below is a list of essential tools and materials for this project.
Essential Tools Checklist
- Electric drill with drill bits
- Screwdriver (Phillips and flathead)
- Measuring tape
- Level tool
- Wrench or socket set
- Pencil for marking
- Safety goggles
- Work gloves
Materials Needed For Installation
- Slide kit designed for bunk beds
- Mounting brackets and screws (usually included)
- Wood shims or spacers (optional for adjustments)
- Sandpaper (for smoothing rough edges)
- Protective finish or paint (optional)
Preparing The Bunk Bed
Preparing the bunk bed is the first step before adding a slide. It helps ensure safety and a smooth installation. Take time to get the bed ready. This will make the process easier and protect your child during play.
Start by creating a clean, safe workspace. Then check the bed’s strength. Both steps are important for a successful project.
Clearing The Area
Remove all toys, clothes, and furniture near the bunk bed. Clear space around the bed for tools and the slide parts. This gives you room to work safely. It also prevents accidents or damage to other items.
Make sure the floor is clean and dry. A clutter-free area helps you focus and avoid tripping.
Inspecting Bed Stability
Check the bunk bed’s frame and joints. Look for loose screws or cracks in the wood or metal. Tighten any loose parts before starting. This keeps the bed strong and safe.
Test the bed by gently shaking it. If it feels wobbly, fix it first. A stable bed supports the slide well and protects your child.
Installing The Slide
Installing the slide on a bunk bed adds fun and functionality. The process requires care and the right steps. Safety comes first to ensure a secure and smooth slide. Follow these simple instructions to install the slide properly.
Positioning The Slide
Place the slide next to the bunk bed at the chosen side. Choose a side with enough space for sliding down safely. Align the slide’s top with the bed’s upper bunk edge. Make sure the slide’s base rests firmly on the floor. Double-check the angle to ensure it is comfortable to use.
Securing The Slide To The Frame
Use bolts or screws to attach the slide to the bed frame. Check the slide’s manual for the correct hardware. Tighten all fasteners firmly but avoid over-tightening. Attach brackets or clamps if the slide set includes them. Make sure the slide does not wobble after fixing.
Testing For Stability
Push the slide gently to test its hold on the frame. Try sliding down slowly to check for safety. Look for any movement or loose parts during the test. Tighten screws again if you find any instability. Confirm the slide feels strong before regular use.
Adding Safety Measures
Adding safety measures is important when you add a slide to a bunk bed. It helps protect children from falls and injuries. Safety features make the slide fun and secure. Careful steps keep your child safe while playing.
Installing Guardrails
Guardrails prevent children from falling off the slide or bunk bed. Install sturdy rails along the slide edges. Make sure the rails are high enough to stop falls. Use smooth materials to avoid splinters or sharp edges. Check the rails often to keep them secure and strong.
Using Non-slip Surfaces
Non-slip surfaces reduce slipping risks on the slide and steps. Apply non-slip tape or mats on the slide surface. Use textured paint or rubber coatings for extra grip. Add non-slip pads to the ladder steps. These surfaces help children climb and slide safely every time.
Personalizing Your Slide
Personalizing your bunk bed slide makes it special for your child. It turns a simple slide into a fun and unique play space. Kids love seeing their ideas come to life. Personal touches make the slide more inviting and exciting. This section shows easy ways to decorate and add accessories to the slide.
Painting And Decorating
Start by choosing bright and cheerful colors for the slide. Use non-toxic, child-safe paint to keep it safe. You can paint stripes, polka dots, or stars for a playful look. Stencils help create neat shapes and patterns. Let your child pick their favorite colors. It makes the slide feel personal and fun.
Adding Fun Accessories
Add small accessories to make the slide more exciting. Attach soft foam stickers or decals along the edges. Consider adding a small canopy or fabric cover at the top for shade. Hang lightweight mobiles or wind chimes nearby for extra fun sounds. These simple additions create a magical slide experience. Accessories also encourage imaginative play.
Maintaining The Slide
Maintaining the slide on a bunk bed is important for safety and fun. Regular care helps keep the slide smooth and secure. It also extends the life of the slide and prevents accidents. Simple steps make maintenance easy and effective.
Regular Safety Checks
Check the slide for loose screws or bolts every week. Tighten any parts that feel wobbly or weak. Look for cracks or sharp edges on the slide surface. Remove any broken pieces right away to avoid injuries. Test the slide by gently pressing on it before use. Ensure it is firmly attached to the bunk bed frame. Check the floor area for obstacles or hard objects.
Cleaning Tips
Use a soft cloth and mild soap to clean the slide. Avoid harsh chemicals that can damage the slide material. Wipe the slide dry after cleaning to prevent slipping. Remove dirt and dust to keep the slide smooth. Clean the slide regularly, especially after outdoor play. Keep the slide free from sticky residues or spills. This keeps the slide safe and pleasant to use.

Credit: www.youtube.com
Frequently Asked Questions
How Do I Attach A Slide To A Bunk Bed Safely?
To attach a slide safely, follow manufacturer instructions closely. Use sturdy screws and brackets. Ensure the slide is stable and secure before use. Check for any sharp edges or loose parts to prevent accidents.
What Tools Are Needed To Add A Slide To A Bunk Bed?
Common tools include a drill, screwdriver, measuring tape, and wrench. You might also need a level to ensure the slide is aligned. Having these tools ready makes installation easier and safer.
Can Any Bunk Bed Support A Slide Attachment?
Not all bunk beds support slides. Check the bed’s weight limit and structural strength. Beds made of solid wood or metal usually work best. Always verify compatibility before purchasing a slide.
How Long Does It Take To Install A Bunk Bed Slide?
Installation usually takes between 30 minutes to 2 hours. Time depends on your experience and the slide’s complexity. Following clear instructions helps speed up the process.
Conclusion
Adding a slide to a bunk bed brings fun and excitement to any room. It also saves space and keeps kids active indoors. Follow the steps carefully for safety and stability. Choose the right materials and tools before you start.
Take your time to measure and fit everything well. A well-installed slide creates a playful and safe environment. Enjoy watching children laugh and play every day. Simple changes can make a big difference in your home.