Are you looking to maximize space and add a fun twist to your bedroom? Building a 3 level bunk bed might be the perfect solution for you.
Imagine having three cozy beds stacked safely, giving your room more floor space and making sleepovers more exciting. In this guide, you’ll learn step-by-step how to create a sturdy, stylish bunk bed that fits your needs. Whether you’re a beginner or just want some fresh tips, this article will make the process simple and doable.
Ready to transform your space and impress everyone with your handiwork? Let’s dive in!
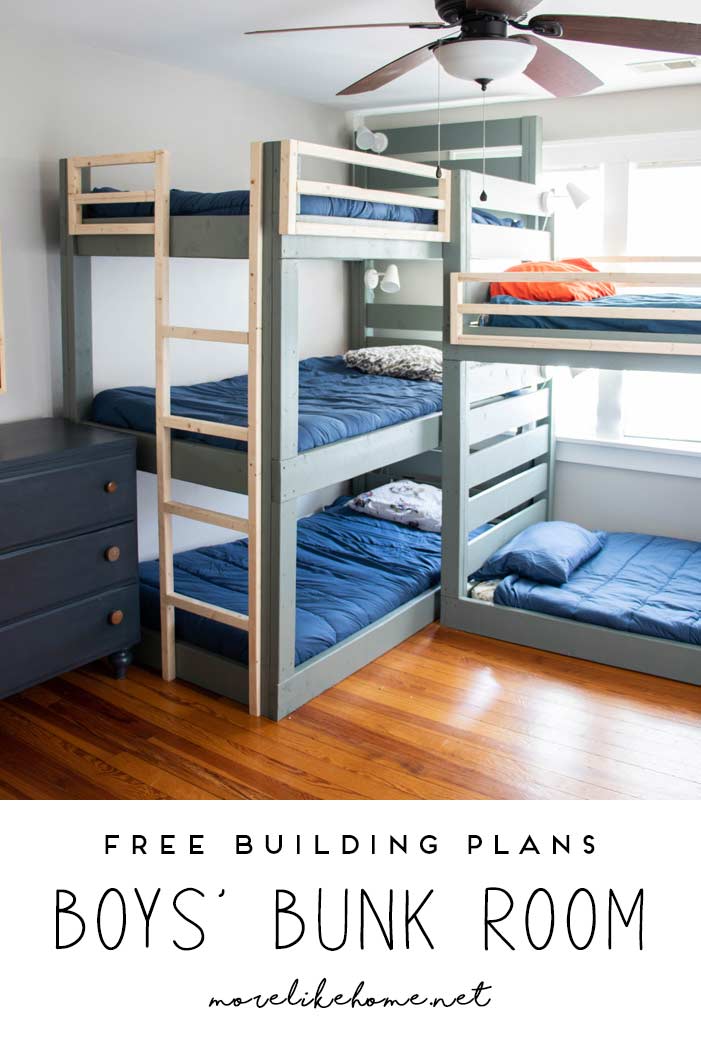
Credit: www.morelikehome.net
Planning Your Bunk Bed
Planning your three-level bunk bed is the first step to a safe and sturdy build. Good planning saves time, money, and frustration. Think about the needs and space before starting. Take your time with this part. It sets the foundation for a successful project.
Choosing The Right Design
Pick a design that fits your room and style. Simple designs work best for beginners. Consider safety features like guardrails and ladder placement. Balance looks with functionality. A neat design also helps keep the bed strong and stable.
Selecting Materials
Use strong, durable wood like pine or oak. Avoid soft or weak wood that might break. Choose screws and bolts over nails for extra strength. Sand all edges smooth to prevent splinters. Good materials ensure the bed lasts long and stays safe.
Measuring Space And Dimensions
Measure your room carefully before buying materials. Check the height, width, and length available. Leave space for the ladder and movement around the bed. Consider ceiling height for the top bunk. Accurate measurements prevent fitting problems later.
Gathering Tools And Materials
Building a 3 level bunk bed needs careful preparation. Gathering the right tools and materials helps the project go smoothly. This step saves time and ensures safety. It also makes the bed strong and durable. Below are the key items to collect before starting.
Essential Tools List
Start with basic woodworking tools. A power drill speeds up screwing and drilling tasks. A saw is necessary to cut wood pieces precisely. Sandpaper smooths rough edges for safety. A tape measure helps with accurate measurements. A screwdriver, hammer, and level are also needed. These tools make the building process easier and safer.
Recommended Wood Types
Choose wood that is strong and long-lasting. Pine is a popular choice for bunk beds. It is affordable and easy to work with. Oak is harder and more durable but costs more. Avoid soft woods that can bend or break. Make sure the wood is dry and free of cracks. This ensures a sturdy and safe bunk bed.
Hardware And Safety Accessories
Use screws and bolts designed for furniture. Wood screws hold pieces tightly together. Corner brackets add extra support. Safety rails are essential for the top levels. They prevent falls and injuries. Non-slip pads under the bed protect the floor. Check all hardware before assembly for best results.
Cutting And Preparing Wood
Cutting and preparing wood is the first step in building a strong 3 level bunk bed. It sets the base for safety and durability. Accuracy and care during this stage help avoid mistakes later. Follow clear steps to measure, cut, and finish the wood pieces properly.
Marking Measurements
Start by measuring each piece of wood carefully. Use a tape measure and pencil to mark exact lengths. Mark twice to ensure accuracy. Clear, straight lines guide your cuts. Label each piece to match your design plan. This prevents confusion during assembly.
Safe Cutting Techniques
Always wear safety goggles and gloves before cutting wood. Use a sharp saw for clean cuts. Keep your hands clear of the blade at all times. Cut slowly and steadily along the marked lines. Secure the wood piece with clamps to stop movement. Proper cutting reduces splinters and uneven edges.
Sanding And Finishing Wood Pieces
After cutting, sand all wood surfaces smoothly. Start with coarse sandpaper to remove rough spots. Then use fine sandpaper for a polished finish. Smooth edges prevent splinters and improve safety. Clean dust off wood before applying any finish or paint. This step prepares wood for long-lasting protection.
Building The Frame
Building the frame is the first step in creating a strong 3 level bunk bed. This part gives the bed its shape and stability. Careful work here makes sure the bed will be safe and last a long time. Follow each step closely to build a solid frame.
Assembling The Base
Start by cutting the wood for the base. Use thick, sturdy boards for strong support. Lay the boards flat on the ground. Join the pieces using screws or bolts. Check the base is square by measuring diagonals. A firm, even base is key for the whole bed.
Constructing Side Rails
Next, build the side rails that hold the mattress. Cut long wooden planks for each side. Attach the rails to the base with strong screws. Make sure the rails stand straight and steady. The rails keep the mattress from sliding off. Double-check the height for safety.
Adding Support Beams
Support beams add strength to the frame. Measure and cut beams to fit between the side rails. Secure beams tightly with screws. Space them evenly to hold weight well. These beams stop the bed from bending or breaking. Strong support beams protect sleepers on all levels.
Creating The Ladder And Guardrails
Creating the ladder and guardrails is a key step in building a 3 level bunk bed. These parts keep the bed safe and easy to use. A strong ladder helps kids climb up and down without trouble. Guardrails stop anyone from falling off the top bunks. This section shows how to design and install these parts for safety and strength.
Designing A Sturdy Ladder
Choose solid wood that can hold weight well. The ladder should be wide enough for safe climbing. Space the steps evenly for good balance. Sand the edges smooth to avoid splinters. Make the steps flat and deep enough for feet to rest. Attach the ladder at a slight angle to make climbing easier.
Installing Guardrails For Safety
Guardrails should run along the sides of the top two bunks. Use thick wood that won’t bend or break easily. The height must be enough to prevent falls but not block the bed entry. Leave small gaps between slats to avoid trapping fingers. Secure the rails firmly to the bed frame for stability.
Securing Ladder And Rails To Frame
Use strong screws or bolts to attach the ladder and guardrails. Check that all joints are tight and do not wiggle. Add metal brackets under the ladder steps for extra support. Double-check the rails for any loose parts before use. Safety depends on how well these parts are fixed to the frame.
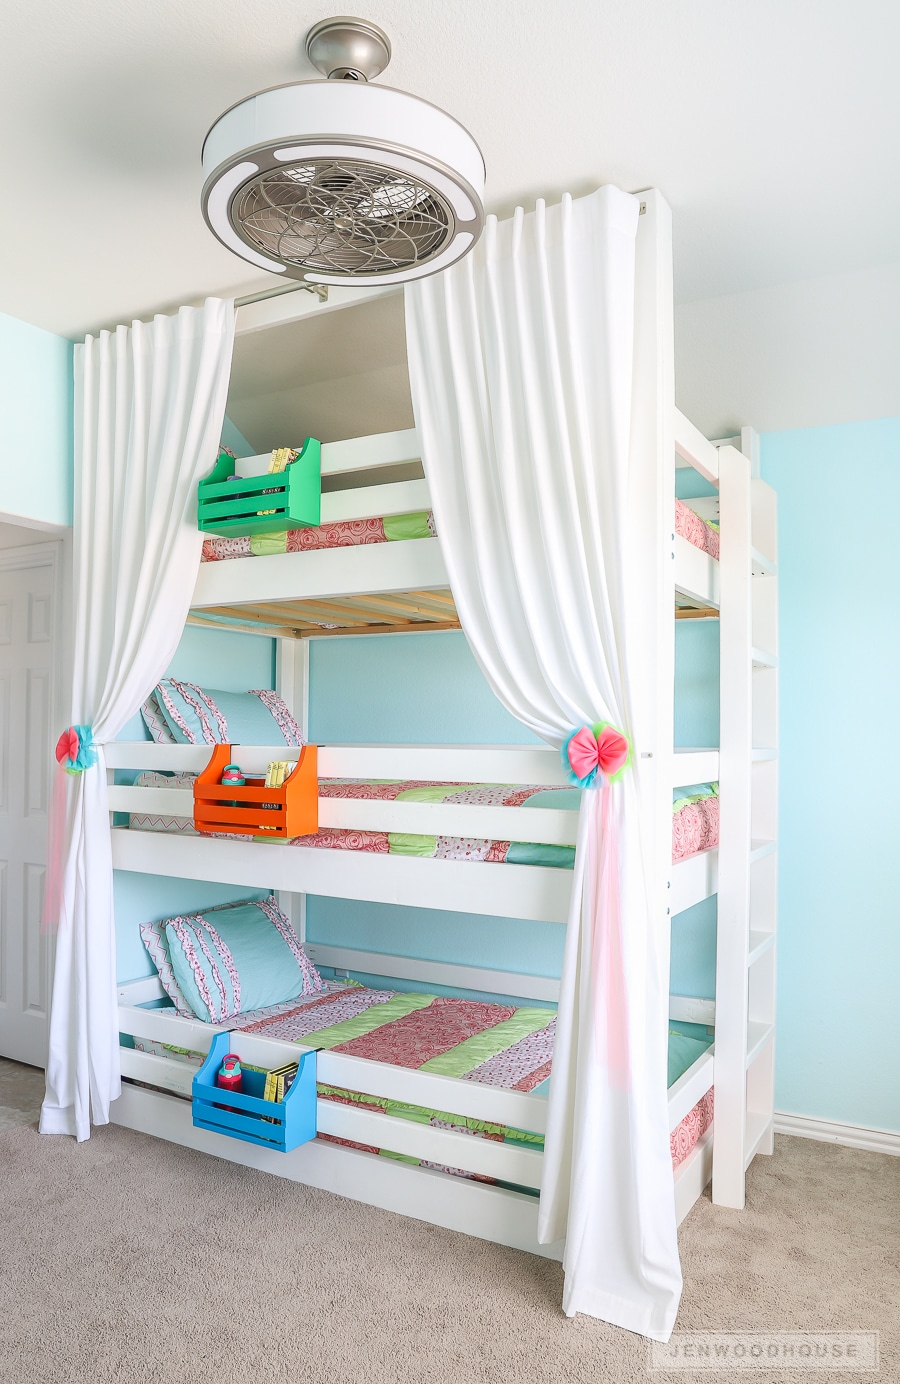
Credit: jenwoodhouse.com
Final Assembly And Inspection
The final assembly and inspection are crucial steps in building a 3 level bunk bed. This stage brings all parts together and ensures the bed is strong and safe. Careful attention here prevents future problems and keeps users secure.
Take your time to join all parts correctly. Check every connection before tightening screws and bolts. A solid and stable bed depends on this careful work.
Joining All Components
Start by aligning the bed frames and ladders. Make sure each piece fits perfectly. Use the instruction guide to match parts. Connect the side rails, guardrails, and ladder securely. Double-check that all pieces are in the right place before moving on.
Tightening Fasteners
Use a screwdriver or wrench to tighten all screws and bolts. Tighten slowly and evenly. Avoid over-tightening, which can damage the wood. Check each fastener twice for a secure hold. Proper tightening keeps the bed stable and strong.
Safety Checks And Adjustments
Inspect the entire bed for loose parts or sharp edges. Test the ladder and guardrails to ensure they are firm. Make sure there is no wobbling or movement. Adjust any loose components right away. Safety checks protect those who will use the bunk bed.
Finishing Touches
Finishing touches bring your 3 level bunk bed to life. They add style, comfort, and safety. This final step makes the bed ready for use and helps it last longer. Focus on painting, bedding, and care to complete your project perfectly.
Painting Or Staining Options
Choose paint or stain that suits your room’s theme. Paint offers bright colors and hides wood flaws. Stain shows wood grain and feels natural. Use non-toxic, child-safe products for safety. Apply thin, even coats for a smooth finish. Let each coat dry fully before adding another.
Adding Mattresses And Bedding
Select mattresses that fit each bunk level. Measure carefully to avoid gaps or overhangs. Use firm, supportive mattresses for safety. Choose bedding that matches your room’s style. Soft sheets and cozy blankets make the bed inviting. Keep bedding simple for easy washing and changing.
Maintaining Your Bunk Bed
Check the bed regularly for loose screws or cracks. Tighten bolts and screws as needed to keep it sturdy. Clean surfaces with a damp cloth to remove dust. Avoid harsh chemicals that can damage paint or wood. Inspect ladders and guardrails for safety every few months. Proper care keeps your bunk bed safe and beautiful.

Credit: adultbunkbeds.com
Frequently Asked Questions
What Materials Are Needed For A 3 Level Bunk Bed?
You need sturdy wood, screws, bolts, wood glue, a drill, a saw, and safety gear. Quality materials ensure strength and durability for the bunk bed.
How Much Space Is Required For A 3 Level Bunk Bed?
Allow at least 7 feet in height and 8 feet in length for safe installation. Ensure enough room for ladders and safe movement around the bed.
Is Building A 3 Level Bunk Bed Safe For Children?
Yes, if built with quality materials and proper safety measures. Include guardrails, secure ladders, and check weight limits to ensure child safety.
How Long Does It Take To Build A 3 Level Bunk Bed?
It typically takes 8 to 12 hours for an experienced DIYer. Time varies based on skill level and tool availability.
Conclusion
Building a 3 level bunk bed takes time and care. Follow each step with patience and focus. Use good materials to keep the bed strong and safe. Double-check your work as you go. A sturdy bunk bed saves space and adds fun to any room.
Enjoy the process and feel proud of your creation. Now, you have a great place to rest or play. Keep safety in mind, and your new bed will last for years. Simple tools and clear steps make the job easier.
You did it!