Are you ready to transform your space with a smart, stylish solution? Building a 3 level bunk bed might sound challenging, but with the right steps, you can create a sturdy, space-saving piece that fits your needs perfectly.
Imagine having three comfy beds stacked safely, freeing up room for play, study, or storage. In this guide, you’ll find simple instructions and tips that anyone can follow—even if you’re new to woodworking. Keep reading, and by the end, you’ll have the confidence and know-how to build a bunk bed that your family will love.
Planning Your Bunk Bed
Planning your three-level bunk bed is the first step to a successful build. Careful preparation saves time and avoids mistakes. This stage helps you understand your space, materials, and safety needs.
Take your time. A well-planned bunk bed will last longer and be safer for users.
Measuring Your Space
Measure the room where you want the bunk bed. Note the length, width, and height. Check for obstacles like windows, doors, and light switches. Allow extra space around the bed for easy movement. Consider ceiling height carefully. Make sure there is enough clearance above the top bunk. This prevents accidents and makes the bed comfortable.
Choosing Materials
Select strong and durable materials for the bed frame. Solid wood like pine or oak works well. Avoid soft or weak wood that can break easily. Choose screws and bolts designed for furniture. Use non-toxic paint or finish to protect the wood. Materials should be sturdy but easy to work with. Quality materials ensure a safe and long-lasting bunk bed.
Safety Considerations
Think about safety at every step. Guardrails are essential on the top bunk. They prevent falls during sleep. Use a sturdy ladder that is easy to climb. Make sure all joints are tight and secure. Sand down rough edges to avoid splinters. Check weight limits for each bunk level. A safe design protects children and adults alike.
Gathering Tools And Supplies
Gathering the right tools and supplies is the first step to build a sturdy 3 level bunk bed. Having everything ready saves time and makes the process smooth. This section helps you prepare well before starting the project.
Essential Tools List
Get these tools for a solid build:
- Power drill with drill bits
- Measuring tape
- Carpenter’s square
- Handsaw or circular saw
- Screwdriver set
- Sandpaper or electric sander
- Clamps to hold wood pieces
- Pencil for marking
- Level for straight alignment
Recommended Hardware
Choose strong and reliable hardware parts:
- Wood screws (2.5 to 3 inches)
- Bolts and nuts for extra support
- Metal brackets for corners
- Wood glue for tight joints
- Washers to spread bolt pressure
- Safety rails hardware
Wood Selection Tips
Select wood that is safe and strong:
- Use hardwoods like oak or maple
- Softwoods like pine also work well
- Choose straight, knot-free boards
- Check wood for cracks or splits
- Use plywood for bed slats
- Opt for smooth surface for easy finishing
Preparing The Wood
Preparing the wood is the first important step in building a 3 level bunk bed. Good preparation makes the bed strong and safe. It also helps the bed look neat and last longer. This step includes cutting the wood to the right size, smoothing the surfaces, and making holes for screws. Each part must be ready before you start putting the bed together.
Cutting Dimensions
Measure the wood pieces carefully. Follow your plan for the bunk bed exactly. Cut each piece to the correct length and width. Use a sharp saw to make clean cuts. Straight edges help parts fit well. Mark each piece to avoid confusion later. Double-check all measurements before cutting. Accurate cuts save time and avoid mistakes.
Sanding And Finishing
Sand every wood piece to remove rough spots. Use medium-grit sandpaper first, then fine-grit for smoothness. Smooth surfaces prevent splinters and improve safety. Sand edges and corners well to make them round. After sanding, wipe the wood clean to remove dust. Apply a wood finish or sealant for protection. Choose a finish that is safe for children.
Pre-drilling Holes
Mark where screws will go on each wood piece. Use a drill to make pilot holes before screwing. Pre-drilling stops wood from splitting. It also helps screws go in straight. Make holes slightly smaller than screw size. Check alignment of holes on joined pieces. Proper drilling ensures a tight and strong fit. Take time here for a solid frame.
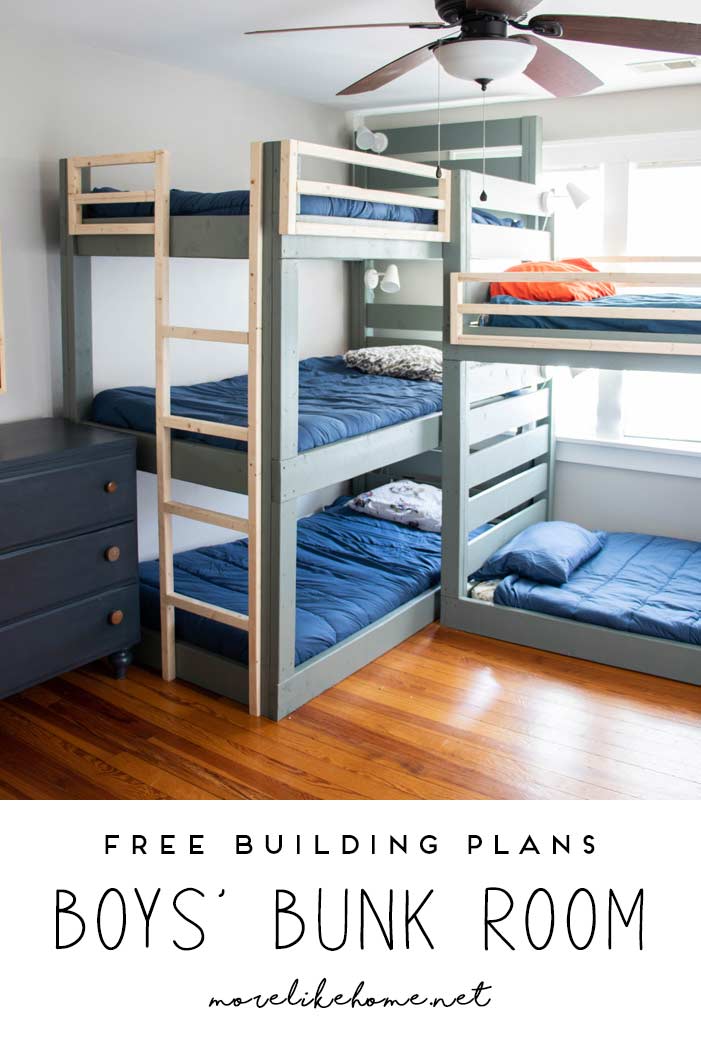
Credit: www.morelikehome.net
Building The Frame
Building the frame is the most important step in making a 3 level bunk bed. It gives the bed its shape and strength. Each level must be solid to keep the bed safe and stable. Follow the steps carefully to build a strong frame that lasts.
Constructing The Base
Start with the base frame. Use thick wooden beams for support. Cut four long pieces for the sides. Connect them with shorter pieces at each end. Use screws and wood glue to join parts tightly. Make sure the base is square and level. This foundation holds the whole bed.
Assembling The Middle Level
Next, build the middle frame. Use the same size wood as the base. Attach vertical posts to the base corners. These posts hold the middle level. Fix horizontal beams between the posts. Check that the frame is stable. Secure all joints with screws. The middle level must carry weight safely.
Adding The Top Level
Finally, create the top frame. Attach taller vertical posts to the middle level. These posts support the top bed. Add horizontal beams across the posts. Make sure the frame is even and sturdy. Tighten all screws and check for wobble. The top level needs strong support for safety.
Installing Safety Features
Installing safety features on a three-level bunk bed is very important. It helps prevent accidents and keeps children safe. Each part of the bed must be secure and strong. Safety is not just about comfort but also peace of mind for parents and kids.
Guard Rails Setup
Guard rails stop children from falling off the bed. Use strong wood or metal for the rails. The rails should cover the entire length of the top and middle bunks. Attach them tightly with screws to avoid any gaps. Check the height; it must be tall enough to hold a child safely.
Securing The Ladder
The ladder must be firmly attached to the bed frame. Use bolts instead of nails for stronger support. Make sure the ladder steps are wide and not slippery. Position the ladder at a safe angle for easy climbing. Test the ladder by putting weight on it before use.
Weight Support Tips
Check the bed’s weight limit before building or using it. Use thick wood or metal beams for the frame. Reinforce all joints with extra screws or brackets. Avoid using weak or thin materials that may break. Regularly inspect the bed for any signs of wear or damage.

Credit: adultbunkbeds.com
Final Assembly And Finishing
The final assembly and finishing stage brings your 3 level bunk bed project to life. This step focuses on connecting all parts securely and adding a protective finish. It ensures the bed is strong, looks good, and is safe for use. Taking your time here makes a big difference in the bed’s durability and appearance.
Attaching All Levels
Start by aligning the second and third levels with the base. Use screws and bolts to fasten each level firmly. Double-check that all joints fit snugly without gaps. Tighten all screws to prevent wobbling. This step creates a sturdy frame that supports weight evenly.
Applying Paint Or Stain
Choose paint or stain based on your room’s style. Use a brush or roller to apply an even coat. Paint protects the wood from moisture and dirt. Stain enhances the natural wood grain and adds color. Let the first coat dry fully before applying a second one for better coverage.
Final Safety Check
Inspect the bed carefully for loose screws or sharp edges. Sand any rough spots to avoid splinters. Confirm guardrails and ladders are secure and stable. Test the bed by gently pressing on each level. A safe bunk bed prevents accidents and ensures peace of mind.
Space-saving Tips
Building a 3 level bunk bed saves a lot of space in any room. It creates more room for other furniture and activities. Using smart space-saving tips makes the room neat and organized. Let’s explore some ideas to make the best use of the space around your bunk bed.
Under-bed Storage Ideas
Use the space under the bottom bunk for storage boxes or drawers. Store toys, clothes, or bedding in labeled containers. Rolling bins fit easily and slide out for quick access. This keeps the floor clear and items organized. Open shelves under the bed also work well for books or shoes.
Multi-functional Add-ons
Add features like built-in desks or shelves to the bunk bed frame. This creates a study or play area without needing extra furniture. Hooks on the sides hold backpacks or hats. A small ladder with storage steps saves space and keeps essentials close. These add-ons make the bunk bed more useful and tidy.
Optimizing Room Layout
Place the bunk bed against a wall to open up floor space. Use corners for the bed to keep the center free for movement. Arrange other furniture, like desks or dressers, near the bed for convenience. Keep pathways clear to avoid clutter and make the room feel larger. Plan the layout before building for best results.
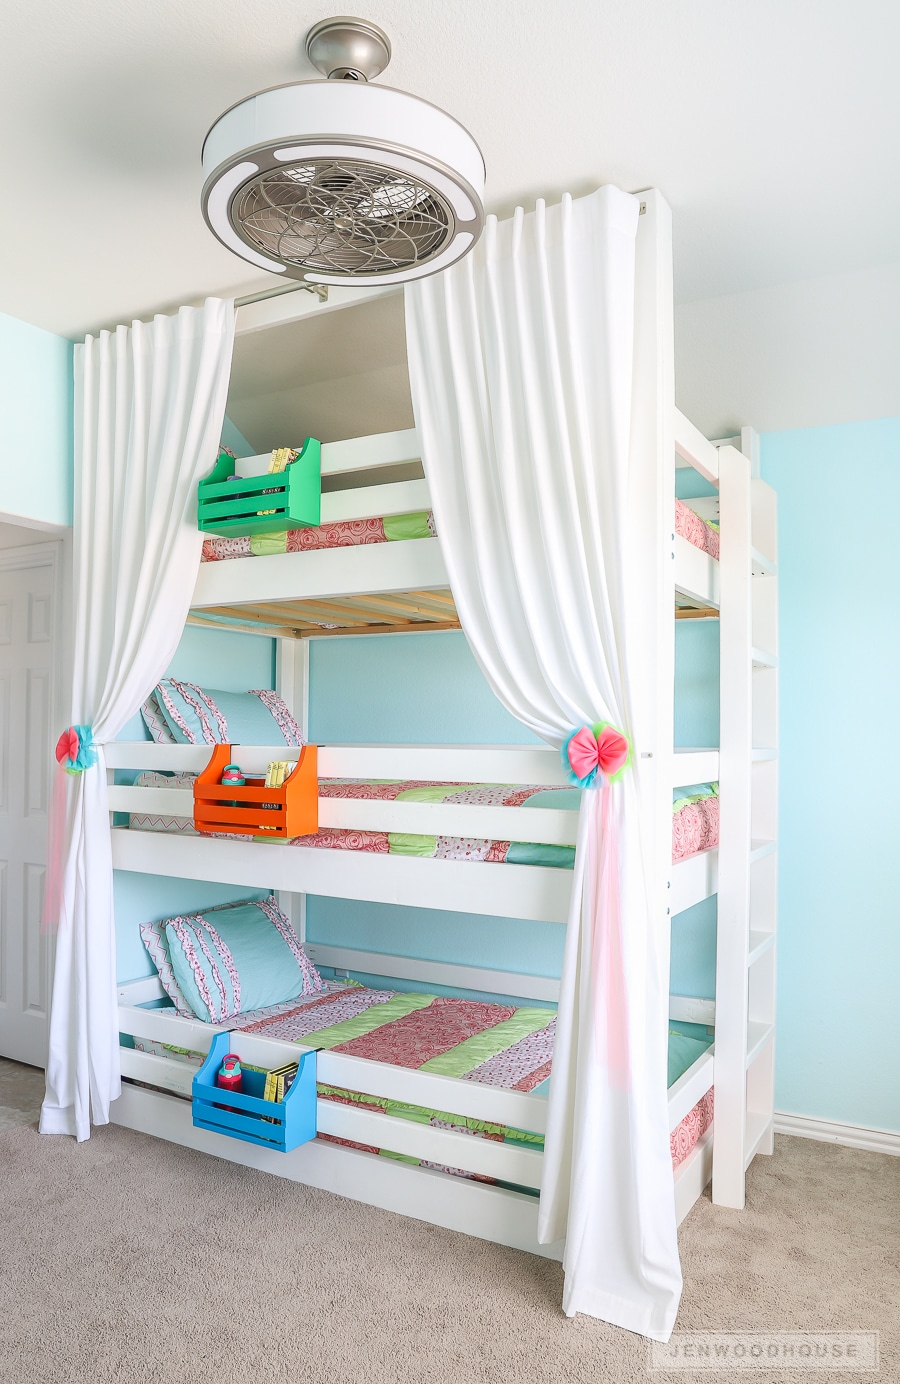
Credit: jenwoodhouse.com
Frequently Asked Questions
What Materials Are Needed For A 3 Level Bunk Bed?
You need sturdy wood, screws, nails, wood glue, sandpaper, and a drill. Choose high-quality plywood or hardwood for durability. Safety rails and ladders are essential. Using quality materials ensures the bunk bed is strong and safe for use.
How Long Does Building A 3 Level Bunk Bed Take?
Building a 3 level bunk bed typically takes 1-3 days. Time depends on your experience and tools available. Planning and preparation can speed up the process. Allow extra time for sanding and finishing touches for a polished look.
Is A 3 Level Bunk Bed Safe For Children?
Yes, if built with safety in mind. Use guardrails on all beds and secure ladders firmly. Ensure the wood is smooth and free of splinters. Follow weight limits and supervise younger children when using the bed.
Can I Customize The Design Of A 3 Level Bunk Bed?
Absolutely! Customize size, color, and features like storage or desks. Personalizing makes the bed functional and fits your space perfectly. Use paint or stain for a unique look. Custom designs increase usability and style.
Conclusion
Building a 3 level bunk bed can save space and add fun to any room. Follow clear steps to ensure safety and strength. Use good materials and measure twice before cutting. Take your time and check each part as you go.
This project brings comfort and style to your home. Enjoy the process and the final result!