Are you tired of ordinary bookshelves that lack personality? Imagine creating a unique, sturdy bookshelf that not only holds your favorite books but also becomes a conversation starter.
Building a bookshelf out of pipes is easier than you think—and it adds a cool, industrial touch to any room. In this guide, you’ll discover simple steps to turn basic materials into a stylish, functional piece. Ready to transform your space and showcase your creativity?
Keep reading, and you’ll have your custom bookshelf in no time.
Materials Needed
Planning your bookshelf is the first step to a successful project. Careful preparation saves time and materials. It helps create a sturdy, attractive shelf that fits your space perfectly. Planning also guides your choices for pipes, wood, and tools.
Measuring Space
Start by measuring the area where you want the bookshelf. Note the width, height, and depth. Check for any obstacles like outlets or vents. Measure twice to avoid mistakes. Write down all measurements clearly.
Design Ideas
Think about the style you want. Pipes give an industrial look. Wood shelves add warmth. Decide if you want open shelves or closed sections. Sketch a rough design on paper. Keep it simple for easy building.
Choosing Dimensions
Choose shelf height based on what you will store. Books need more height than small decor items. Shelf depth should fit your items but not stick out too much. Pipe diameter affects strength and look. Balance size and sturdiness carefully.
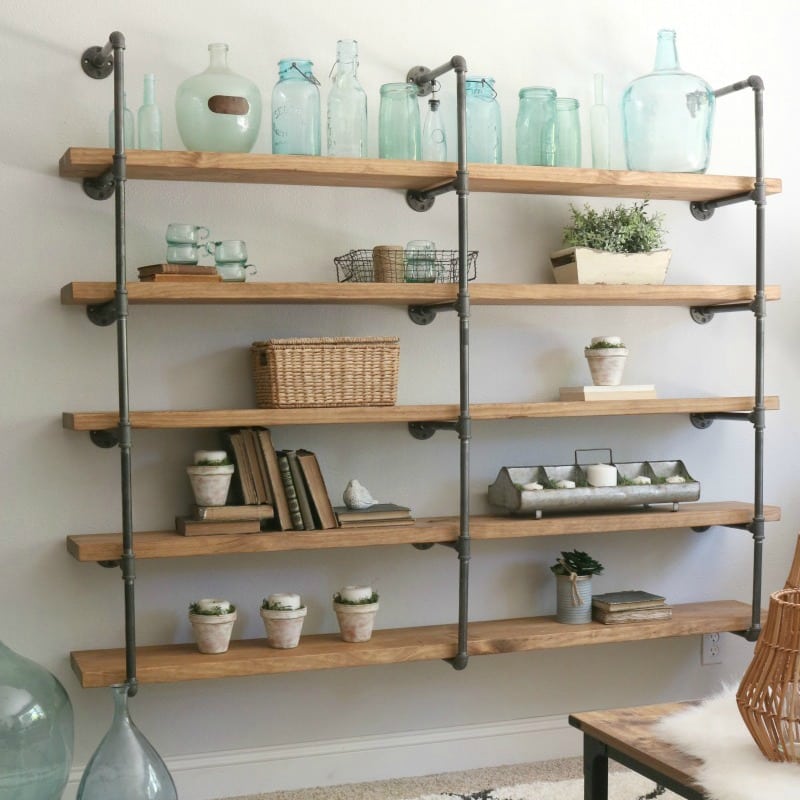
Credit: thedesigntwins.com
Planning Your Bookshelf
Preparing the pipes is an important step in building a sturdy bookshelf. This process ensures your pipes fit perfectly and look neat. Proper preparation helps the pipes last longer and hold the shelves securely.
Cutting Pipes To Size
Measure the length needed for each pipe carefully. Use a tape measure for accuracy. Mark the pipes clearly with a marker or tape. Cut the pipes using a pipe cutter or hacksaw. Cut slowly to avoid rough edges and bends. Check each pipe after cutting to confirm the length.
Cleaning And Finishing
Remove dirt and rust from the pipes before assembly. Use a wire brush or sandpaper for cleaning. Wipe the pipes with a damp cloth to clear dust. Apply a coat of metal primer for better paint adhesion. Paint the pipes with a rust-resistant spray paint. Let the paint dry completely before use.
Preparing The Pipes
Cutting and preparing wood is a key step in building a sturdy bookshelf out of pipes. The wood must be measured and cut precisely to fit the frame. Proper preparation ensures smooth edges and a clean finish. This process affects both the look and strength of your shelf.
Start by measuring and marking the wood carefully. Then, smooth the surfaces by sanding and apply a finish to protect the wood. These steps help the wood last longer and look better.
Measuring And Marking
Measure the wood pieces according to your design. Use a tape measure for accuracy. Mark the cut lines with a pencil. Double-check the measurements before cutting. Clear and straight marks make cutting easier. This step prevents mistakes and wasted wood.
Sanding And Finishing
Sand the wood to remove rough edges and splinters. Start with coarse sandpaper, then use finer grit for smoothness. Sand along the grain for best results. After sanding, wipe off dust with a cloth. Apply a finish like paint, stain, or sealant. This protects the wood and gives a polished look.
Cutting And Preparing Wood
Assembling the frame is the first step to build your pipe bookshelf. It creates the strong base that will hold the shelves and books. A well-built frame keeps the entire structure steady and safe to use. Follow each step carefully for a solid frame.
Connecting Pipes And Fittings
Start by gathering all pipes and fittings needed for the frame. Use black iron pipes for a sturdy look. Screw the pipes tightly into the fittings. Use a pipe wrench for a secure hold. Make sure each connection fits flush to avoid wobbling. Assemble the vertical and horizontal parts first. Check alignment before tightening fully. This helps keep the frame square and balanced.
Securing Stability
Stability is key to prevent your bookshelf from tipping. Attach flanges at the base of each vertical pipe. Screw the flanges firmly into the floor or wall. Use anchors if mounting on drywall for extra support. Add cross braces between vertical pipes if needed. This increases strength and reduces sway. Test the frame by gently shaking it. Tighten any loose joints to ensure firmness.
Assembling The Frame
Attaching shelves to the pipe frame is a key step in building your bookshelf. It makes sure the wood boards stay strong and steady. This part needs care and focus to keep the structure safe and useful. Follow simple steps to place the shelves right and fix them firmly.
Positioning Wood Boards
Start by placing the wood boards on the pipe frame. Check the frame’s width and length to match the boards perfectly. Lay each board flat across the pipes. Make sure the boards are even and straight. Leave equal space between shelves for a neat look. Adjust the boards until they sit well without wobbling.
Fixing Shelves To Frame
Use screws or brackets to fix the wood boards to the pipes. Hold the board firmly and mark where the screws will go. Drill holes in the wood at the marks. Attach brackets if needed for extra support. Screw the boards tightly to stop any movement. Double-check all shelves are secure before adding books.
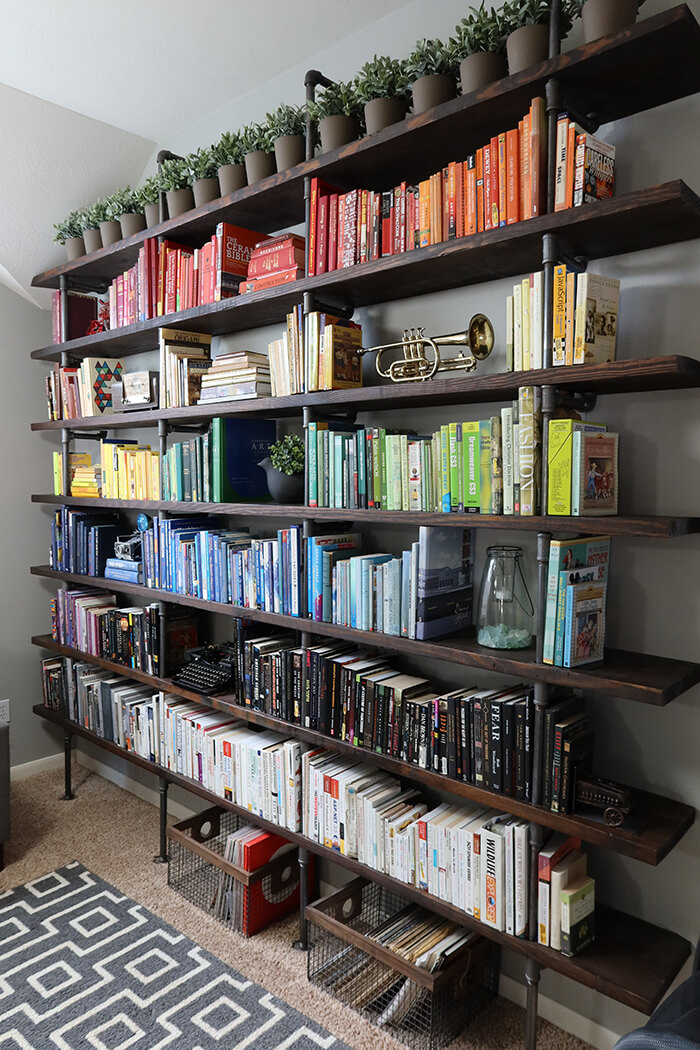
Credit: grayhousestudio.com
Attaching Shelves
Finishing touches make your pipe bookshelf look complete and last longer. These final steps protect the wood and pipes. They also improve the shelf’s style and feel. Focus on painting or staining the wood and adding protective coatings to the entire piece.
Painting Or Staining
Painting adds color and personality to the wood shelves. Choose paint that fits your room’s style. Use a brush or spray paint for smooth coverage. Staining brings out the wood’s natural grain. It gives a warm and classic look. Apply stain evenly with a cloth or brush. Let paint or stain dry fully before the next step.
Adding Protective Coatings
Protective coatings guard against scratches and spills. Use clear varnish or polyurethane for strong protection. These coatings keep wood looking fresh longer. Apply one or two thin layers with a brush. Let each layer dry before adding the next. Coatings also help protect metal pipes from rust. A clear sealant works well on pipes. This step ensures your bookshelf stays beautiful and durable.
Finishing Touches
Small details make a big difference in your pipe bookshelf. Tighten all connections and check for stability. A smooth finish on pipes and shelves gives a neat, polished look.
Handling Tools Safely
Always wear safety glasses to protect your eyes from dust and debris. Use gloves to avoid cuts and scrapes. Keep your workspace clean and well-lit. Follow the tool instructions carefully to prevent accidents. Never rush while using power tools. Keep your fingers clear of moving parts. Unplug tools when not in use. Store sharp tools safely to avoid injuries.
Ensuring Structural Support
Check all pipe connections tightly before starting. Use a level to keep shelves straight and balanced. Make sure pipes fit securely to avoid wobbling. Use anchors if attaching the bookshelf to a wall. Test the shelf with light weights first. Gradually add heavier items to check stability. Avoid overloading shelves beyond their capacity. Regularly inspect the bookshelf for loose parts or damage.
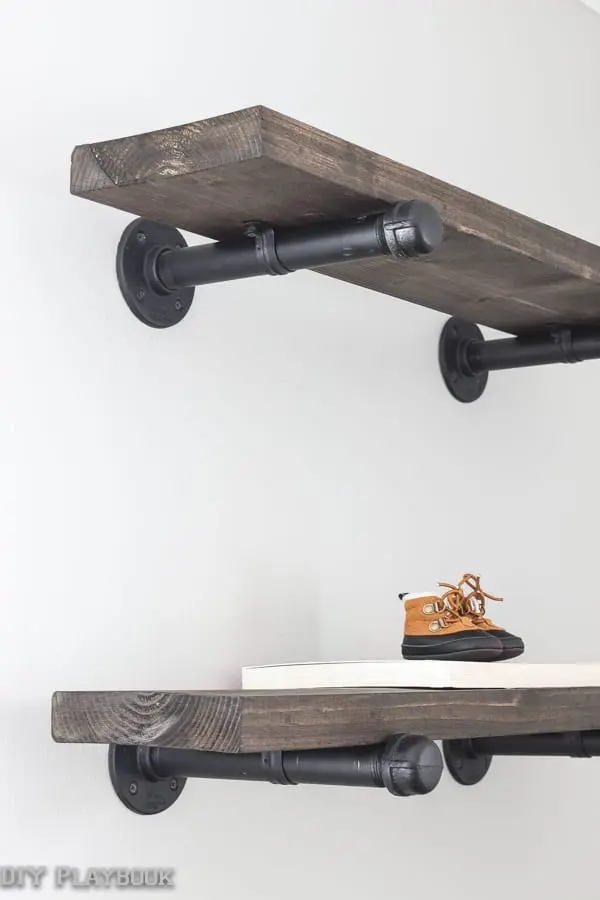
Credit: thediyplaybook.com
Frequently Asked Questions
What Materials Are Needed To Build A Pipe Bookshelf?
You need metal pipes, flanges, connectors, wooden boards, screws, and a drill. These materials create a sturdy, industrial-style bookshelf. Choose durable pipes and quality wood for best results. Proper tools ensure easy assembly and a professional finish.
How Do I Measure Space For A Pipe Bookshelf?
Measure the wall width, height, and depth where you want the bookshelf. Consider pipe and board thickness for accurate dimensions. Plan shelf spacing based on book sizes. Precise measurements prevent fitting issues and improve stability.
Can I Customize The Size Of My Pipe Bookshelf?
Yes, pipe bookshelves are highly customizable. Adjust pipe length and wood size to fit your space. You can add or remove shelves as needed. Customization allows you to create a unique, functional design tailored to your needs.
How To Assemble Pipes And Wood For The Bookshelf?
First, attach flanges to the wall and pipes. Connect pipes with fittings to form the frame. Place wooden boards on pipe supports and secure with screws. Follow your design plan carefully for a strong, balanced bookshelf.
Conclusion
Building a bookshelf out of pipes is a fun and practical project. It adds a unique look to any room. You only need a few tools and materials. The steps are simple and easy to follow. This project lets you create storage that fits your style.
You can customize the size and shape as you like. Plus, it saves money compared to buying furniture. Try this project to enjoy both function and design. A handmade bookshelf brings charm and personality to your space. Give it a try and see how satisfying it feels.