Are you ready to create your own bookshelf speaker box that sounds amazing and fits perfectly in your space? Building a speaker box yourself lets you control the quality, size, and style—plus, it’s a rewarding project you’ll be proud of.
Whether you want better sound for your music or a unique setup for your home, this guide will walk you through each step clearly and simply. By the end, you’ll have the skills to build a custom speaker box that delivers great sound and looks fantastic.
Let’s get started!

Credit: everestkitchennc.com
Materials And Tools Needed
Building a bookshelf speaker box requires the right materials and tools. This step ensures your project is strong and sounds good. Choosing quality wood and parts affects the final result. Having the correct tools makes the build easier and more accurate.
Essential Wood Types
Use medium-density fiberboard (MDF) or plywood for speaker boxes. MDF is dense and smooth, which helps reduce sound vibrations. Plywood is lighter and strong but may need sealing. Avoid softwoods like pine because they can warp or crack. Pick wood that is easy to cut and shape.
Required Tools
Basic tools include a saw, drill, and screwdriver. A jigsaw or circular saw cuts the wood pieces precisely. A drill makes holes for screws and speaker wires. Sandpaper smooths rough edges and surfaces. Clamps hold pieces steady while gluing or screwing. A measuring tape and pencil help with accurate cuts.
Speaker Components
You need speaker drivers, crossovers, and wiring. Drivers are the speaker parts that produce sound. Tweeters handle high frequencies, woofers handle lows. Crossovers split the sound signals to the right driver. Use quality wires for clear sound and safe connections. Also, get speaker terminals to connect cables outside the box.
Credit: projectgallery.parts-express.com
Planning Your Bookshelf Speaker
Planning your bookshelf speaker is the first step to building a great sound system. Careful thought helps create a speaker box that sounds clear and fits your space well. This stage sets the foundation for a successful project and enjoyable listening experience.
Choosing The Right Dimensions
Start by deciding the size of your speaker box. The dimensions affect sound quality and fit in your room. Measure the space where you want to place the speaker. Keep the box small enough to fit but large enough for good sound. Typical bookshelf speakers range from 10 to 15 inches tall and 6 to 9 inches wide. Use these sizes as a guide to balance sound and space.
Designing The Speaker Box
Choose a box shape that supports good sound. A simple rectangular box works well for beginners. Think about the type of wood or material to use. MDF or plywood are popular for strong, smooth surfaces. Make sure the box is sealed tightly to avoid air leaks. Add internal bracing to reduce vibrations and improve sound clarity. Plan for speaker placement on the front panel, keeping space for wires and ports.
Selecting Crossover Components
The crossover splits sound frequencies between the woofer and tweeter. Choose quality components like capacitors and inductors for smooth sound. Match the crossover to your drivers’ specifications for best results. Simple two-way crossovers work well for bookshelf speakers. Test different values to find the right balance between bass and treble. This step improves overall sound and speaker performance.
Cutting And Preparing Wood Panels
Cutting and preparing wood panels is a key step in building a bookshelf speaker box. Precise cuts ensure the box fits well and sounds great. Taking time here makes assembly easier and the final product stronger.
Choosing the right wood and measuring carefully helps avoid mistakes. Smooth edges prevent damage and improve the look. This section covers measuring, cutting, and finishing wood panels for your project.
Measuring And Marking
Start by measuring your wood panels accurately. Use a tape measure and a pencil for clear marks. Mark all cut lines before starting to cut. Double-check measurements to avoid errors. Mark both sides of the wood for better guidance.
Safe Cutting Techniques
Use a sharp saw for clean cuts. Clamp the wood to keep it steady while cutting. Wear safety glasses to protect your eyes. Cut slowly and follow the marked lines closely. Keep fingers away from the blade at all times.
Sanding And Finishing Edges
Smooth all cut edges with sandpaper. Start with coarse grit, then use fine grit for a soft finish. Check for splinters and rough spots carefully. Sanding helps the panels fit better and look neat. Clean dust off before assembling the box.

Credit: www.arylic.com
Assembling The Speaker Box
Building a bookshelf speaker box starts with careful assembly. This step is key for strong, clear sound. Each part must fit well and hold tight. The right assembly creates a solid box that keeps sound inside. Follow these simple steps to put your speaker box together.
Joining Panels
Begin by aligning the side, top, and bottom panels. Use wood glue on the edges for a strong bond. Clamp the panels firmly to hold them as the glue dries. For extra strength, screw the panels together at the edges. Make sure the corners are square. This keeps the box even and stable.
Sealing Joints For Airtightness
Seal every joint carefully to stop air leaks. Use silicone or wood sealant along the seams inside the box. Spread the sealant evenly to cover all gaps. Airtight joints improve sound quality by preventing air loss. Check the inside for any small holes and seal them too.
Installing Internal Bracing
Internal bracing reduces vibrations and strengthens the box. Cut braces to fit inside between panels. Attach them with glue and screws. Place braces where the panels meet for best support. This helps keep the speaker box rigid. A firm box means better sound clarity and less distortion.
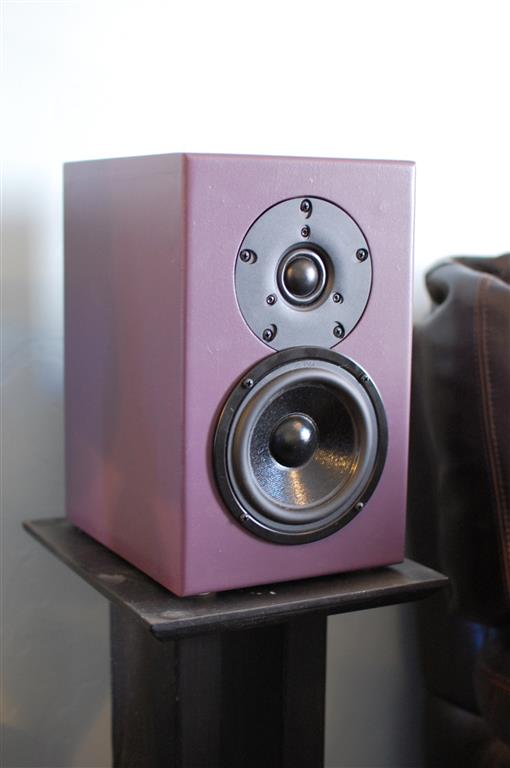
Mounting The Speaker Drivers
Mounting the speaker drivers is a key step in building a bookshelf speaker box. It affects sound quality and speaker durability. Proper mounting ensures clear sound and prevents damage to the drivers.
This part involves placing tweeters and woofers correctly, wiring them, and securing them firmly. Each step must be done carefully for the best results.
Positioning Tweeters And Woofers
Place the tweeter near the top of the box. This helps high frequencies travel better. The woofer should be below the tweeter. It handles low and mid frequencies. Keep some space between them to avoid sound overlap. Align drivers so sound waves blend smoothly. This setup improves sound clarity and balance.
Wiring The Speakers
Use good quality speaker wire for wiring. Connect the positive terminal of the amplifier to the driver’s positive terminal. Do the same for the negative terminals. Avoid crossing wires to prevent short circuits. Check all connections are tight and secure. Proper wiring stops sound distortion and loss.
Securing Drivers To The Box
Place each driver in its cutout hole. Use screws or bolts to fix them firmly. Tighten screws evenly to avoid warping the driver frame. Add a gasket or foam strip between driver and box. This prevents air leaks and vibration noise. Secure drivers well to keep sound clear and strong.
Finishing Touches
Finishing touches bring your bookshelf speaker box to life. They protect the wood and improve its look. Careful finishing also helps your speaker last longer and sound better. These final steps make a big difference in the overall quality.
Applying Paint Or Veneer
Start by sanding the surface smooth. Remove all dust with a clean cloth. Choose paint or veneer based on your style. Use even strokes when painting to avoid drips. Let the paint dry fully before handling. If using veneer, apply glue evenly and press it down firmly. Trim any excess veneer with a sharp blade. Finish with a clear sealant to protect the surface.
Adding Speaker Grills
Speaker grills protect the drivers from dust and damage. Select grills that match your speaker size. Attach the grills with screws or magnets for easy removal. Make sure the grills fit tightly but do not block sound. Test the speaker sound with grills on to confirm clarity.
Final Quality Checks
Inspect all joints and edges for gaps or rough spots. Test the speaker by playing different music types. Listen for any rattles or distortions. Tighten screws or adjust parts as needed. Clean the surface to remove fingerprints or dust. Your bookshelf speaker box is ready to use.
Testing And Tuning
Testing and tuning your bookshelf speaker box is important to get the best sound. This process helps find any problems and fix them. It also makes sure the speakers sound clear and balanced. The steps include checking the initial sound, adjusting crossover settings, and finding the best placement.
Initial Sound Testing
Start by playing different types of music or sounds. Listen for any buzzing, rattling, or distortion. Check if the bass, midrange, and treble sound clear. Test the speaker at low and high volumes. This helps spot any weak points in the speaker design or build.
Adjusting Crossover Settings
The crossover controls which frequencies each speaker driver plays. Adjust it to balance bass and treble sounds. Use a small screwdriver or knob if your crossover is adjustable. Change settings slowly and listen carefully. This step improves sound clarity and prevents overlap between drivers.
Optimizing Placement For Best Sound
Place the speaker box in different spots in the room. Try near a wall, in a corner, or on a shelf. Listen to how sound changes with each position. Move the speaker slightly forward, backward, or sideways. Proper placement enhances bass response and overall sound quality.
Frequently Asked Questions
What Materials Are Best For Bookshelf Speaker Boxes?
Plywood and MDF are ideal materials for bookshelf speaker boxes. They offer durability, excellent sound insulation, and ease of cutting. Choose ¾-inch thickness for optimal strength and acoustic performance. Avoid particleboard as it’s less sturdy and can degrade sound quality.
How Do I Calculate The Speaker Box Volume?
Measure your speaker’s recommended internal volume from the manual or online specs. Use this volume to design your box dimensions, ensuring enough space for proper sound resonance. Accurate volume ensures better bass response and overall sound clarity.
Should I Seal The Speaker Box Airtight?
Yes, sealing the box airtight is crucial. It prevents air leaks that distort sound quality and reduce bass efficiency. Use wood glue and silicone sealant on all joints for an airtight enclosure.
What Tools Do I Need To Build A Speaker Box?
Essential tools include a saw (circular or jigsaw), drill, screwdriver, measuring tape, clamps, and sandpaper. These tools help cut, assemble, and finish the box accurately and cleanly.
Conclusion
Building a bookshelf speaker box is a fun and rewarding project. You can enjoy better sound and a personal touch in your room. Follow the steps carefully, measure twice, and take your time. Using the right materials helps create a strong and clear-sounding speaker.
With patience, you will have a great speaker box to show off. Start small, learn as you go, and enjoy your new audio experience. Simple tools and effort bring big results. Give it a try and hear the difference yourself.