
Are you tired of cluttered spaces and looking for a way to showcase your favorite books and treasures? Building a built-in bookshelf might be the perfect solution for you.
Imagine having a stylish, sturdy shelf that fits perfectly in your room, adding both storage and charm. In this guide, you’ll discover simple steps to create a bookshelf that feels like it was made just for your home. Whether you’re a beginner or have some DIY experience, you’ll find tips that make the process easy and rewarding.
Ready to transform your space and impress everyone with your craftsmanship? Let’s get started!

Credit: southernyankeediy.com
Planning Your Bookshelf
Planning your built-in bookshelf is the first step to a successful project. A well-thought plan saves time and avoids mistakes. It helps you create a bookshelf that fits your space perfectly. This section guides you through key points to plan your bookshelf effectively.
Choosing The Right Location
Pick a spot with enough wall space and good lighting. Avoid areas with moisture or direct sunlight. Think about how you use the room. The bookshelf should be easy to reach and blend with the room’s style. Check for electrical outlets or switches that could block the shelf.
Measuring The Space
Measure the height, width, and depth of the wall carefully. Use a tape measure and write down each dimension. Note any obstacles like baseboards or trim. Measure twice to avoid errors. These numbers guide your shelf size and shape. Plan shelf heights based on the books or items you want to store.
Selecting Materials And Tools
Choose materials that match your room’s look and budget. Common options include plywood, MDF, or solid wood. Think about durability and finish. Gather tools like a saw, drill, level, and screws. Make sure you have safety gear such as goggles and gloves. Proper materials and tools make the build easier and stronger.
Designing The Bookshelf
Designing the bookshelf is the first step to building a great built-in. This step sets the foundation for the entire project. Planning carefully saves time and materials later. Good design fits your space and needs perfectly.
Sketching The Layout
Start by drawing a simple sketch of your bookshelf. Use graph paper or a digital tool for accuracy. Mark the wall space where the shelf will go. Include windows, doors, and outlets in your sketch. This helps avoid surprises during construction. Sketching shows how the bookshelf will fit in the room.
Deciding Shelf Dimensions
Choose the height, width, and depth of each shelf. Consider the size of books and objects you will store. Standard shelf depth is usually 10 to 12 inches. Adjust shelf height to fit tall or short items. Keep enough space between shelves for easy access and display. Proper dimensions make your bookshelf functional and neat.
Incorporating Style Elements
Think about the style that matches your room’s decor. Choose between modern, classic, or rustic looks. Add moldings, trim, or lighting to enhance appearance. Select paint or stain colors that blend well with walls and furniture. Style elements give your built-in shelf a unique character. This makes the bookshelf a beautiful part of your home.
Preparing The Area
Preparing the area is the first step to building a built-in bookshelf. This step helps create a safe and clean workspace. It also makes the building process smoother and faster. Taking time to prepare means fewer problems later.
Clearing The Space
Remove all furniture and items from the area. This frees up enough room to work comfortably. Clear the floor and walls near the planned bookshelf. A clean space reduces the chance of accidents. It also helps you move tools and materials easily.
Protecting Surrounding Surfaces
Cover floors with drop cloths or old sheets. Tape plastic or paper to walls near the work area. Protect surfaces from dust, paint, and scratches. Use painter’s tape to secure coverings in place. Keeping surfaces safe saves time on cleaning later.
Gathering Supplies
Collect all tools and materials before starting work. Include wood, screws, nails, a drill, level, measuring tape, and paint. Having everything ready prevents interruptions during building. Organize supplies within easy reach for better efficiency. This preparation helps the project go smoothly.

Credit: southernyankeediy.com
Building The Frame
Building the frame is the first key step in creating a sturdy built-in bookshelf. The frame acts as the skeleton, supporting the shelves and holding everything together. Taking your time to build a strong frame ensures the bookshelf will last for years. Follow each step carefully for the best results.
Cutting The Lumber
Start by measuring the space where the bookshelf will go. Mark the lumber according to these measurements. Use a saw to cut the wood pieces straight and to size. Cut the vertical sides and horizontal shelves separately. Double-check each piece after cutting to avoid mistakes.
Assembling The Frame
Lay the cut pieces flat on the ground. Join the vertical sides to the horizontal shelves using wood screws. Use a drill to make pilot holes first. This stops the wood from splitting. Make sure the frame is square by measuring the diagonals. Adjust if needed before tightening the screws fully.
Securing The Frame To The Wall
Place the frame inside the wall space. Use a level to check it is straight and even. Find the wall studs with a stud finder. Screw the frame into the studs for strong support. Add extra screws at the top and bottom for stability. This keeps the bookshelf firm and safe.
Adding Shelves
Adding shelves is an important step in building a built-in bookshelf. Shelves hold your books and decorations. Proper shelves make the bookshelf strong and look neat. This part explains how to measure, support, and attach shelves.
Measuring And Cutting Shelves
Start by measuring the width and depth of your bookshelf space. Use a tape measure for accuracy. Mark the measurements on your shelf wood. Cut the shelves with a saw, following the marks carefully. Smooth the edges with sandpaper to avoid splinters.
Installing Shelf Supports
Shelf supports hold the shelves in place. Choose the type of supports you want. Common options include brackets, pins, or cleats. Measure and mark where the supports will go inside the bookshelf. Use a level to keep the supports straight. Attach the supports securely with screws.
Attaching The Shelves
Place each shelf on its supports. Check that the shelf fits well and sits level. Use screws or nails to fix the shelves to the supports. This step adds extra strength. Double-check stability by pressing lightly on the shelves. Adjust if any shelf feels loose.
Credit: gagemadehome.com
Finishing Touches
Finishing touches bring your built-in bookshelf to life. They make the piece look polished and complete. This final step enhances both beauty and durability. Focus on smooth surfaces, color, and neat details. These small efforts give a professional look to your project.
Sanding And Smoothing
Start by sanding all wood surfaces. Use fine-grit sandpaper for a soft finish. Sand edges and corners carefully. This removes rough spots and splinters. Wipe dust off with a clean cloth. Smooth wood helps paint or stain stick well.
Painting Or Staining
Choose paint or stain based on your room style. Use a brush or roller for even coverage. Apply thin coats and let each dry fully. Stain shows wood grain and adds warmth. Paint offers color and hides imperfections. Finish with a clear sealant for protection.
Installing Trim And Molding
Add trim and molding for a refined look. Cut pieces to fit shelves and edges exactly. Attach with nails or strong glue. Fill nail holes with wood filler. Sand lightly after drying. Trim frames the bookshelf and blends it with the room.
Maintaining Your Bookshelf
Maintaining your built-in bookshelf keeps it looking great and lasting longer. Regular care protects the wood and finish. Small actions can prevent big problems over time. Follow these easy tips to keep your bookshelf neat and sturdy.
Regular Cleaning Tips
Dust your bookshelf at least once a week. Use a soft cloth or microfiber duster. Avoid wet or rough cloths that can scratch the surface. Clean books and shelves gently to remove dirt. A vacuum with a brush attachment helps reach corners. For stubborn spots, use a damp cloth with mild soap. Dry the shelf immediately to stop moisture damage.
Preventing Damage
Place your bookshelf away from direct sunlight. Sunlight fades the wood and paint over time. Keep it away from heaters or damp areas. Heat and moisture cause warping and cracking. Use coasters under plants or decorations to avoid water rings. Avoid overloading shelves with heavy items. Distribute weight evenly to prevent sagging. Check screws and brackets yearly to keep it stable.
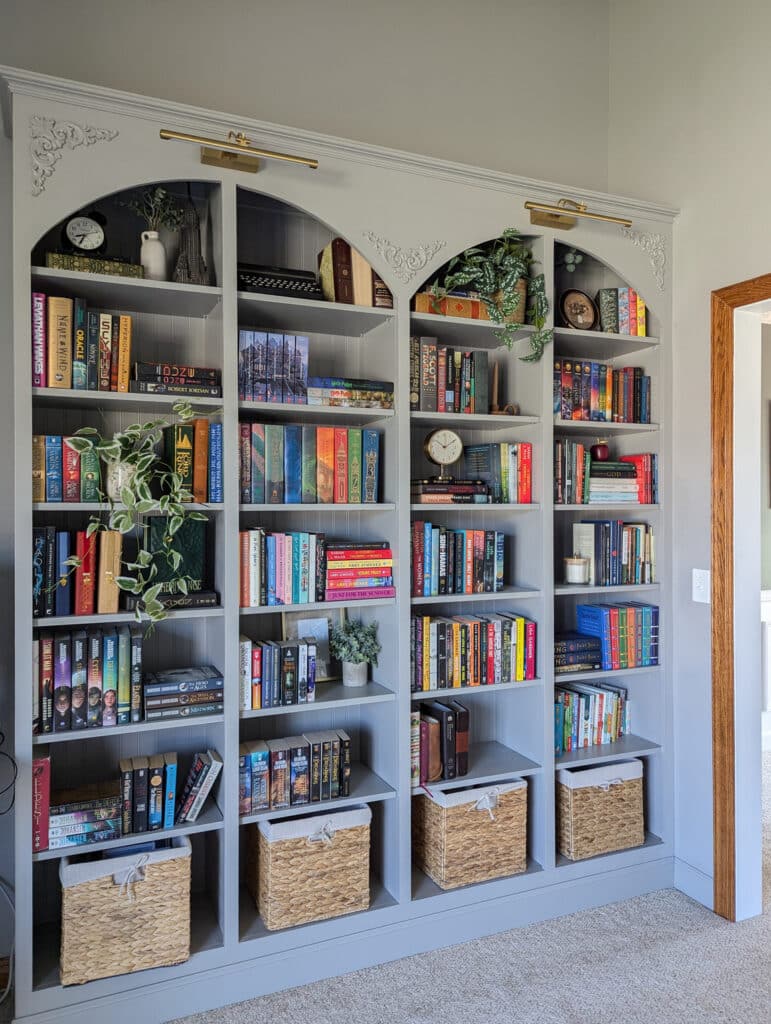
Updating The Look
Change the style by painting or staining the shelf. Choose light colors to brighten a room. Dark colors add a classic, cozy feel. Replace old hardware like knobs or handles. Add LED strip lights for a modern touch. Rearrange books and decorations for a fresh look. Use baskets or boxes to organize smaller items. Small changes keep your bookshelf interesting and stylish.
Frequently Asked Questions
What Tools Are Needed To Build A Built-in Bookshelf?
You need a saw, drill, level, measuring tape, screws, wood glue, and clamps. These tools ensure precise cuts and secure assembly for a sturdy bookshelf.
How Do I Measure Space For A Built-in Bookshelf?
Measure the width, height, and depth of the intended wall space. Accurate measurements help create a perfect fit for your built-in bookshelf.
Which Wood Is Best For Built-in Bookshelves?
Plywood and hardwood like oak or maple are ideal. They offer durability and a smooth finish suitable for built-in shelves.
How Long Does It Take To Build A Built-in Bookshelf?
It typically takes 1-3 days depending on size and complexity. Proper planning and tools speed up the building process.
Conclusion
Building a built-in bookshelf adds charm and storage to any room. It fits your space perfectly and shows your style. The process takes time but feels rewarding. You only need basic tools and careful measuring. Start simple, and adjust as you go.
Enjoy your new bookshelf filled with books and memories. A little effort brings big changes to your home. Why wait? Create your built-in bookshelf today.

