
Looking to add a unique touch to your space while keeping your books organized? Building a triangle bookshelf might be just what you need.
It’s a stylish, eye-catching piece that’s surprisingly simple to create with the right steps. In this guide, you’ll discover how to turn basic materials into a striking bookshelf that fits perfectly in any room. Ready to impress your friends and enjoy your favorite reads in a whole new way?
Keep reading, and let’s get started on your very own triangle bookshelf.
Materials And Tools
Building a triangle bookshelf needs the right materials and tools. Choosing good materials and having proper tools makes the project easier. Safety is also important. Prepare everything before starting to work.
Wood Selection
Pick wood that is strong and smooth. Pine, oak, or plywood work well. Pine is easy to cut and affordable. Oak is harder and lasts longer. Plywood is stable and less likely to warp. Choose wood thick enough to hold weight, about 3/4 inch.
Required Tools
Gather tools for cutting, measuring, and assembling. A saw is necessary for cutting wood pieces. Use a tape measure for accurate dimensions. A drill helps to make holes and drive screws. Sandpaper or a sander smooths rough edges. A square tool keeps corners straight.
Safety Gear
Protect yourself with safety gear. Wear safety glasses to guard your eyes. Use ear protection if power tools are loud. Gloves protect your hands from splinters. Wear a dust mask to avoid breathing sawdust. Safety first. Always be careful while working.

Credit: ispydiy.com
Design And Measurements
Design and measurements form the base of your triangle bookshelf project. Accurate design ensures the shelves fit well and look good. Measurements guide each step, from cutting to assembly. Taking time to plan saves effort later. Focus on size, marking, and angles to build a strong shelf.
Choosing The Size
Decide how tall and wide the bookshelf should be. Think about the space where it will stand. Smaller shelves work well for desks or corners. Larger shelves hold more books and decor. Keep proportions balanced to keep the triangle shape clear and stable.
Marking The Wood
Use a pencil and ruler to mark all pieces on the wood. Mark the triangle’s sides and shelf positions clearly. Double-check each line before cutting. Precise marks help avoid mistakes and waste. Label each part to keep track during assembly.
Cutting Angles
Cutting the triangle’s angles correctly is key. Use a miter saw or handsaw with an angle guide. The triangle corners need exact 60-degree cuts for a perfect fit. Cut slowly and check each piece after cutting. Smooth edges with sandpaper for safety and finish.
Cutting The Pieces
Cutting the pieces for your triangle bookshelf is the first step toward bringing your project to life. Careful cutting ensures the shelves fit perfectly and the bookshelf looks neat. This step requires patience and attention to detail. Follow these tips to get clean, accurate cuts that will make assembly easier.
Measuring Twice
Always measure your wood pieces twice before cutting. Use a tape measure and mark the lines clearly. Double-check the measurements to avoid mistakes. Precise measurements save time and materials. Remember, once cut, wood cannot be put back.
Using The Saw
Choose the right saw for your cuts. A circular saw or miter saw works well for straight lines. Keep the wood steady and cut slowly. Follow the marked lines carefully. Wear safety gear like goggles and gloves while cutting. Clean cuts help the pieces fit together smoothly.
Sanding Edges
After cutting, sand all edges to remove splinters. Use medium-grit sandpaper first, then fine-grit for a smooth finish. Smooth edges prevent injuries and improve the look of your bookshelf. Take your time sanding corners and edges evenly.
Assembling The Frame
Assembling the frame is the key step in building your triangle bookshelf. This part forms the strong base and shape. Take your time to align the pieces carefully. A solid frame means a sturdy bookshelf.
Joining The Sides
Start by placing the side panels on a flat surface. Hold two sides together to form the triangle shape. Use clamps to keep them steady. Make sure the edges meet evenly. This helps the frame stay balanced.
Securing With Screws
Next, drill pilot holes through the edges to avoid splitting the wood. Insert screws to join the sides firmly. Tighten screws evenly to keep the frame tight. Use screws that are the right length for your wood.
Checking Angles
Check all angles with a carpenter’s square or protractor. The triangle corners should be exactly 60 degrees. Adjust screws if the angles are off. Perfect angles ensure your bookshelf looks neat and fits well.
Adding Shelves
Adding shelves to your triangle bookshelf is an important step. Shelves create space for books and decorations. Properly spaced and secured shelves make the bookshelf strong and useful. This section guides you through measuring, supporting, and fixing shelves easily.
Measuring Shelf Spacing
Start by deciding how many shelves you want. Think about the height of your books or items. Measure the inside height of the triangle frame. Divide this height by the number of shelves plus one. This gives even spacing for each shelf. Mark these points inside the frame with a pencil. Double-check measurements to avoid mistakes. Correct spacing keeps your bookshelf balanced and practical.
Attaching Shelf Supports
Choose strong supports to hold each shelf. Small wooden cleats or metal brackets work well. Cut supports to fit the width of each shelf. Attach supports at the marks you made earlier. Use screws and a drill for a tight hold. Make sure supports are level and straight. Proper supports stop shelves from sagging or falling.
Fixing The Shelves
Cut your shelves to the right size before fixing. Sand the edges to avoid splinters. Place each shelf on its supports carefully. Secure shelves using screws from underneath or brackets. Check each shelf is level and steady. Tighten screws if shelves feel loose. Fixed shelves give your bookshelf strength and style.
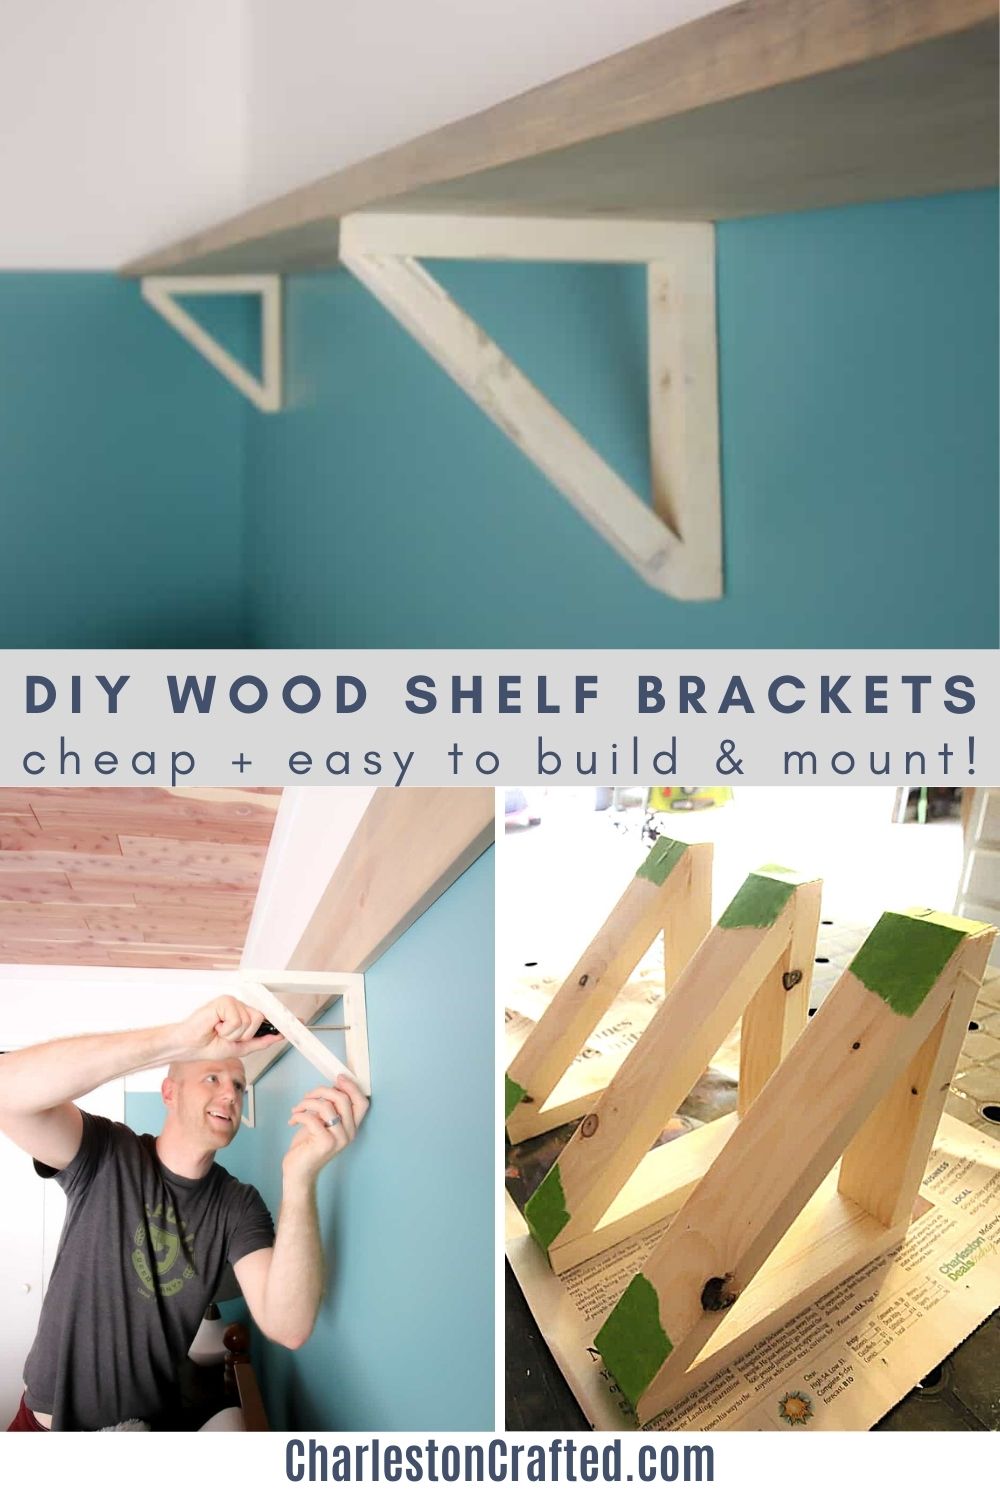
Credit: www.charlestoncrafted.com
Finishing Touches
Finishing touches make your triangle bookshelf look polished and last longer. These final steps improve its appearance and protect the wood. A well-finished shelf feels smooth and looks neat.
Filling Holes And Gaps
Check the shelf for small holes or gaps. Use wood filler to cover these spots. Apply it with a putty knife and smooth the surface. Let it dry fully before sanding. This step helps create a flawless finish.
Painting Or Staining
Choose paint or stain based on your style preference. Paint offers bright, solid colors. Stain shows the wood’s natural grain. Apply evenly with a brush or cloth. Work in thin coats for the best results. Allow each coat to dry well.
Sealing For Durability
Seal your shelf to protect it from damage. Use a clear polyurethane or varnish. This layer guards against water, scratches, and dirt. Brush it on smoothly, covering all surfaces. Let it dry completely before use. Sealing keeps your bookshelf strong and beautiful.
Placement And Styling
Placement and styling are key to making your triangle bookshelf stand out. Proper placement ensures it fits well in your room. Styling adds personality and charm to the space.
Think about how the shelf complements the room’s layout. The right spot highlights the bookshelf’s unique shape. Styling turns it from a simple storage unit into a decorative piece.
Best Spots For Display
Place the triangle bookshelf near a window for natural light. Corners make great spots to save space and add interest. Use empty wall space to create a floating effect. Avoid placing it where it blocks walkways or doors.
Decorating Your Shelf
Mix books with small plants for a fresh look. Use colorful items to brighten the shelf. Keep some space empty to avoid clutter. Add personal touches like photos or souvenirs. Balance heavy and light objects for a neat style.
Maintenance Tips
Dust the shelf regularly to keep it clean. Wipe with a damp cloth for tougher stains. Check screws and joints to keep it sturdy. Avoid placing heavy items that can damage the shelf. Keep it away from direct sunlight to prevent fading.

Credit: www.instructables.com
Frequently Asked Questions
What Materials Are Needed To Build A Triangle Bookshelf?
You need wood panels, screws, wood glue, sandpaper, paint or stain, a drill, and a saw. Choose durable wood like pine or plywood for stability and a clean finish.
How Long Does It Take To Build A Triangle Bookshelf?
Building a triangle bookshelf typically takes 3 to 5 hours. Time varies based on your experience and the tools you have available.
Can I Customize The Size Of The Triangle Bookshelf?
Yes, you can customize the size to fit your space. Adjust the dimensions of wood panels while maintaining the triangular structure.
What Tools Are Essential For Building This Bookshelf?
Essential tools include a saw, drill, screwdriver, measuring tape, and clamps. These tools help cut, assemble, and secure the bookshelf properly.
Conclusion
Building a triangle bookshelf is simple and rewarding. It fits well in small spaces and adds style to any room. Follow each step carefully and take your time. Use good materials for strong, lasting shelves. Personalize it with paint or decorations.
Enjoy your new bookshelf that holds books and shows creativity. Keep practicing to improve your skills. This project brings joy and a sense of achievement. Why wait? Start building your triangle bookshelf today!