Are you looking to save space and add a fun, cozy spot for your kids or guests? Building a built-in bunk bed might be the perfect solution for your home.
Imagine having a sturdy, custom bed that fits perfectly into your room, giving you more floor space and a unique design that stands out. In this guide, you’ll discover simple steps to create your own built-in bunk bed, even if you’re not a woodworking expert.
Keep reading, and you’ll learn how to make a safe, stylish, and space-saving bed that everyone will love.
Planning Your Bunk Bed
Designing the bed frame is a key step in building a built-in bunk bed. A strong, well-planned frame keeps the bed safe and sturdy. It also shapes the look and feel of the final piece. Careful design saves time and materials during construction.
Think about the room size and how the bunk bed fits in. Plan the frame to suit the space and needs. Start with a clear design before cutting any wood. This reduces mistakes and makes assembly easier.
Sketching The Layout
Begin by drawing the bunk bed layout on paper. Show the top and side views. Mark the position of each part, like the mattress and ladder. Use simple lines and shapes. This helps visualize the design clearly.
Keep the sketch neat. Label important measurements. It guides you during building and avoids confusion. Make changes to the sketch if needed. A good layout leads to a better bed frame.
Deciding On Bed Size And Height
Measure the mattress size before designing the frame. Common sizes include twin or full. Choose the size that fits your space and needs. Set the bed height to allow enough space between bunks.
Consider ceiling height and room layout. Leave space for a child to sit up comfortably on the lower bunk. Also, plan the ladder height for easy climbing. Proper size and height improve comfort and safety.
Incorporating Storage And Safety Features
Think about adding shelves or drawers under the beds. Storage saves room and keeps things tidy. Plan where to place these features in the frame design. Make sure they do not block access or space.
Include guardrails on the top bunk to prevent falls. Use smooth edges and sturdy materials. Secure the ladder firmly to the frame. Safety features protect users and make the bed more reliable.

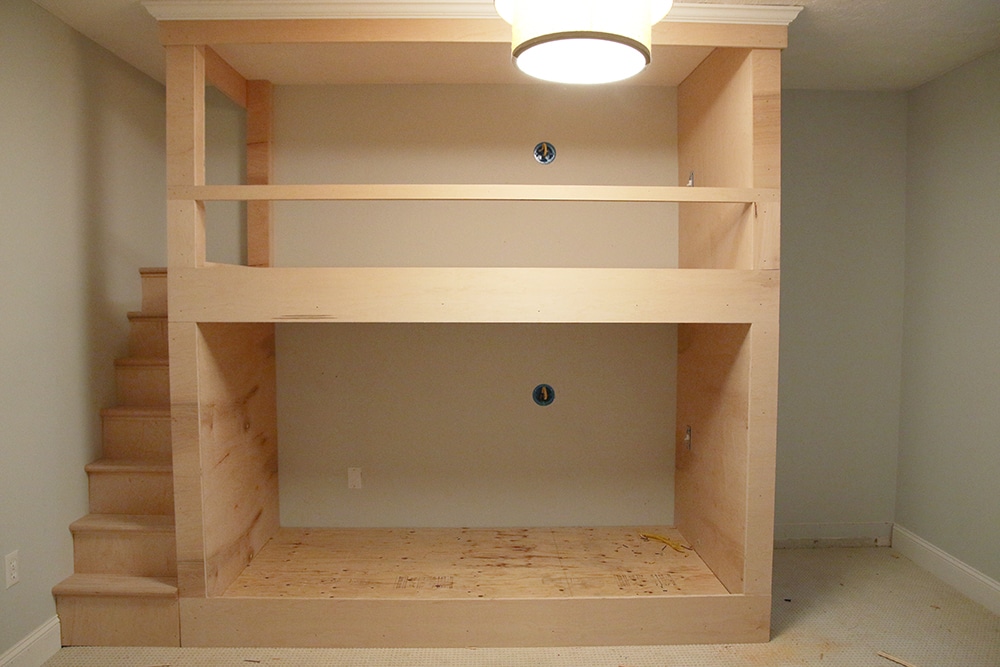
Credit: www.simplyhandmadestudios.com
Designing The Bed Frame
Building the frame is the first step to creating a sturdy built-in bunk bed. This frame supports the entire structure. It must be strong and safe. Using quality wood and precise measurements will help the bed last for years.
Each part of the frame has a specific role. Cutting wood to the right size is crucial. Then, assembling the base and supports creates a solid foundation. Finally, guardrails and a ladder add safety and access.
Cutting Wood To Size
Start by measuring the space where the bunk bed will fit. Write down the length, width, and height. Choose wood that can handle weight well, like pine or oak. Use a saw to cut the wood to the exact sizes needed. Double-check each piece before cutting. This reduces mistakes and waste.
Assembling The Base And Supports
Lay out the cut wood pieces on a flat surface. Connect the longer pieces to form the bed’s base frame. Use screws and wood glue for a strong bond. Add vertical supports at corners and middle points. These supports hold the upper bunk safely. Check that everything is square and level.
Installing Guardrails And Ladder
Attach guardrails along the top bunk’s edges. These prevent falls during sleep. Secure the guardrails with screws deep into the frame. Build a ladder using sturdy wood steps and side rails. Fix the ladder to the bed frame at a comfortable angle. Ensure the ladder is steady and safe to climb.
Building The Frame
Finishing touches make your built-in bunk bed safe and beautiful. They help protect the wood and create a cozy space for sleeping. These final steps complete your project and add comfort and style.
Sanding And Smoothing Surfaces
Start by sanding all wood surfaces with fine-grit sandpaper. This removes rough spots and splinters. Smooth surfaces prevent injuries and help paint or stain stick better. Take your time to sand edges and corners well.
Painting Or Staining
Choose paint or stain to match your room’s style. Paint adds color and protects wood from moisture. Stain shows the natural wood grain and gives a warm look. Apply thin, even coats and let each dry fully before the next.
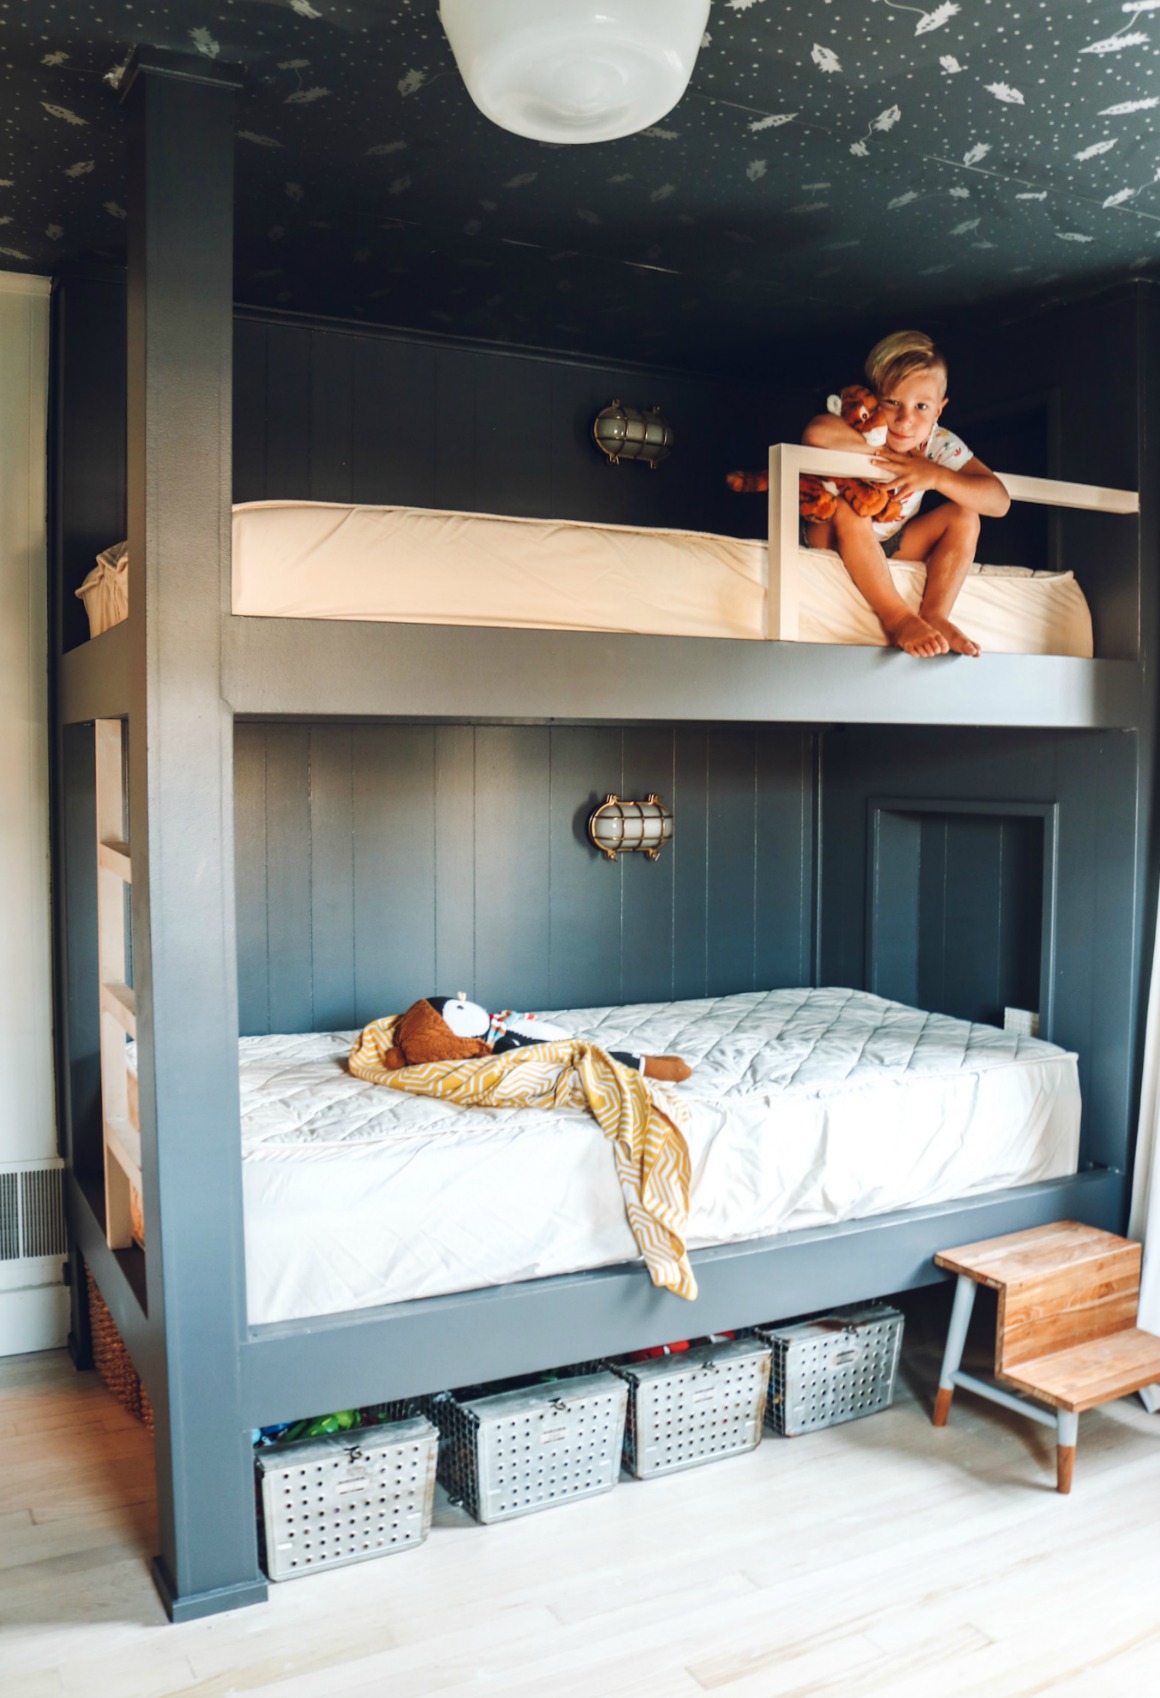
Adding Mattresses And Bedding
Pick mattresses that fit the bunk bed perfectly. Firm and comfortable mattresses support good sleep. Use soft bedding like sheets and blankets for warmth. Add pillows for extra comfort and a finished look.
Credit: chrislovesjulia.com
Finishing Touches
Building a built-in bunk bed is exciting. Safety and durability should be your top priorities. A strong bed keeps kids safe and lasts many years. Use smart steps to make the bed steady and secure. Choose good materials and check the bed often. These tips help you build a bunk bed that stands the test of time.
Securing The Bed To The Wall
Attach the bed frame firmly to the wall. Use strong brackets and screws designed for heavy loads. Find wall studs with a stud finder for the best support. Avoid just using drywall anchors. Secure connections prevent the bed from moving or tipping. Double-check all fasteners after installation. A steady bed means a safer sleep space.
Choosing Sturdy Materials
Select solid wood or high-quality plywood for the frame. Avoid thin or weak boards that can break easily. Use screws instead of nails for stronger joints. Choose non-toxic paint or finish to keep the bed safe for kids. Durable materials hold weight well and resist wear. Good materials keep the bed safe for years.
Regular Maintenance Checks
Inspect the bed regularly for loose screws or cracks. Tighten any loose bolts quickly to keep the bed solid. Look for signs of wear or damage on all parts. Clean the bed to remove dust and dirt that can cause damage. Fix small problems before they grow bigger. Regular care makes the bunk bed last longer and stay safe.
Credit: nestingwithgrace.com
Frequently Asked Questions
What Materials Are Needed To Build A Built-in Bunk Bed?
You will need wood boards, screws, brackets, plywood, paint, and a mattress. Quality materials ensure durability and safety. Proper tools like drills and saws are also essential for precise construction.
How Long Does It Take To Build A Built-in Bunk Bed?
Building a built-in bunk bed typically takes 1 to 3 days. Time depends on your skill level, design complexity, and preparation. Planning ahead helps speed up the process and ensures a smooth build.
Is It Safe To Build A Built-in Bunk Bed Yourself?
Yes, if you follow safety guidelines and use sturdy materials. Ensure all joints are secure and add guardrails. Proper measurements and installation prevent accidents and provide a stable sleeping space.
What Design Styles Work Best For Built-in Bunk Beds?
Modern, rustic, and minimalist styles are popular for built-in bunk beds. Choose a design that fits your room’s decor and maximizes space. Customizing with shelves or desks adds functionality.
Conclusion
Building a built-in bunk bed saves space and adds style to any room. Follow each step carefully to ensure safety and durability. Use quality materials and proper tools for the best results. Take your time and enjoy the process of creating something useful.
A well-made bunk bed can last for years and bring joy to your family. Try this project to make your home more functional and cozy. Simple, smart, and practical.