Are you ready to create a bunk bed that’s not only sturdy but also easy and safe to climb? Building a bunk bed with steps can transform your space and add a fun, practical touch to your room.
Whether you want to save space, give your kids a cool new bed, or just enjoy a rewarding DIY project, this guide will walk you through every step. You’ll discover simple tips and tricks to make the process smooth and enjoyable.
Keep reading, and soon you’ll have a stylish bunk bed that fits your needs perfectly.
Choosing The Right Materials
Choosing the right materials is the first step in building a sturdy bunk bed with steps. The materials must be strong and safe for daily use. Selecting quality wood and tools ensures your project lasts long. Safety gear protects you during the building process.
Selecting Wood Types
Choose wood that is strong and durable. Pine is affordable and easy to work with. Oak or maple are harder and last longer. Avoid soft woods like cedar for the frame. Check for smooth surfaces and no cracks. Wood should be dry to prevent warping.
Essential Tools Needed
You need a saw to cut the wood pieces. A drill helps to make holes and screw parts together. Sandpaper smooths rough edges to avoid splinters. A measuring tape ensures all parts fit correctly. Use clamps to hold pieces steady while working.
Safety Gear To Use
Wear safety goggles to protect your eyes from dust. Use gloves to avoid splinters and cuts. A dust mask stops you from breathing sawdust. Wear closed-toe shoes to protect your feet. Keep your workspace clean and organized for safety.

Credit: www.youtube.com
Planning Your Bunk Bed Design
Planning your bunk bed design is the first step to a successful build. Careful planning saves time and avoids mistakes. It ensures the bed fits the room and is safe to use. Focus on the space, the steps, and a clear plan before starting. This section covers key points to help you plan well.
Measuring Space And Dimensions
Measure the room space where the bunk bed will go. Note the length, width, and height of the area. Leave space for walking and other furniture. Check the ceiling height to avoid a cramped top bunk. Measure the mattress size to match the bed frame. Accurate measurements prevent surprises later.
Designing Steps For Safety
Steps need to be easy to climb and steady. Plan wide steps with a non-slip surface to avoid falls. Make sure the steps are strong and well attached. Consider the height between each step for comfort. Adding a handrail improves safety, especially for children. Safety is a top priority in your design.
Sketching A Simple Blueprint
Draw a basic blueprint of the bunk bed design. Include dimensions, step placement, and support beams. Keep the sketch clear and easy to follow. This visual guide helps during the building process. It also allows changes before cutting any wood. A simple blueprint keeps the project on track.
Cutting And Preparing Wood Pieces
Cutting and preparing wood pieces is the first step to building a strong bunk bed. This process ensures all parts fit perfectly. Precise cutting helps avoid mistakes later. Proper preparation also makes the wood safe to handle. Follow these steps to get the best results.
Marking Cut Lines Accurately
Start by measuring each wood piece carefully. Use a pencil and a ruler to mark cut lines clearly. Double-check measurements before cutting. Straight lines make clean cuts easier. Accurate marking saves time and wood.
Using Power Tools Safely
Wear safety glasses and gloves before using power tools. Keep fingers away from blades and moving parts. Use clamps to hold wood steady. Turn off tools when adjusting settings. Follow all safety instructions for each tool.
Sanding For Smooth Edges
After cutting, use sandpaper or a sander on edges. Smooth edges prevent splinters and injuries. Sand until the surface feels soft and even. Pay attention to corners and cut ends. Clean dust off before assembly.
Assembling The Bed Frame
Assembling the bed frame is the key step in building a bunk bed with steps. It creates the strong base that supports both beds. Careful work here ensures safety and durability. Follow clear steps to build each part correctly. Use the right tools and materials for best results.
Building The Lower Bed Frame
Start by laying out the wood pieces for the lower bed frame. Use sturdy wood like pine or oak. Attach the side rails to the head and footboards with screws. Check that all corners form right angles. Add slats across the frame to support the mattress. Space slats evenly for good weight distribution.
Constructing The Upper Bed Frame
Next, build the upper bed frame similarly to the lower one. Use the same strong wood and hardware. Make sure the frame is square and secure. Add slats carefully to hold the mattress safely. Double-check all connections to avoid wobbling or gaps. The upper frame needs to be extra strong for safety.
Joining Frames Securely
Attach the upper frame to the lower frame with strong brackets. Use long bolts and nuts for firm joints. Tighten all fasteners well to prevent movement. Install support beams between the frames for extra strength. Check the entire structure for stability. This step keeps both beds safe and steady during use.
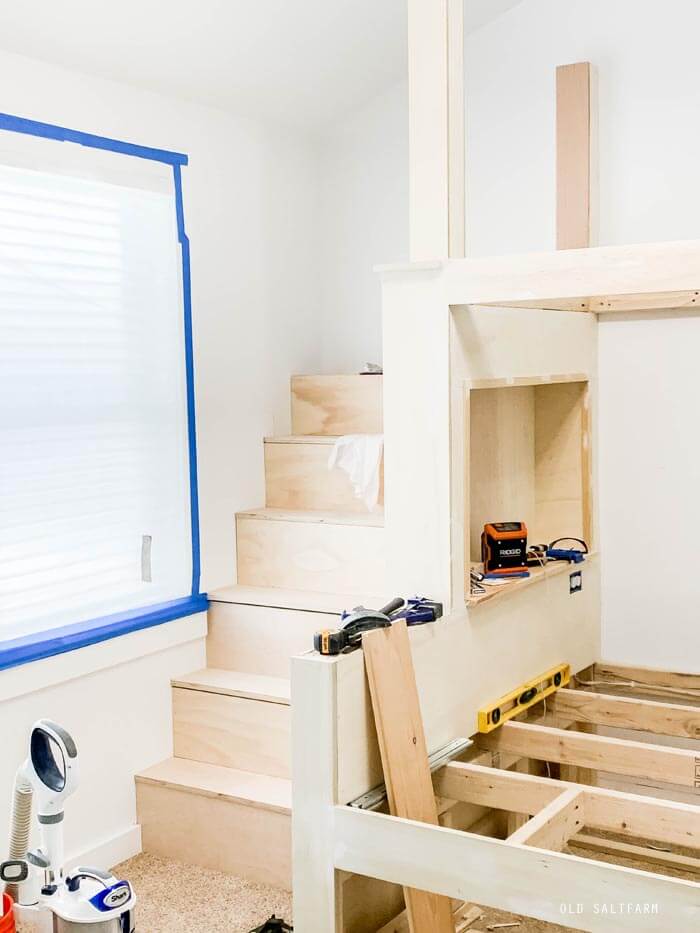
Building The Steps
Building the steps for your bunk bed is an important task. It ensures safe and easy access to the top bunk. Well-made steps add both function and style to the bed. Follow the simple guide below to create sturdy steps.
Step Frame Construction
Start by cutting wood pieces for the frame. Use strong, durable wood like pine or oak. Cut two long side pieces and several shorter ones for the steps. Assemble the frame by attaching the shorter pieces between the sides. Make sure the steps are evenly spaced. Use screws to secure all joints tightly.
Attaching Steps To Bed
Next, position the step frame next to the bunk bed. Align it so the steps reach the top bunk safely. Use brackets or metal plates to attach the frame to the bed. Screw the brackets into both the bed and the step frame. This keeps the steps from moving or tipping.
Ensuring Stability And Support
Check that the steps feel solid under pressure. Add extra support by attaching a back brace if needed. Use a level to confirm the steps are straight. Tighten all screws and bolts firmly. Test the steps by climbing them slowly and carefully. Make sure there is no wobbling or creaking sound.
Adding Safety Features
Adding safety features to a bunk bed is very important. These features help prevent falls and injuries. Safety makes the bed more secure and comfortable for kids. Focus on three main areas: guardrails, wall attachment, and step covers. Each part plays a key role in keeping the bunk bed safe.
Installing Guardrails
Guardrails stop children from rolling off the bed. Use strong wood or metal rails on both sides. Make sure rails are high enough to hold a child safely. Attach guardrails tightly with screws to avoid gaps. Check for smooth edges to prevent scratches or cuts. Guardrails increase safety, especially on the top bunk.
Securing The Bed To The Wall
Fasten the bunk bed frame to the wall for extra stability. Use brackets or straps designed for furniture. Secure the bed at several points along the wall. This reduces shaking and tipping risks. Wall attachment is a must for homes with active kids. It keeps the bunk bed steady during play or sleep.
Using Non-slip Step Covers
Steps can be slippery and cause falls. Cover each step with non-slip strips or mats. Choose materials that stick well and resist wear. Non-slip covers improve grip for climbing up and down. They make the bed safer, especially at night or with socks. Easy to install and replace, these covers boost safety effectively.
Finishing Touches
Finishing touches make your bunk bed look complete and safe. This step adds beauty and strength. It also ensures the bed is ready for use. Focus on painting, decorating, and safety checks. These small steps bring the whole project together.
Applying Paint Or Stain
Choose paint or stain that suits your room’s style. Use a brush or roller for even coverage. Apply thin coats to avoid drips and uneven spots. Let each coat dry fully before adding another. Paint protects the wood and adds color. Stain highlights the natural wood grain. Both make the bed last longer and look better.
Adding Decorative Elements
Add simple decorations to personalize the bed. Use stickers, decals, or small wooden shapes. Attach soft cushions or fabric to the steps for comfort. Choose colors and designs that match the room. Avoid heavy or sharp items that can cause harm. Decorative touches make the bed inviting and unique.
Final Safety Checks
Check all screws and bolts to ensure tightness. Look for sharp edges and sand them smooth. Test the bed’s stability by applying gentle pressure. Make sure guardrails are secure and high enough. Confirm the ladder or steps are firmly attached. Safety checks prevent accidents and keep kids safe.
Credit: oldsaltfarm.com

Credit: thediyplan.com
Frequently Asked Questions
What Materials Are Needed To Build A Bunk Bed With Steps?
You need wood planks, screws, nails, a drill, saw, measuring tape, and sandpaper. Choose sturdy, durable wood like pine or oak for safety and longevity.
How Do You Ensure The Bunk Bed Steps Are Safe?
Securely attach each step to the frame using screws. Use non-slip materials on steps and ensure proper spacing to prevent slips and falls.
What Is The Best Design For Bunk Bed Steps?
Choose wide, deep steps with guardrails for extra safety. Consider storage drawers under steps to maximize space efficiency.
How Long Does It Take To Build A Bunk Bed With Steps?
It typically takes 1 to 3 days, depending on skill level and tools. Proper planning and measuring reduce building time and errors.
Conclusion
Building a bunk bed with steps is a smart choice for space and safety. Follow each step carefully to avoid mistakes. Use good materials and check your work often. Take your time and ask for help if needed. A well-built bunk bed lasts long and stays strong.
Enjoy the extra room and safe climb for kids. This project brings both fun and function to your home. Start your build with confidence and care.