Are you ready to transform your bathroom with a brand-new vanity cabinet? Building your own vanity cabinet might sound tricky, but with the right steps, you can create a beautiful and functional piece that fits perfectly in your space.
Imagine having a cabinet designed just for your needs, saving money, and adding a personal touch to your bathroom. In this guide, you’ll discover simple, clear instructions that make the process easy and even enjoyable. Keep reading, and by the end, you’ll have the confidence to build a vanity cabinet that not only looks great but lasts for years.
Credit: www.youtube.com
Planning Your Vanity Cabinet
Planning your vanity cabinet is the first step to a successful build. Careful thought helps you avoid mistakes. It saves time, money, and effort. This stage focuses on size, style, materials, and measurements. Each part matters for a perfect fit and look.
Choosing The Right Size And Style
Pick a size that fits your bathroom space well. Measure the area where the vanity will go. Make sure there is enough room to move freely. Choose a style that matches your bathroom design. Simple, modern, or traditional styles work well. The style affects the cabinet’s look and feel.
Selecting Materials And Tools
Choose strong, water-resistant materials like plywood or MDF. These last longer in bathroom conditions. Select a finish that resists moisture and stains. Gather basic tools: saw, drill, screwdriver, measuring tape, and level. Having the right tools makes the job easier and safer.
Measuring Your Space Accurately
Measure the width, height, and depth of the space carefully. Check for any pipes, outlets, or obstacles near the area. Write down all measurements clearly. Double-check numbers to avoid errors. Accurate measurements ensure the cabinet fits perfectly and functions well.
Credit: thriftdiving.com
Preparing The Workspace
Preparing the workspace is an important first step in building a new vanity cabinet. A clean and organized area helps you work safely and efficiently. It also reduces the chance of mistakes and accidents. Take time to clear the space, gather safety gear, and organize your tools and materials. This sets the stage for a smooth building process.
Clearing The Area
Remove all items from the workspace. This includes furniture, rugs, and decorations. Clear the floor to avoid tripping hazards. Sweep or vacuum the area to remove dust and debris. Make sure there is enough room to move around freely. This space will help you handle large pieces easily.
Gathering Safety Equipment
Safety is key while building a vanity cabinet. Wear safety glasses to protect your eyes. Use gloves to keep your hands safe from sharp edges. A dust mask helps prevent breathing in sawdust. Keep ear protection nearby if using loud power tools. Having safety gear ready keeps you protected at all times.
Organizing Tools And Materials
Arrange your tools within easy reach. Group similar tools together, like screwdrivers and hammers. Lay out all materials such as wood, screws, and hinges. Check that you have everything needed before starting. An organized setup saves time and reduces frustration. You can focus on building without interruptions.
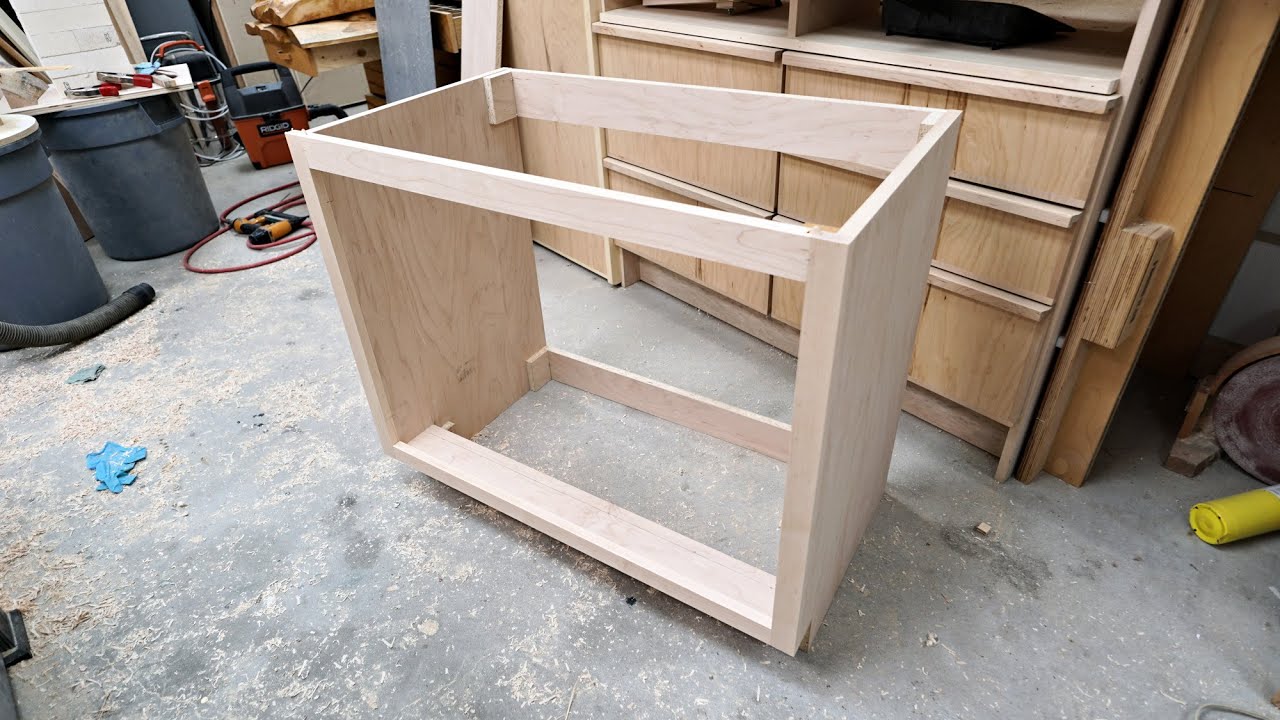
Cutting And Assembling The Cabinet Frame
Cutting and assembling the cabinet frame is an essential step in building a new vanity cabinet. This stage shapes the main structure and ensures the cabinet fits perfectly in your bathroom. Accurate cuts and solid joints create a strong base for the entire project. Follow these steps carefully to build a reliable frame.
Cutting Wood Panels To Size
Start by measuring each wood panel according to your cabinet design. Use a tape measure and mark the cut lines clearly. A circular saw or table saw works well for straight cuts. Cut slowly to keep edges smooth and precise. Double-check each panel’s size before moving on.
Joining Frame Pieces
Place the cut panels on a flat surface to assemble the frame. Use wood glue on the edges that will join together. Clamp the pieces tightly and let the glue dry for a strong bond. Reinforce joints with screws or nails for extra strength. Keep corners square to avoid misalignment.
Ensuring Structural Stability
Check the frame for any wobbling or loose parts. Add corner braces inside the frame for extra support. Make sure all connections are tight and secure. A stable frame prevents future damage and keeps the cabinet sturdy. Test the frame by gently shaking it before adding shelves or doors.
Adding Shelves And Drawers
Adding shelves and drawers to your new vanity cabinet increases its storage and functionality. These features help organize items neatly and keep your space tidy. Careful planning and precise installation make a big difference in the cabinet’s use and look.
Designing Interior Storage
Plan the inside layout based on your needs. Decide how many shelves and drawers you want. Choose sizes that fit your items well. Consider space for taller objects or small accessories. Use simple sketches to visualize the design. This step saves time and effort during installation.
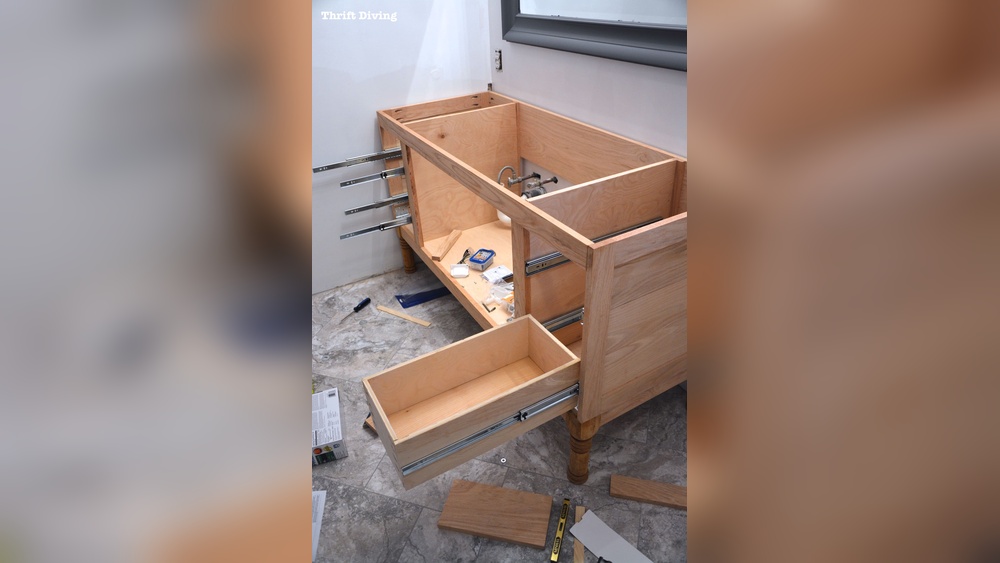
Installing Drawer Slides
Select drawer slides that match your drawer size and weight. Attach slides to the cabinet sides first. Then fix the matching parts to the drawers. Check for smooth movement before securing all screws. Align slides carefully to avoid sticking or wobbling. Proper installation ensures easy opening and closing.
Fitting Shelves Securely
Measure shelf spaces accurately for a perfect fit. Use shelf pins or brackets for support. Place pins evenly on both sides of the cabinet. Insert shelves gently and check for levelness. Tighten supports to prevent shifting or falling. Secure shelves keep your items safe and stable.
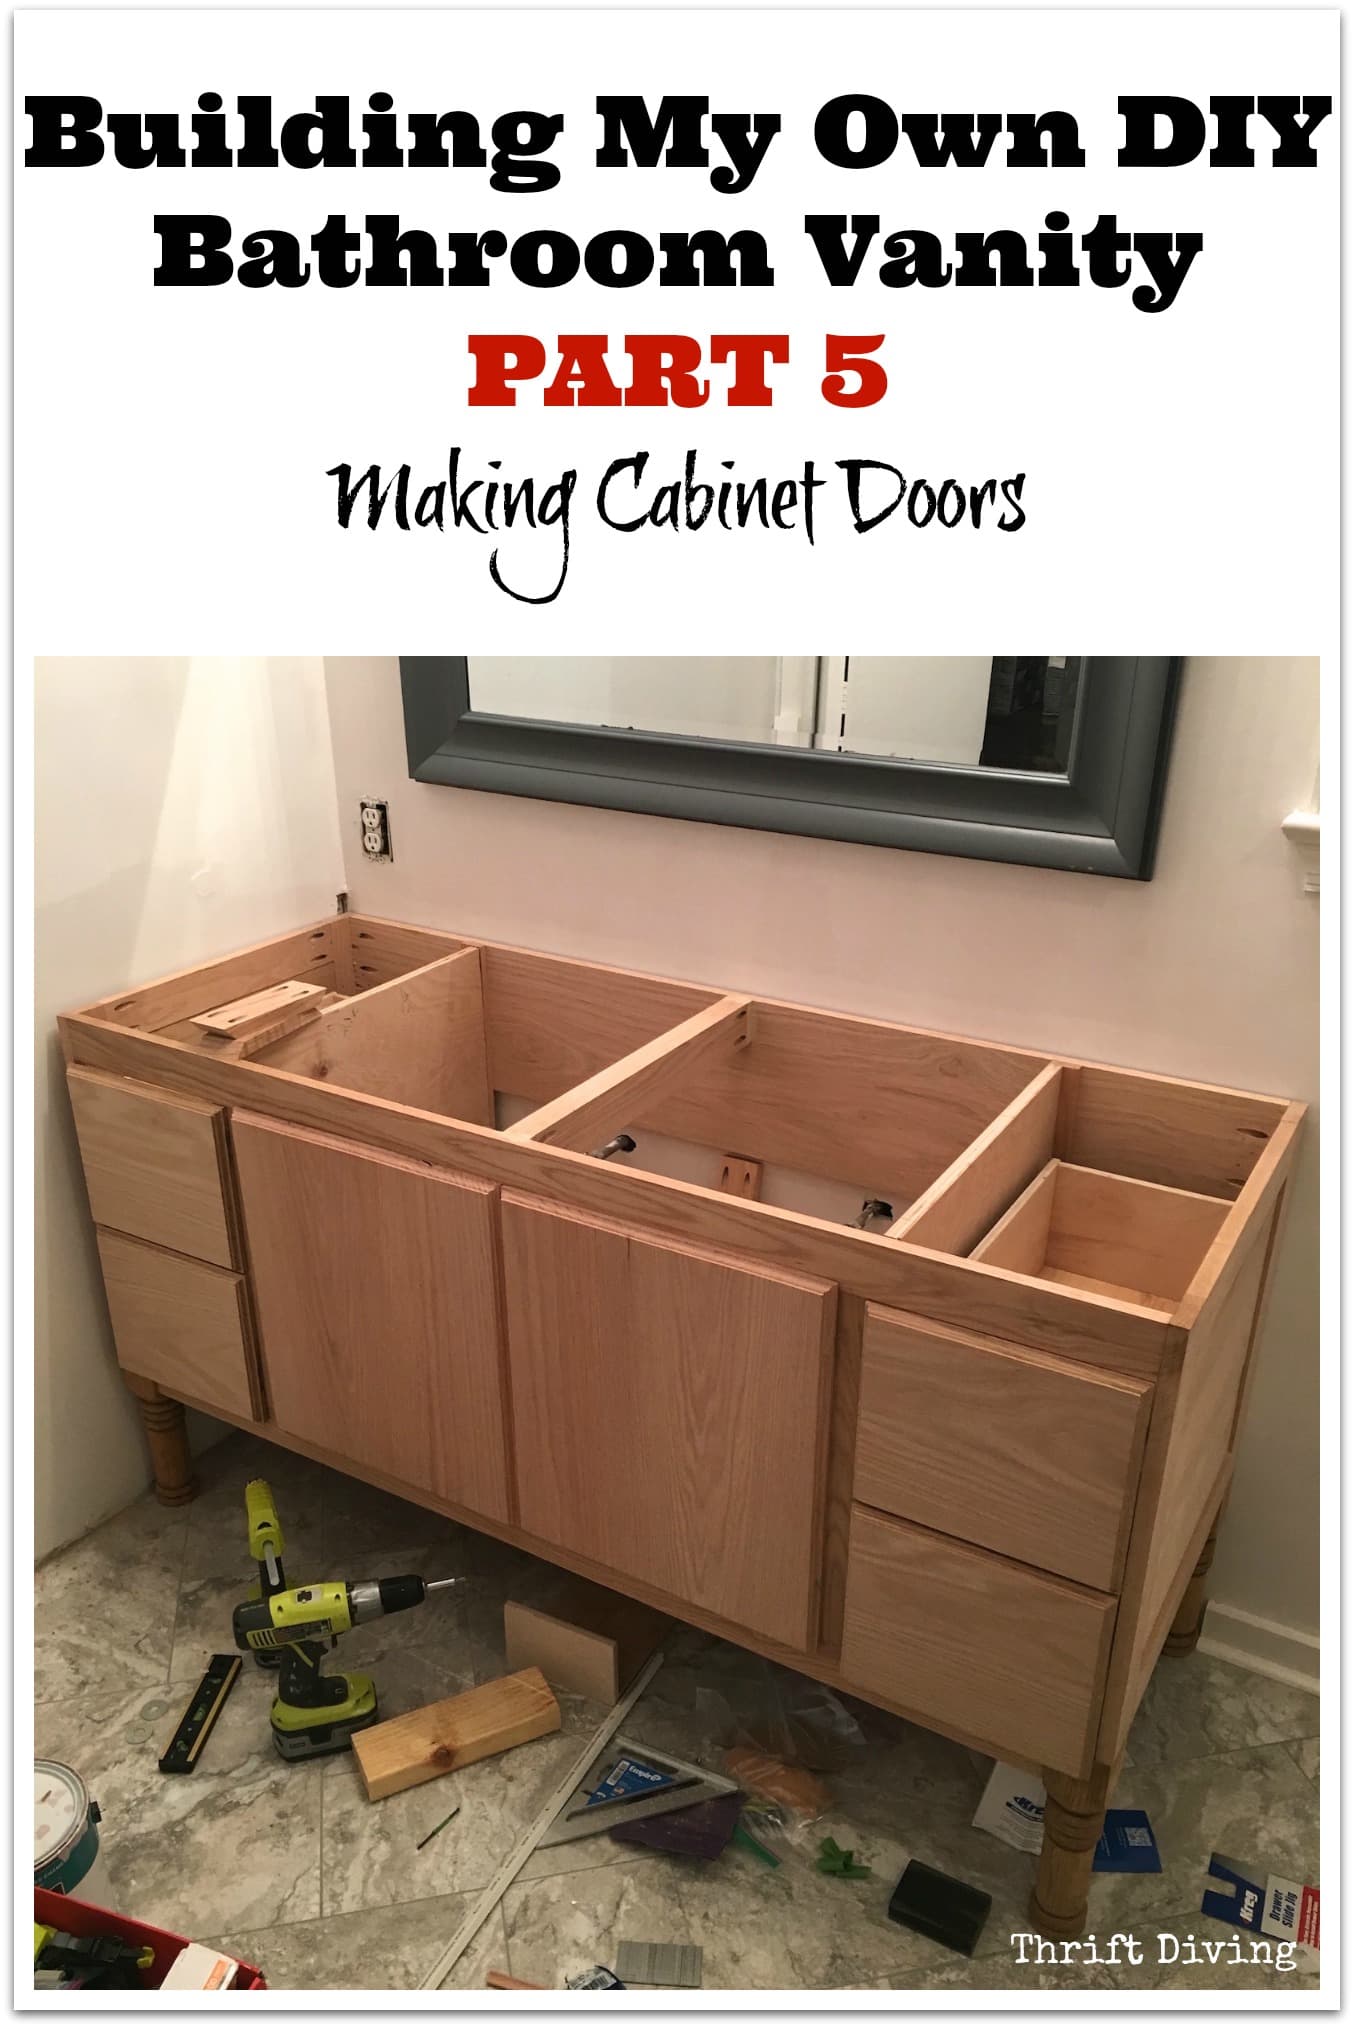
Finishing Touches
Finishing touches bring your new vanity cabinet to life. These steps make it smooth, colorful, and functional. A well-finished cabinet looks great and lasts longer.
Sanding And Smoothing Surfaces
Start by sanding all surfaces with fine-grit sandpaper. This removes rough spots and old paint. Sanding creates a smooth base for paint or stain. Wipe dust away with a damp cloth before the next step.
Applying Paint Or Stain
Choose paint or stain that matches your bathroom style. Use a brush or roller for even coverage. Apply thin coats to avoid drips and runs. Let each coat dry fully before adding another. This protects the wood and enhances its look.
Installing Hardware And Handles
Pick hardware that fits the cabinet design and your taste. Attach handles with screws, aligning them carefully. Check that doors and drawers open smoothly. Hardware adds the final style and makes your cabinet easy to use.
Installing The Vanity Cabinet
Installing the vanity cabinet is a key step in your bathroom project. This part requires care and attention to ensure the cabinet fits well and works properly. Follow clear steps to position, secure, and connect the cabinet. Checking everything at the end avoids future problems.
Positioning And Securing The Cabinet
First, place the vanity cabinet in its spot. Use a level to check it is straight. Adjust the cabinet until it sits firmly on the floor and against the wall. Mark the wall where the cabinet meets the studs. Drill pilot holes through the cabinet back into the wall studs. Use screws to attach the cabinet securely. Avoid over-tightening to prevent damage.
Connecting Plumbing Fixtures
Turn off the water supply before starting plumbing work. Connect the sink drain to the cabinet drain pipe. Tighten all connections by hand, then use a wrench for a snug fit. Attach the water supply lines to the faucet. Check for leaks by turning the water on slowly. Fix any leaks before proceeding.
Final Adjustments And Checks
Check the cabinet doors and drawers for smooth opening and closing. Adjust hinges and drawer tracks if needed. Clean the cabinet surface to remove dust and fingerprints. Make sure the cabinet is stable and all fixtures work correctly. Your vanity cabinet is now ready to use.
Maintenance Tips For Longevity
Building a new vanity cabinet is just the start. Keeping it in good shape takes some care and attention. Regular maintenance helps your cabinet last longer and look great. Simple steps can prevent damage and costly repairs. Follow these tips to protect your investment and enjoy your vanity for years.
Cleaning And Care
Clean your vanity cabinet regularly with a soft cloth. Use mild soap and water for stains. Avoid harsh chemicals that can damage the finish. Wipe spills immediately to stop stains and water marks. Dust the cabinet often to keep it fresh and shiny.
Handling Repairs
Check your cabinet for loose handles or hinges. Tighten screws as soon as you notice them. Fix small scratches with wood filler or touch-up markers. Replace broken parts quickly to avoid bigger problems. Do not ignore signs of wear or damage.
Preventing Water Damage
Water can ruin your vanity cabinet fast. Use a waterproof sealant on wood surfaces near sinks. Keep towels handy to dry wet areas after use. Avoid leaving standing water on the cabinet. Ensure good ventilation in the bathroom to reduce moisture.

Credit: www.youtube.com
Frequently Asked Questions
What Materials Are Best For Building A Vanity Cabinet?
Wood like plywood or MDF is ideal for vanity cabinets. These materials resist moisture and provide durability. Choose water-resistant finishes to protect from bathroom humidity. Solid wood offers strength but requires sealing. Quality materials ensure longevity and a polished look.
How Do I Measure Space For A New Vanity Cabinet?
Measure the width, depth, and height of your bathroom area. Allow extra space for plumbing and door clearance. Accurate measurements prevent fitting issues. Use a tape measure and record dimensions carefully. Double-check measurements before purchasing or building.
What Tools Are Needed To Build A Vanity Cabinet?
Essential tools include a saw, drill, screwdriver, measuring tape, and level. Sandpaper and clamps help with finishing and assembly. Safety gear like goggles and gloves is important. Having the right tools ensures a smooth build process and professional results.
How Long Does It Take To Build A Vanity Cabinet?
Building a vanity cabinet typically takes 4 to 8 hours. Time varies based on design complexity and skill level. Pre-cut materials can speed up the process. Allow extra time for drying finishes and installing hardware.
Conclusion
Building a new vanity cabinet can be simple and fun. Plan your steps clearly and gather all materials first. Take your time to measure and cut carefully. Assembly goes smoothly with patience and attention. A well-built cabinet adds style and storage to your space.
Enjoy the satisfaction of creating something useful yourself. Keep practicing to improve your skills for future projects. You can do this!