
Imagine turning an empty wall into a stylish, space-saving feature that holds your favorite books and décor perfectly. Building a recessed bookshelf can do just that, giving your room a clean, built-in look without taking up extra space.
If you’ve ever thought about adding a custom touch to your home but felt unsure where to start, this guide is for you. By the end, you’ll have the confidence and know-how to create a beautiful, recessed bookshelf that fits your style and needs.
Ready to transform your space? Let’s dive in!

Credit: www.instructables.com
Planning Your Bookshelf
Planning your recessed bookshelf is the first step to a great result. Careful preparation saves time and effort. It helps you avoid costly mistakes and ensures your shelf fits perfectly. Start with a clear idea of what you want and where it will go. Think about size, style, and function. This part of the process sets the foundation for success.
Choosing The Right Location
Pick a wall that has enough space and no obstacles inside. Avoid walls with pipes, wires, or vents. Check for studs to support the shelf securely. A living room or study often works best. The location should be easy to reach and see. Think about natural light and how the shelf fits the room’s style.
Measuring The Space
Use a tape measure to find the height, width, and depth of the wall area. Measure twice to be sure. Consider the thickness of the wall and any baseboards. Note any uneven spots or corners. Write down all measurements clearly. These numbers guide the size of your recessed bookshelf.
Selecting Materials And Tools
Choose wood that suits your style and budget. Plywood or MDF are common choices. Pick screws, nails, and brackets that hold weight well. Get a saw, drill, level, and screwdriver ready. Sandpaper and paint or stain finish the shelf nicely. Have all tools on hand before starting the build.
Preparing The Wall
Preparing the wall is the first step to build a recessed bookshelf. This step sets the foundation for a safe and strong installation. You must know the wall’s structure before cutting or drilling. Careful preparation saves time and prevents damage.
Follow clear steps to ensure accuracy and safety. These steps include finding studs and wiring, marking the bookshelf size, and cutting the wall opening. Each step is important for a perfect fit.
Locating Studs And Wiring
Use a stud finder to locate wall studs. Studs provide support for the bookshelf. Mark stud locations with a pencil. Also, check for electrical wires and pipes. Avoid cutting near wires to prevent accidents. Scan the wall carefully before any work.
Marking The Bookshelf Dimensions
Measure the desired width, height, and depth of the bookshelf. Use a level to draw straight lines on the wall. Mark the exact area to cut. Double-check the measurements. Clear and accurate marks guide the cutting process.
Cutting The Wall Opening
Wear safety glasses and a dust mask. Use a drywall saw or a jigsaw for cutting. Cut along the marked lines slowly and carefully. Remove the cut piece of drywall gently. Check the opening fits the bookshelf frame perfectly.
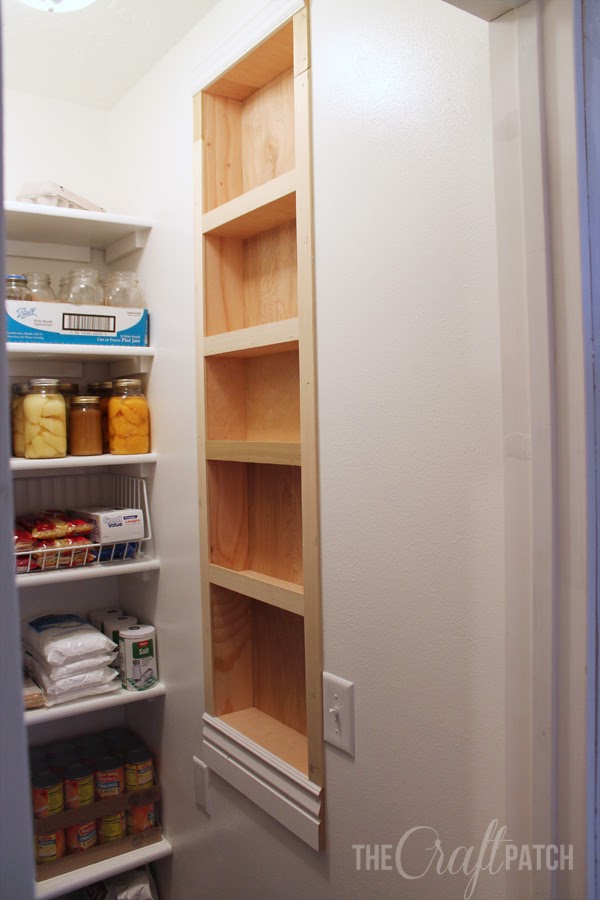
Building The Frame
Building the frame is the first step to creating a recessed bookshelf. This part gives the shelf its shape and strength. A strong frame keeps the bookshelf sturdy and safe. Follow clear steps to build a frame that fits perfectly in your wall.
Constructing The Support Frame
Start by cutting wood pieces to match the bookshelf size. Use solid wood or plywood for best support. Assemble the pieces into a rectangular box shape. Nail or screw the corners tightly to hold the frame together. Double-check all joints to avoid weak spots.
Securing The Frame To The Wall
Find the wall studs using a stud finder. Align the frame with the studs for strong support. Use long screws to attach the frame to the studs. Secure the frame at multiple points to keep it steady. Avoid loose attachments that can cause wobbling.
Ensuring Level And Square
Use a level tool to check the frame’s horizontal position. Adjust until the frame is perfectly flat and even. Check the corners with a carpenter’s square to ensure right angles. Make any needed corrections before moving forward. A level and square frame means a professional finish.
Credit: www.thecraftpatchblog.com
Installing Shelves
Installing shelves is a key step in building a recessed bookshelf. Shelves hold your books and decorations. They must fit well and be strong. Careful measuring and cutting help create neat, sturdy shelves. Proper attachment keeps them secure. Adjusting shelf heights adds flexibility for different items.
Cutting Shelf Boards
Measure the width inside the frame carefully. Mark the shelf boards with a pencil at the right length. Use a saw to cut along the marks. Cut slowly to keep edges smooth. Sand the edges to remove rough spots. Clean boards look better and fit well.
Attaching Shelves To The Frame
Place the shelf boards inside the frame. Use a level to check they are straight. Attach shelves with screws or nails into the frame. Pre-drill holes to avoid splitting the wood. Drive screws in until shelves feel firm. Double-check all shelves are steady and even.
Adjusting Shelf Heights
Decide where to place each shelf based on your needs. Mark new shelf positions on the frame. Remove shelves carefully if you need to move them. Install new supports at the marked heights. Place shelves on the supports and test stability. Adjust as needed for perfect spacing.
Finishing Touches
Finishing touches make your recessed bookshelf look neat and complete. They improve both the look and feel of the shelf. Take time to work on small details. These steps will help your bookshelf last longer and fit well with your room’s style.
Sanding And Smoothing Edges
Start by sanding all edges and surfaces. Use fine-grit sandpaper for a smooth finish. Sand corners carefully to remove sharp spots. Smooth edges prevent splinters and create a clean look. Wipe away dust with a dry cloth before moving on.
Painting Or Staining
Choose paint or stain to match your room decor. Paint gives a fresh, bright look. Stain shows the wood grain and adds warmth. Apply thin, even coats and let dry fully. Use a brush or roller for paint. For stain, use a cloth to rub it in. Finish with a clear sealant to protect the surface.
Adding Trim And Molding
Trim and molding add style and hide gaps. Select trim that fits your room’s design. Cut pieces to size and attach with nails or glue. Check alignment before securing. Fill nail holes with wood filler. Sand again if needed for a smooth finish. This step gives your bookshelf a polished, built-in appearance.
Maintaining Your Bookshelf
Maintaining your recessed bookshelf keeps it looking great and lasting longer. Regular care prevents wear and tear. It also helps your books stay safe and organized. Follow simple steps to clean, protect, and refresh your shelves.
Cleaning Tips
Dust your bookshelf often. Use a soft cloth or a duster. Avoid wet cloths that can damage the wood. For stubborn dirt, use a mild soap with water. Wipe gently and dry immediately. Keep cleaning tools away from sharp edges to avoid scratches.
Preventing Damage
Avoid placing heavy items on the shelves. Too much weight can cause sagging. Use coasters under drinks to stop water rings. Keep the bookshelf away from direct sunlight to prevent fading. Control room humidity to avoid warping or cracking. Check shelves regularly for loose screws or nails.
Updating Shelf Layout
Change the shelf layout to fit new items. Move shelves to different heights for taller books. Mix books with decorative objects for a fresh look. Rotate books to prevent spine damage from long-term pressure. Rearrange items to keep your space interesting and neat.

Credit: www.youtube.com
Frequently Asked Questions
What Tools Are Needed To Build A Recessed Bookshelf?
Essential tools include a stud finder, drill, saw, level, measuring tape, and screws. These ensure accurate cuts and secure installation. Safety gear like goggles and gloves is also recommended for protection during the build process.
How Do I Measure The Wall For A Recessed Bookshelf?
Measure the wall’s width, height, and depth where the bookshelf will fit. Use a stud finder to locate studs. Accurate measurements prevent gaps and ensure the bookshelf fits flush with the wall.
What Materials Are Best For A Recessed Bookshelf?
Plywood or MDF are commonly used due to durability and smooth finishes. Choose hardwood for a premium look. Use wood screws and wood glue for sturdy assembly and long-lasting support.
How Long Does It Take To Build A Recessed Bookshelf?
Building a recessed bookshelf typically takes 1 to 3 days. This depends on complexity, skill level, and drying time for paint or finishes. Planning and preparation can speed up the process.
Conclusion
Building a recessed bookshelf adds charm and saves space. It fits neatly into your wall and holds many books. You only need basic tools and some patience. Measure carefully, cut precisely, and install securely. Painting or staining can match your room’s style.
A well-made shelf lasts for years. Try this project to improve your home’s look and function. Simple steps, great results. Give your room a fresh feel with a recessed bookshelf.