
Are you tired of cluttered bookshelves that take up too much space? Imagine having a stylish, space-saving revolving bookshelf right in your home.
It’s not just a dream—you can build one yourself! This guide will walk you through simple steps to create a unique bookshelf that spins, making your books easy to find and your room look amazing. Ready to transform your space and impress your friends?
Let’s get started!
Materials And Tools Needed
Building a revolving bookshelf needs the right materials and tools. Choosing good wood and having the right equipment makes the project easier. Safety gear is also important to protect yourself while working. This section will guide you through everything you need to start.
Choosing The Right Wood
Pick wood that is strong and smooth. Pine and oak are good choices. Pine is cheaper and easy to cut. Oak is harder and lasts longer. Avoid wood with many knots or cracks. Measure your space to know how much wood you need. Buy extra wood for mistakes or changes.
Essential Tools Checklist
You will need a saw to cut the wood. A drill helps make holes for screws. Sandpaper or a sander smooths rough edges. A screwdriver or electric driver is needed for screws. A tape measure and pencil help mark wood accurately. A level ensures your shelves stand straight. Clamps hold pieces together while you work.
Safety Gear To Use
Wear safety glasses to protect your eyes. Use ear protection to avoid loud noises. Gloves keep your hands safe from splinters. A dust mask stops you from breathing sawdust. Wear closed shoes to protect your feet. Keep your work area clean to avoid accidents.

Credit: www.youtube.com
Planning Your Bookshelf
Planning your revolving bookshelf is the first step to a successful build. Careful planning helps avoid mistakes and saves time. It also ensures the shelf fits your space perfectly. Consider the design, size, and rotation method before you start.
Think about how many books you want to store. Visualize the shelf’s style and how it will turn. Planning well leads to a sturdy, useful bookshelf you will enjoy.
Designing The Layout
Choose a design that fits your room and style. Decide the number of shelves and their height. Think about the shape—round, square, or hexagon works well. Keep the design simple for easy building. Add space for decoration or small items.
Measuring Space And Dimensions
Measure the area where the bookshelf will stand. Check height, width, and depth carefully. Allow extra space for turning the shelf smoothly. Use a tape measure and write down all numbers. Accurate measurements make the build easier and better.
Selecting A Rotation Mechanism
Pick a rotation method that suits your skills and tools. Lazy susans are common and easy to install. Ball bearings offer smooth rotation but cost more. Consider the weight of books for choosing the mechanism. Test the turn before finalizing your choice.
Cutting And Preparing Wood
Cutting and preparing wood is a key step in building a revolving bookshelf. This process helps ensure all pieces fit well together. Precise cuts and smooth surfaces make the shelf strong and safe. Take your time and follow each step carefully. Good preparation saves time during assembly and improves the final look.
Marking And Measuring Cuts
Start by measuring each piece of wood carefully. Use a tape measure and a pencil to mark the exact cutting lines. Double-check all measurements before making any cuts. Mark the wood clearly so you can see the lines while cutting. Accurate marking prevents mistakes and wasted wood.
Cutting Techniques
Use a saw that suits the type of wood you have. A handsaw or circular saw works well for most cuts. Follow the marked lines slowly and steadily. Keep your hands away from the blade for safety. Clean, straight cuts help the pieces fit better and look neat.
Sanding And Smoothing
After cutting, sand all edges and surfaces. Use sandpaper or a sanding block to remove rough spots. Smooth wood prevents splinters and gives a polished finish. Spend extra time on corners and edges. Well-prepared wood makes painting or staining easier later.
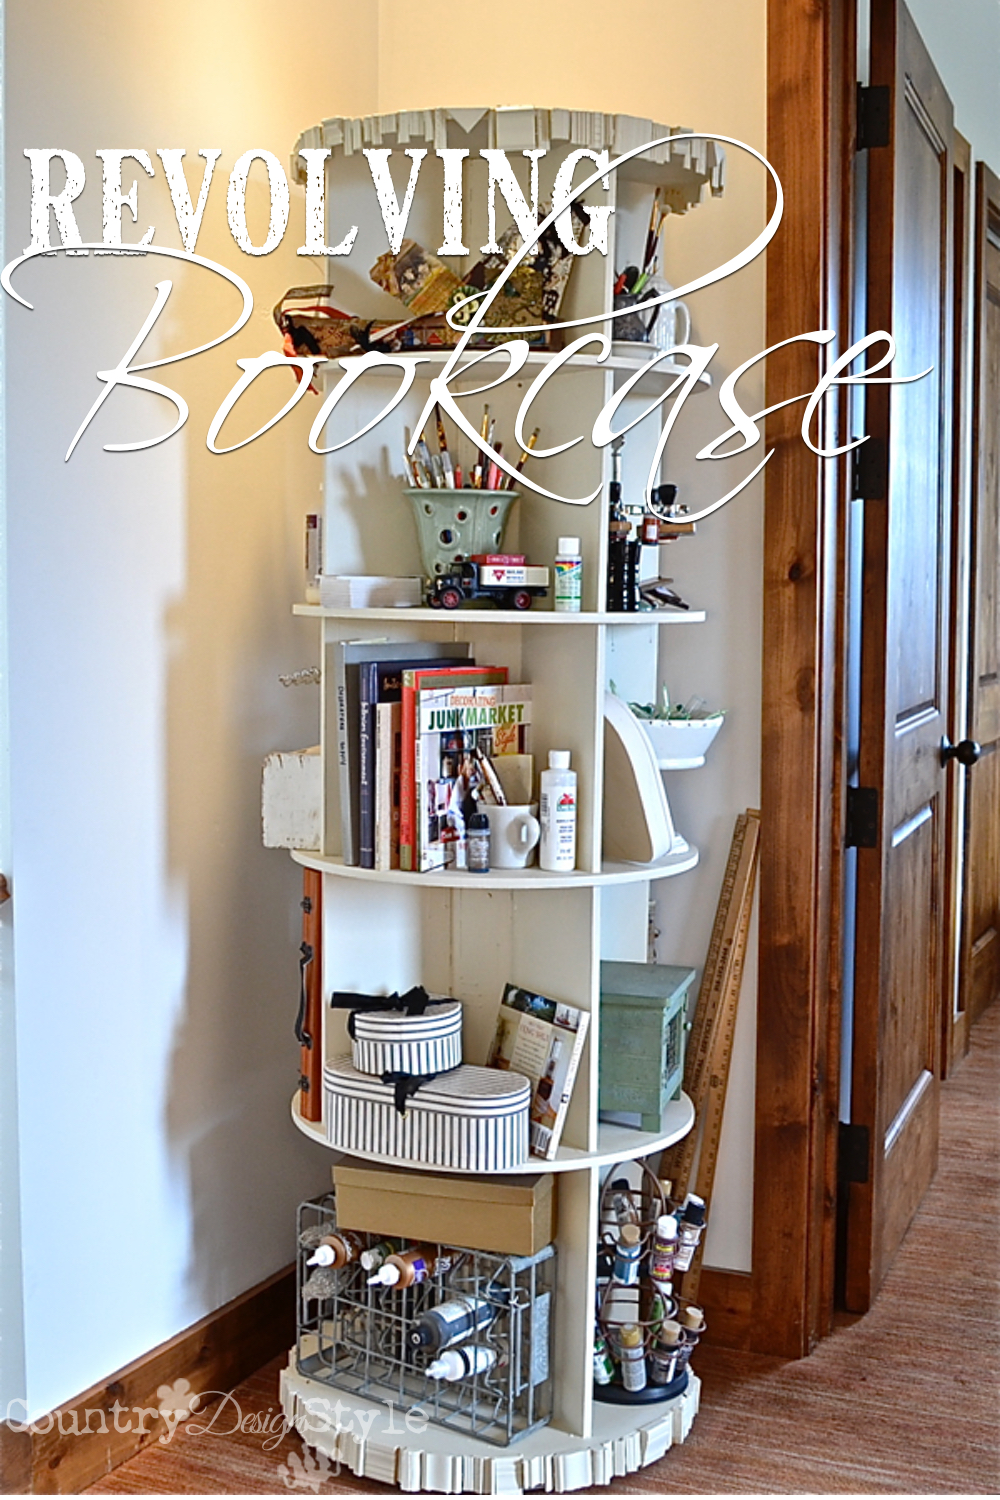
Credit: countrydesignstyle.com
Assembling The Frame
Assembling the frame is the key step in building your revolving bookshelf. This stage sets the structure and ensures stability. Follow each step carefully for a strong and durable frame. Prepare your tools and materials before starting.
Building The Base
Start with a solid base. Use a thick wooden board for support. Cut it to the desired size. Sand the edges to make them smooth. Attach a rotating mechanism, like a lazy Susan bearing, at the center. This part will allow the bookshelf to spin easily.
Constructing The Shelves
Measure and cut wooden planks for the shelves. Make sure each shelf fits well within the frame. Sand the surfaces to avoid splinters. Decide how many shelves you want. Arrange them evenly for balance and style. Each shelf must be sturdy enough to hold books.
Joining Components Securely
Use screws and wood glue to connect all parts. Pre-drill holes to avoid wood splitting. Tighten screws firmly but do not over-tighten. Check that the shelves are level and the frame is square. Let the glue dry completely before moving the bookshelf. This guarantees a strong, lasting frame.
Installing The Revolving Mechanism
Installing the revolving mechanism is a key step in building your bookshelf. It allows the shelves to spin smoothly. This step needs care and precision. Proper installation ensures durability and easy use. Follow these simple steps to add the rotating feature.
Choosing Bearings Or Lazy Susan Hardware
Pick the right rotating hardware first. Bearings offer smooth and quiet rotation. They fit well for heavier shelves. Lazy Susan hardware is easier to install. It usually costs less and works fine for lighter loads. Check the weight your shelf will hold. Match it with the hardware’s capacity. Choose metal parts for strength and durability. Avoid plastic parts if you want long-lasting rotation.
Attaching The Rotating Base
Start by fixing the rotating base to the bottom of your bookshelf. Use screws that fit the hardware holes tightly. Make sure the base sits flat on the floor or platform. Align the base center with the shelf center. This keeps the rotation balanced. Tighten the screws but do not over-tighten. Over-tightening can stop smooth movement or damage the parts.
Testing Smooth Rotation
Turn the shelf gently to check the spin. The movement should be easy and quiet. No wobbling or sticking. If it feels rough, check the screws and alignment again. Adjust the hardware to fix any tight spots. Test the rotation several times. Ensure the shelf spins fully and stops smoothly. This step confirms your revolving mechanism works well.
Finishing Touches
Finishing touches make your revolving bookshelf look complete and polished. This step protects the wood and adds style. It also ensures the shelf lasts longer. Focus on painting or staining, applying a protective coating, and adding decorative elements. These small steps enhance both beauty and function.
Painting Or Staining
Choose paint or stain that matches your room’s style. Paint gives a smooth, colorful finish. Stain shows the natural wood grain. Use a brush or cloth to apply evenly. Let each coat dry fully before adding another. This process brings out the best in your bookshelf.
Applying Protective Coating
Protective coatings guard against scratches and moisture. Use clear polyurethane or varnish for strong protection. Apply thin, even layers with a brush. Allow drying time between coats. This step keeps your bookshelf looking new for years.
Adding Decorative Elements
Decorative touches make your bookshelf unique. Add knobs, decals, or small carvings for character. Use stencils to create patterns or names. Keep decorations simple to avoid clutter. These details personalize your project and make it stand out.
Maintenance Tips
Keeping your revolving bookshelf in good shape takes simple care. Regular maintenance helps it turn smoothly and last longer. Small efforts prevent big problems later. Follow these easy tips to keep your bookshelf working well.
Cleaning The Bookshelf
Dust builds up on shelves and inside the mechanism. Use a soft cloth to wipe all surfaces. Avoid wet cloths that can damage wood. Clean the shelves weekly to keep dust away. For tight spots, use a small brush or vacuum with a brush tool.
Lubricating The Mechanism
The spinning part needs light oil or silicone spray. Apply a small amount to the rotating parts. Move the shelf back and forth to spread the lubricant. Do this every few months to keep the turn smooth. Avoid heavy oils that attract dirt or cause stickiness.
Troubleshooting Common Issues
If the shelf sticks or makes noise, check for dust or debris. Clear anything blocking the moving parts. Tighten loose screws that may cause wobbling. If the rotation feels stiff, add a little lubricant. Replace broken parts quickly to avoid damage.

Credit: www.anikasdiylife.com
Frequently Asked Questions
What Materials Are Needed To Build A Revolving Bookshelf?
You need plywood, wood screws, a lazy Susan bearing, wood glue, sandpaper, paint or stain, and basic tools like a saw and drill. These materials ensure a sturdy, functional, and smooth rotating bookshelf.
How Do I Assemble A Revolving Bookshelf Step-by-step?
Start by cutting wood panels to size. Attach shelves to the central support. Fix the lazy Susan bearing at the base. Sand, paint, or stain the wood. Finally, assemble all parts securely for smooth rotation.
How Can I Customize The Size Of My Revolving Bookshelf?
Measure your available space first. Adjust shelf height and width based on book sizes. Customize the number of shelves and overall dimensions to fit your room and storage needs perfectly.
What Safety Tips Should I Consider When Building?
Wear safety goggles and gloves during cutting and drilling. Work in a well-ventilated area. Use clamps to hold wood steady. Ensure all screws are tight to prevent wobbling and accidents.
Conclusion
Building a revolving bookshelf adds charm and function to any room. It saves space and keeps books easy to reach. The steps are simple and clear to follow. With some tools and patience, you can create a useful piece. This project suits many skill levels and styles.
Enjoy your new bookshelf and the joy it brings. Keep organizing and sharing your favorite reads in style.