Are you running out of space for your books or want to add a stylish touch to your room? Building a wall mounted bookshelf could be the perfect solution.
It not only saves floor space but also turns your collection into a beautiful display. Imagine having a sturdy, custom shelf that fits your style and needs exactly. In this guide, you’ll learn simple steps to create your own wall mounted bookshelf, even if you’ve never done a project like this before.
Ready to transform your space and show off your favorite reads? Let’s get started!
Materials And Tools Needed
Building a wall mounted bookshelf needs the right materials and tools. Choosing good wood and having the proper tools make the project easier. This section explains what you need to start your bookshelf project. Use this guide to prepare your workspace and gather everything.
Choosing The Right Wood
Select wood that is strong and easy to work with. Pine is a popular choice for beginners. It is light and affordable. Oak and maple offer more strength but cost more. Consider the shelf’s weight and style before picking wood. Smooth wood helps with a clean finish and safer handling.
Essential Tools For The Project
Basic tools are needed to cut and assemble the shelf. A saw helps to cut wood pieces accurately. A drill makes holes for screws and anchors. A level keeps your shelf straight on the wall. Measuring tape ensures precise lengths. Sandpaper smooths rough edges for a neat look.
Additional Supplies
Besides wood and tools, some extra items help with assembly. Screws or nails hold the shelf parts together. Wall anchors secure the shelf to drywall. Wood glue adds strength to joints. Paint or stain finishes the wood and protects it. Safety gear like goggles and gloves keep you safe.
Planning Your Bookshelf
Planning your wall mounted bookshelf is the first step to a successful project. This stage helps you avoid mistakes and save time. Careful planning ensures the shelf fits perfectly and holds your books safely.
Think about the space you have and what you want the shelf to look like. Write down your ideas clearly. This guide will help you plan well.
Measuring Wall Space
Start by measuring the wall where you want the bookshelf. Use a tape measure for accuracy. Note the width, height, and depth of the space. Check for any obstacles like light switches or power outlets. Mark these areas to avoid problems later.
Design And Dimensions
Choose a design that fits your room style and needs. Decide on the number of shelves and their height. Keep shelf depth enough for your books, usually 8 to 12 inches. Remember, bigger shelves need stronger support. Sketch your design on paper or use a digital tool.
Weight Capacity Considerations
Think about how much weight the shelf will hold. Books can be heavy, so select strong materials. Study the wall type to pick the right mounting hardware. Use anchors or studs for better support. Safety comes first to prevent accidents and damage.
Preparing The Wall
Preparing the wall is an important step before mounting your bookshelf. A strong, secure wall ensures the shelf holds weight safely. This step helps avoid damage and keeps your books safe. Follow these simple actions to get your wall ready.
Locating Studs
Studs are the wooden beams behind the wall. They provide the best support for heavy shelves. Use a stud finder to find these beams easily. Move the tool slowly across the wall. Mark the edges of each stud to find the center. This is where you will anchor the shelf.
Marking Mounting Points
Measure the height where you want the shelf. Use a pencil to mark the spots on the wall. Align these marks with the stud centers you found. Make sure the marks are level and evenly spaced. This ensures the shelf will sit straight and secure.
Wall Preparation Tips
Clean the wall surface before drilling. Remove dust and dirt with a dry cloth. Check for any loose paint or wallpaper. Repair cracks or holes with filler and sand smooth. Use a level to double-check your marks. This prevents mistakes during installation.
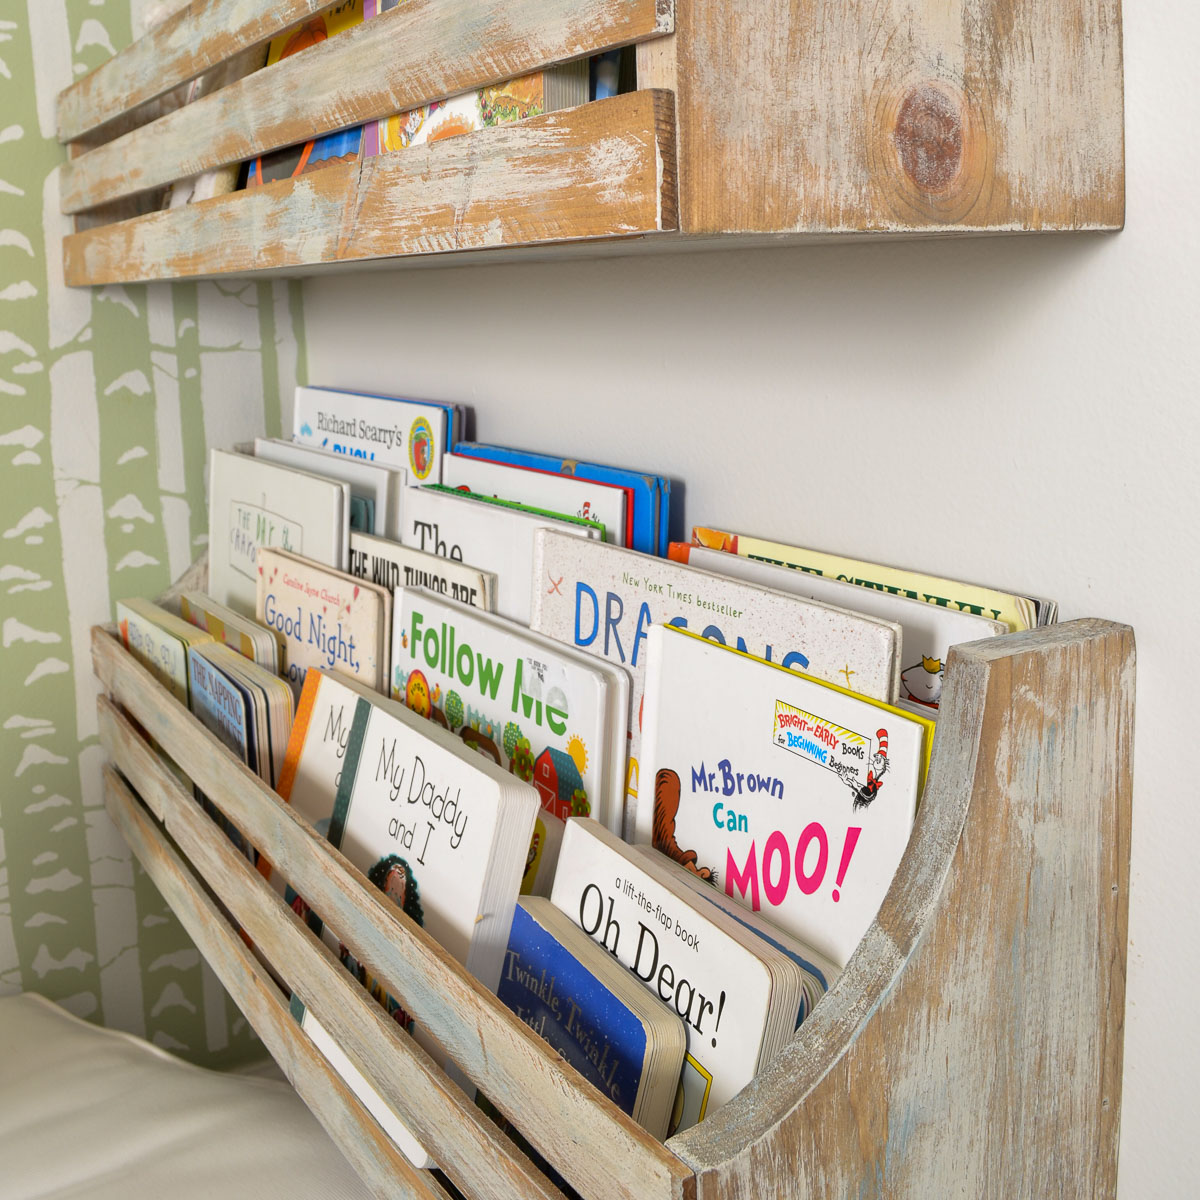
Credit: refreshliving.us
Cutting And Assembling Shelves
Cutting and assembling shelves is an important step in building a wall-mounted bookshelf. This process shapes your wood and brings all parts together. Careful measuring and precise cutting ensure the shelves fit well. Sanding smooths the surfaces for a nice finish. Assembling connects all pieces firmly to create a strong shelf.
Measuring And Cutting Wood
Start by measuring the wood according to your shelf design. Use a tape measure and mark the wood with a pencil. Double-check your measurements to avoid mistakes. Cut the wood using a saw, following the marked lines carefully. Straight, clean cuts make assembly easier and the shelf look better.
Sanding And Finishing
Sand all cut edges with fine sandpaper. This removes splinters and rough spots. Sand the entire surface to prepare for finishing. Wipe away dust with a clean cloth. Apply paint or wood stain for a smooth, attractive look. Let the finish dry fully before assembling the shelves.
Assembling Shelf Components
Lay out all shelf pieces on a flat surface. Use wood glue at the joints for extra strength. Attach shelves to side panels with screws or nails. Check that corners are square and shelves are level. Tighten all fasteners securely to prevent wobbling. Your shelf frame is now ready to mount on the wall.
Mounting The Bookshelf
Mounting the bookshelf is a key step to make it safe and sturdy. Proper mounting holds the shelf firmly on the wall. It keeps your books and decorations secure. Follow these steps carefully to mount your wall bookshelf correctly.
Securing Brackets Or Supports
Start by choosing strong brackets or supports. Find wall studs with a stud finder. Mark the spots where brackets will go. Use a drill to make holes in the wall. Attach brackets using screws that fit the wall type. Tighten the screws so brackets do not move.
Attaching Shelves To The Wall
Place the shelf on the secured brackets. Align the shelf edges evenly with the brackets. Use screws to fix the shelf to the brackets. Check that the screws are tight and secure. This step keeps the shelf from sliding off.
Ensuring Stability
Test the shelf by gently pressing on it. Check for any wobbling or loose parts. Tighten screws if you find any movement. Use a level to confirm the shelf is straight. Make sure the shelf holds weight without shifting.
Finishing Touches
Finishing touches make your wall mounted bookshelf look complete and polished. These final steps bring out the beauty of your work. They also protect the wood and help the shelf fit your room’s style perfectly.
Focus on painting or staining first. Then, add decorative elements that match your taste. Finally, organize your books and items to make the shelf both useful and attractive.
Painting Or Staining
Choose paint or stain to protect the wood and enhance its look. Paint offers many colors for a bold or soft appearance. Stain shows the wood’s natural grain and adds warmth. Use a brush or cloth to apply evenly. Let the finish dry completely before moving to the next step.
Adding Decorative Elements
Add small details to personalize your bookshelf. Use trim, decals, or small hooks for extra flair. Place plants or small artwork on the shelf to create interest. These touches help the shelf blend with your room’s decor. Keep decorations simple to avoid clutter.
Organizing Books And Items
Arrange books by size, color, or subject for easy access. Mix books with decorative items like vases or picture frames. Leave some space between objects to keep the shelf neat. Use bookends to keep books upright and tidy. A well-organized shelf looks inviting and functional.
Maintenance And Safety
Maintaining a wall mounted bookshelf is key to keeping it safe and lasting long. Regular care prevents accidents and keeps the shelf looking good. Follow simple steps to ensure your shelf stays sturdy and clean.
Regular Checks For Stability
Check the bookshelf’s stability often. Look for loose screws or brackets. Tighten any parts that feel wobbly. Make sure the shelf is firmly attached to the wall. Avoid putting too much weight on it. This helps prevent it from falling.
Cleaning Tips
Dust the bookshelf weekly with a soft cloth. Avoid using wet or harsh cleaners. Use a dry or slightly damp cloth to wipe the surface. Clean spills immediately to avoid stains. Keep books and items tidy to reduce dust buildup.
Preventing Damage
Do not overload the shelf with heavy items. Distribute weight evenly across the shelf. Use wall anchors suitable for your wall type. Avoid hitting or bumping the shelf hard. Keep sharp objects away to prevent scratches. Small care steps protect your bookshelf for years.

Credit: www.youtube.com
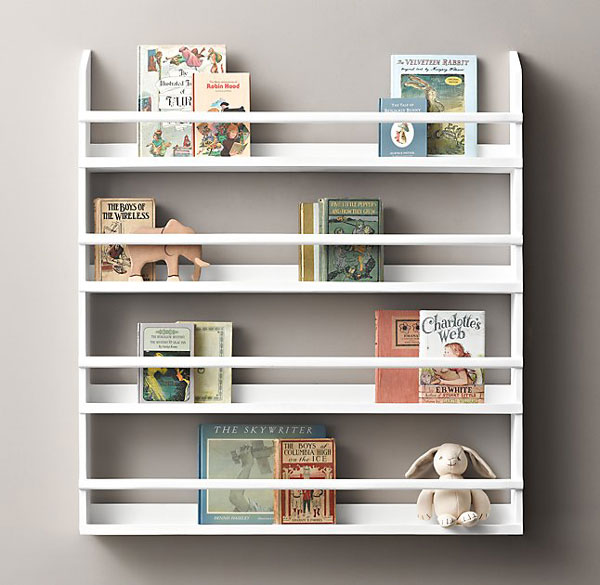
Credit: createdbyv.com
Frequently Asked Questions
What Materials Do I Need To Build A Wall Mounted Bookshelf?
You need wood planks, brackets, screws, wall anchors, a drill, level, measuring tape, and a stud finder. Choose sturdy materials to ensure durability and safety.
How Do I Find Studs For Mounting The Bookshelf?
Use a stud finder to locate studs behind your wall. Mark the stud positions with a pencil to securely anchor the shelf.
What Tools Are Essential For Building A Wall Mounted Bookshelf?
Essential tools include a drill, screwdriver, level, measuring tape, stud finder, and saw. These tools help ensure accurate measurements and secure installation.
How Much Weight Can A Wall Mounted Bookshelf Hold?
Weight capacity depends on materials and mounting. Properly anchored shelves can hold between 20 to 50 pounds per bracket safely.
Conclusion
Building a wall mounted bookshelf can change your space. It saves floor room and keeps books organized. You only need basic tools and some patience. Follow each step carefully to get the best results. Enjoy your new shelf and display your favorite books.
Small projects like this bring big rewards at home. Try adding your personal touch to make it unique. Start today and see how easy it can be.
