Imagine waking up every day to a headboard that not only looks great but also holds your favorite books within arm’s reach. If you love reading and want to add a personal touch to your bedroom, a bookshelf headboard might be exactly what you need.
It’s practical, stylish, and surprisingly easy to make yourself. You’ll discover simple steps to create a unique bookshelf headboard that fits your style and space perfectly. Ready to transform your bedroom and keep your books close? Let’s get started!
Materials And Tools Needed
Gathering the right materials and tools is key to building a sturdy bookshelf headboard. This step ensures your project goes smoothly and looks great. Knowing what to use helps avoid delays and extra costs. Below are the main materials and tools needed for this DIY project.
Choosing The Right Wood
Select wood that is strong and easy to work with. Pine is a popular choice for beginners. It is affordable and light. Oak or maple offer more durability but cost more. Choose wood boards that are smooth and free of cracks. The size depends on your bed width and desired shelf height. Plan carefully to avoid waste.
Essential Tools For The Project
A power drill is necessary for making holes and driving screws. Use a saw to cut the wood to the right sizes. A measuring tape ensures accuracy. Sandpaper or an electric sander smooths rough edges. A screwdriver helps with fine adjustments. A level keeps your shelves straight. Having clamps is useful to hold pieces together while assembling.
Additional Supplies
Buy wood screws that fit your wood thickness. Wood glue adds extra strength to joints. Paint or wood stain gives your headboard a finished look. Brushes or rags help apply finishes evenly. Protective gear like gloves and goggles keep you safe. Drop cloths protect your floor during painting or sanding. Small nails or brackets may be needed for extra support.
Credit: www.hgtv.com
Planning Your Bookshelf Headboard
Planning your bookshelf headboard is the first step to a functional and stylish bedroom. A good plan helps you avoid mistakes and saves time. Careful preparation ensures the headboard fits well and looks great.
Start by knowing your space and bed size. Think about the style you want and how to keep it safe and sturdy. These points guide you to a perfect DIY bookshelf headboard.
Measuring Your Bed And Space
Measure the width of your bed frame accurately. Check the height from the floor to the top of the mattress. Note the space available behind the bed on the wall. Allow extra room for shelves and decorations. Write down all measurements before you start building.
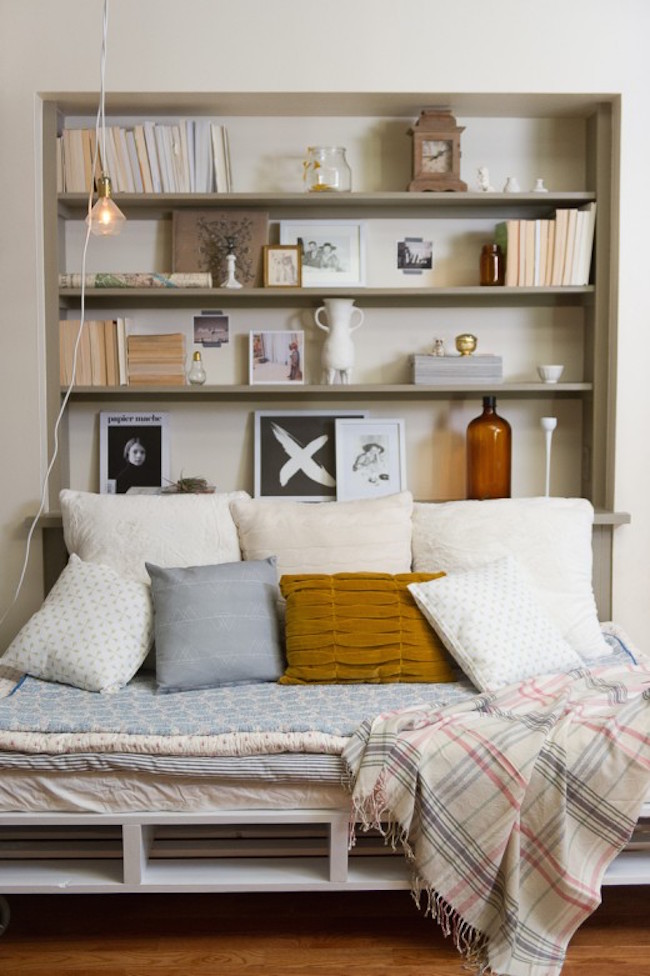
Design Ideas And Styles
Choose a design that fits your room’s look. Simple, modern lines suit most spaces. Rustic wood shelves add warmth and charm. Think about open shelves or with doors. Decide on the number of shelves you need. Balance style with how many books or items to store.
Safety Considerations
Make sure the headboard is stable and well-anchored. Use strong materials that hold weight safely. Avoid sharp edges or loose parts that may cause injury. Check that shelves can support your books without bending. Secure the headboard to the wall to prevent tipping.
Cutting And Preparing Wood
Cutting and preparing wood is a key step in building a bookshelf headboard. It shapes the wood pieces to the right size. It also makes sure the wood is smooth and ready for assembly. Careful preparation helps the project look neat and last longer.
Marking And Measuring Cuts
Start by measuring each wood piece carefully. Use a tape measure for accuracy. Mark the cut lines with a pencil. Double-check your measurements before cutting. Clear marks help you cut straight and avoid mistakes.
Sanding And Smoothing Edges
After cutting, the wood edges can be rough or splintered. Use sandpaper or a sanding block to smooth these edges. Sand in the direction of the grain for a clean finish. Smooth edges prevent splinters and give a polished look.
Prepping For Assembly
Before putting the pieces together, clean off dust from sanding. Check all pieces fit well without gaps. Organize your wood parts by size and shape. This makes assembly faster and easier. Ready wood pieces help the headboard stay strong and steady.
Assembling The Frame
Assembling the frame is a key step in making a bookshelf headboard. This part sets the base and shape. A strong frame keeps the headboard sturdy and safe.
Focus on precise measurements and solid connections. Take your time to ensure each part fits well. A well-built frame makes the rest of the project easier.
Building The Main Structure
Start by cutting the wood pieces for the frame. Use two long boards for the sides. Add shorter boards at the top and bottom. Join these with screws or wood glue. Check the corners to keep them square. This forms a rectangle that fits your bed width.
Securing Shelves In Place
Measure the space inside the frame for shelves. Mark where each shelf will go. Attach shelves using screws from the outside edges. Use clamps to hold shelves while screwing. Make sure shelves are level and even. This keeps books from tipping or sliding off.
Adding Support Braces
Add braces to strengthen the frame. Place braces diagonally on the back corners. Use small wood pieces and secure with screws. Braces stop the frame from wobbling. They help the headboard hold weight safely over time.
Finishing Touches
Finishing touches bring your bookshelf headboard to life. They protect the wood and add style. A well-done finish makes your project look complete and neat. These final steps help your headboard last longer and fit your bedroom decor.
Painting Or Staining Options
Choose paint or stain based on your room’s style. Paint covers wood fully and offers many color choices. Stain shows the wood grain and adds warmth. Use light colors for a fresh look. Dark stains create a rich, cozy feel. Test colors on scrap wood to see the real shade.
Sealing And Protecting Wood
Seal your headboard to protect it from damage. Use clear polyurethane for strong protection. It guards against scratches and spills. Apply two or three thin coats with a brush. Let each coat dry well before the next. Sand lightly between coats for smoothness. This step keeps the wood safe and shiny.
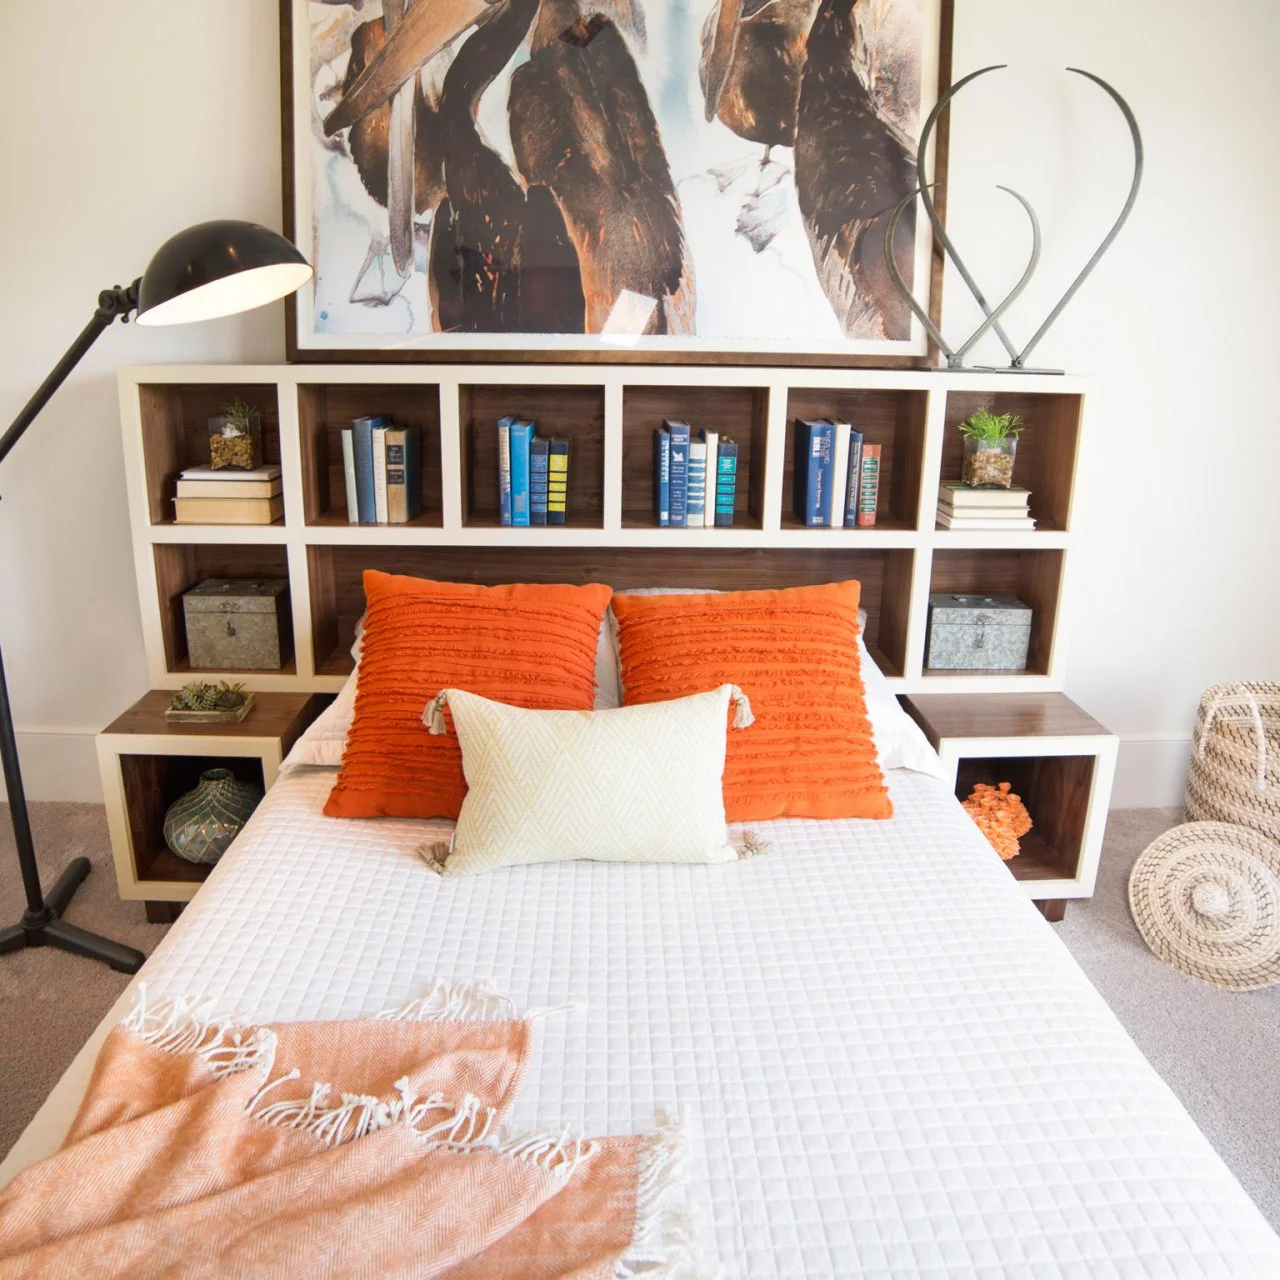
Decorating Your Headboard
Decorate to personalize your bookshelf headboard. Add small plants, fairy lights, or framed photos. Use bookends to keep books tidy and stylish. Place a clock or small art pieces for charm. Keep decorations simple to avoid clutter. A neat look makes your bedroom calm and inviting.

Credit: www.youtube.com
Installing The Headboard
Installing your bookshelf headboard is the final step to complete your project. It needs careful work to make sure it is strong and safe. This section explains different ways to install your headboard.
Attaching To The Bed Frame
Start by checking the size of your bed frame. Match the headboard’s height and width to the bed. Use bolts and screws to fix the headboard to the frame. Make sure the bolts are tight but not too tight. Check that the headboard does not wobble after attaching.
Wall Mounting Techniques
Find the wall studs using a stud finder. Mark the spots where you will mount the headboard. Use strong brackets or cleats for support. Drill holes into the studs, then screw the brackets securely. Hang the headboard on the brackets. This method saves space and looks neat.
Ensuring Stability And Safety
Double-check all screws and bolts. Tighten any loose parts to prevent movement. Place rubber pads between the headboard and wall to avoid scratches. Test the headboard by gently pushing it. If it moves, add extra support. Safety is key for a long-lasting headboard.
Maintenance And Care Tips
Keeping your bookshelf headboard in good shape makes it last longer and look great. Regular care helps avoid damage and keeps the wood or material fresh. Simple steps can keep your headboard clean, fix small problems, and update its look over time. This section explains easy ways to care for your bookshelf headboard.
Cleaning Your Headboard
Dust your headboard weekly using a soft cloth. Avoid wet or harsh chemicals that can damage the wood. Use a dry microfiber cloth to remove dirt gently. For stubborn spots, dampen the cloth slightly with water and wipe carefully. Dry the surface immediately to prevent moisture damage.
Repairing Minor Damages
Small scratches or dents can be fixed easily. Use wood filler or putty for deep scratches. Lightly sand the area after it dries to smooth the surface. For minor marks, use a matching wood stain or polish. Check screws and fittings often to tighten loose parts and keep the headboard stable.
Updating Style Over Time
Change the look of your headboard without replacing it. Paint it with a new color to match your room decor. Add decorative elements like stencils or wallpaper on the shelves. Swap out handles or knobs for a fresh design. Refresh your headboard every few years to keep your bedroom inviting.
Credit: www.spacejoy.com
Frequently Asked Questions
What Materials Are Needed To Make A Bookshelf Headboard?
You need wood boards, screws, a drill, sandpaper, paint or stain, and brackets. Choose sturdy wood like pine or oak for durability. Optional items include wood glue and a level for precision. These materials ensure a strong, functional bookshelf headboard.
How Much Time Does Building A Bookshelf Headboard Take?
Building a bookshelf headboard typically takes 4 to 6 hours. This depends on your skill level and design complexity. Allow extra time for drying paint or stain. Planning and preparation can speed up the process while ensuring quality results.
Can A Bookshelf Headboard Fit All Bed Sizes?
Yes, bookshelf headboards can be customized to fit any bed size. Measure your bed’s width and height before building. Adjust shelf dimensions accordingly for a perfect fit. Custom builds ensure both functionality and aesthetic appeal for any bedroom.
Is It Difficult To Build A Bookshelf Headboard For Beginners?
Building a bookshelf headboard is beginner-friendly with basic woodworking skills. Clear instructions and simple tools help. Start with a simple design to build confidence. Patience and careful measuring improve the final outcome and make the process enjoyable.
Conclusion
Building a bookshelf headboard adds style and function to any bedroom. You can save space and keep books close while sleeping. The project is simple and fits many room sizes. Choose materials and colors that match your decor. Follow the steps carefully to make a sturdy headboard.
Enjoy your new piece that stores books and looks great. Try this DIY to personalize your sleeping space today.
