Are you ready to add a sturdy and stylish ladder to your wood bunk bed? Building your own ladder might sound tricky, but it’s easier than you think.
With the right steps and simple tools, you can create a safe ladder that fits perfectly with your bed. Imagine the satisfaction of climbing up a ladder you made yourself—strong, reliable, and built just for your space. Keep reading, and you’ll discover how to turn basic wood into a ladder that’s both functional and attractive.
Your bunk bed upgrade starts here!
Materials And Tools Needed
Building a wood bunk bed ladder needs the right materials and tools. Choosing good wood ensures strength and safety. Having the right tools makes the job easier. Safety gear protects you during the process. This section explains what you need to start.
Wood Selection
Choose solid wood like pine or oak for the ladder. These woods are strong and easy to work with. Avoid soft or weak wood that can break. Use boards that are straight and free of knots. The wood should be at least 1 inch thick. This thickness supports weight and keeps the ladder safe.
Essential Tools
You need a saw to cut the wood to size. A drill helps make holes for screws. Use a screwdriver or a power drill to fasten parts. Sandpaper or a sander smooths rough edges. A tape measure ensures accurate cuts. A carpenter’s square helps keep corners right angled.
Safety Gear
Wear safety goggles to protect your eyes from dust and wood chips. Use gloves to avoid splinters and cuts. A dust mask stops you from breathing sawdust. Hearing protection is important when using loud tools. Always work in a well-lit and clean space.

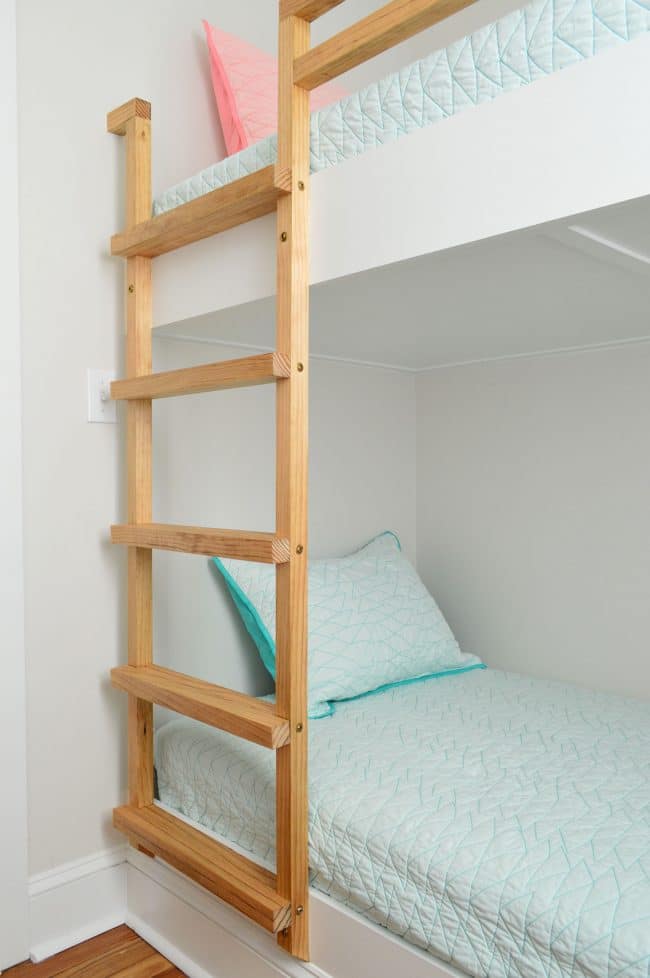
Credit: yellowbrickhome.com
Designing Your Ladder
Designing your ladder is the first important step in building a wood bunk bed ladder. A good design ensures safety and comfort. It helps you create a ladder that fits perfectly with your bunk bed. Careful planning prevents mistakes and saves time and materials.
Measuring The Bunk Bed Height
Start by measuring the total height from the floor to the top bunk. Use a tape measure for accuracy. Write down this number clearly. This measurement decides the ladder’s length. Also, measure the distance from the floor to the bottom of the top bunk frame. This helps decide where to place the ladder steps.
Choosing Ladder Dimensions
Pick the ladder width that fits your space and is easy to climb. A common width is about 15 inches. Decide the distance between each step. Around 10 to 12 inches works best for most people. Choose the thickness of wood for strong support. Usually, 1 to 1.5 inches thick wood is enough for safety.
Sketching The Ladder Plan
Draw a simple ladder plan on paper. Show the side view with exact measurements. Mark the height, width, and step positions. Label each part clearly. This sketch guides you while cutting and assembling. It helps spot errors before you start building. Keep the drawing handy during the project.
Cutting The Wood Pieces
Cutting the wood pieces is the first big step in building your bunk bed ladder. Accurate cuts ensure the ladder fits well and stays strong. Take your time with measurements and cutting. Safety is important, so wear goggles and gloves.
Prepare your workspace with a flat surface. Use sharp tools for clean cuts. Measure twice, cut once to avoid mistakes.
Measuring And Marking
Start by measuring the wood pieces needed for the ladder. Use a tape measure and pencil for clear marks. Mark each piece carefully to match your design. Double-check all measurements before cutting. Clear marks help avoid confusion later.
Cutting Side Rails
The side rails hold the ladder steps. Cut two long pieces from sturdy wood. Use a saw to cut along the marked lines. Keep the cuts straight for a good fit. Smooth the edges with sandpaper to avoid splinters.
Cutting Steps
Cut the steps shorter than the rails. Each step should be the same length. Use a square tool to keep cuts square. Sand the steps well so they are safe to climb. Check that steps fit snugly between the rails.
Assembling The Ladder Frame
Assembling the ladder frame is a key step in building your wood bunk bed ladder. This process creates the solid structure that supports each step. Proper assembly ensures safety and stability. Follow simple steps to put the frame together correctly.
Attaching Steps To Side Rails
Start by positioning the steps between the two side rails. Align each step with the marks on the rails. Use clamps to hold the steps in place. Check that the steps sit flat and straight before moving on.
Ensuring Even Spacing
Measure the distance between each step carefully. Consistent spacing makes climbing easier and safer. Use a ruler or tape measure to check gaps. Adjust the steps as needed to keep them evenly spaced.
Securing With Screws
Use wood screws to fasten each step to the side rails. Pre-drill holes to avoid splitting the wood. Tighten screws firmly but avoid over-tightening. Double-check each connection for strength and security.
Sanding And Finishing
Sanding and finishing are essential steps in building a wood bunk bed ladder. These steps make the ladder safe and beautiful. Sanding removes rough spots and splinters. Finishing protects the wood from damage. It also gives the ladder a smooth, clean look.
Smoothing Rough Edges
Start by sanding all wood surfaces with medium-grit sandpaper. Focus on edges and corners where splinters can form. Use fine-grit sandpaper to create a soft, smooth finish. Sand along the wood grain to avoid scratches. Check for any rough patches and sand them carefully. Smooth edges prevent injuries and improve ladder comfort.
Applying Paint Or Stain
Choose paint or stain that fits your room’s style. Paint adds color and covers the wood completely. Stain enhances the natural wood grain and tones. Apply a thin, even coat with a brush or cloth. Let the first coat dry fully before adding more. Multiple coats give better color and coverage. Paint or stain helps protect the wood from moisture and wear.
Adding Protective Coating
Seal the ladder with a clear protective coating. Use polyurethane or varnish for strong protection. Apply thin layers with a clean brush. Let each layer dry before adding the next. This coating guards against scratches, water, and dirt. It keeps the ladder looking good for years. A well-finished ladder is safe and lasts longer.

Credit: www.youtube.com
Installing The Ladder
Installing the ladder is a crucial step in building a wood bunk bed ladder. It ensures safe and easy access to the top bunk. Proper installation prevents accidents and keeps the ladder sturdy. Follow each step carefully to secure the ladder correctly.
Positioning The Ladder
Place the ladder at the side of the bunk bed where it fits best. Make sure it lines up with the top bunk’s opening. The ladder should lean slightly against the bed frame. Check that the bottom rests firmly on the floor. Avoid placing it too far or too close to the bed.
Securing To The Bunk Bed
Use screws or bolts to fix the ladder to the bed frame. Attach the ladder at the top and middle points for extra support. Drill pilot holes to prevent the wood from splitting. Tighten all fasteners firmly. Double-check that the ladder does not wobble after securing.
Testing Stability
Test the ladder by applying pressure with your hands. Climb the ladder slowly, one step at a time. Notice any movement or loose parts. If the ladder shifts, tighten the screws again. Make sure the ladder feels solid and safe before use.
Maintenance Tips
Maintaining your wood bunk bed ladder is key for safety and durability. Small care steps keep it strong and looking good. Set a routine to check and clean the ladder often.
Simple actions prevent damage and avoid accidents. Well-kept ladders last longer and stay safe for kids. Use these tips to keep your ladder in top shape.
Regular Inspections
Look over the ladder every few weeks. Check for cracks, splinters, or loose parts. Spotting problems early stops bigger damage. Watch for signs of wear on steps and side rails. Act fast if you find any issues.
Tightening Screws
Loose screws make the ladder unsafe. Use a screwdriver to tighten all screws regularly. Focus on joints and where steps meet rails. Tighten gently to avoid stripping the screws. Regular checks keep the ladder solid and stable.
Cleaning And Care
Dust and dirt can wear down the wood. Wipe the ladder with a damp cloth often. Avoid harsh chemicals; mild soap works well. Dry the wood completely after cleaning. Treat the wood with polish or oil for extra protection. Clean ladders look nicer and last longer.
Credit: www.younghouselove.com
Frequently Asked Questions
What Tools Do I Need To Build A Wood Bunk Bed Ladder?
You need a saw, drill, measuring tape, screwdriver, wood glue, clamps, and sandpaper. These tools help cut, assemble, and smooth the ladder parts efficiently.
How Do I Choose The Best Wood For A Bunk Bed Ladder?
Select hardwood like oak or maple for strength and durability. Avoid softwoods to ensure safety and longevity of the ladder.
What Are The Safety Tips For Building A Bunk Bed Ladder?
Measure precisely, secure all joints tightly, and sand all edges smooth. Always test the ladder’s stability before use to prevent accidents.
How Long Does It Take To Build A Wood Bunk Bed Ladder?
It typically takes 3 to 5 hours, depending on your skill level and tools. Planning and precise measurements can speed up the process.
Conclusion
Building a wood bunk bed ladder is easier than it seems. Start with good measurements and safe materials. Take your time to cut and assemble each step carefully. Check that the ladder is strong and steady before use. With patience, you can create a safe, useful ladder for your bunk bed.
Enjoy the satisfaction of building something practical by yourself. A simple project, but one that adds value and safety to your home. Keep practicing your woodworking skills with small projects like this.