Are you looking to add a stylish and functional piece to your home without spending a fortune? Building an easy console table might be just what you need.
Imagine having a beautiful table that fits perfectly in your hallway, living room, or entryway—made by your own hands. In this guide, you’ll discover simple steps that anyone can follow, even if you’re new to woodworking. By the end, you’ll have the confidence and know-how to create a console table that not only looks great but also suits your space perfectly.
Ready to get started? Let’s dive in.
Materials And Tools Needed
Building a console table is easier with the right materials and tools. Gathering everything before you start saves time and effort. This section covers the basic supplies you need to create a sturdy and attractive table.
Essential Wood Types
Choose wood that fits your style and budget. Pine is soft and easy to work with. Oak offers strength and a classic look. Birch is smooth and great for painting. Make sure the wood is dry and free from cracks.
Required Hardware
You need screws to hold the table parts together. Wood glue adds extra strength to joints. Sandpaper smooths rough edges. Wood filler fixes small holes or dents. Consider using corner brackets for added support.
Basic Tools For Assembly
A drill makes screwing easier and faster. A saw cuts the wood to size. A measuring tape helps get exact lengths. A screwdriver tightens screws securely. A clamp holds pieces steady while gluing.
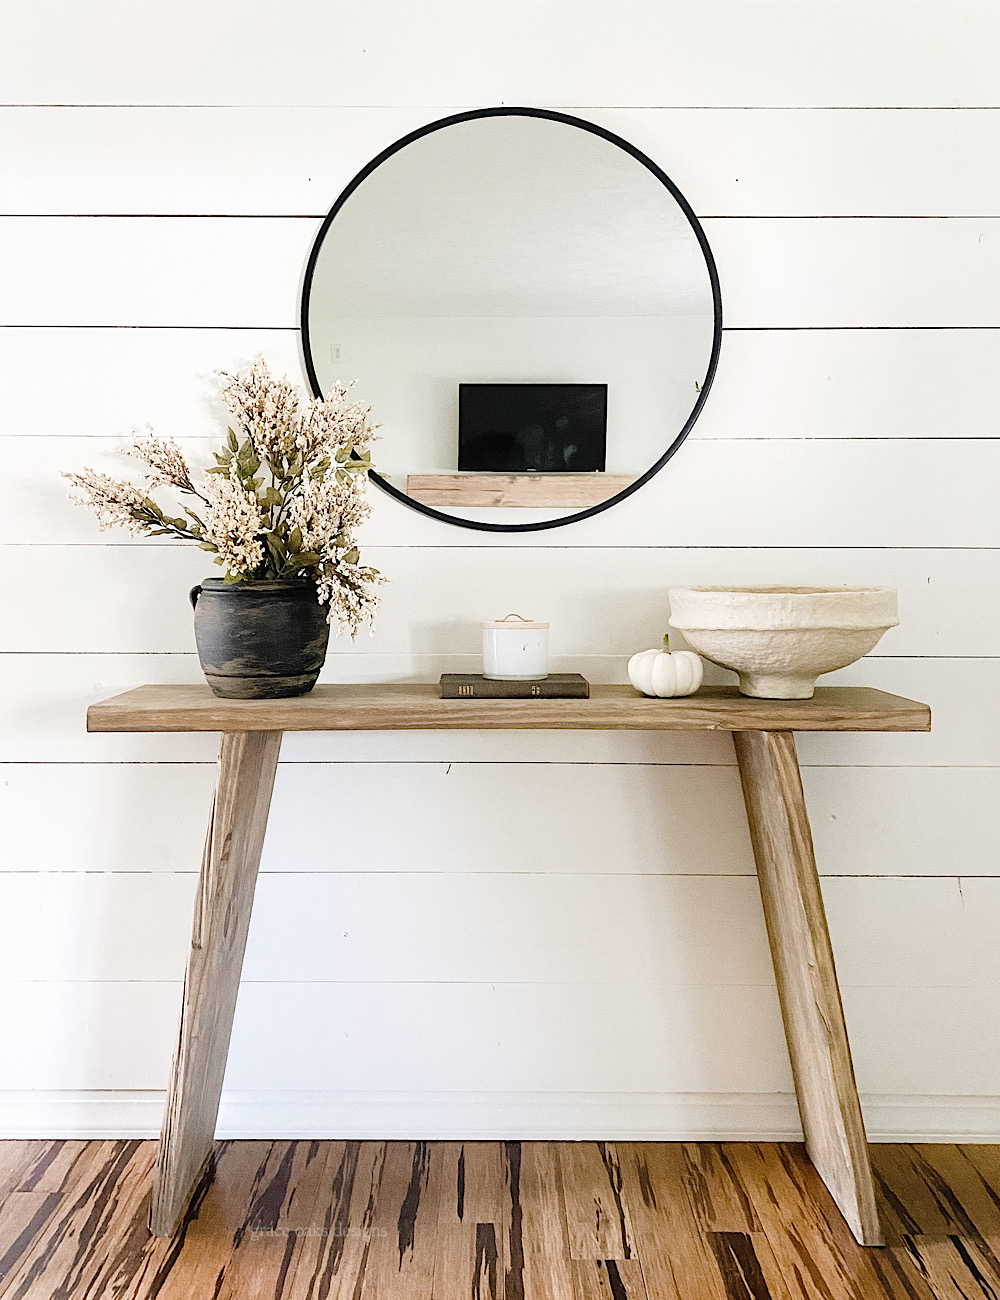
Credit: graceoaksdesigns.com
Choosing The Right Design
Choosing the right design is key to building an easy console table. The design affects how simple the build will be and how well the table fits your space. A good design balances style, function, and ease of construction. Think about your skill level and what you want the table to do. This helps pick a design that suits your needs and home.
Simple Styles For Beginners
Start with a basic shape. Rectangular or square tops with straight legs are easiest. Avoid complex curves or joints. These simple styles need fewer tools and less time. A clean, minimal design looks good in many rooms. It also helps you practice woodworking skills without stress.
Incorporating Storage Options
Adding shelves or drawers can make your table more useful. Open shelves are easier to build than drawers. You can store books, keys, or small items neatly. Think about what you want to keep nearby. Storage adds function but keep it simple to avoid tricky steps.
Matching Your Home Decor
Pick a design that fits your room style. Rustic wood suits farmhouse or country looks. Sleek metal or painted wood fits modern spaces. Choose colors and finishes that match your walls and furniture. A well-matched table blends in and enhances your home’s feel.
Measuring And Cutting Wood
Measuring and cutting wood are the first and most important steps in building a console table. Good measurements ensure all parts fit well. Cutting wood carefully helps avoid mistakes and saves time. This stage sets the base for a strong, neat table.
Accurate Measurements
Use a tape measure for exact lengths. Mark each piece clearly with a pencil. Double-check every measurement before cutting. Measure twice. Cut once. This rule prevents wasting wood. Keep your marks straight and visible. Use a square tool to draw perfect right angles.
Safe Cutting Techniques
Wear safety goggles to protect your eyes. Use a sharp saw for cleaner cuts. Keep your hands away from the blade. Cut slowly and steadily. Secure wood firmly on a stable surface. Follow the marked lines carefully. Turn off the saw before moving wood. Safety is key for a smooth project.
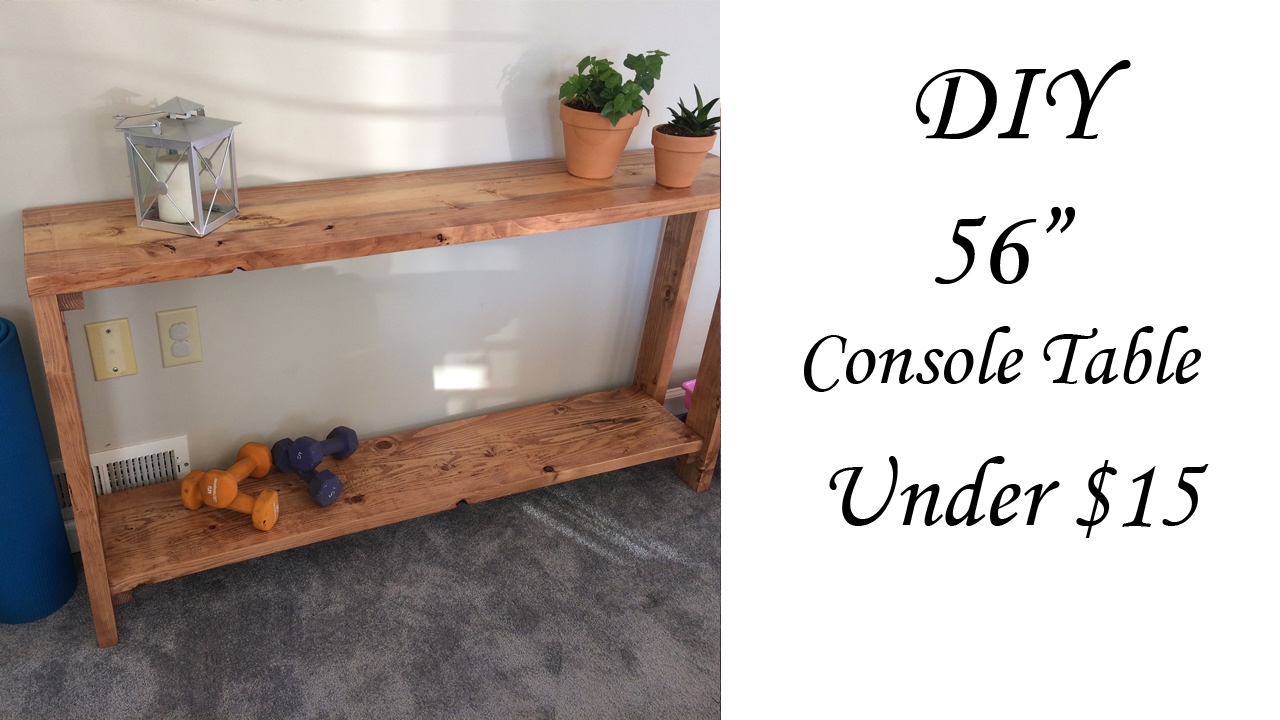
Credit: www.youtube.com
Assembling The Table Frame
Assembling the table frame is the key step to build your console table. This part creates the base that holds everything together. A strong frame means your table stays steady and lasts long. Follow simple steps to join parts and check stability.
Joining Legs And Supports
Start by placing the legs upright. Use screws or wood glue to attach the supports between the legs. These supports help hold the legs in place. Make sure the supports fit tightly. Measure twice to ensure the legs are even. Tight joints make the frame solid.
Ensuring Stability
Check the frame for wobbling after joining parts. Adjust screws if any leg feels loose. Add corner braces if needed for extra strength. Place the frame on a flat surface and press down gently. A stable frame will not move or shake. Stability ensures your console table works well and looks good.
Adding The Tabletop
Adding the tabletop is an important step in building your console table. It creates the main surface where you place items. This step needs careful attention to make sure the table is sturdy and looks great.
Securing The Surface
Place the tabletop on the frame. Check it is centered and even. Use screws or nails to fix it firmly. Drill pilot holes first to avoid wood splitting. Tighten the screws just enough to hold the surface tight. Avoid over-tightening which can damage the wood.
Sanding For Smooth Finish
Sand the tabletop to remove rough spots. Use medium-grit sandpaper first, then fine grit for a smooth touch. Sand along the wood grain to avoid scratches. Wipe the dust off with a cloth after sanding. A smooth surface feels nice and looks professional.
Finishing Touches
Finishing touches give your console table a polished look. They protect the wood and highlight its beauty. Taking time here improves the table’s durability and style. Follow easy steps to make your table stand out.
Painting And Staining Tips
Choose paint or stain based on the wood type and your style. Sand the surface smoothly before applying color. Use thin layers for even coverage. Let each layer dry fully to avoid smudges. Test colors on a scrap piece first. Use a brush or cloth to apply stain evenly. Work in the direction of the wood grain. For paint, use a primer for better grip. Light coats prevent drips and rough spots.
Protective Coatings
Seal your table with a protective coat to last longer. Polyurethane and varnish are common choices. They guard against scratches, water, and stains. Use a brush or spray for smooth application. Apply two or three thin layers for best results. Sand lightly between coats to remove bumps. Allow full drying time to harden the surface. This step keeps your table looking new for years.
Styling Your Console Table
Styling your console table brings life to any space. It lets you show your personality and taste. A well-styled table can make a room feel warm and inviting. It also keeps things tidy and useful. Small touches create big impacts. Here is how you can style your console table easily and attractively.
Decor Ideas
Start with simple decor pieces. A small vase with fresh flowers adds color and freshness. Picture frames with family photos make it personal. Use a small stack of books for height and interest. A decorative bowl or tray can hold keys or coins. Choose items that match your room’s style and colors. Keep the arrangement balanced, not crowded. Leave some empty space for a clean look.
Functional Accessories
Add items that help you stay organized. A small lamp provides light and a cozy feel. Use baskets or boxes under the table for extra storage. A bowl or dish for loose change keeps clutter away. A charging station for phones and gadgets keeps cords neat. Pick accessories that fit your daily needs. Practical pieces make the table both beautiful and useful.

Credit: saffronavenue.com
Frequently Asked Questions
What Materials Do I Need To Build A Console Table?
You need wood boards, screws, wood glue, sandpaper, paint or stain, and basic tools like a saw and drill. Choose sturdy wood like pine or oak for durability. Quality materials ensure a strong and lasting console table.
How Long Does It Take To Build A Console Table?
Building an easy console table typically takes 3 to 5 hours. This depends on your experience level and the complexity of the design. Allow extra time for drying paint or stain. Planning ahead speeds up the process.
Can Beginners Build A Console Table Easily?
Yes, beginners can build an easy console table with simple step-by-step instructions. Start with basic tools and a straightforward design. Take your time measuring and assembling parts carefully to ensure success.
What Tools Are Essential For Making A Console Table?
Essential tools include a saw, drill, screwdriver, measuring tape, and clamps. Sandpaper or a sander helps smooth the wood surface. Having the right tools makes assembly easier and improves the final result.
Conclusion
Building an easy console table can be fun and rewarding. You only need a few tools and simple steps. This project saves money and adds style to your home. Take your time and follow the instructions carefully. Soon, you will enjoy a new piece of furniture made by you.
Try different finishes or colors to match your space. Remember, practice makes perfect. Start today and create something useful and beautiful.

