
Are you looking for a smart way to add storage without taking up extra space? Building a bookshelf into your wall could be the perfect solution.
It not only saves room but also gives your space a clean, stylish look. Imagine having your favorite books and decor displayed right where you want them, easily reachable and beautifully framed by your own custom-built shelf. In this guide, you’ll find simple steps and practical tips to help you create a built-in bookshelf that fits your style and needs.
Ready to transform your wall and organize your space like never before? Let’s dive in!
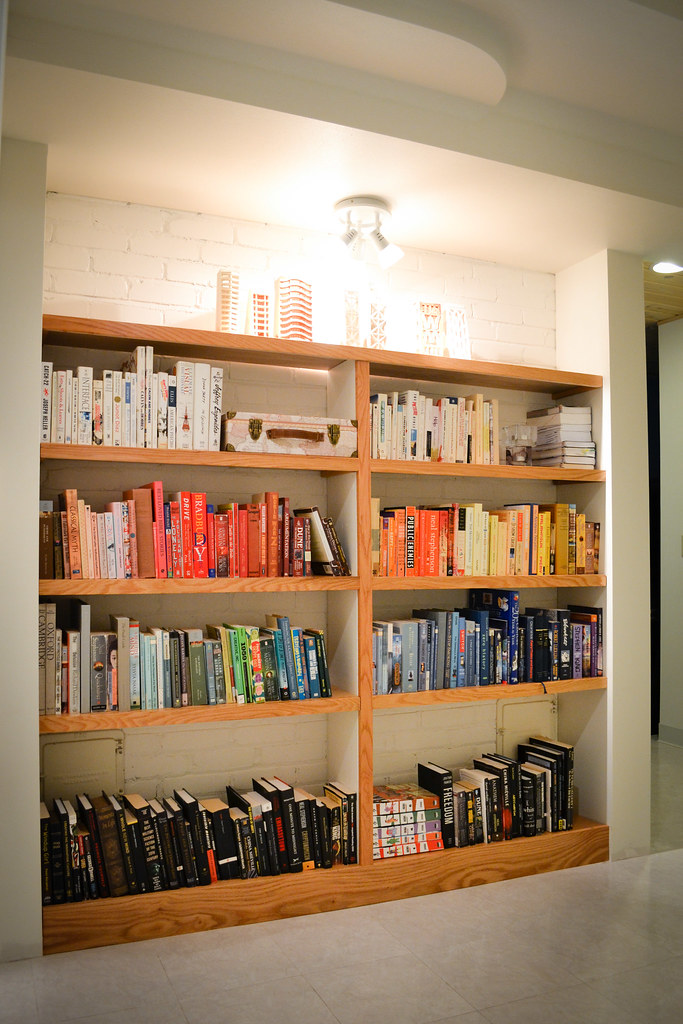
Credit: www.thingsimadetoday.com
Planning Your Built-in Bookshelf
Planning your built-in bookshelf is the first step to a successful project. It helps you organize ideas and avoid mistakes. Careful planning saves time and money. It also ensures the shelf fits well and looks great.
Choosing The Perfect Location
Select a wall that has enough space for the bookshelf. Check for electrical outlets, switches, or vents that might get in the way. A well-lit area makes reading easier and highlights the shelf. Think about how the shelf will fit with your room’s style.
Measuring Wall Space Accurately
Use a tape measure to get exact width, height, and depth of the wall. Measure twice to avoid errors. Write down all numbers clearly. Consider any baseboards or moldings that might affect the size. Accurate measurements help the shelf fit perfectly.
Selecting Materials And Tools
Choose wood that matches your room’s decor and budget. Plywood and MDF are popular for built-ins. Pick screws, nails, and brackets for strong support. Get tools like a drill, level, saw, and measuring tape ready. Good materials and tools make building easier and safer.
Preparing The Wall
Preparing the wall is the first step to build a bookshelf into the wall. It sets the foundation for a strong and safe shelf. Careful preparation saves time and prevents problems later. The wall must be clear, checked for studs and wiring, and measured properly. This section guides you through these key tasks.
Clearing The Area
Start by removing furniture and decorations near the wall. Clear space helps you work easily and avoid damage. Take down pictures, shelves, or hooks on the wall. Sweep or vacuum the floor to keep dust away. A clean workspace improves safety and comfort.
Locating Studs And Wiring
Use a stud finder to locate the studs inside the wall. Studs provide support for the bookshelf. Mark their positions with a pencil. Check for electrical wires with a wire detector. Avoid cutting into wires to prevent hazards. Knowing where studs and wires are is crucial.
Marking Shelf Dimensions
Measure the space where the bookshelf will go. Use a tape measure and a pencil for marks. Draw the outline of the shelf on the wall. Double-check measurements to ensure accuracy. Clear markings guide you during cutting and installation.
Constructing The Frame
Constructing the frame is the first step to building a built-in bookshelf. This frame gives shape and strength to the shelf. It must be strong and fit well inside the wall space. A solid frame keeps the shelves straight and can hold the weight of books.
Cutting Lumber To Size
Start by measuring the wall space where the bookshelf will go. Write down the height, width, and depth of the frame. Use these measurements to mark your lumber. Cut the wood pieces carefully with a saw. Make sure the cuts are straight for a better fit. Cut enough pieces for the sides, top, bottom, and shelves.
Assembling The Frame
Lay out the cut pieces on a flat surface. Arrange them in the shape of the bookshelf frame. Use wood screws or nails to join the corners. Check that all angles are square using a carpenter’s square. Tighten all connections so the frame does not wobble. The frame should be sturdy and hold its shape.
Securing Frame To Wall Studs
Find the wall studs behind the drywall using a stud finder. Mark the stud locations on the floor and ceiling. Position the frame inside the wall space against the studs. Use long screws to attach the frame firmly to the studs. This prevents the bookshelf from moving or falling. Double check that the frame is level and secure before adding shelves.
Installing Shelves
Installing shelves is a key step in building a bookshelf into a wall. It brings your design to life and creates space for your books and decor. Careful planning and precise work ensure strong, level shelves that last.
Follow each step carefully for the best results. Start by choosing the right shelf style. Then cut and fit the shelves to your frame. Finally, attach them securely for stability.
Choosing Shelf Styles
Pick a shelf style that fits your room and needs. Floating shelves offer a clean, modern look without visible supports. Box shelves provide extra storage and a classic shape. Adjustable shelves allow flexibility for different book sizes. Consider the weight your shelves must hold. Solid wood suits heavy loads. MDF or plywood works well for lighter items.
Cutting And Fitting Shelves
Measure the space inside the frame carefully. Mark the shelf length on your wood pieces. Use a saw to cut shelves straight and smooth. Sand edges to avoid splinters and improve finish. Test fit each shelf inside the frame. Make small adjustments so shelves fit snugly without gaps. Ensure shelves sit level before fixing them in place.
Attaching Shelves To Frame
Secure shelves to the frame using strong brackets or screws. Drill pilot holes to prevent wood from splitting. Use a level to check each shelf’s alignment before tightening. For floating shelves, hidden brackets keep supports invisible. Check stability by pressing down gently. Tighten screws if shelves move or wobble. Proper attachment ensures your bookshelf holds books safely and looks great.
Finishing Touches
Finishing touches bring your built-in bookshelf to life. They make the piece look smooth and complete. These final steps help your bookshelf blend perfectly with the wall and room. Take your time to get these details right. A neat finish will impress everyone and last for years.
Sanding And Smoothing Surfaces
Start by sanding all wooden surfaces. Use fine-grit sandpaper for a soft, smooth feel. Sand edges and corners carefully to remove rough spots. Wipe dust away with a damp cloth after sanding. Smooth surfaces allow paint or stain to stick well. This step also helps prevent splinters and cracks.
Painting Or Staining
Choose paint or stain that matches your room’s style. Paint gives a clean, solid color. Stain shows the wood’s natural beauty. Apply a primer before painting for better coverage. Use even strokes and avoid thick layers. Let each coat dry fully before adding another. A good finish protects the wood and looks great.
Adding Trim And Molding
Trim and molding add style and cover gaps. Select trim that fits your room’s design. Cut pieces to fit the bookshelf edges and corners. Attach with nails or wood glue. Fill nail holes with wood filler and sand smooth. This step hides seams and gives a polished look. Trim can make your bookshelf look built-in and custom-made.
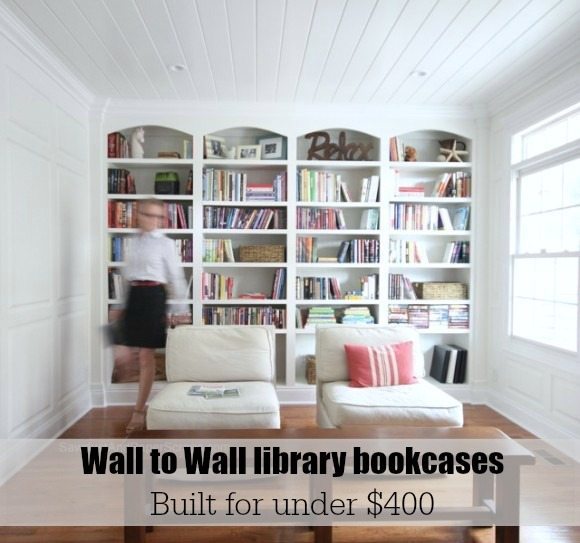
Credit: sawdustgirl.com
Maintaining Your Bookshelf
Maintaining your built-in bookshelf helps keep it looking great and lasting long. Regular care prevents damage and keeps your space tidy. Small efforts can save time and money later.
Cleaning Tips
Dust your bookshelf often using a soft cloth or duster. Avoid wet cloths that can damage wood or paint. For tough spots, use a mild soap with water and dry quickly. Keep books clean by wiping their covers gently.
Checking For Stability
Look at the shelves regularly to ensure they stay strong. Press gently on shelves to check for wobbling or sagging. Tighten screws or brackets if you see looseness. Fix any cracks or damage as soon as possible.
Updating Shelf Layout
Change your shelf arrangement to keep it fresh and useful. Move books or decor to balance weight and avoid clutter. Add or remove shelves based on your storage needs. Rearranging also helps spot any hidden dust or damage.
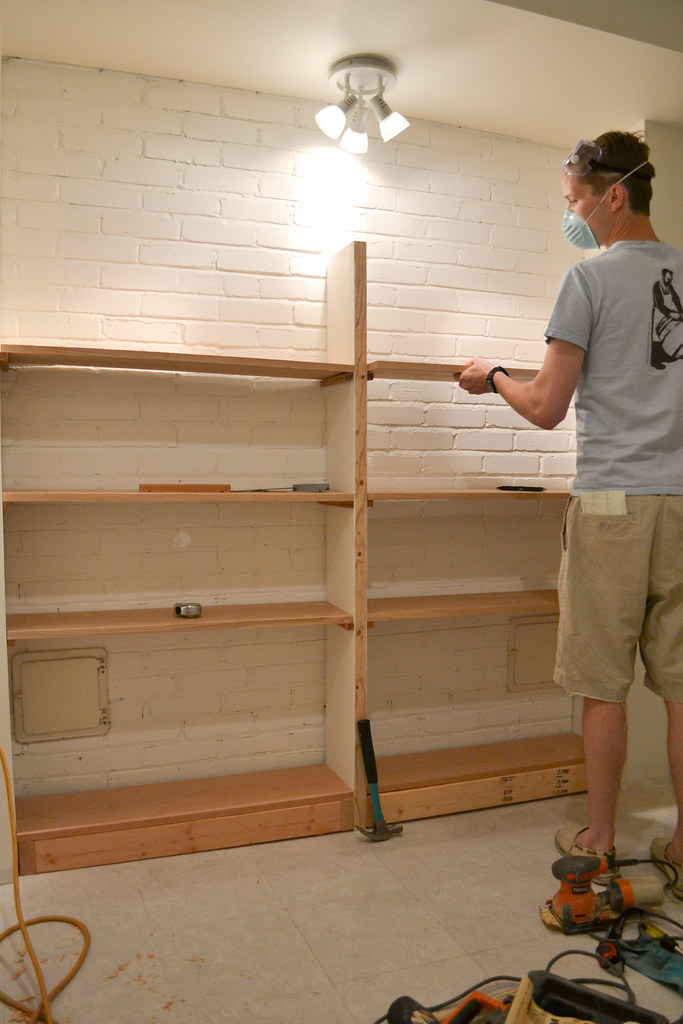
Credit: www.thingsimadetoday.com
Frequently Asked Questions
How Do I Start Building A Bookshelf Into A Wall?
Begin by selecting the wall and measuring the available space. Then, gather materials like wood, screws, and drywall. Mark the bookshelf dimensions on the wall and check for studs or wiring before cutting. This ensures a safe, secure, and customized built-in bookshelf.
What Tools Are Needed For A Wall Bookshelf Project?
You will need a stud finder, measuring tape, level, saw, drill, screws, and drywall tools. These tools help create precise cuts and secure the bookshelf firmly into the wall. Using the right tools makes the project easier and the result more professional.
How Can I Ensure The Bookshelf Is Securely Attached?
Locate wall studs with a stud finder and anchor the bookshelf into them. Use appropriate screws and brackets for support. Secure attachment prevents wobbling and ensures safety when placing heavy books or decorations on shelves.
What Materials Work Best For A Built-in Bookshelf?
Use sturdy plywood or solid wood for shelves and frame. Drywall or plaster can finish the wall around the bookshelf. Quality materials increase durability and provide a polished, seamless look that integrates well with your room’s design.
Conclusion
Building a bookshelf into a wall adds charm and saves space. Start with a clear plan and the right tools. Measure well to fit your space perfectly. Cut and assemble carefully for strong shelves. Paint or finish to match your room’s style.
Take your time and enjoy the process. A built-in bookshelf can hold books and treasures. It brings warmth and function to any room. Try it yourself and see the difference it makes. Simple steps lead to a great result.
