
Looking for a simple way to upgrade your entryway? Building your own bench and coat rack can be the perfect solution.
Imagine having a stylish spot where you can sit down, take off your shoes, and hang your coat—all in one place. Not only does this save space, but it also adds a warm, welcoming touch to your home. In this guide, you’ll discover easy steps to create a sturdy and attractive entryway bench with a coat rack that fits your style.
Ready to transform your entryway and impress your guests? Let’s get started!
Credit: www.etsy.com
Materials And Tools Needed
Building an entryway bench and coat rack starts with gathering the right materials and tools. This step ensures a smooth process and a sturdy final product. Choosing quality items saves time and effort during assembly. Below are the key materials and tools needed for this project.
Wood Selection
Pick wood that fits your style and budget. Pine, oak, and cedar are popular choices. Pine is affordable and easy to work with. Oak is strong and has a beautiful grain. Cedar resists moisture and insects, perfect for entryways. Choose boards that are straight and free of cracks.
Hardware And Fasteners
You need screws, nails, and brackets to hold pieces together. Use wood screws for a strong bond. Choose screws that are the right length for your wood thickness. Hinges may be needed if your bench has a storage lid. Hooks or pegs will serve as the coat rack part. Pick hardware with a finish that matches your design.
Essential Tools
Basic tools make building easier and safer. A saw is essential for cutting wood to size. Use a drill to make holes and drive screws. Sandpaper or a power sander smooths rough edges. A measuring tape helps ensure accurate cuts. A level keeps everything straight and balanced. A screwdriver or drill bit fits your screws.
Designing Your Entryway Bench
Designing your entryway bench is an important step in creating a welcoming space. The bench should fit your entryway well and serve your needs. Think about size, style, and storage before you start building. This helps make sure the bench looks good and works well in your home.
Choosing The Size
Measure your entryway carefully. The bench should not block doors or walkways. A small bench fits tight spaces. A larger bench offers more seating and storage. Decide how many people will use it. This helps pick the right size for your space and needs.
Selecting The Style
Pick a style that matches your home décor. Simple designs work in modern homes. Rustic styles fit well in country or farmhouse spaces. Think about the bench’s shape and color. Choose materials that look good and last long. This makes your bench a nice part of your entryway.
Planning Storage Options
Storage keeps your entryway neat and organized. Add shelves or cubbies for shoes and bags. A bench with a lift-up seat hides items inside. Hooks or racks above can hold coats and hats. Plan storage based on what you need to store daily. This keeps everything easy to find.
Building The Bench Frame
Building the bench frame is the key step in creating your entryway bench and coat rack. This part gives your bench strength and shape. A solid frame will hold the seat and support the weight of people sitting. Careful work here ensures the bench lasts a long time.
Cutting The Wood Pieces
Start by measuring the wood pieces you need. Use a tape measure and pencil for accuracy. Cut two long side pieces for the frame’s length. Cut two shorter pieces for the width. Also, cut support pieces to hold the frame tight. Use a saw to make clean, straight cuts. Check each piece to match your plan.
Assembling The Frame
Place the side pieces on a flat surface. Fit the shorter width pieces between the long sides. Use wood glue on the edges for a strong bond. Then, fasten the pieces with screws or nails. Add the support pieces inside the frame for extra strength. Make sure all corners are square and tight. Let the glue dry before moving on.
Sanding And Smoothing
Use sandpaper or an electric sander to smooth the frame. Sand all edges and surfaces until no rough spots remain. This helps the bench look nice and prevents splinters. Wipe off dust with a cloth after sanding. A smooth frame is easier to paint or stain later. Take your time to get a clean finish.
Adding The Seat And Storage
Adding the seat and storage to your entryway bench and coat rack makes it practical and stylish. A comfortable seat invites guests to sit, while storage keeps your entryway tidy. This part of the project requires careful assembly and smart use of space.
Attaching The Seat
Start by choosing a strong, flat piece of wood for the seat. Make sure it fits the frame well. Align the seat on top of the bench frame. Use screws or brackets to secure it firmly. Check that it does not wobble or move. Sand the edges to avoid rough spots. A smooth seat feels better and looks neat.
Incorporating Storage Compartments
Plan where to add storage under the seat. Open compartments or drawers work well. Measure the space and cut wood panels to size. Attach panels to create separate sections. Use hinges if you want a lift-up seat for hidden storage. Paint or stain the inside for a clean look. Storage keeps shoes, bags, and hats out of sight.
Finishing Touches
Sand the entire bench to smooth all surfaces. Apply paint, stain, or sealant to protect the wood. Let it dry completely before use. Add cushions or pillows for comfort. Check all screws and fittings are tight. Small details make the bench both durable and inviting.
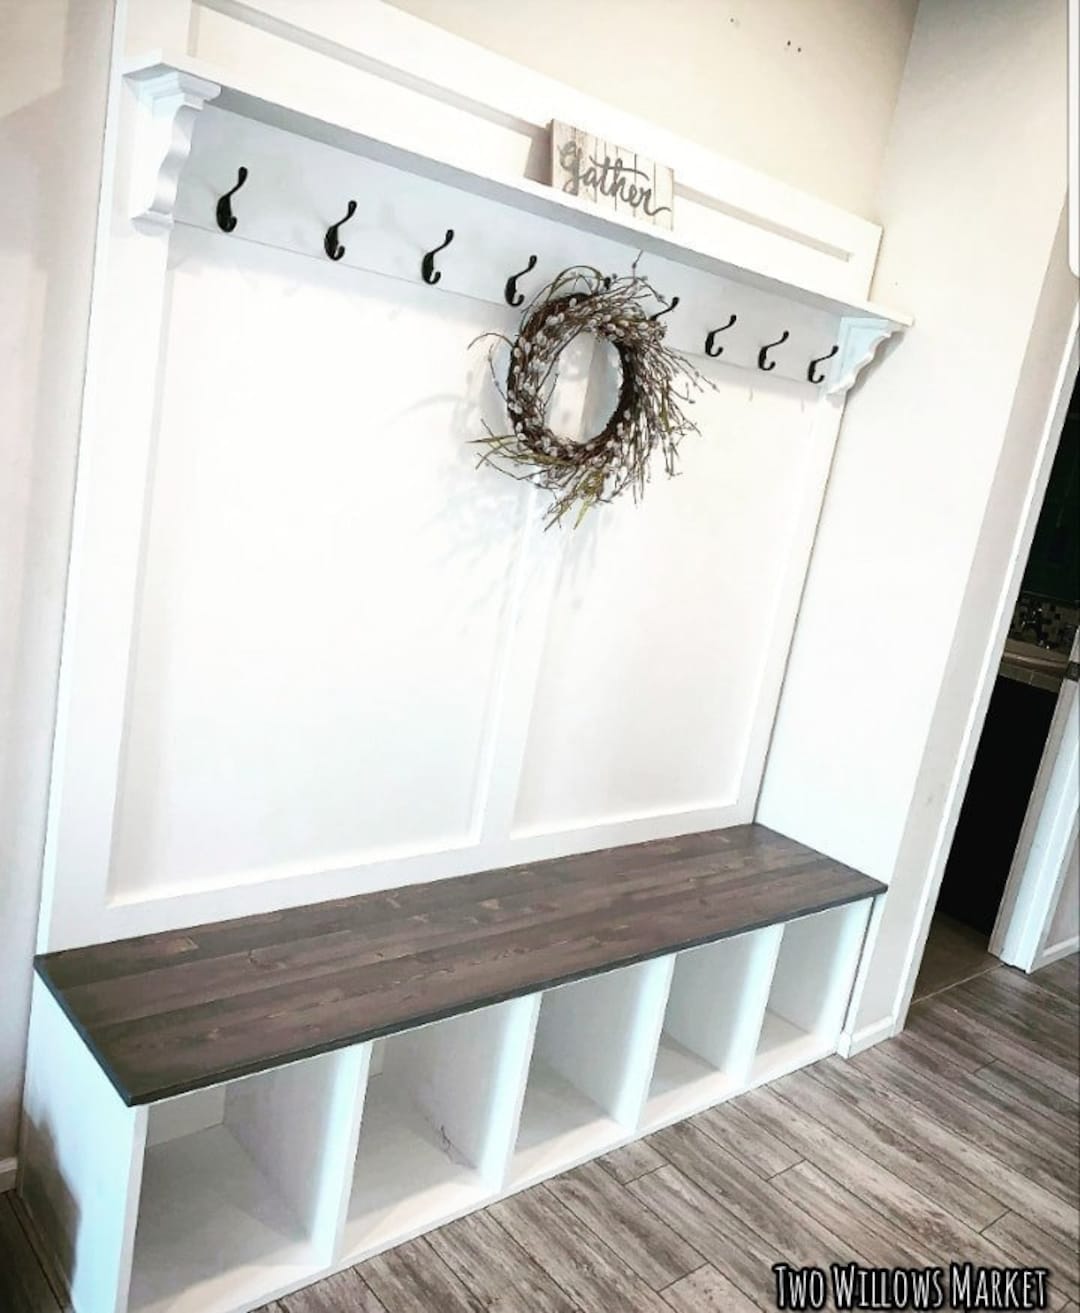
Constructing The Coat Rack
Constructing the coat rack is a key part of building your entryway bench. It adds function and style to the space. The coat rack keeps jackets and bags organized and easy to reach. Follow simple steps to create a sturdy and attractive rack that fits your bench perfectly.
Designing The Rack Layout
Start by measuring the width of your bench. Decide how many hooks or pegs you want. Space them evenly for a balanced look. Choose the height so coats hang freely without touching the bench. Sketch your layout on paper before cutting wood.
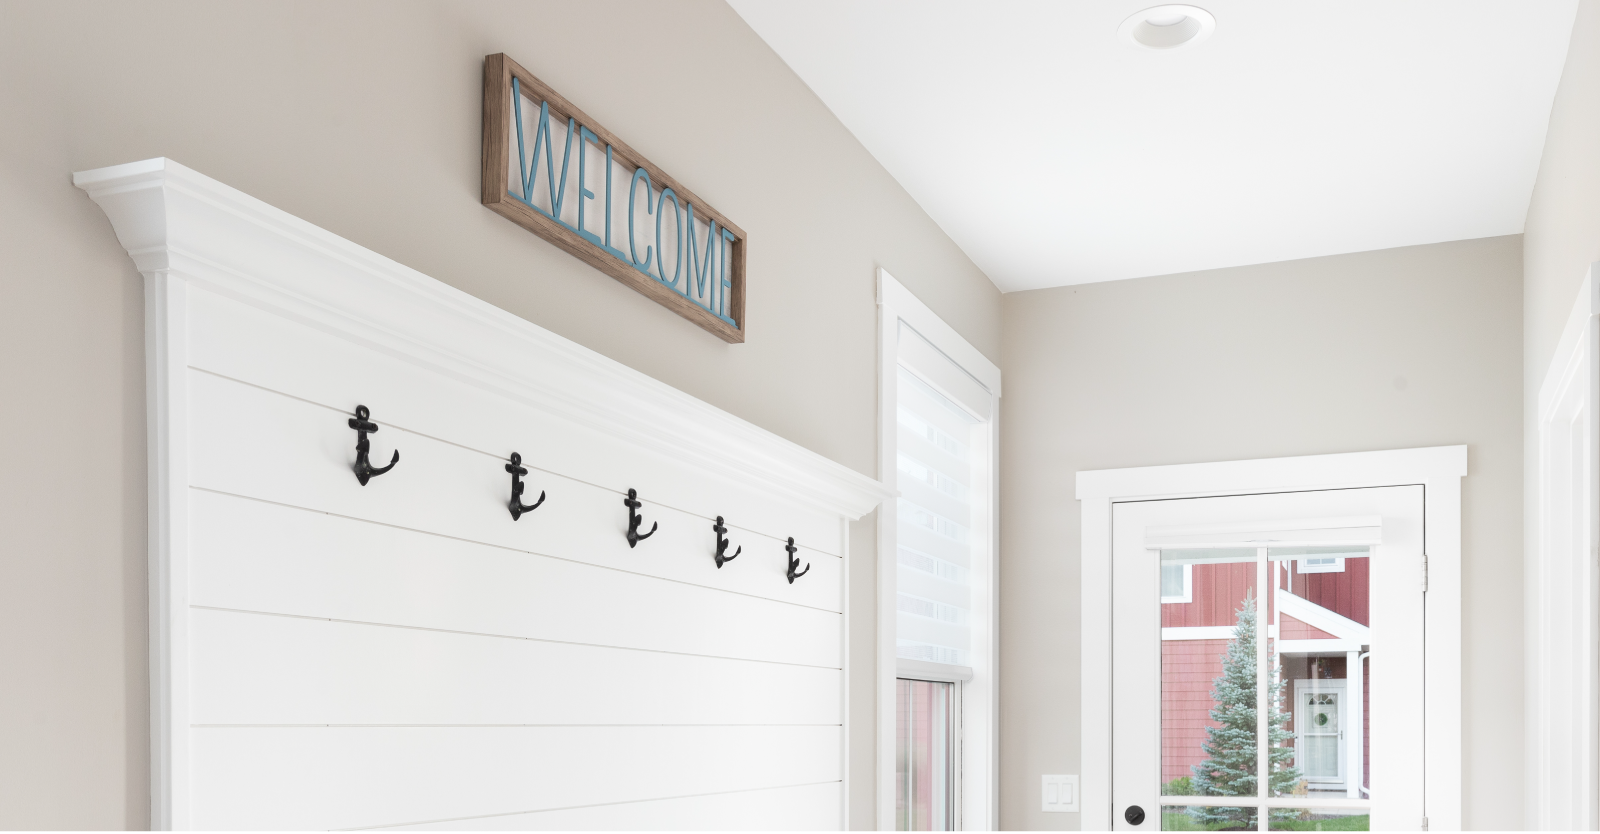
Mounting Hooks Or Pegs
Select hooks or wooden pegs that suit your style. Attach them firmly to the rack board using screws. Drill pilot holes first to avoid splitting the wood. Test each hook by pulling gently to ensure it is secure. Use enough hooks to hold all coats comfortably.
Securing The Rack To The Bench
Align the coat rack with the back of the bench. Use wood screws to fasten the rack to the bench frame. Check that the rack is straight and stable before tightening screws fully. Add brackets under the rack for extra support if needed. This makes the rack safe for daily use.

Credit: www.youtube.com
Painting And Finishing
Painting and finishing your entryway bench and coat rack adds beauty and protection. This step enhances the wood’s natural look or changes its color. It also guards against wear, dirt, and moisture. A well-finished piece lasts longer and looks cleaner. Choose the right paint or stain based on your style and wood type. Then apply the finish carefully for smooth, even coverage. Finally, protect the wood to keep your furniture strong and attractive.
Choosing Paint Or Stain
Pick paint to add solid color and hide wood grain. Paint works well for bright, bold styles. Stain shows the wood’s texture and natural patterns. It offers a softer, warmer look. Choose water-based paint or stain for easy clean-up. Oil-based options last longer but need more care. Test your choice on scrap wood before starting. This helps you see the true color and finish.
Applying Finish
Prepare the wood by sanding it smooth. Remove dust with a clean cloth. Use a brush or foam applicator for paint or stain. Apply thin, even coats to avoid drips and bubbles. Let each coat dry fully before adding the next. Sand lightly between coats for a smooth surface. Follow the product instructions for drying times. Multiple coats improve color depth and durability.
Protecting The Wood
Seal the wood with a clear topcoat. Polyurethane or varnish works well for protection. Choose satin or matte finish to avoid shine. Apply thin, even layers with a clean brush. Let each coat dry completely before reapplying. This layer guards against scratches, water, and dirt. Regular cleaning keeps the finish looking fresh. Avoid harsh chemicals that can damage the seal.
Installation And Placement Tips
Installing your entryway bench and coat rack correctly ensures safety and style. Proper placement helps keep your entryway neat and functional. Follow these tips to set up your furniture with care.
Choosing The Right Spot
Select a space near your door but not blocking it. Make sure there is room to sit and hang coats easily. Avoid tight corners or high-traffic paths. A clear area creates a welcoming first impression.
Anchoring For Stability
Secure the bench and coat rack to the wall. Use strong brackets or anchors suitable for your wall type. This stops wobbling and prevents accidents. Check the weight limits and use proper screws for safety.
Maintaining Your Entryway Bench
Clean your bench regularly with a soft cloth. Wipe away dust and dirt to keep it fresh. Check for loose screws or damage every few months. Tighten parts and fix issues quickly to extend its life.
Credit: learn.kregtool.com
Frequently Asked Questions
How Do I Start Building An Entryway Bench And Coat Rack?
Begin by planning the design and measuring your space. Gather materials like wood, screws, and tools. Cut the wood to size, assemble the bench frame, add seating, then attach the coat rack. Sand and finish for durability and style.
What Materials Are Best For Entryway Bench And Coat Rack?
Use sturdy hardwood like oak, maple, or pine for durability. Choose moisture-resistant finishes to protect wood. Use metal hooks for coats and durable screws for assembly. Quality materials ensure a long-lasting and attractive entryway piece.
How Can I Customize My Entryway Bench And Coat Rack?
Add storage baskets or cubbies under the bench. Paint or stain the wood to match your decor. Choose decorative hooks or add cushions for comfort. Customizing enhances functionality and fits your personal style perfectly.
How Long Does It Take To Build This Furniture?
Building an entryway bench and coat rack typically takes 4-6 hours. Time varies depending on skill level and design complexity. Allow extra time for drying finishes and assembling parts carefully to ensure quality.
Conclusion
Building your own entryway bench and coat rack saves money and adds style. You control the design and size to fit your space perfectly. Plus, the project is simple and fun to do. Use basic tools and materials anyone can find.
This DIY creates a welcoming spot for shoes, bags, and coats. Enjoy the pride of making something useful with your own hands. Try it today and see how it changes your entryway’s look. Small changes make a big difference.