Are you tired of cluttered entryways and lost coats? Building a wall-mounted coat rack can transform your space instantly.
Imagine having a stylish, practical spot to hang your jackets, bags, and scarves—all within easy reach. This simple project doesn’t require expert skills or expensive tools, but it can make a huge difference in your home’s organization. Keep reading, and you’ll discover easy steps to create your own coat rack that fits your style and needs perfectly.
Your space is about to get smarter and tidier—let’s make it happen!
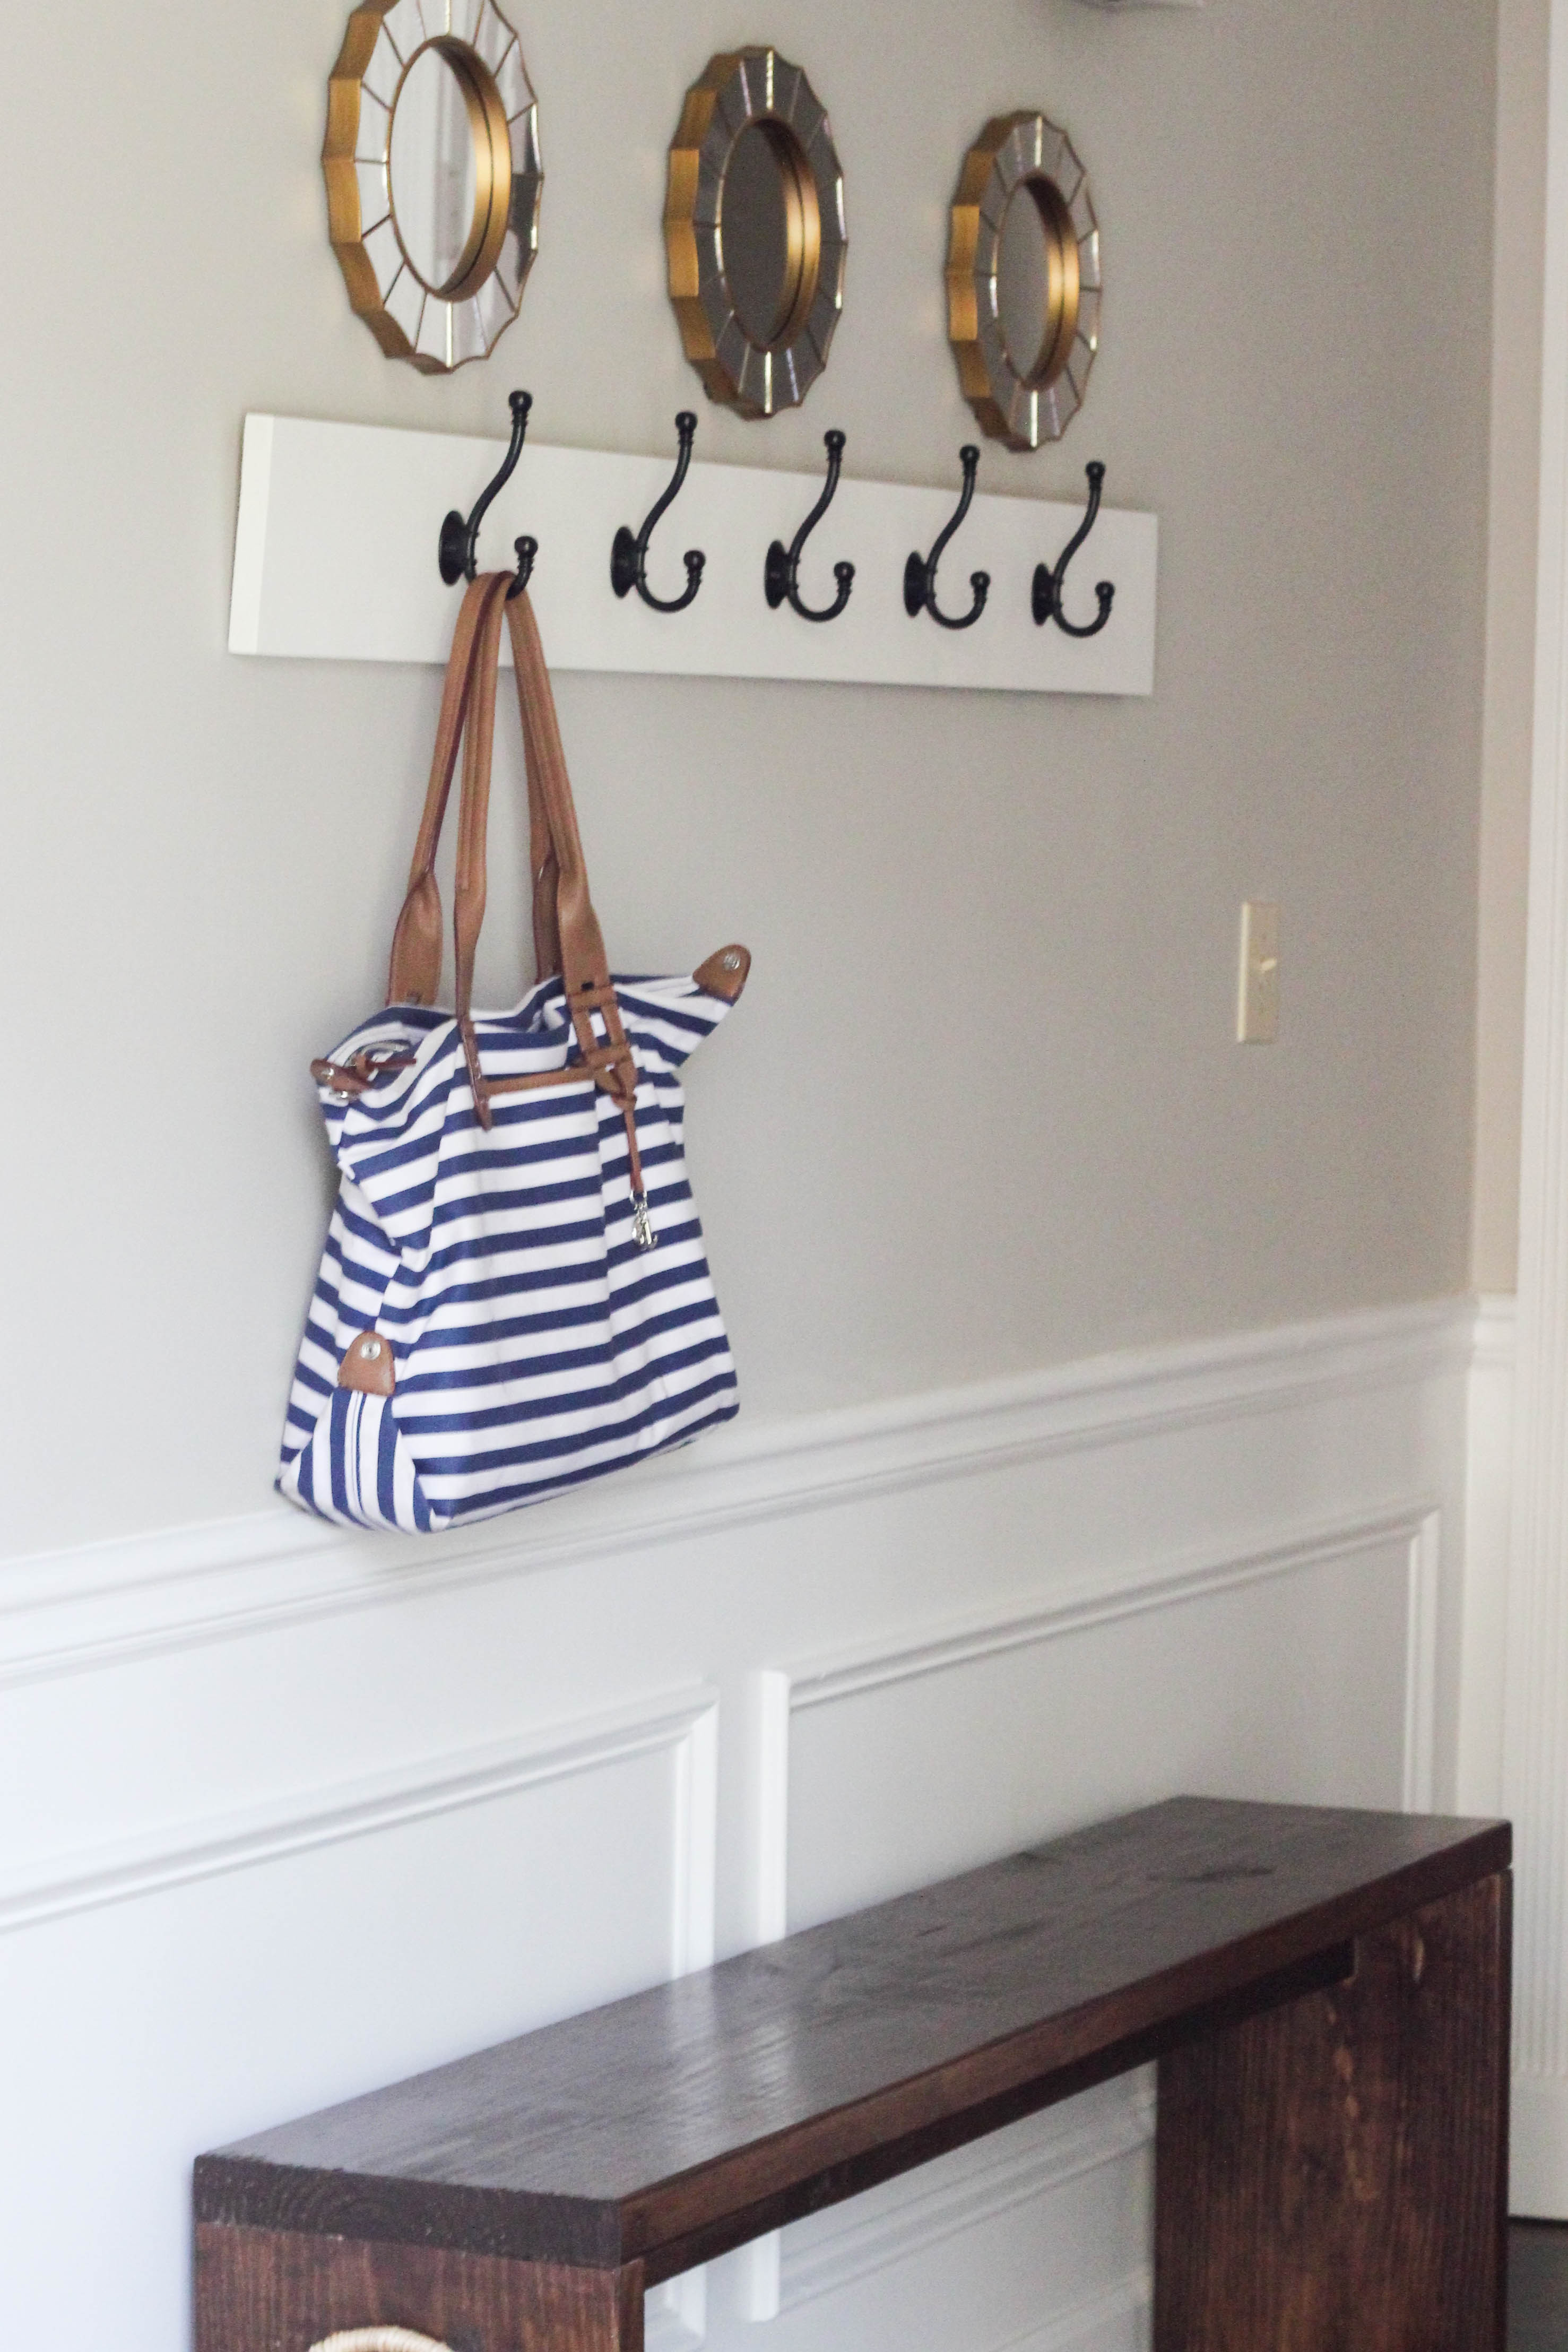
Credit: www.erinspain.com
Materials And Tools Needed
Before building a wall mounted coat rack, gather all materials and tools. This step makes the project smooth and enjoyable. Knowing what to use helps avoid delays and mistakes. Focus on quality materials for a durable rack. Also, choose tools that fit your skill level.
Choosing The Right Wood
Select wood that is strong and easy to work with. Pine, oak, and cedar are good choices. Pine is affordable and lightweight. Oak is tougher and lasts longer. Cedar resists moisture and insects, perfect for humid areas. Pick wood with a smooth surface for easy finishing. Avoid wood with many knots or cracks.
Selecting Hooks And Accessories
Choose hooks that hold coats well and look nice. Metal hooks offer strength and a classic look. Wooden hooks match the rack’s wood for a uniform style. Decide on the number of hooks based on your needs. Add small shelves or a key holder for extra function. Make sure accessories fit the rack size and style.
Essential Tools For Assembly
Gather basic tools before starting the project. A drill is needed to make holes for screws. Use a screwdriver to fix hooks and wood pieces. A measuring tape helps with accurate cuts and placements. Sandpaper smooths rough wood edges for safety. A level ensures the rack hangs straight on the wall.
Designing Your Coat Rack
Designing your wall mounted coat rack is the first step in creating a useful and stylish piece. This phase shapes the final look and function of your rack. It helps you plan the size, hook placement, and style details. A good design fits your space and meets your needs. Think about where you will mount it and what you will hang on it. This guide breaks down the key parts of the design process.
Determining Size And Shape
Measure the wall space where you want to install the rack. Choose a size that fits well without crowding the area. Consider the number of coats and items you want to hang. A longer rack holds more but takes more space. Shapes can be simple rectangles or creative forms like circles or arrows. Pick a shape that matches your room’s style.
Planning Hook Placement
Decide how many hooks you need based on your family size or guests. Space hooks evenly to avoid crowded coats. Leave enough room between hooks for bulky items. Hooks should be strong and easy to reach. Think about mixing hook types for different items like hats or bags. Proper hook placement makes your rack practical and tidy.
Adding Decorative Elements
Decorative touches make your coat rack unique and attractive. Paint the wood in colors that match your room. Add patterns or stencils for a personal touch. Use interesting hook designs such as vintage knobs or modern metals. Small accents like engraved initials or nature motifs add charm. Decoration turns a simple rack into a room highlight.
Preparing The Wood
Preparing the wood is the first important step in building a wall mounted coat rack. It ensures the wood fits well and looks good. Taking time here saves problems later.
Good preparation helps the coat rack last longer and hold weight safely. This part includes measuring, cutting, and sanding the wood.
Measuring And Marking
Start by measuring the wood pieces carefully. Use a tape measure for exact lengths. Mark the wood with a pencil where you will cut. Double-check the marks to avoid mistakes.
Cutting To Size
Use a saw to cut the wood along your marks. Cut slowly and steadily for straight edges. Keep safety in mind and wear protective gear. Clean cuts make the rack look neat.
Sanding For Smooth Finish
Sand the edges and surfaces to remove rough spots. Use fine-grit sandpaper for a smooth finish. Sanding helps the paint or stain stick better. It also prevents splinters when touching the rack.
Assembling The Rack
Assembling the wall mounted coat rack is a straightforward step. It brings all the pieces together for a sturdy and useful rack. Careful assembly ensures the rack holds coats and bags safely.
Follow each step closely. Use the right tools and parts. This will make your coat rack strong and long-lasting.
Attaching Hooks Securely
Start by marking where each hook will go. Space them evenly for balance and ease of use.
Use screws that fit the hooks well. Screw each hook tightly into the wood. This prevents wobbling and keeps hooks stable.
Check each hook by pulling it gently. It should feel firm and not move.
Reinforcing The Structure
Add support by attaching brackets or extra screws. Place them near the ends and middle of the rack.
This step helps the rack hold more weight. Reinforced racks last longer without bending or breaking.
Use a level to keep the rack straight on the wall. A crooked rack can cause uneven weight and damage.
Final Touches And Painting
Sand the wood smooth to avoid splinters. Clean dust off before painting.
Choose paint or stain that matches your room style. Apply thin coats for an even finish.
Let the paint dry completely before mounting the rack. This keeps the finish clean and intact.
Mounting The Rack On The Wall
Mounting the rack on the wall is a key step in this project. It makes the coat rack sturdy and safe to use. Proper mounting also gives a clean, professional look. Follow these steps to secure your rack firmly.
Finding Studs And Marking Spots
Start by locating the wall studs with a stud finder. Studs provide strong support for heavy items. Mark the spots where the studs are found. Use a pencil to mark the exact places for screws. These marks help keep the rack steady over time.
Using Appropriate Wall Anchors
If studs are not in the right places, use wall anchors. Choose anchors that fit the wall type—drywall, plaster, or brick. Insert anchors carefully to avoid damage. Anchors hold screws tightly and prevent the rack from falling.
Ensuring Level Installation
Use a level tool to keep the rack straight. Place it on top of the rack before drilling holes. Adjust the rack until the bubble is centered. A level rack looks neat and prevents coats from sliding off.
Credit: www.osons-a-stmalo.com
Maintenance And Care Tips
Taking care of your wall mounted coat rack helps it last longer. Proper maintenance keeps it looking fresh and strong. Simple steps can prevent damage and keep the finish bright.
Cleaning Techniques
Dust your coat rack regularly using a soft cloth. Avoid harsh chemicals that can harm the wood or metal. Use mild soap mixed with water for deeper cleaning. Wipe gently and dry immediately to prevent moisture damage.
Preventing Damage
Do not overload the coat rack with heavy items. Spread out the weight evenly across the hooks. Avoid hanging wet clothes for long periods to stop mold and warping. Check screws and brackets often to keep the rack stable.
Refreshing The Finish
Use furniture polish or oil to restore shine on wooden racks. Apply a small amount and rub it in with a soft cloth. For metal racks, use a metal cleaner to remove rust and marks. Repeat this process every few months for best results.

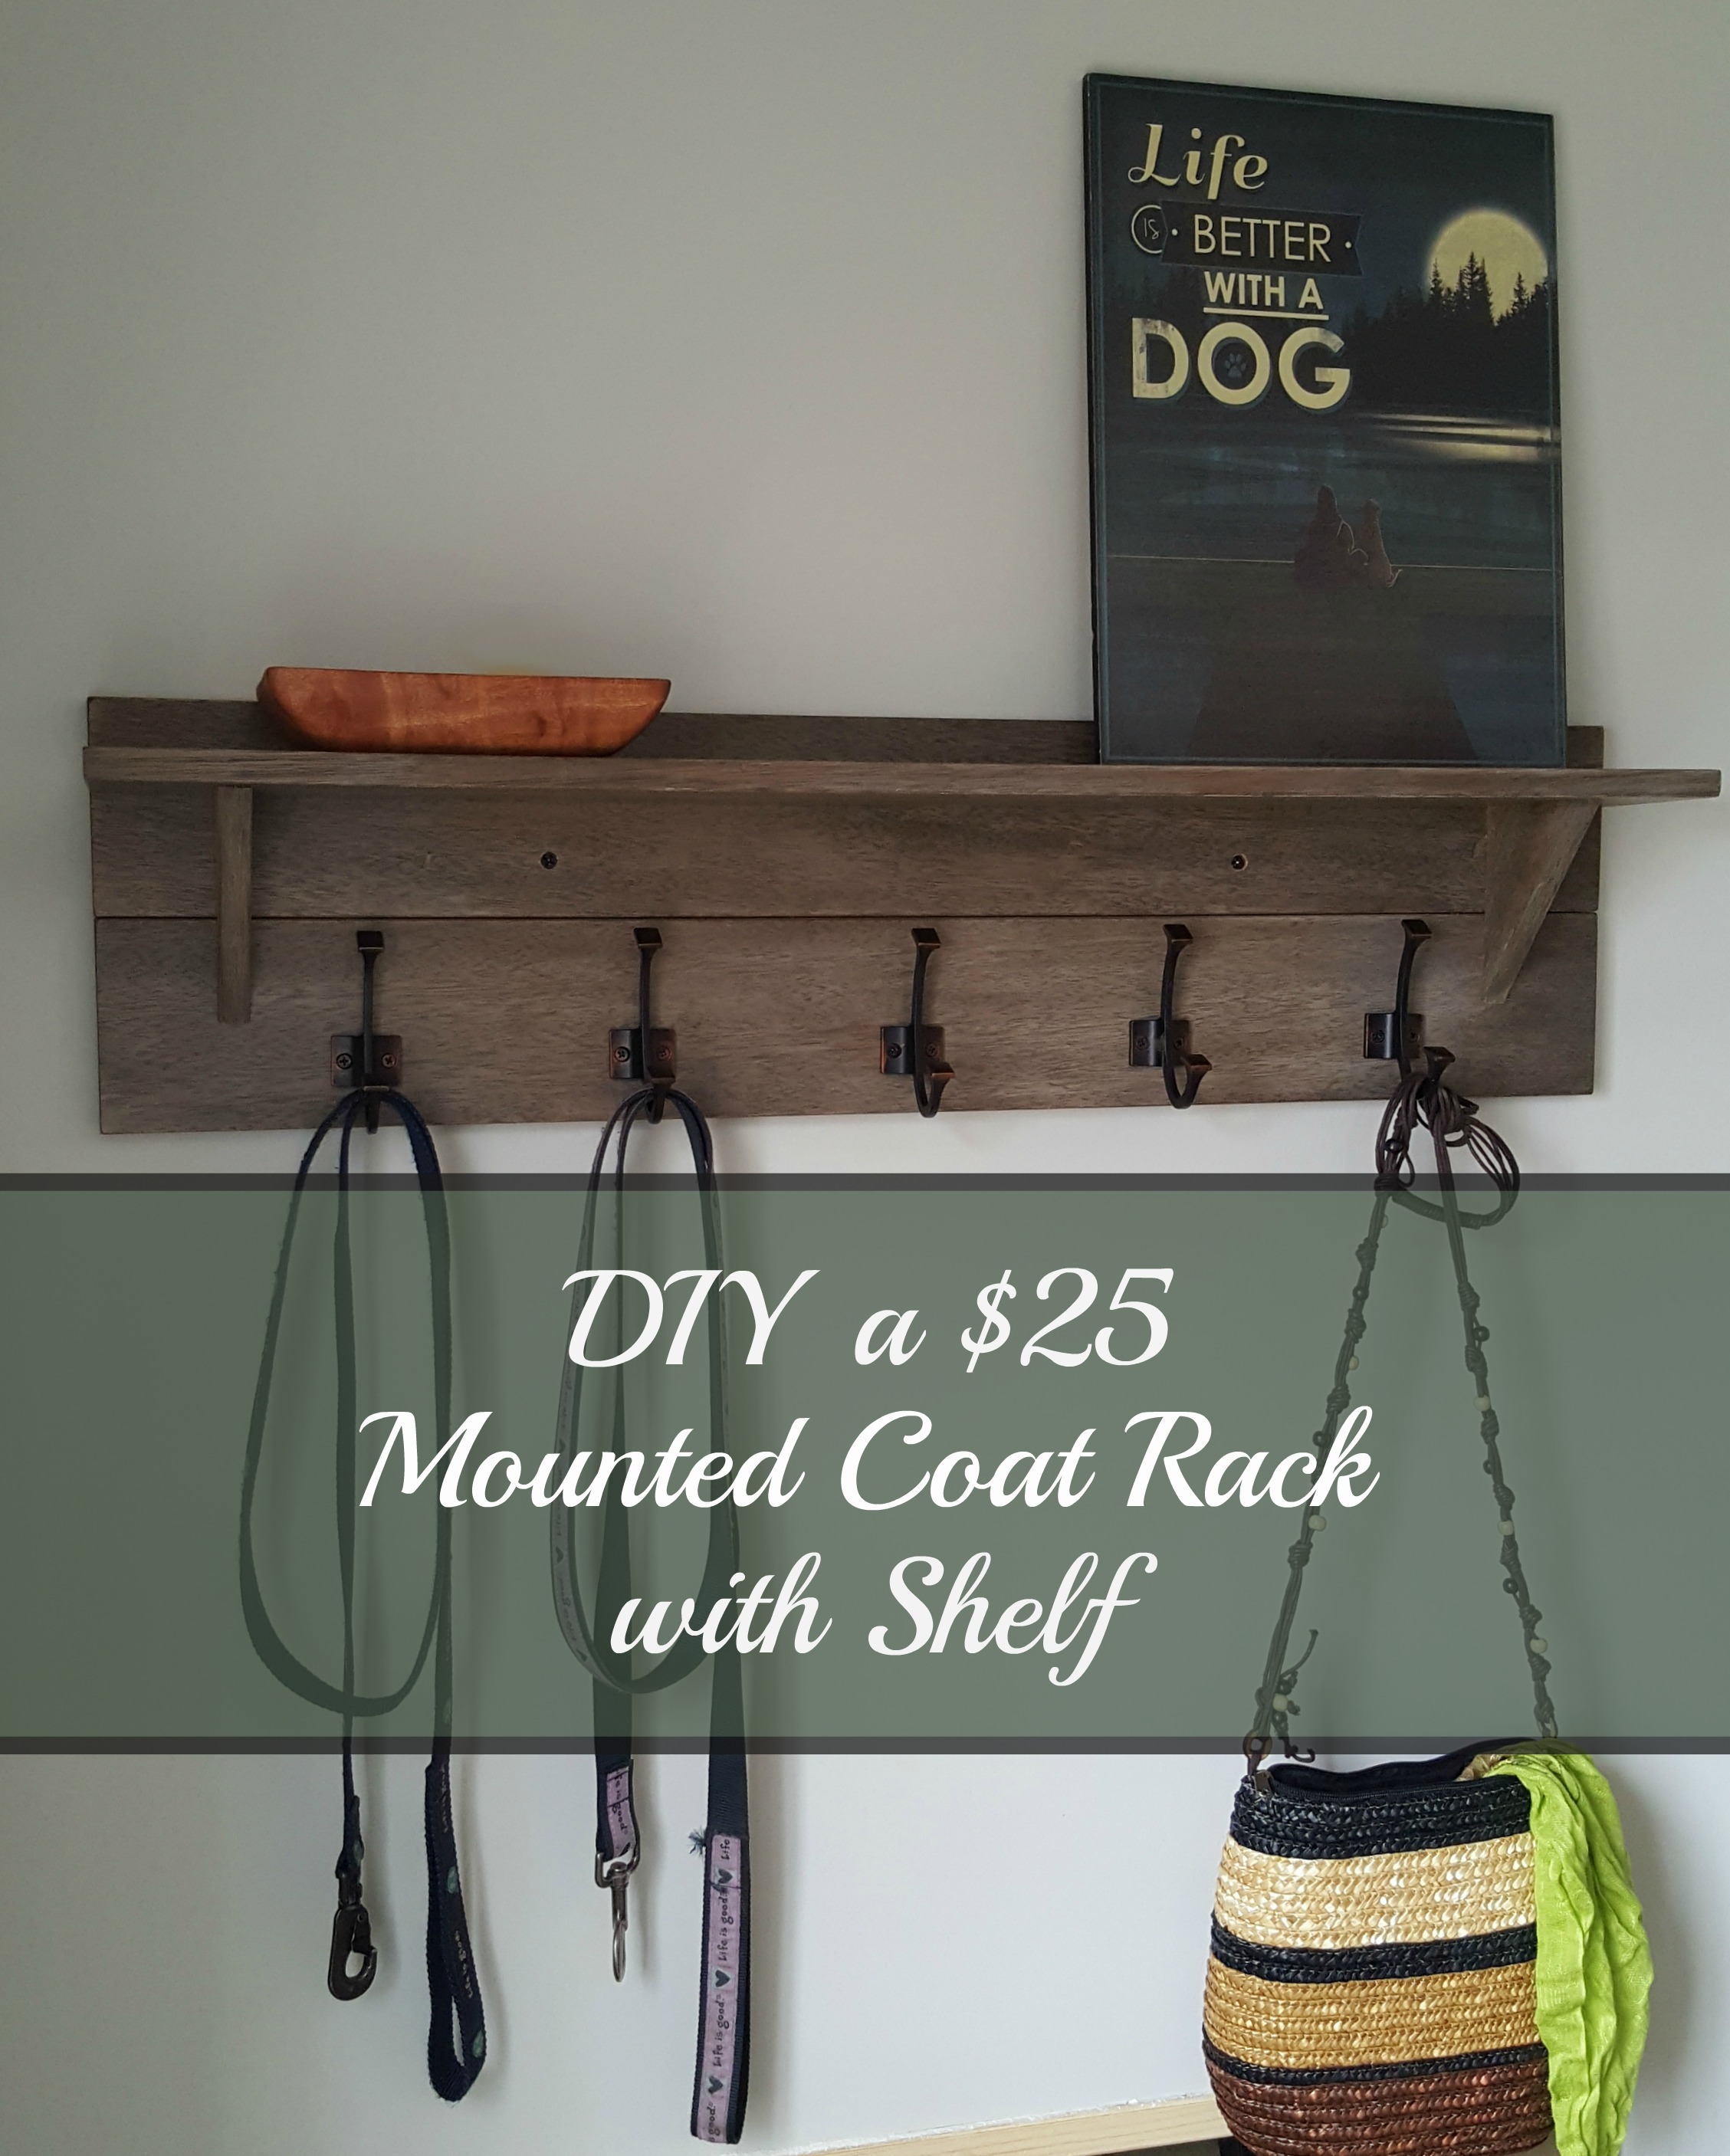
Credit: www.youtube.com
Frequently Asked Questions
What Materials Are Needed For A Wall Mounted Coat Rack?
You need wood planks, hooks, screws, wall anchors, a drill, and a level. Choose sturdy wood for durability and matching hooks for style.
How Do I Securely Attach A Coat Rack To The Wall?
Locate wall studs using a stud finder, then drill pilot holes. Use screws and anchors to ensure the rack supports heavy coats safely.
Can I Customize The Design Of My Coat Rack?
Yes, you can customize size, number of hooks, and paint colors. Personalize it to match your home decor and storage needs.
What Tools Are Essential For Building A Coat Rack?
Essential tools include a drill, screwdriver, measuring tape, level, pencil, and sanding block. These help ensure precise, secure assembly of your rack.
Conclusion
Building a wall mounted coat rack adds style and function to any space. It keeps your coats and hats neat and easy to reach. With basic tools and simple steps, anyone can make one. Choose the right materials to match your home decor.
Take your time to measure and install it securely. This project saves space and helps organize your entryway. Enjoy a tidy, welcoming area with your new coat rack. A small effort brings big benefits every day.