Are you ready to create a cozy and practical bunk bed that fits perfectly in your space? Building your own bunk bed can save you money and give you a sense of pride in crafting something with your own hands.
Imagine having free plans that guide you step-by-step, making the process simple and stress-free. Whether you’re looking to maximize space in a kid’s room or add extra sleeping spots for guests, this guide will show you exactly how to do it.
Keep reading to discover easy-to-follow plans that turn your bunk bed dreams into reality.
Materials And Tools Needed
Building your own bunk bed starts with the right materials and tools. Choosing good wood and having the correct tools makes the project easier and safer. Planning ahead saves time and helps avoid mistakes. This section covers wood selection tips and essential tools you need.
Wood Selection Tips
Choose strong, durable wood for safety and long-lasting use. Pine is common, affordable, and easy to work with. Oak and maple offer more strength but cost more. Avoid soft or weak wood that can break easily. Look for smooth, straight planks without knots or cracks. Use kiln-dried wood to reduce warping. Make sure the wood is thick enough to support weight. Standard thickness is 1.5 inches or more for main parts.
Essential Tools List
Gather these tools before starting your bunk bed project. A measuring tape is critical for accurate cuts. Use a circular saw or miter saw to cut wood pieces cleanly. A drill with different bits helps make holes and drive screws. Screwdrivers or a power driver speed up assembly. Sandpaper or a power sander smooths rough edges. A level ensures your bed stays balanced and even. Clamps hold pieces steady during gluing or screwing. Safety gear like goggles and gloves protects your eyes and hands. Have a pencil and square for marking straight lines.
Credit: fixthisbuildthat.com
Designing Your Bunk Bed
Designing your bunk bed is the first step in building a safe and functional piece of furniture. Good design fits your space and meets your needs. Think about the room size and who will use the bed. Careful planning helps you avoid mistakes and saves time during building.
Start by deciding the size and style. This makes the project clearer and easier to follow. A well-designed bunk bed adds value and comfort to any bedroom.
Measuring Space And Dimensions
Measure the room carefully before drawing plans. Note the ceiling height and floor space available. Leave extra space for walking and other furniture. Measure doorways and stairs to know if the bed fits easily. Check mattress sizes to match your bed frame dimensions. Accurate measurements prevent problems during assembly.
Choosing A Style
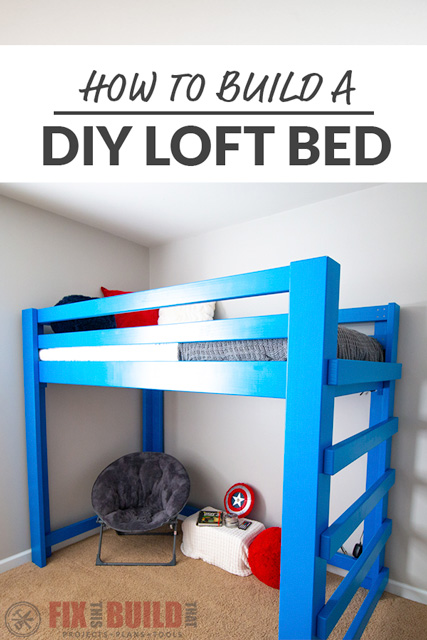
Pick a style that fits your room and taste. Simple designs are easier to build and maintain. Classic bunk beds have two beds stacked vertically. Loft beds raise the top bed higher for a desk or play area underneath. Consider safety features like guardrails and sturdy ladders. Choose a style that suits the user’s age and needs.
Cutting The Wood Pieces
Cutting the wood pieces is a key step in building your bunk bed. Accurate cuts ensure the bed fits together well. Take your time and prepare properly. This step shapes the entire project.
Use the right tools and follow safety rules. Measure carefully before cutting each piece. Clear markings help guide your saw. Precision here means easier assembly later.
Marking And Measuring Accurately
Start by measuring each board with a tape measure. Mark the cut lines clearly with a pencil. Double-check every measurement before cutting. Use a square to keep lines straight and even. Mark all pieces before using any saw. Accurate marking saves time and prevents mistakes.
Safety Tips For Cutting
Wear safety goggles to protect your eyes from dust and chips. Use ear protection if your saw is loud. Keep your hands away from the blade at all times. Secure the wood firmly on a workbench or sawhorse. Cut slowly and steadily to avoid slips. Always unplug power tools when changing blades or making adjustments.

Credit: diycozyhome.com
Assembling The Frame
Assembling the frame is a key step in building your bunk bed. It creates the main structure that holds everything together. Take your time to make sure each part fits well and is strong. This section will guide you through building the bed posts and attaching the side rails.
Building The Bed Posts
Start by cutting four sturdy wooden posts. These will support the entire bunk bed. Use strong wood like pine or oak for safety. Cut each post to the same length for balance. Sand the edges smooth to avoid splinters. Drill pilot holes to prevent the wood from splitting. Secure the posts with wood screws for a tight fit. Check each post is straight before moving to the next step.
Attaching Side Rails
Next, attach the side rails to the bed posts. These rails hold the mattress and provide side support. Measure carefully to ensure the rails are level and even. Use brackets or screws to fasten the rails firmly. Double-check the rails for stability by pressing on them gently. Keep the rails tight against the posts to avoid wobbling. This step ensures your bunk bed frame stays solid and safe for use.
Constructing The Ladder
Constructing the ladder is a key step in building your own bunk bed. It must be strong and safe for daily use. The ladder connects the floor to the top bunk, so it needs careful planning and sturdy materials. This section covers different ladder designs and ways to attach them securely.
Design Options For The Ladder
The ladder design affects comfort and safety. Straight ladders are simple and easy to build. They lean against the bed frame at a slight angle. Another option is the built-in ladder, which fits into the bunk bed frame itself. It saves space and looks neat.
Step ladders have wider steps for easier climbing. They work well for young children. You can also add handrails for extra support. Choose a design that matches your space and how the bed will be used.
Secure Attachment Methods
Attaching the ladder firmly prevents accidents. Use heavy-duty screws or bolts for strong connections. Drill pilot holes first to avoid splitting the wood. Attach the ladder to the bed frame at both the top and bottom.
Brackets can add extra support and hold the ladder steady. Check that the ladder does not wobble before use. Tighten all fasteners regularly to keep the ladder safe over time.

Credit: topshelfdiy.com
Adding Safety Features
Adding safety features to your bunk bed is very important. It protects children from falling and getting hurt. Safety makes the bed more secure and comfortable. Take time to add strong and reliable parts. This helps keep the bed safe for years.
Installing Guardrails
Guardrails stop sleepers from rolling off the bed. Use solid wood or metal for strong rails. The rails should cover most of the bed’s side. Leave a small gap to avoid trapping heads or limbs. Attach rails firmly with screws and brackets. Make sure the rails do not wobble or move.
Checking Stability
Check the bed’s frame for any shaking or loose parts. Tighten all screws and bolts before use. Test the bed by gently rocking it from different sides. Add extra supports under the bed if needed. Stability ensures the bed stays safe during sleep and play. A stable bed prevents accidents and injuries.
Finishing Touches
Finishing touches make your bunk bed look great and last longer. They protect the wood and give it a nice feel. These steps help your project look clean and safe for use.
Sanding And Smoothing
Start by sanding all surfaces with medium-grit sandpaper. This removes rough spots and splinters. Next, use fine-grit sandpaper to make the wood smooth. Sand edges and corners carefully for safety. Wipe off dust with a clean cloth before painting or staining. Smooth wood helps paint stick better and feels nice to touch.
Painting And Staining
Choose paint or stain that works well on wood. Paint covers the wood and adds color. Stain shows the wood grain and adds warmth. Apply a primer before painting for better coverage. Use a brush or roller for even coats. Let each coat dry fully before adding another. Seal with a clear finish to protect the surface. A good finish keeps the bunk bed looking fresh and strong for years.
Tips For Maintenance
Maintaining your bunk bed ensures safety and extends its life. Simple care helps avoid big problems. Check your bed often and fix small issues fast. This keeps the bed strong and safe for kids.
Regular Inspections
Look over the bunk bed every few weeks. Check for cracks, loose screws, or worn parts. Watch for splinters or rough edges on wood. Pay attention to the ladder and guardrails. Early checks catch problems before they grow.
Tightening And Repairs
Use a screwdriver to tighten all bolts and screws. Loose parts can make the bed unsafe. Replace broken or bent hardware quickly. Sand down rough or splintered wood to avoid injuries. Fixing small issues keeps the bed sturdy and safe.
Frequently Asked Questions
What Tools Are Needed To Build A Bunk Bed?
Basic tools include a saw, drill, measuring tape, screwdriver, and sander. Safety gear like goggles and gloves is essential. These tools help cut, assemble, and finish your bunk bed accurately and safely.
How Long Does It Take To Build A Bunk Bed?
Building a bunk bed typically takes 8 to 12 hours. Time varies based on skill level and plan complexity. Proper preparation and following clear instructions can help complete the project efficiently.
Are Free Bunk Bed Plans Safe To Use?
Yes, free plans from reputable sources are safe if followed correctly. Always check for sturdy design, weight limits, and use quality materials. Safety is crucial when building beds for children.
Can I Customize Bunk Bed Plans To Fit My Space?
Absolutely, most plans allow customization for dimensions and design. Adjust height, length, or storage options to suit your room. Customizing ensures your bunk bed fits perfectly and meets your needs.
Conclusion
Building your own bunk bed can save money and add fun to your space. Follow clear plans step by step. Use strong, safe materials for best results. Take your time and measure twice before cutting. This project brings pride and comfort to your home.
Enjoy the process and the final product. Creating furniture yourself feels rewarding and useful. Start planning today and see your bunk bed come alive.