Are you looking for a smart way to save space and add style to your room? Building your own bunk bed loft could be the perfect solution.
Imagine having a cozy bed up high and a handy space below for study, play, or storage. It’s easier than you think, and you don’t need to be a woodworking expert. In this guide, you’ll discover simple, step-by-step instructions to create a sturdy, safe, and stylish bunk bed loft that fits your needs.
Keep reading, and by the end, you’ll feel confident to start building your own space-saving masterpiece.
Choosing The Right Design
Choosing the right design for your bunk bed loft is very important. It affects comfort, safety, and how well it fits your room. A good design saves space and looks great. Think about your needs and the room size before starting.
Space Measurement Tips
Measure your room carefully. Check the height from floor to ceiling. Leave space for moving around the bed. Measure the wall length where the bed will go. Write down all numbers to avoid mistakes. Think about space for a ladder or desk under the loft.
Material Selection
Pick strong materials for safety. Wood is a popular choice because it is sturdy and easy to work with. Metal can be good for a modern look. Choose materials that last and do not break easily. Think about the color and finish too. Smooth surfaces are safer for kids.
Style Ideas
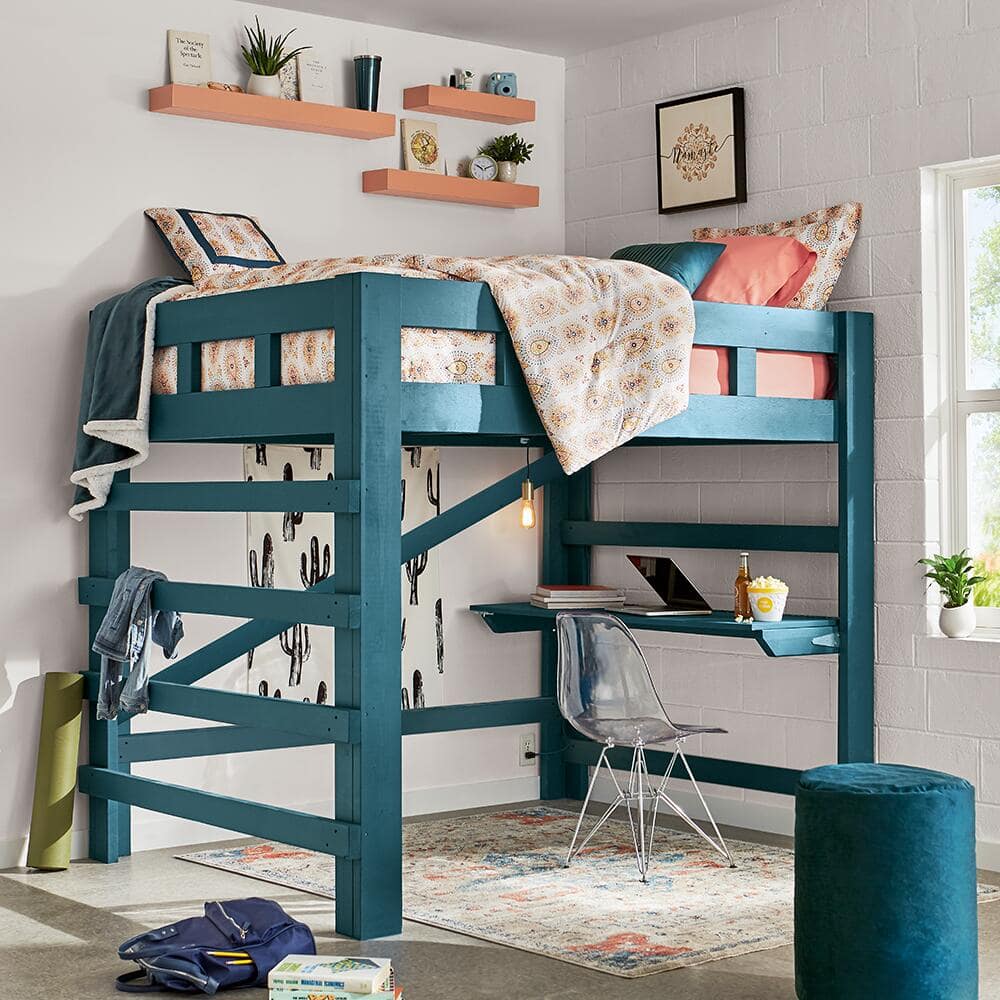
Choose a style that fits your room theme. A simple design works well in small rooms. Add shelves or storage to save space. A loft with a desk under is great for study. Use light colors to make the room look bigger. Personal touches like paint or decals make it unique.

Credit: www.amazon.com
Gathering Tools And Materials
Gathering the right tools and materials is the first step to build your own bunk bed loft. Having everything ready makes the project easier and safer. It helps you avoid delays and frustration during the build. This section covers the essential tools, wood types, finishes, and safety gear you need to start.
Essential Tools List
Start with basic woodworking tools. A power drill speeds up screwing and drilling. A circular saw or handsaw cuts wood to size. A tape measure ensures accurate measurements. Clamps hold wood pieces firmly. A carpenter’s square checks corners for perfect angles. Sandpaper smooths rough edges. A pencil marks cut lines. A screwdriver tightens screws securely.
Wood Types And Finishes
Choose strong, durable wood for safety. Pine is affordable and easy to work with. Oak and maple are harder and last longer. Avoid soft woods that may break easily. Use wood with smooth surfaces to prevent splinters. Apply a non-toxic finish to protect wood and skin. Paint or stain can brighten the loft’s look. Let finishes dry fully before assembly.
Safety Gear
Protect yourself during the project. Safety glasses shield eyes from dust and chips. Work gloves prevent splinters and cuts. Ear protection reduces noise from power tools. A dust mask stops inhaling sawdust. Wear sturdy shoes to guard feet. Keep a first aid kit nearby for minor injuries. Safety gear keeps the build safe and smooth.
Preparing Your Workspace
Preparing your workspace is a key step before building a bunk bed loft. A clean and organized area helps you work safely and faster. It also keeps your tools and materials easy to find. Take time to set up your space right. This will make the whole project smoother and more enjoyable.
Clearing The Area
Start by removing any clutter or furniture from the workspace. Clear the floor to have enough room to move around. A wide, open space prevents accidents and makes handling large wood pieces easier. Sweep the floor to avoid slipping on dust or debris. Keep the area bright for better visibility.
Setting Up Workbench
Place a sturdy workbench in the center of your workspace. The bench should be at a comfortable height for working. Secure it to avoid wobbling during cutting or drilling. Arrange your tools on or near the bench. This keeps them within reach and saves time.
Organizing Materials
Sort all wood, screws, nails, and hardware by type and size. Use bins or boxes to keep small items together. Lay out your materials in the order you will use them. This helps avoid confusion and speeds up the building process. Double-check that you have everything before starting.
Building The Frame
Building the frame is the first and most important step. It gives the bunk bed loft its strength and shape. A strong frame ensures safety and long-lasting use. Focus on accuracy and quality while working on this part.
Cutting Wood Pieces
Start by measuring the wood carefully. Use a tape measure and mark the cut lines clearly. Cut the wood pieces according to your plan. Use a saw and cut slowly for clean edges. Make sure all pieces match the required sizes.
Assembling Side Rails
Take the side rails and place them parallel. Attach the rails using screws or bolts. Keep the rails straight and even. Check the alignment with a level tool. Tighten the screws to make the rails firm and stable.
Constructing Support Beams
Support beams hold the mattress and the frame. Cut the beams to fit between the side rails. Fix the beams securely using screws or brackets. Space the beams evenly to spread the weight well. Double-check the strength of each connection.
Adding The Loft Platform
Adding the loft platform is a key step in building your own bunk bed loft. This platform will hold the mattress and provide a safe sleeping space. It must be strong and steady to support weight over time.
Careful placement and securing of each part will ensure the loft is both comfortable and safe. Take your time to follow the steps closely for the best results.
Securing Slats
Start by placing wooden slats evenly across the bed frame. These slats will hold the mattress in place. Use screws to fasten each slat securely to the frame. Make sure there is no movement when pressed. Properly secured slats prevent sagging and add strength.
Ensuring Stability
Check all joints and connections for tightness. Use brackets or corner braces for extra support if needed. Stability keeps the loft from wobbling or shifting. Test the platform by applying pressure in different areas. Fix any weak spots before moving on.
Checking Level
Use a carpenter’s level to check the platform’s flatness. A level surface keeps the mattress from sliding off. Adjust slats or supports if the platform is uneven. Double-check after adjustments to ensure a safe and comfortable bed.
Credit: www.homedepot.com
Installing Ladder And Safety Rails
Installing the ladder and safety rails is a key step in building your bunk bed loft. These parts help keep the bed safe and easy to use. Proper placement and secure attachment make the loft sturdy. Safety rails prevent falls during sleep. The ladder offers safe access to the top bunk. Careful work here ensures comfort and safety for everyone.
Ladder Placement
Choose a spot for the ladder that is easy to reach. Avoid areas that block room space or doorways. The ladder should lean slightly but stay stable. Attach the ladder close to the bed frame. Make sure it is not too steep. The angle should allow climbing without strain.
Attaching Safety Rails
Fix safety rails on all sides of the top bunk. Use strong screws and brackets for secure attachment. Rails should be tall enough to stop rolling off. Leave a small gap for air and comfort. Check that rails do not block the mattress or bedding.
Testing Strength
Test the ladder and rails before using the bed. Apply pressure to check if they hold firm. Shake gently to confirm no loose parts. Make sure the ladder supports your weight easily. Confirm safety rails do not move or bend. Repeat testing regularly to keep the loft safe.
Finishing Touches
Finishing touches make your bunk bed loft look complete and safe. They improve the wood’s feel and protect it from damage. A well-finished bed also adds style to the room. Spend time on these last steps to get the best results.
Sanding Surfaces
Sanding smooths rough edges and removes splinters. Use medium-grit sandpaper first, then fine-grit for a soft finish. Sand all surfaces, including corners and edges. Wipe dust off with a damp cloth before painting or staining.
Applying Paint Or Stain
Choose paint or stain that fits your room’s style. Paint covers wood completely and comes in many colors. Stain shows the wood grain and adds warmth. Apply evenly with a brush or roller. Let each coat dry well before adding another.
Decorating Ideas
Add fun touches to personalize the loft bed. Use colorful pillows and blankets for comfort. Hang string lights or small shelves for toys and books. Add wall decals or posters nearby to brighten the space. Make the loft a cozy, inviting place for kids.
Maintenance Tips
Maintaining your bunk bed loft keeps it safe and sturdy for years. Small checks and care help avoid big problems later. Spend a little time regularly to keep it in top shape.
Regular Inspections
Look over the entire bunk bed loft often. Check for cracks, splits, or worn wood. Make sure the bed frame holds tight and steady. Watch for loose screws or nails sticking out. Catch small issues early to fix them fast.
Tightening Hardware
Use a screwdriver or wrench to tighten bolts and screws. Parts can loosen from use and movement. Tight hardware keeps the bed strong and safe. Check every connection point on the loft bed. Tighten anything that feels loose or shaky.
Cleaning Advice
Dust the bunk bed regularly to stop dirt build-up. Use a soft cloth or duster for wood surfaces. Avoid wet cleaning that can damage wood or metal. Clean spots or stains gently with a mild soap solution. Keep the loft bed fresh and inviting.
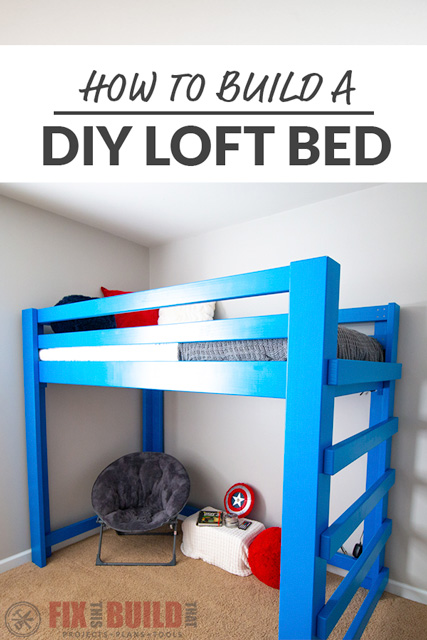
Credit: fixthisbuildthat.com
Frequently Asked Questions
What Tools Are Needed To Build A Bunk Bed Loft?
You need a drill, saw, measuring tape, screwdriver, level, and safety gear. These tools help cut, assemble, and secure the bed safely.
How Do I Ensure The Bunk Bed Loft Is Safe?
Use sturdy materials, secure joints tightly, and add guardrails. Check weight limits and follow building codes to prevent accidents.
What Type Of Wood Is Best For Bunk Bed Lofts?
Choose hardwoods like oak, maple, or birch. They offer durability, strength, and long-lasting support for safe use.
How Much Time Does It Take To Build A Bunk Bed Loft?
Building usually takes 1 to 3 days depending on experience and complexity. Planning and preparation can save time during assembly.
Conclusion
Building your own bunk bed loft saves space and adds charm. It takes planning, measuring, and careful work. Use quality materials and follow safety steps. A sturdy bed lasts longer and keeps kids safe. Personal touches make the loft unique and cozy.
Enjoy the pride of creating something useful at home. This project suits those who like hands-on work. Start small, learn as you go, and have fun. Your new bunk bed loft will bring joy and comfort. A smart, simple design fits many rooms well.