Are you tired of cluttered entryways and misplaced coats? Hanging a wall-mounted coat rack can be a simple and stylish solution to keep your space organized.
But if you’re not sure where to start or worried about making mistakes, don’t worry—you’re in the right place. This guide will walk you through easy steps to hang your coat rack securely and perfectly. Keep reading, and you’ll soon have a neat, accessible spot for all your jackets and bags.
Let’s make your home more functional and welcoming—one hook at a time!
Choosing The Right Coat Rack
Choosing the right coat rack is important for both function and style. The perfect rack holds your coats neatly and matches your room decor. Consider the space available and the type of coats you wear. Think about how many hooks you need and how strong the rack must be. This makes hanging easier and keeps your space tidy.
Material And Style Options
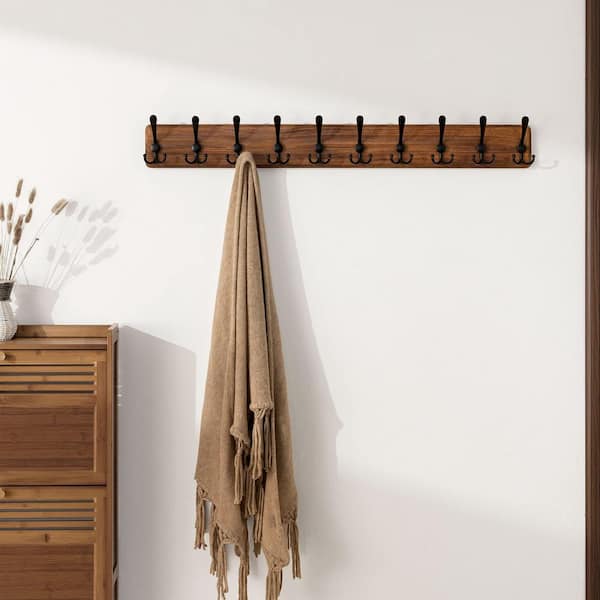
Coat racks come in many materials like wood, metal, and plastic. Wood offers a classic look and feels warm. Metal racks often have a modern or industrial style. Plastic racks are usually light and easy to clean. Pick a material that fits your home’s style and your taste.
Styles vary from simple bars with hooks to decorative designs. Some racks have shelves or extra storage space. Choose a style that matches your room’s look and your storage needs.
Size And Weight Considerations
Measure the wall space where you plan to hang the rack. The rack should fit well without crowding the area. Consider the weight of the coats you will hang. Heavy coats need strong racks and secure mounting.
Check the weight limit of the coat rack before buying. Choose one that holds all your coats safely. A well-sized rack keeps your entryway organized and easy to use.

Credit: www.amazon.com
Selecting The Ideal Location
Choosing the right spot for your wall mounted coat rack is key. It affects how useful and neat your space looks. The right location makes hanging coats easy and keeps your room organized. Consider your daily habits and room setup before deciding the place.
Assessing Wall Space
Find a wall area that has enough room for the rack. Check for free space around to avoid crowding. Clear walls near entrances or hallways work well. Avoid walls with many switches or outlets. A smooth, flat surface is best for mounting.
Height And Accessibility
Mount the rack at a height easy for everyone to reach. Aim for about 5 to 6 feet from the floor. Keep in mind the height of all users, including children. Make sure hooks are not too high or low. This keeps coats and bags easy to hang and grab.
Gathering Necessary Tools
Before hanging a wall mounted coat rack, gather all necessary tools. This step helps the process go smooth and fast. Having the right tools ready means fewer interruptions. It also ensures the rack is secure and safe to use.
Essential Tools Checklist
Start with a drill for making holes in the wall. Use a screwdriver to tighten screws firmly. A tape measure helps position the rack evenly on the wall. A pencil is useful for marking drill spots. A level ensures the rack hangs straight. Wall anchors and screws are key for strong support. Check the package for recommended hardware too.
Safety Equipment
Protect your eyes with safety goggles. Gloves prevent splinters and minor cuts. Ear protection helps when using loud power tools. Wear sturdy shoes to avoid foot injuries. Keep a first aid kit nearby just in case. Safety first keeps the project trouble-free and safe.
Marking Mounting Points
Marking mounting points is a key step in hanging a wall mounted coat rack. It sets the foundation for a secure and balanced installation. Taking time to mark accurately helps prevent mistakes that could damage your wall or cause the rack to hang unevenly.
Focus on precision and careful measurement. This ensures the coat rack fits perfectly in your chosen spot. Follow the steps below to mark mounting points correctly and prepare for the next phase of installation.
Measuring And Aligning
Measure the width of your coat rack first. Find the spots where the mounting brackets or holes are located. Use a tape measure to mark these points on the wall.
Align the marks carefully. Make sure the distance between them matches the rack’s mounting holes exactly. Double-check measurements to avoid errors.
Use a pencil for marking. It makes corrections easy if needed. Keep your marks light but visible.
Using A Level For Accuracy
Place a level along the marks to check for evenness. A level ensures the rack will hang straight and look neat. Adjust the marks as needed until the bubble centers perfectly.
Mark the final points with confidence. These marks guide your drilling or screwing. Accuracy here prevents crooked mounting and improves the rack’s stability.
Drilling And Anchoring
Drilling and anchoring are key steps in hanging a wall mounted coat rack securely. Proper drilling ensures the rack stays fixed and holds weight without falling. Anchors provide extra support, especially on drywall or hollow walls. This section explains how to pick the right anchors and drill correctly for different wall types.
Choosing Wall Anchors
Select anchors based on your wall type and the coat rack weight. Plastic expansion anchors work well for light loads on drywall. For heavier racks, use metal anchors or toggle bolts. Masonry walls need sleeve anchors or masonry screws. Match anchor size to the drill bit and screw size. Using the right anchor prevents damage and keeps the rack firm.
Drilling Tips For Different Surfaces
Use a drill bit suited to the wall material. For drywall, a standard twist bit works fine. Masonry or brick requires a masonry bit. Wood walls need a wood drill bit. Drill slowly and steadily to avoid cracks. Mark the spots clearly before drilling. Keep the drill straight to make clean holes. Clean dust from holes before inserting anchors. This helps anchors grip firmly and hold the rack well.
Installing The Coat Rack
Installing the coat rack on your wall is the key step to keep your space tidy. A strong and secure rack holds coats, bags, and hats without falling. Proper installation ensures safety and durability. Follow the steps carefully for best results.
Attaching Mounting Brackets
First, find the mounting brackets that came with your coat rack. Align them with the holes on the back of the rack. Use a screwdriver to fasten screws tightly into the brackets. Make sure brackets are secure and straight. This step prepares the rack for wall attachment.
Securing The Rack To The Wall
Locate wall studs with a stud finder for strong support. Mark the spots where the screws will go. Drill pilot holes into the marked spots on the wall. Hold the rack against the wall and line up the brackets with the holes. Screw the rack firmly into the wall using wall anchors if needed. Check that the rack does not wobble before use.
Final Adjustments And Testing
After hanging your wall mounted coat rack, the final step is crucial. This step ensures your rack is safe and works well. Making small changes and testing stability helps avoid accidents. It also keeps your coats secure. Take your time with these final adjustments. They make a big difference in the rack’s performance.
Ensuring Stability
Check if the coat rack sits flat against the wall. It should not wobble or tilt. Tighten all screws firmly. Use a level tool to confirm it is straight. If the rack moves, add extra anchors or screws. Stability prevents damage to your wall and rack.
Load Testing Tips
Start by hanging a few light items. Slowly add more weight to the rack. Watch for any signs of bending or loosening. Test with the heaviest coats you plan to hang. If the rack holds steady, it is ready to use. Avoid overloading to keep it strong for a long time.

Credit: www.amazon.com
Maintenance And Care
Maintaining your wall mounted coat rack keeps it strong and looking good. Regular care stops damage and helps it last longer. Simple steps make a big difference.
Cleaning Tips
Dust the rack often with a soft cloth. Use a damp cloth for sticky spots. Avoid harsh cleaners that can damage the finish. Dry the rack well after cleaning. This prevents water marks and rust.
Checking For Loose Screws
Check the screws every few months. Tighten any that feel loose. Loose screws can cause the rack to fall. Use the right screwdriver for the screws. This keeps the rack safe and secure.
Credit: www.homedepot.com
Frequently Asked Questions
How Do I Choose The Right Wall For A Coat Rack?
Select a sturdy wall near your entryway. Avoid drywall without studs. Use a stud finder to locate secure mounting points. This ensures the coat rack holds weight safely and remains stable over time.
What Tools Are Needed To Hang A Coat Rack?
You need a drill, screws, wall anchors, a level, and a stud finder. These tools help secure the rack properly and keep it straight on the wall.
How High Should I Mount A Wall Coat Rack?
Mount the coat rack about 5 to 6 feet from the floor. This height is convenient for most people to hang and retrieve coats comfortably.
Can I Hang A Coat Rack On Drywall Without Studs?
Yes, but use heavy-duty wall anchors to support the weight. Avoid hanging heavy coats without anchors, as this can damage the wall or cause the rack to fall.
Conclusion
Hanging a wall mounted coat rack is simple with the right steps. Measure and mark your spots carefully. Use proper tools for a strong hold. Check that the rack is level before fixing it. Secure hooks firmly to avoid accidents.
A well-installed coat rack keeps your space neat. Enjoy the easy access to your coats and bags. This small project can improve your home’s organization quickly. Give it a try and see the difference yourself.
