Are you ready to transform your bathroom floor without the hassle of a full remodel? Installing vinyl tiles around your vanity cabinet is a smart and affordable way to upgrade your space.
You might think it’s tricky to fit tiles perfectly around your cabinet, but with the right steps, you can achieve a clean, professional look. In this guide, you’ll discover simple tips and tricks that make the process easier than you expect.
Keep reading, and you’ll soon have a beautiful floor that adds style and value to your home.
Prepare The Area
Preparing the area is the first step to install vinyl tile flooring around a vanity cabinet. A clean, smooth surface helps the tiles stick well. It makes the floor look even and neat. Follow these steps to get the floor ready.
Clear And Clean The Floor
Remove all items from the floor near the vanity. Sweep or vacuum dirt and dust thoroughly. A clean surface helps the tiles stay in place. Wipe the floor with a damp cloth to remove stains. Let the floor dry completely before moving on.
Remove Old Flooring If Needed
Check if old flooring covers the area. Vinyl tiles stick best to bare, solid floors. Peel off old tiles or carpet carefully. Use a scraper to remove glued pieces. Dispose of all debris to keep the work area safe.
Check For Moisture And Repair Subfloor
Look for damp spots or water damage on the subfloor. Moisture can cause tiles to lift or mold to grow. Use a moisture meter if available for accuracy. Fix cracks or holes with floor patch or filler. Ensure the floor is dry and smooth before tiling.
Gather Materials And Tools
Gathering the right materials and tools is the first step to a smooth vinyl tile flooring project. Proper preparation saves time and avoids mistakes. It ensures the tiles fit well around the vanity cabinet without damage.
Before starting, know what vinyl tiles suit your space. Then, collect all tools and safety gear. This makes the job easier and safer.
Select Vinyl Tiles
Choose vinyl tiles that match your bathroom style. Pick tiles with good water resistance for durability. Measure the area around the vanity cabinet accurately. Buy a few extra tiles to cover cuts and mistakes. Thicker tiles offer better comfort and longevity.
List Essential Tools
Prepare these tools for installation. A utility knife to cut tiles precisely. A tape measure to get exact dimensions. A straightedge or ruler for clean cuts. A chalk line to mark guidelines on the floor. A roller to press tiles firmly in place. A putty knife to lift or adjust tiles.
Safety Equipment
Protect yourself during installation. Wear gloves to avoid cuts from sharp tools. Use knee pads for comfort while working on the floor. Safety glasses protect your eyes from debris. Work in a well-ventilated area to avoid inhaling fumes. Keep a first aid kit nearby for minor injuries.
Measure And Plan Layout
Measuring and planning the layout is a crucial step before installing vinyl tile flooring around a vanity cabinet. This stage ensures a neat, professional finish and reduces waste. Taking accurate measurements and planning the tile pattern helps avoid mistakes and saves time during installation.
Measure Floor Dimensions
Start by measuring the entire floor area around the vanity. Use a tape measure to get the length and width in inches or centimeters. Record these numbers carefully. Measure twice to avoid errors. Accurate floor dimensions allow you to estimate the amount of vinyl tile needed.
Mark Cutting Lines Around Vanity
Next, mark the exact edges of the vanity on the floor. Use a pencil or chalk to draw cutting lines. These marks guide you when cutting tiles to fit snugly around the cabinet. Ensure the lines are clear and straight. Proper marking prevents gaps and uneven edges near the vanity.
Plan Tile Pattern
Choose a tile pattern that suits your space and style. Lay out tiles on the floor without adhesive to visualize the pattern. Consider starting from the center or a focal point for balance. Adjust tiles to avoid small cuts at edges. Planning the pattern helps create a polished look around the vanity cabinet.

Credit: www.bestlaminate.com
Cut Tiles For Vanity Fit
Cutting vinyl tiles to fit around a vanity cabinet is an important step. It ensures a clean, professional look. Taking time to cut tiles carefully will help avoid gaps or uneven edges. This process requires some tools and patience. Follow these tips to make the job easier and neater.
Use Proper Cutting Tools
Choose the right tools for cutting vinyl tiles. A utility knife with a sharp blade works well. A straightedge or ruler helps guide your cuts. For curved edges, use scissors or a tile cutter designed for vinyl. Always keep blades sharp for clean cuts. Dull blades can cause rough or jagged edges.
Make Precise Cuts
Measure the space around the vanity carefully. Mark the tiles where you need to cut. Use a pencil or marker that shows clearly on the tile. Cut slowly and follow the lines exactly. Take your time to avoid mistakes. Precise cuts make the floor look smooth and even.
Test Fit Tiles
Place cut tiles around the vanity before final installation. Check if they fit well without gaps or overlaps. Adjust your cuts if needed. Testing the fit helps catch errors early. It saves time and prevents damage to tiles later.
Apply Adhesive And Place Tiles
Applying adhesive and placing vinyl tiles around a vanity cabinet needs care. This step ensures the tiles stick well and look neat. Proper adhesive use stops tiles from lifting or moving later. Follow simple actions to get smooth, lasting results.
Choose Suitable Adhesive
Select an adhesive made for vinyl tiles. Check the label to confirm it works on bathroom floors. Some adhesives resist moisture and heat better. Using the right glue keeps tiles in place for years.
Spread Adhesive Evenly
Use a notched trowel to spread adhesive evenly. Cover small sections at a time to stop glue from drying. Keep a thin, smooth layer. Too much glue can cause bumps under tiles.
Lay Tiles Carefully
Place each tile gently onto the adhesive. Press down firmly to remove air bubbles. Align tiles close to the vanity cabinet edges. Check each tile stays level with others. Take time for neat, even spacing.

Credit: www.blesserhouse.com
Finish Edges And Seams
Finishing the edges and seams around your vanity cabinet is key to a neat vinyl tile floor. This step stops water from seeping under tiles and keeps the floor looking polished. Take your time to ensure a clean, tight fit between the tiles and the vanity.
Seal Gaps Around Vanity
Fill any spaces between the tiles and vanity base with a flexible sealant. Use a waterproof caulk to block water and dirt. Smooth the sealant with a wet finger or tool for a clean line. This prevents damage and keeps your floor safe.
Smooth Tile Edges
Check the tile edges next to the cabinet. Trim any rough or uneven parts with a sharp utility knife. Lightly sand the edges to make them smooth. Clean dust away before applying adhesive or sealant. Smooth edges help tiles fit tightly and look tidy.
Allow Adhesive To Set
Let the adhesive dry fully before using the area. Check the product instructions for drying time. Avoid stepping on tiles during this period to keep them in place. Proper drying makes the floor strong and durable around the vanity.
Clean And Maintain Flooring
Keeping your vinyl tile flooring clean and well-maintained near the vanity cabinet extends its life. Proper care prevents stains and damage. Regular cleaning also keeps the floor looking fresh and new. Follow these simple steps to maintain your flooring effectively.
Remove Excess Adhesive
After installing vinyl tiles, check for leftover adhesive. Use a plastic scraper or soft cloth to gently lift it. Avoid sharp tools that can scratch the tiles. Clean the area with warm, soapy water to remove sticky residue. Dry the floor completely to prevent slips.
Regular Cleaning Tips
Sweep or vacuum the floor daily to remove dust and dirt. Use a damp mop with mild detergent for weekly cleaning. Avoid harsh chemicals or abrasive cleaners that can dull the surface. Wipe spills immediately to prevent stains. Let the floor air dry before walking on it.
Prevent Damage Near Vanity
Place a protective mat or rug near the vanity cabinet. Avoid dragging heavy objects across the vinyl tiles. Keep water from pooling around the cabinet base to stop warping. Check for leaks regularly and fix them quickly. Use felt pads under furniture to prevent scratches.
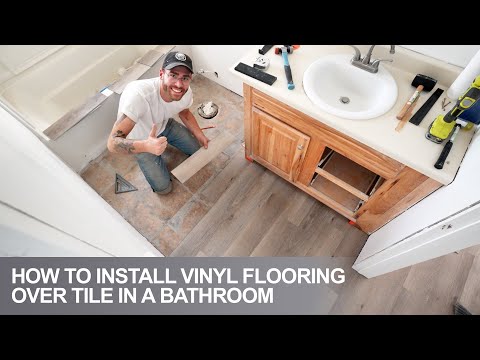
Credit: www.youtube.com
Frequently Asked Questions
How Do I Prepare The Floor Before Installing Vinyl Tiles?
Clean the floor thoroughly to remove dirt and grease. Ensure the surface is smooth, dry, and level. Repair any cracks or holes for a strong adhesive bond.
Can Vinyl Tiles Be Installed Around Vanity Cabinets?
Yes, vinyl tiles can be installed around vanity cabinets. Cut tiles precisely to fit edges and corners. Use a utility knife for clean cuts.
What Adhesive Is Best For Vinyl Tile Flooring?
Use a pressure-sensitive vinyl tile adhesive for best results. It provides strong bonding and allows repositioning during installation. Follow manufacturer instructions for application.
How Do I Cut Vinyl Tiles Around Plumbing Pipes?
Measure the pipe diameter and mark tiles accordingly. Use a hole saw or utility knife to cut holes. Fit tiles snugly around pipes for a clean finish.
Conclusion
Installing vinyl tile flooring around a vanity cabinet can be simple and effective. Careful measuring and cutting help fit tiles perfectly. Take your time to align tiles neatly for a clean look. Use the right adhesive to keep tiles secure and lasting.
Clean the area after installation to enjoy your new floor. This project adds style and value to your bathroom. With patience and care, anyone can do it well. Give your space a fresh, updated feel today.