Have an old dresser taking up space and wondering what to do with it? What if you could turn it into a beautiful bookshelf that fits perfectly in your home?
You don’t need to buy expensive furniture or have special skills to make this happen. With a few simple steps, you can transform that old dresser into a stylish and functional bookshelf that showcases your favorite books and decor. Keep reading, and you’ll discover how easy and rewarding this project can be for you.
Choosing The Right Dresser
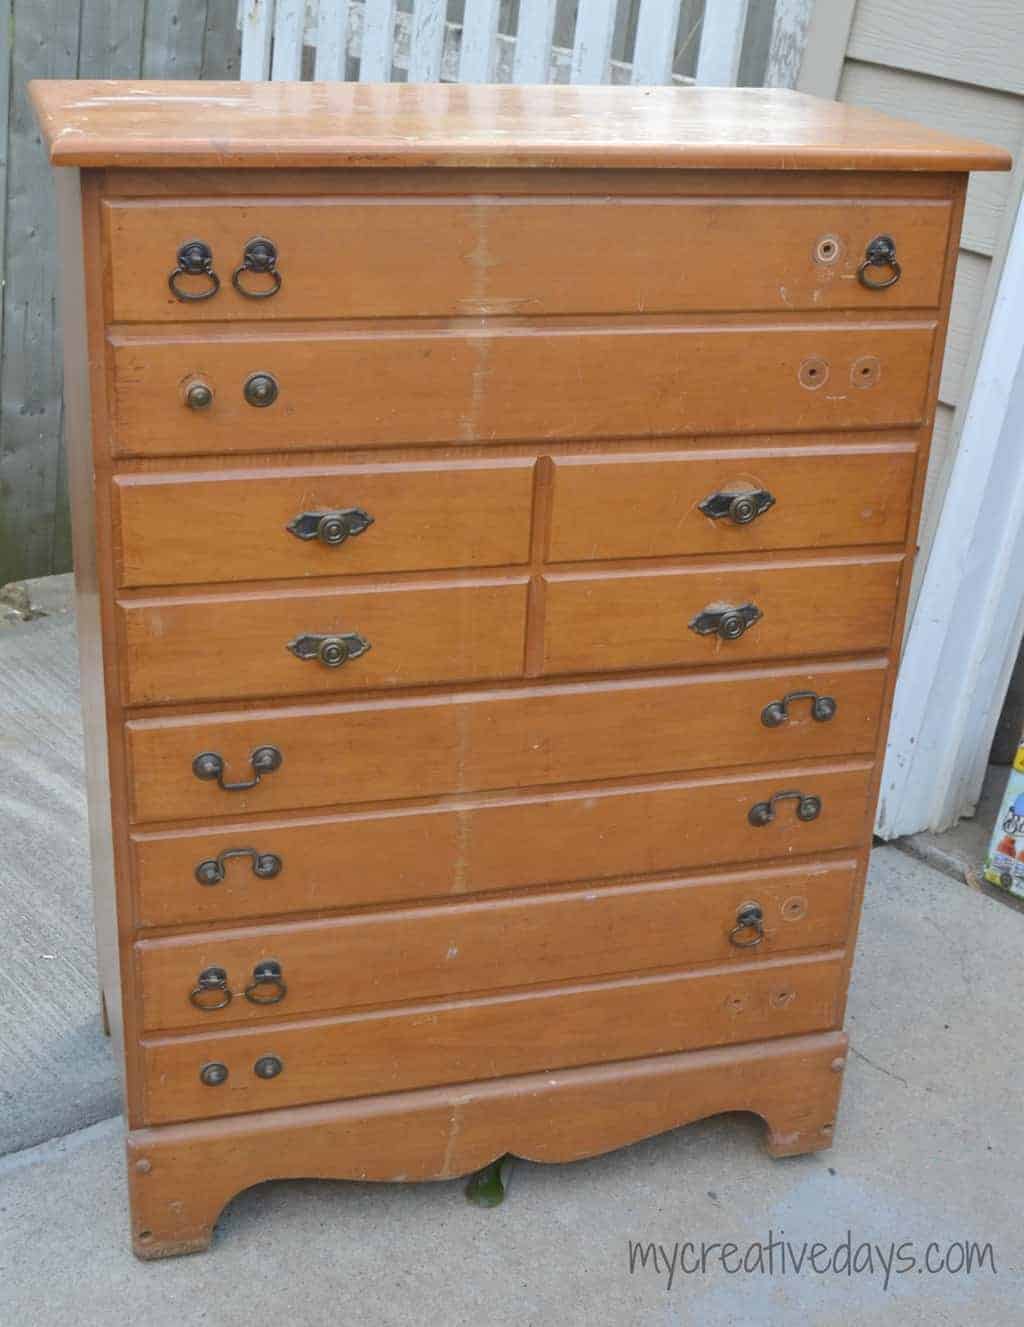
Choosing the right dresser is key to making a beautiful bookshelf. The dresser must fit your space and style. It should also be sturdy enough to hold books safely. Take your time to find a dresser that suits your needs.
Assessing Size And Shape
Measure the space where the bookshelf will go. The dresser should not be too big or too small. Tall dressers work well for vertical shelves. Wide dressers can hold more books but take more space. Check the shape too. Straight lines make it easier to add shelves.
Checking Material And Condition
Choose a dresser made of solid wood for strength. Avoid particleboard or thin materials that may break. Look closely for cracks or damage. Ensure the dresser is stable and not wobbly. Good condition means less work and a longer-lasting bookshelf.
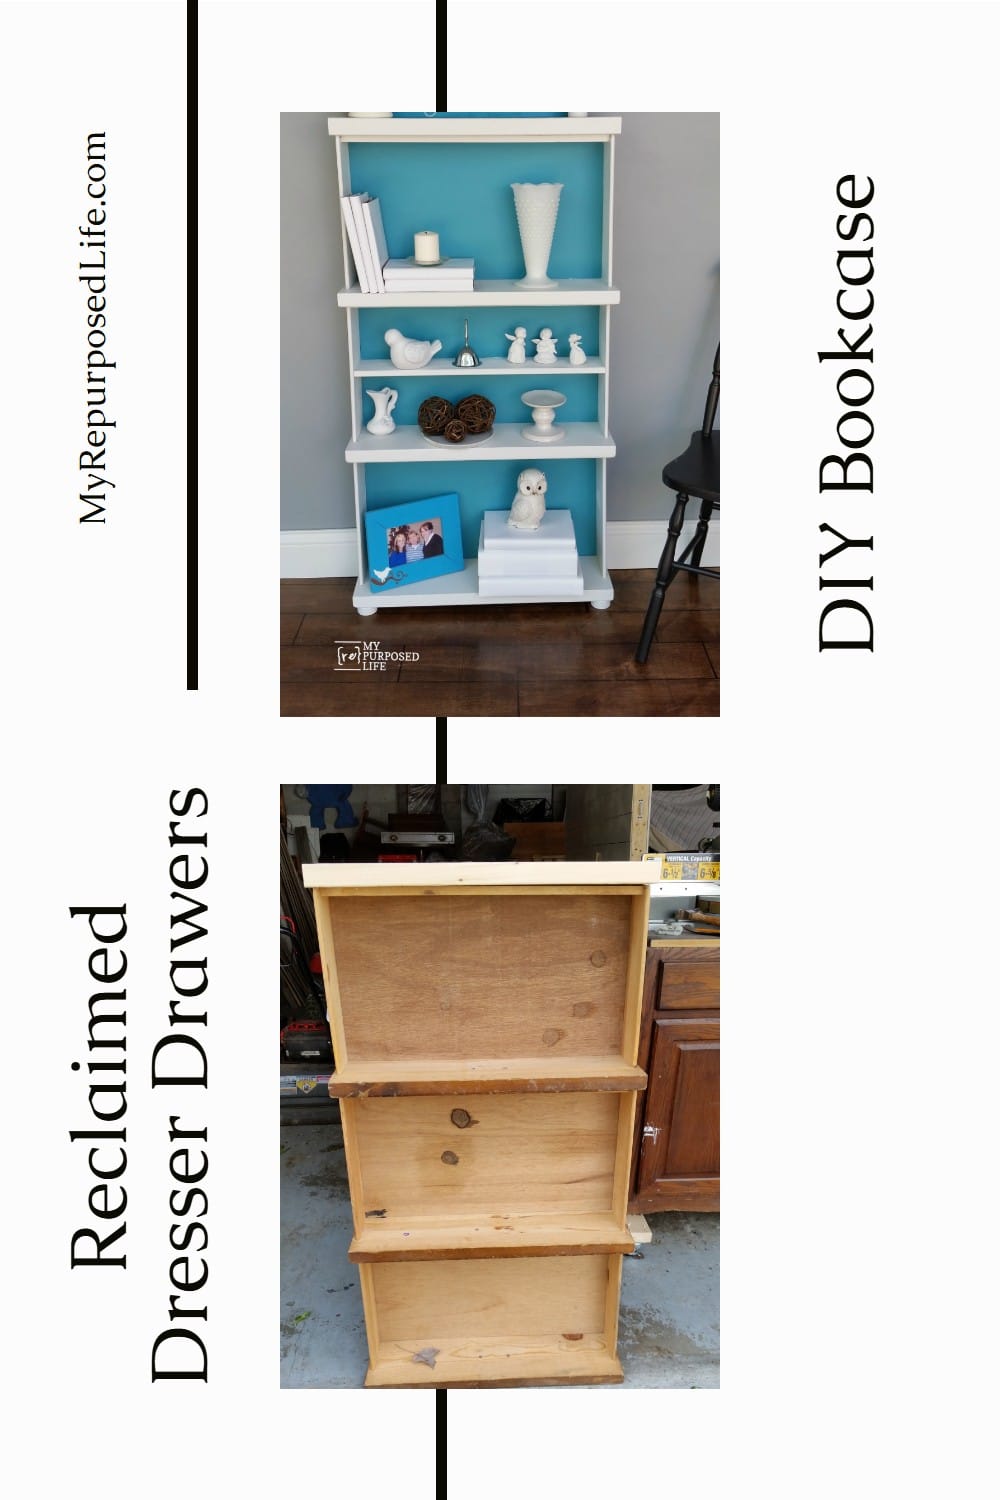
Credit: www.myrepurposedlife.com
Gathering Tools And Materials
Before starting your project, gather all tools and materials. This step saves time and keeps your work organized. It also helps avoid interruptions during your build. Having the right tools makes the process easier and safer. Check each item before you begin. Make sure everything works well and is in good condition.
Essential Tools List
- Screwdriver (Phillips and flathead)
- Power drill with drill bits
- Measuring tape
- Level
- Hammer
- Pry bar or crowbar
- Sandpaper (medium and fine grit)
- Clamps
- Wood glue
- Safety goggles
- Dust mask
Optional Supplies For Finishing
- Paint or wood stain
- Paintbrushes or foam brushes
- Wood filler
- Clear sealant or varnish
- Painter’s tape
- Drop cloth or old newspaper
Preparing The Dresser
Preparing the dresser is the first step to turn it into a bookshelf. This process makes sure the dresser is clean and ready for changes. It helps the new bookshelf look neat and last longer.
Removing Drawers And Hardware
Start by taking out all the drawers. This clears space and makes the dresser lighter. Next, remove all the hardware like handles and knobs. Use a screwdriver to unscrew them carefully. Keep the screws and hardware safe. You might use some parts later or replace them with new ones.
Sanding And Cleaning Surfaces
Sand the dresser surfaces to remove old paint or finish. Use medium-grit sandpaper first, then fine-grit for a smooth touch. Sanding helps paint or stain stick better. After sanding, wipe the dresser with a damp cloth. This removes dust and dirt. Make sure the surface is dry before painting or staining.
Credit: www.mycreativedays.com
Modifying The Structure
Modifying the structure of an old dresser is the key step in turning it into a functional bookshelf. This process involves removing unnecessary parts and adding new elements for stability and storage. It helps the dresser serve a new purpose while keeping its sturdy frame.
Removing Drawer Dividers
Start by taking out all the drawers from the dresser. Check inside for any dividers or panels that separate drawer spaces. Use a screwdriver or a hammer to carefully remove these dividers. Clearing out these sections creates open space for books and larger items. Be gentle to avoid damaging the frame.
Adding Support Shelves
After clearing the inside, measure the space where you want to add shelves. Cut wooden boards to fit the width and depth of the dresser. Attach the boards securely using screws or brackets. These shelves provide extra support and help organize your books neatly. Make sure the shelves are level and strong enough to hold weight.
Painting And Finishing
Painting and finishing your old dresser turned bookshelf is key to a fresh, polished look. These steps protect the wood and make your project last longer. The right paint or stain brings new life to the wood. A good finish guards against scratches and spills. Let’s explore how to pick the best options and apply them well.
Choosing Paint Or Stain
Decide if you want a solid color or a natural wood look. Paint hides imperfections and adds bold color. Stain highlights wood grain and gives a warm tone. Choose paint for a modern, bright style. Pick stain for a classic, rustic feel. Test colors on a small area first. Use water-based paint for easy cleanup. Oil-based paint lasts longer but needs strong cleaners. Stains come in many shades, from light to dark. Match the finish to your room’s decor.
Applying Finish For Durability
Finish protects paint or stain from damage. Use a clear polyurethane for strong protection. Water-based finishes dry fast and have low odor. Oil-based finishes add a slight amber tint. Apply thin coats with a brush or cloth. Let each coat dry completely before the next. Sand lightly between coats for smoothness. Finish the top and sides well, where wear is highest. This step keeps your bookshelf looking great for years.
Reassembling And Styling
After transforming your old dresser into a bookshelf, it’s time to reassemble and style it. This step brings your project to life. Focus on making the shelves functional and beautiful. Small details make a big difference.
Reattaching Or Removing Drawer Fronts
Decide if you want the drawer fronts on or off. Removing them opens the shelves fully for books and decor. Leaving them adds a unique look. You can also attach them partially for a mix of open and closed spaces. Use screws or nails to secure drawer fronts back if you choose to keep them. Sand and paint or stain to match your new style.
Arranging Books And Decor
Place books in different directions for a creative look. Stack some horizontally, stand others vertically. Add small decor items like plants or photo frames. Keep some empty space to avoid clutter. Balance colors and sizes to create harmony. This makes your bookshelf both useful and stylish.
Safety Tips And Maintenance
Safety and maintenance keep your bookshelf sturdy and lasting long. Old dressers can be heavy and unstable if not handled well. Simple safety steps prevent accidents and damage. Regular care keeps the wood and paint in good shape. This section guides you through key safety tips and easy maintenance tasks.
Securing The Bookshelf To The Wall
Attach the bookshelf firmly to the wall. Use wall anchors and brackets for strong support. This stops the shelf from tipping over. Place screws into studs for better hold. Check the stability often to keep it safe. Avoid placing heavy items only on one side.
Regular Cleaning And Upkeep
Dust the bookshelf weekly using a soft cloth. Avoid harsh chemicals that may damage the paint or wood. Use mild soap and water for stains. Dry the surface immediately to prevent water marks. Inspect the dresser for loose screws or cracks regularly. Tighten screws and fix small issues to extend its life.

Credit: www.recreateddesigns.com
Frequently Asked Questions
How Do I Convert An Old Dresser Into A Bookshelf?
Start by removing the drawers and sanding the frame. Then, paint or stain the dresser. Finally, adjust shelves to fit books and secure it to the wall for safety.
What Tools Are Needed To Make A Bookshelf From A Dresser?
You will need a screwdriver, sandpaper, paintbrush, measuring tape, saw (optional), and wall anchors. These tools help disassemble, refurbish, and secure the dresser safely.
Can I Customize The Bookshelf After Conversion?
Yes, you can add shelves, paint it any color, or add decorative molding. Customizing enhances style and functionality to match your room’s decor.
Is It Safe To Use An Old Dresser As A Bookshelf?
Yes, if you reinforce the frame and anchor it to the wall. This prevents tipping and ensures it can hold book weight safely.
Conclusion
Transforming an old dresser into a bookshelf saves money and reduces waste. You only need basic tools and a little time. This project adds charm and function to any room. It suits beginners and those who enjoy DIY tasks. Try customizing the shelf with paint or decorations.
A unique, personal bookshelf can brighten your space. Start with what you have, and create something useful. Small steps lead to great results. Your old dresser has new life now. Enjoy your handmade bookshelf every day!