Are you looking to add a unique touch to your home with a stylish bookshelf? Making a bull nose bookshelf is easier than you might think, and it can transform any room with its smooth, rounded edges.
In this guide, you’ll learn simple steps to build your own eye-catching shelf that not only looks great but is also sturdy and practical. Whether you’re a beginner or have some DIY experience, this project will give you the confidence to create something truly special for your space.
Ready to start? Let’s dive in and make your perfect bull nose bookshelf!
Materials And Tools Needed
Building a bull nose bookshelf needs the right materials and tools. Choosing quality wood and having the correct tools makes the project easier. Safety gear protects you during the work. This section covers everything needed before starting.
Choosing The Right Wood
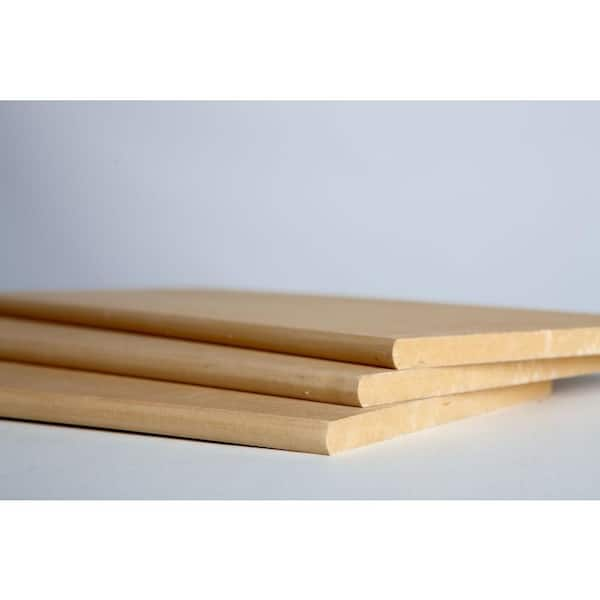
Pick wood that is strong and smooth. Pine, oak, or maple are good choices. Pine is cheaper and easy to cut. Oak and maple last longer and look nice. Make sure the wood is dry. Wet wood can warp over time. Choose pieces without cracks or knots for a clean finish.
Essential Tools List
You need basic woodworking tools for this project. A saw helps cut the wood to size. A router with a round-over bit shapes the bull nose edges. Sandpaper or a sander smooths the surfaces. A drill with bits makes holes for screws. Clamps hold wood pieces in place. A measuring tape and pencil help mark cuts.
Safety Gear
Protect your eyes with safety goggles. Wear gloves to avoid splinters and cuts. Use ear protection to block loud noises from tools. A dust mask keeps wood dust out of your lungs. Always work in a clean, well-lit space. Safety gear keeps you safe and comfortable.

Credit: www.homedepot.com
Preparing The Wood
Preparing the wood is the first important step in making a bull nose bookshelf. It ensures the wood fits perfectly and looks smooth. Taking time here saves effort later. The wood must be measured, cut, and sanded carefully. This prepares the wood for shaping the rounded edges of the bull nose design.
Measuring And Marking
Start by measuring the wood pieces with a tape measure. Mark the wood clearly using a pencil. Make straight lines where cuts will be. Double-check measurements for accuracy. Marking helps keep the cuts clean and precise. This step makes sure the bookshelf parts fit together well.
Cutting To Size
Use a saw to cut the wood along your marks. Cut slowly to avoid splintering the wood. Keep your hands steady and follow safety rules. Check each piece after cutting. Correct sizes make the building process easier. Neat cuts mean the bookshelf will look better.
Sanding The Edges
Sanding smooths the wood edges and removes rough spots. Use sandpaper or a sanding block for this task. Move the sandpaper in circles for even smoothing. Pay close attention to the edges that will be rounded. Smooth edges make the wood safe to touch. Sanding also helps the paint or finish stick well.
Creating The Bull Nose Edge
Creating the bull nose edge is a key step in making your bookshelf look professional. This rounded edge softens the corners, making the shelf safer and more stylish. It also shows off your woodworking skills. The process needs careful shaping and smoothing to get that perfect curve.
The bull nose edge can be shaped using tools or by hand. Both methods need patience and attention to detail. The goal is a smooth, even curve without sharp spots or rough edges. Let’s explore how to create this edge with a router and by hand sanding, plus how to check your work for consistency.
Using A Router With A Round-over Bit
A router with a round-over bit is the easiest way to create a bull nose edge. Choose a bit size that matches the curve you want. Secure your wood piece firmly before starting. Move the router steadily along the edge, keeping the base flat on the wood. Take light passes to avoid tear-out or mistakes. The router shapes a clean, even curve quickly.
Hand Sanding For Smooth Curves
Hand sanding helps refine the bull nose edge after routing or if you don’t use power tools. Use medium-grit sandpaper to start shaping the curve. Sand with the grain to avoid scratches. Switch to fine-grit sandpaper for a smooth finish. Take your time to remove any rough spots or uneven areas. Hand sanding adds a soft, natural feel to the edge.
Checking Edge Consistency
Check the edge for an even curve all around. Run your finger along the bull nose to feel for bumps or dips. Use a flexible curve ruler or template to compare the shape. Look for any flat spots or sharp corners. Fix problems by sanding or routing lightly again. Consistency makes your bookshelf look neat and well-made.
Credit: www.homedepot.com
Assembling The Bookshelf
Assembling the bull nose bookshelf is a crucial step to bring your project to life. Careful assembly ensures the shelf looks good and holds weight well. Follow clear steps for a smooth building process.
Joining The Shelves And Sides
Start by aligning the shelves with the sides. Make sure the bull nose edges face outward for a smooth look. Fit each shelf into the slots or marks made earlier. Check that shelves sit evenly and flush against the sides.
Securing With Screws And Glue
Apply wood glue along the edges where shelves meet the sides. Use clamps to hold parts tightly together while drying. Drill pilot holes before screwing to avoid wood splitting. Insert screws carefully and tighten them without cracking the wood.
Ensuring Stability
Test the shelf by gently shaking it side to side. Add corner braces or extra screws if it feels loose. Make sure all joints are tight and glue has dried fully. A stable bookshelf lasts longer and holds books safely.
Finishing Touches
Finishing touches bring your bull nose bookshelf to life. They protect the wood and give it a polished look. These final steps make the bookshelf last longer and look great in any room. Follow these simple finishing steps to complete your project with care.
Applying Stain Or Paint
Choose a stain or paint that suits your room’s style. Use a brush or cloth to apply the stain evenly. Let the stain soak into the wood for a few minutes.
Wipe off any extra stain with a clean cloth. For paint, apply thin coats to avoid drips. Allow each coat to dry before adding another.
Adding A Protective Coat
Protect the finish with a clear coat like polyurethane or varnish. Use a clean brush to apply thin, even layers. This coat guards against scratches and water damage.
Let the protective coat dry fully before touching the shelf. Sand lightly between coats for a smooth finish. Apply two to three coats for best results.
Final Inspection And Adjustments
Check the bookshelf for any rough spots or missed areas. Smooth rough edges with fine sandpaper. Touch up any stains or paint as needed.
Make sure the shelf is sturdy and level. Tighten any loose screws or fasteners. Your bull nose bookshelf is now ready to use and admire.
Tips For Customization
Customizing your bull nose bookshelf makes it fit your style and needs perfectly. Small changes can make a big difference in how it looks and works. Consider these tips to create a unique and useful bookshelf for your home.
Varying Shelf Heights
Change the height of each shelf to hold different items. Tall shelves fit big books or decor pieces. Short shelves work well for small books or collectibles. Mixing heights adds visual interest and practical storage.
Incorporating Decorative Elements
Add design touches like trim or paint to enhance the shelf. Use wood stains for a natural look or bright colors for a fun vibe. Small carvings or metal brackets can make the shelf stand out. Keep decorations simple to match your room’s style.
Optimizing For Different Spaces
Adjust the bookshelf size to fit your room perfectly. Narrow shelves work well in small corners or tight spaces. Wider units fill empty walls and offer more storage. Think about where you want the shelf and plan its size accordingly.

Credit: www.thecraftpatchblog.com
Frequently Asked Questions
What Tools Are Needed To Make A Bull Nose Bookshelf?
You need a jigsaw, sander, drill, clamps, measuring tape, wood glue, screws, and safety gear. These tools help shape and assemble the curved edges precisely and securely.
How Do You Create The Bull Nose Edge On Wood?
Use a router with a bull nose bit to shape the edge smoothly. Sand the edges afterward for a clean, rounded finish that enhances the shelf’s look.
What Type Of Wood Is Best For A Bull Nose Bookshelf?
Hardwoods like oak, maple, or cherry are ideal. They are durable, sand well, and provide a smooth finish for the rounded bull nose edges.
Can A Beginner Make A Bull Nose Bookshelf Easily?
Yes, with basic woodworking skills and patience, beginners can make it. Follow clear instructions and take safety precautions for best results.
Conclusion
Creating a bull nose bookshelf adds style to any room. It needs some tools and patience, but it is doable. Take your time to measure and cut carefully. Sanding the edges makes the shelf smooth and safe. Painting or staining helps protect the wood and looks nice.
This project suits beginners who want a simple woodworking task. Enjoy your new shelf and the books it holds. Keep practicing to improve your skills with each project. Simple steps can create something useful and beautiful. Give it a try and see the difference it makes.