
Are you looking for a creative way to organize your coats and add a unique touch to your space? Making a coat rack out of skis is a fun and stylish project you can easily do yourself.
Imagine turning old or unused skis into a functional piece that sparks conversation every time someone walks in. You’ll discover simple steps to create your own ski coat rack, even if you’re not a DIY expert. Ready to transform your space with a cool, custom rack?
Let’s get started!
Choosing The Right Skis
Choosing the right skis is important for making a sturdy and stylish coat rack. The skis must be strong and in good shape. The style and size of the skis affect the rack’s look and function. Picking the right skis ensures your project lasts long and looks great.
Types Of Skis To Use
Old alpine skis work well for coat racks. They are thick and strong. Cross-country skis are thinner but can create a sleek design. Avoid skis with cracks or major damage. Skis with interesting colors or designs add a unique touch. Choose skis that match your room’s style.
Where To Find Old Skis
Check local thrift stores for used skis. Look at ski shops for clearance or damaged skis. Online marketplaces often have cheap, old skis. Ask friends or family if they have old skis. Garage sales can be a good place to find skis. Always inspect skis for cracks or rot before buying.
Preparing Skis For Crafting
Clean the skis to remove dirt and wax. Use a scraper or fine sandpaper for wax removal. Sand rough edges to avoid splinters. Remove any bindings or metal parts carefully. Check for loose or weak areas and fix them. Make sure the skis are dry before starting your project.
Tools And Materials Needed
Creating a coat rack from old skis is a fun and creative project. Before starting, gather all the tools and materials needed. Having everything ready makes the work easier and faster. Prepare your workspace too. A clean and flat surface helps with the assembly.
Essential Tools
- Power drill with drill bits
- Screwdriver or electric screwdriver
- Measuring tape or ruler
- Level to ensure straight lines
- Sandpaper or sanding block
- Clamps to hold skis in place
Additional Supplies
- Old skis (clean and dry)
- Wall hooks or coat hooks
- Wood screws suitable for skis
- Wood glue for extra strength
- Paint or sealant (optional for finish)
- Mounting brackets or anchors for wall
Safety Gear
- Safety glasses to protect eyes
- Work gloves to protect hands
- Dust mask if sanding creates dust
- Ear protection if using loud tools
Design Ideas For Ski Coat Racks
Designing a coat rack from old skis is a fun way to recycle and decorate. Ski coat racks bring a unique look to any room. They blend outdoor charm with practical use.
Many styles fit different spaces and needs. Choose one that matches your room size and style. Below are some popular design ideas for ski coat racks.
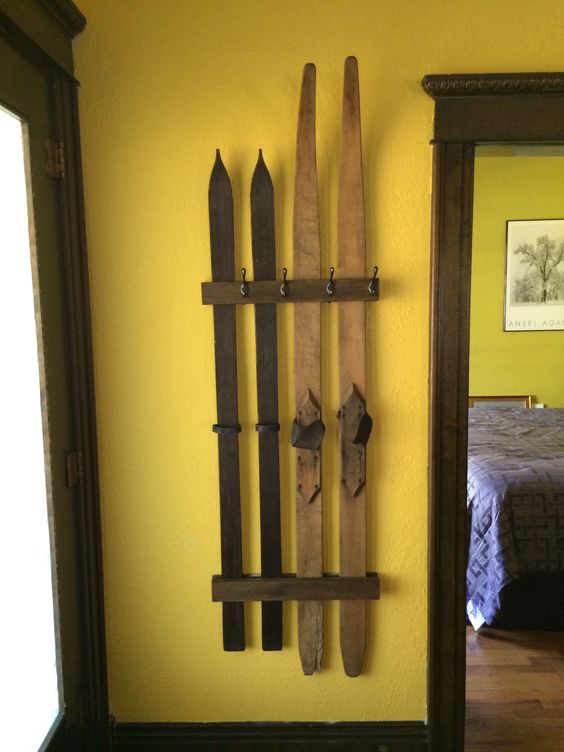
Wall-mounted Racks
Wall-mounted ski racks save floor space and look neat. Attach skis horizontally or vertically on the wall. Use hooks or pegs on the skis for hanging coats.
This style works well in hallways or small rooms. It keeps coats easy to reach without clutter. You can paint or decorate skis for extra style.
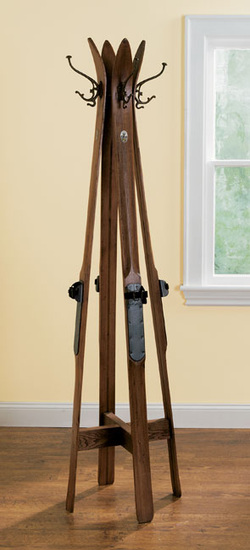
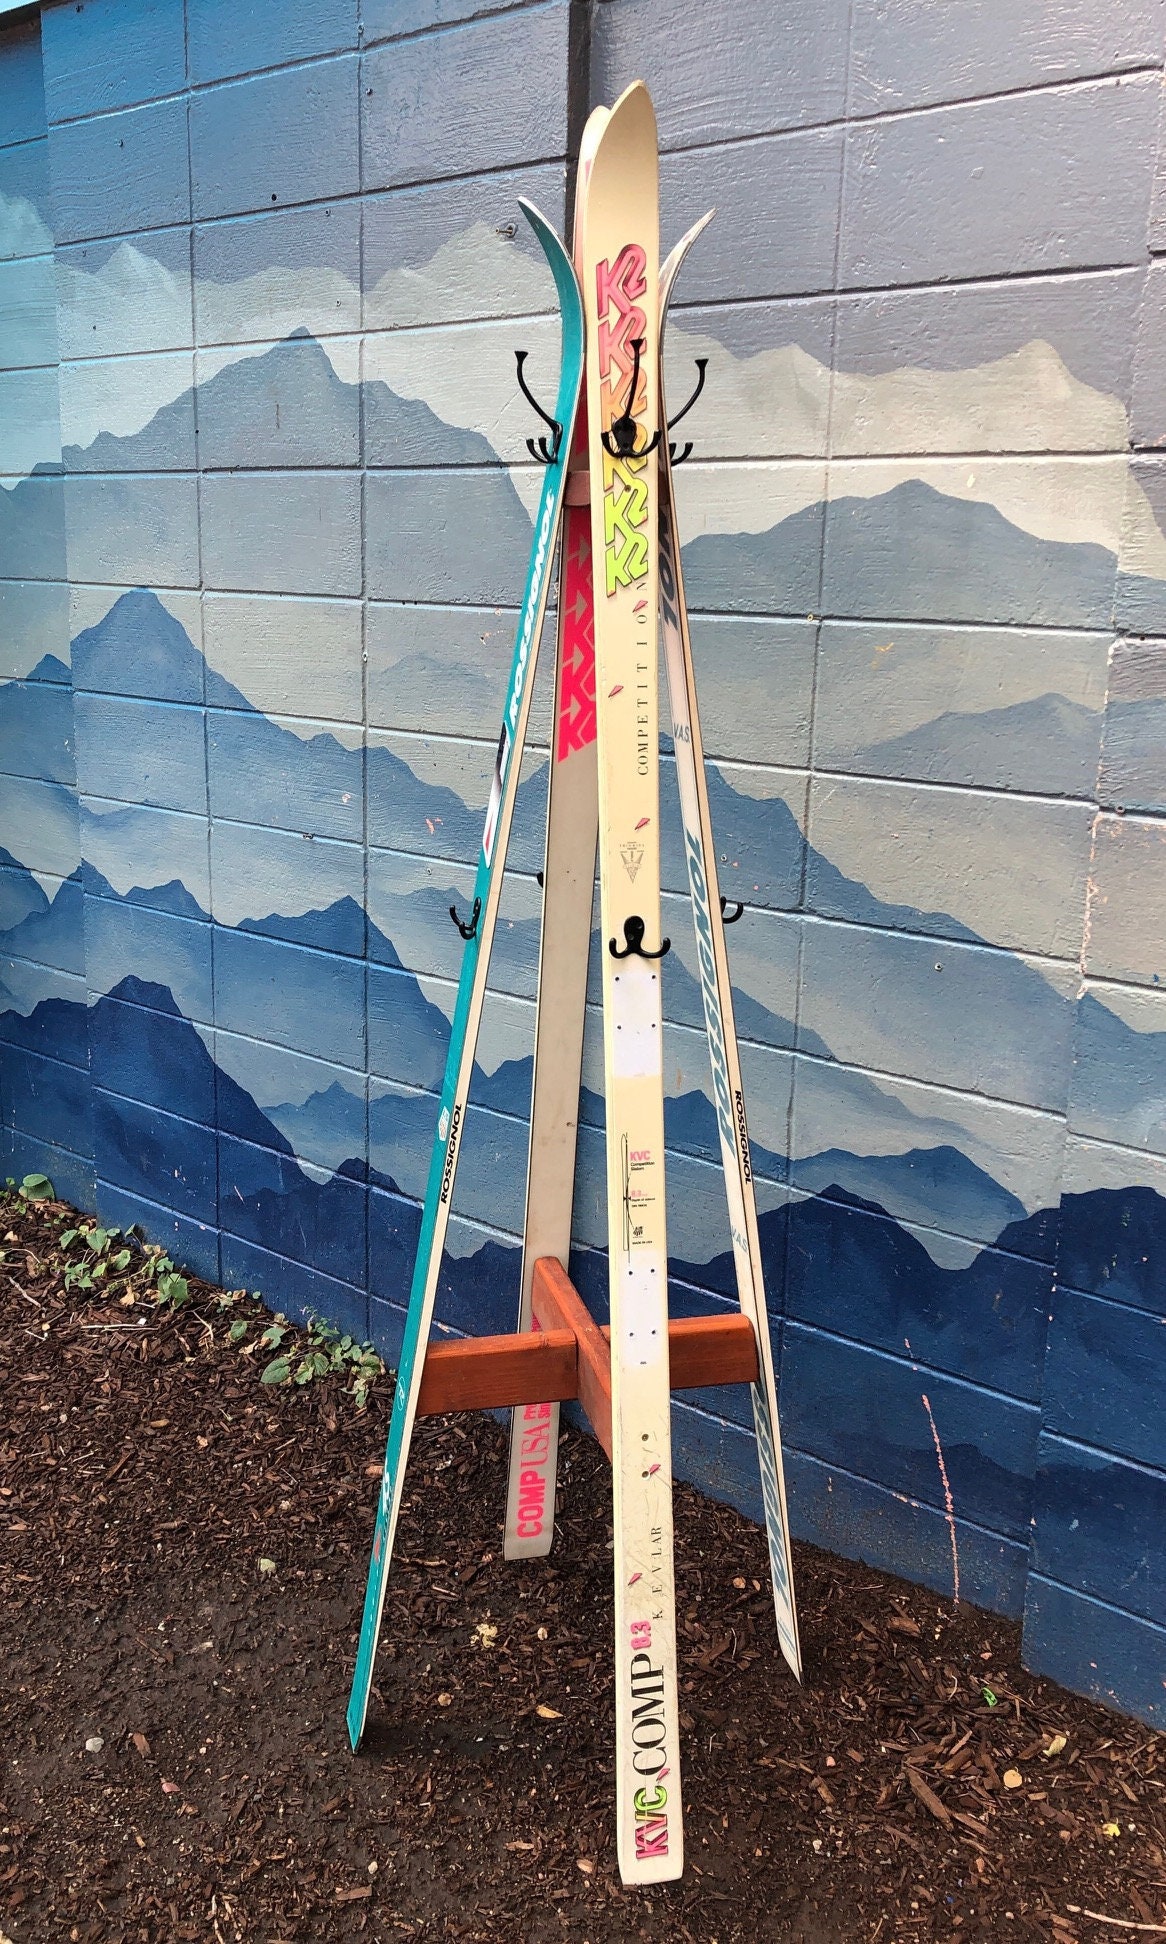
Free-standing Racks
Free-standing racks stand on the floor and are easy to move. Use whole skis or cut pieces to build the frame. Add hooks or rods between skis to hang coats and hats.
This design fits larger spaces like mudrooms or entryways. It adds a rustic, sporty feel. Choose sturdy skis and secure the base well for stability.
Combination Styles
Combine wall-mounted and free-standing features for a unique rack. For example, a free-standing base with wall-mounted skis on top. This mix can hold more coats and gear.
Use different ski colors or shapes for a creative look. This design offers flexibility and style. It suits busy homes with many coats and accessories.
Step-by-step Assembly Guide
Building a coat rack from old skis is a creative way to reuse materials. This step-by-step guide makes the process clear and simple. Follow each step carefully to create a sturdy and stylish rack. No special skills needed. Just some basic tools and patience.
Measuring And Marking
Start by choosing the skis you want to use. Measure the length and width of each ski. Decide how many hooks you want on your rack. Mark spots evenly where hooks will go. Use a pencil for clear, easy-to-see marks. Double-check measurements before moving on.
Cutting And Modifying Skis
Use a saw to cut skis to the desired length. Cut slowly and carefully for a clean edge. Sand rough edges to avoid splinters. Remove or cover sharp parts like ski bindings. Make sure the skis are smooth and safe to handle.
Attaching Hooks And Mounts
Choose sturdy hooks that can hold coats and bags. Drill small pilot holes where you marked earlier. Screw hooks firmly into the skis. Attach mounting hardware on the back for wall hanging. Check that hooks and mounts are secure and stable.
Finishing Touches
Sand the entire rack to smooth any rough spots. Apply a coat of wood finish or paint if desired. Let the rack dry completely before use. Test the rack by hanging a few items. Adjust hooks or mounts if needed for balance.
Customization Tips
Customizing your coat rack made from skis lets you express your style. It also helps the rack fit your space perfectly. Small changes can make a big difference. Here are some easy tips to personalize your ski coat rack.
Painting And Staining
Painting your skis adds color and protects the wood. Choose bright colors for a fun look. Soft tones create a calm feel. Staining shows the wood’s natural pattern. It gives a warm, classic touch. Use a clear coat after painting or staining. This step keeps the finish safe and shiny.
Adding Decorative Elements
Decorations make your coat rack unique. Attach metal hooks in different shapes or colors. Use rope or leather strips for a rustic style. Stick on small stickers or decals for a playful look. You can also add small lights for a cozy vibe. These extras make your rack stand out.
Personalizing With Accessories
Accessories add function and style. Hang a small mirror or a chalkboard on one side. Use baskets or trays to hold gloves or hats. Add name tags to each hook for family members. These touches make the rack useful and personal. Choose accessories that match your room’s decor.
Credit: crystelleboutique.weebly.com
Maintaining Your Ski Coat Rack
Maintaining your ski coat rack helps keep it strong and good-looking. Simple care can extend its life and keep it safe for daily use. A few easy steps will keep your rack clean and ready for coats.
Cleaning And Care
Dust the rack often using a soft cloth. Use a damp cloth to wipe off dirt. Avoid harsh cleaners that damage the ski surface. Dry the rack well to prevent moisture damage. Check for any loose screws or fittings regularly. Tighten them to keep the rack stable and safe.
Repairing Common Issues
Scratches and chips happen over time. Use wood filler or epoxy to fix small damages. Sand the repaired spots lightly for a smooth finish. Replace broken hooks or screws immediately. This prevents further damage or accidents. Keep tools handy for quick repairs as needed.
Storing During Off-season
Store the rack in a dry, cool place when not in use. Cover it with a cloth to keep dust away. Avoid damp areas that cause rust or mold. Remove all coats before storage to reduce weight and stress. Check the rack before using it again after storage.
Inspiration From Real Projects
Drawing inspiration from real projects helps spark creativity when making a coat rack from skis. Seeing how others transform old skis into useful art encourages new ideas. It shows the variety of styles and techniques available for this unique craft.
Real examples also reveal common challenges and smart solutions. They guide you through the process and boost confidence. Let’s explore some creative user examples, popular styles, and places to share your finished coat rack.
Creative User Examples
Many people turn old skis into coat racks with a personal touch. Some use bright paint to add color and personality. Others keep the natural wood look for a rustic feel. Some add hooks between skis or mount skis vertically for space-saving racks. Each project reflects the owner’s style and skill level.
Popular Styles And Trends
Rustic and vintage styles are popular for ski coat racks. Natural wood finishes or distressed paint create a cozy look. Minimalist designs using clean lines and simple hooks fit modern homes. Some racks include shelves or benches for added function. Mixing old skis with metal or leather adds unique flair.
Where To Share Your Creation
Online platforms are great for showing off your ski coat rack. DIY forums and craft groups welcome photos and tips. Social media sites like Instagram and Pinterest help reach many viewers. Local craft fairs or community boards also offer ways to display your work. Sharing inspires others and gains useful feedback.
Credit: www.etsy.com
Credit: www.shelterness.com
Frequently Asked Questions
How Do You Prepare Skis For A Coat Rack?
Clean the skis thoroughly and remove bindings. Sand any rough spots for smooth surfaces. This ensures safety and a polished look for your coat rack.
What Tools Are Needed To Make A Ski Coat Rack?
You need a drill, screws, wall anchors, hooks, and a level. These tools help securely attach skis to the wall and add functional hooks.
Can I Use Old Or Damaged Skis For This Project?
Yes, old or damaged skis work well. They add rustic charm and save materials. Just ensure they are sturdy enough to hold coats.
How Do I Mount The Ski Coat Rack On The Wall?
Use a level to align skis evenly. Drill holes and insert wall anchors for support. Secure skis with screws to ensure stability and safety.
Conclusion
Making a coat rack from old skis adds style and function to your space. It saves money and helps reduce waste. You can customize the rack to fit your room perfectly. Plus, it brings a unique, cozy vibe to your home.
Try this simple project and enjoy a useful, creative piece. It’s a fun way to reuse skis and keep your coats organized. Give it a try—you might love the result!
