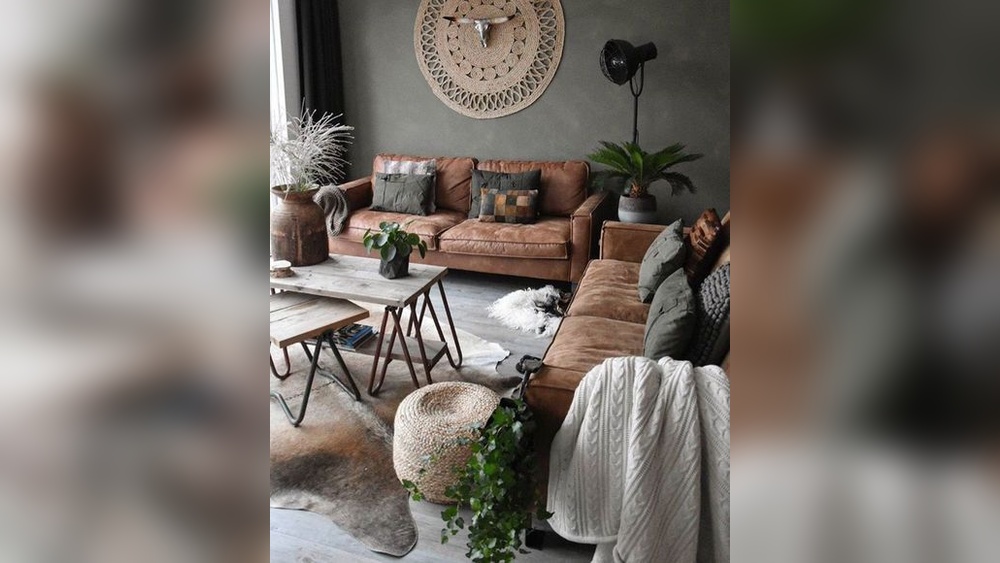
Are you looking for a stylish way to organize your space while adding a personal touch? Making a console table with storage is the perfect project for you.
Not only will it give you extra room to keep your essentials, but it will also transform any hallway or living room corner into a functional and beautiful spot. Imagine having a piece of furniture that fits your style and needs exactly.
Ready to learn how to build one step-by-step? Keep reading, and you’ll discover simple tips and tricks that make this project easy and rewarding. Your perfect console table is closer than you think!
Materials And Tools Needed
Building a console table with storage needs the right materials and tools. This step is key to making a strong and useful piece of furniture. Using good wood and the proper tools helps you work faster and get better results.
Here is a list of what you need to start your project. Knowing these items saves time and avoids mistakes. You will find tips on choosing wood, a list of must-have tools, and some extra accessories to help with your build.
Choosing The Right Wood
Pick wood that is strong and easy to work with. Pine, oak, or plywood are good choices. Pine is soft and cheaper. Oak is hard and long-lasting. Plywood is flat and stable. Check for smooth surfaces and no cracks. Wood size depends on your table design. Measure twice, cut once.
Essential Tools List
Start with a saw to cut your wood. A circular saw or handsaw works well. Use a drill for making holes and fixing screws. Sandpaper or a sander smooths rough edges. A tape measure helps with accurate cuts. A screwdriver or drill bit is needed for screws. Clamps hold wood steady while working. A pencil is useful for marking cuts and holes.
Optional Accessories
Consider wood glue for stronger joints. Brackets or corner braces add extra support. Drawer slides make storage easy to open and close. Paint or stain finishes the table and protects wood. Brushes or rags help apply finishes evenly. Felt pads under the legs protect floors. These extras improve your table’s look and function.
Planning Your Console Table
Planning your console table is the first step to a successful build. Good planning saves time and avoids mistakes. It helps you create a table that fits your space and meets your storage needs.
Think about where you want to place the table. Consider what you want to store. These details guide your design choices. Careful planning ensures your table looks great and works well.
Measuring Your Space
Measure the wall or area where the console table will go. Note the width, height, and depth available. Leave some space around the table for easy movement. Accurate measurements prevent your table from being too big or small. Write down all measurements before you start building.
Designing Storage Options
Decide what items you want to store in the table. Think about shelves, drawers, or cabinets. Choose storage types that fit your needs. For example, drawers work well for small items. Shelves are good for books or baskets. Plan storage that keeps your space tidy and organized.
Sketching Your Table
Draw a simple sketch of your console table. Include all parts like legs, top, and storage areas. Use your measurements to make the sketch accurate. This visual helps you see the final shape. It also guides you during building. Adjust the sketch until you like the design.
Cutting And Preparing Wood
Cutting and preparing wood is the first major step in building a console table with storage. Careful preparation ensures the pieces fit perfectly. It also helps create a sturdy, attractive piece. Taking time here makes assembly easier and the finished table stronger.
Marking Measurements
Start by measuring the wood carefully with a tape measure. Mark the cut lines clearly using a pencil and a square tool. Double-check all measurements before cutting. Accuracy at this stage prevents wasted wood and uneven pieces.
Safe Cutting Techniques
Use a saw suitable for the wood type and thickness. Keep your hands clear of the blade at all times. Wear safety glasses to protect your eyes from sawdust. Cut slowly and steadily to avoid splintering the wood. Support the wood firmly to prevent movement during cutting.
Sanding The Pieces
Sanding smooths rough edges and prepares the wood for finishing. Start with coarse sandpaper to remove splinters and marks. Then use finer grit to create a smooth surface. Sand all edges and surfaces evenly. Wipe off dust with a clean cloth before assembly.
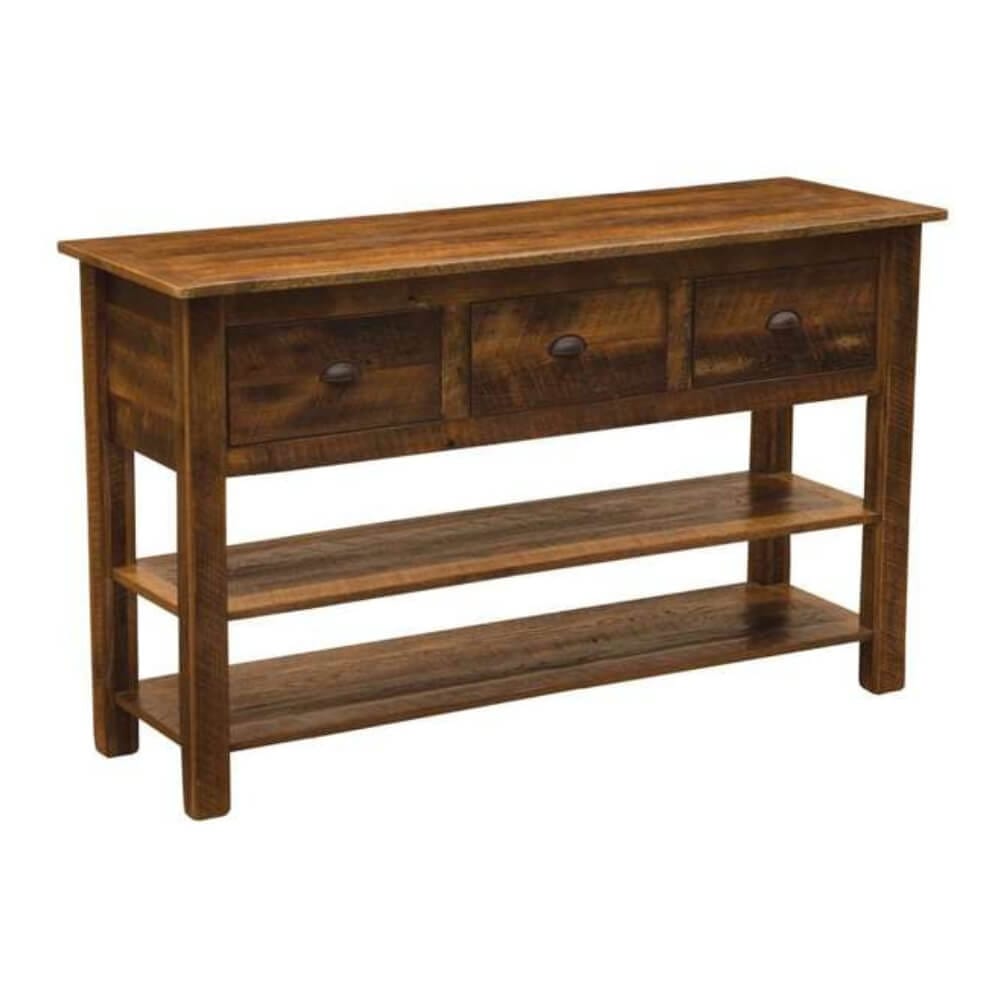
Credit: www.cabinplace.com
Assembling The Table Frame
Assembling the table frame is the first step to build your console table with storage. This step shapes the base and gives strength to your table. Take your time to follow each part carefully. A strong frame supports the entire table and the items you will place on it.
Joining Legs And Supports
Start by attaching the legs to the side supports. Use wood glue on the joints for a tight hold. Then, screw the legs firmly to the supports. Make sure the legs are straight and even. This keeps the table balanced and steady.
Securing The Frame
Next, connect the front and back supports to the leg assembly. Use screws to fix these pieces tightly. Double-check that all screws are fully tightened. This step locks the frame in place and prevents wobbling.
Checking Stability
Place the frame on a flat surface to check stability. Push gently on each corner to test for movement. If it wobbles, tighten the screws again. A stable frame ensures your table will last long and hold weight well.
Building Storage Components
Building storage components for your console table adds both style and function. It helps keep your space neat and organized. Each part of the storage can be made to fit your needs. Below are simple steps to create shelves, drawers, and compartments.
Constructing Shelves
Start by measuring the space under the tabletop. Cut wood pieces to fit the width and depth. Use sturdy boards for strong shelves. Attach the shelves using brackets or nails. Make sure they are level and secure. Shelves provide open storage for books or decor.
Adding Drawers Or Baskets
Drawers add hidden storage and keep items out of sight. Build a simple box with four sides and a bottom panel. Use runners or slides to fit the drawer inside the frame. Baskets offer a rustic and easy-to-use alternative. Choose baskets that fit the shelf space well.
Installing Storage Compartments
Create small compartments by adding dividers inside shelves or drawers. Use thin wood strips to separate sections. Compartments help organize small items like keys or mail. Secure dividers firmly to avoid movement. This keeps your console table tidy and useful.
Finishing Touches
The finishing touches bring your console table to life. They protect the wood and enhance its beauty. These final steps make your project look polished and complete. Small details can create a big difference.
Applying Paint Or Stain
Choose paint or stain that matches your room’s style. Use smooth, even strokes for a clean finish. Let each coat dry fully before adding the next. Stain shows the wood grain, paint adds color and hides it. Test your color on a scrap piece first.
Adding Hardware
Hardware adds function and style to your table. Pick knobs or handles that fit the design. Measure carefully to place them evenly. Screw them in tightly but avoid overtightening. Hardware can be simple or decorative depending on your taste.
Protective Coating
A protective coat guards against scratches and spills. Use clear polyurethane, varnish, or wax. Apply thin layers with a brush or cloth. Let each layer dry before applying the next. This step helps your table last for years.
Tips For Maintenance
Maintaining your console table with storage keeps it looking great and lasting longer. Regular care protects the wood and hardware from damage. Simple habits help you avoid costly repairs. Follow these tips to keep your table in top shape.
Cleaning Advice
Dust your table often with a soft cloth. Avoid wet rags that can harm the wood. Use a mild cleaner made for wood furniture. Wipe spills quickly to stop stains from setting. Clean inside drawers and shelves to prevent dirt build-up.
Handling Wear And Tear
Place coasters under drinks to stop rings and marks. Use pads under decorative items to avoid scratches. Move the table carefully to prevent dents. Tighten loose screws and handles as soon as you see them. Avoid placing heavy objects that could warp the surface.
Periodic Checks
Inspect joints and hinges every few months. Check for signs of wood cracking or splitting. Look for rust or corrosion on metal parts. Fix any small problems before they grow bigger. Regular checks keep your console table sturdy and safe.
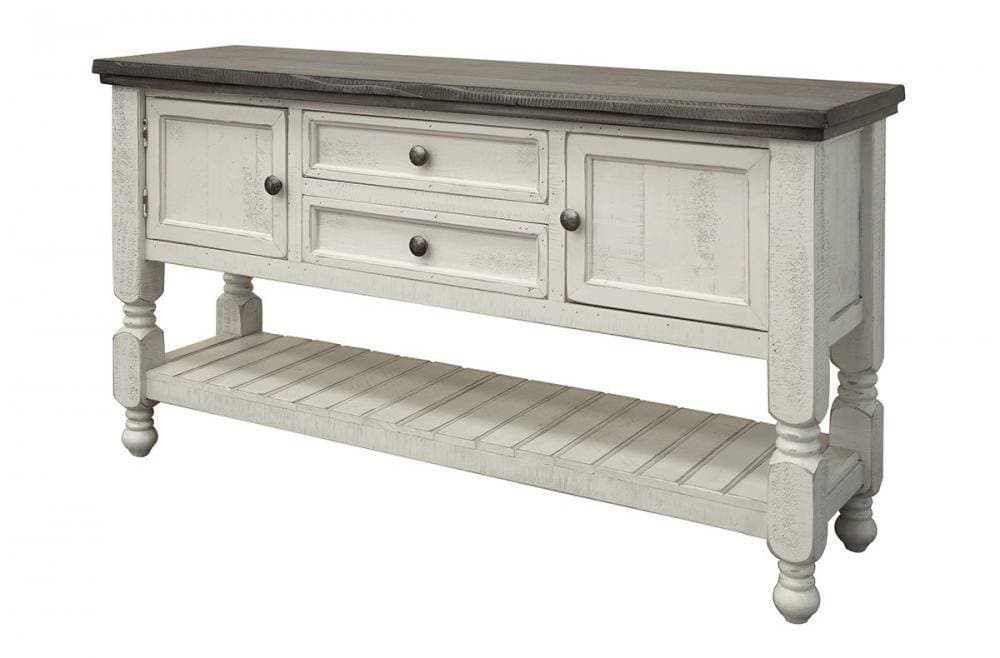
Credit: www.therusticmile.com

Credit: www.amazon.com
Frequently Asked Questions
What Materials Are Best For Making A Console Table With Storage?
Wood like pine, oak, or plywood works best for durability and easy customization. Use screws and wood glue for strong joints. Add baskets or drawers for effective storage options.
How Do I Design Storage Compartments For A Console Table?
Plan compartments based on your storage needs. Use shelves, drawers, or cubbies to organize items. Measure space carefully to fit items without clutter.
What Tools Are Needed To Build A Console Table With Storage?
You’ll need a saw, drill, screwdriver, measuring tape, and sander. Clamps and wood glue help with assembly. Safety gear like goggles is essential.
How Can I Finish My Console Table For Durability?
Apply primer and paint or wood stain for protection. Use a clear sealant or varnish to enhance durability and appearance. Let each coat dry fully.
Conclusion
Building a console table with storage adds style and function to any room. The steps are simple and easy to follow. You can customize the design to fit your space and needs. Using basic tools and materials saves money and offers satisfaction.
This project brings a useful piece that keeps your space neat. Try it yourself and enjoy the process of creating something special. A handmade console table makes any home feel more welcoming and organized.