Are you looking to create a cozy, stylish bunk bed for your Gingerlola dolls? Making a doll bunk bed yourself can be fun, rewarding, and a great way to add a personal touch to your doll’s room.
Imagine seeing your dolls sleep comfortably in a bed you built with your own hands. In this guide, you’ll find simple steps, helpful tips, and easy-to-follow instructions that anyone can use. Whether you’re a beginner or just want to try something new, this project will spark your creativity and bring joy to your playtime.
Keep reading, and soon you’ll have a beautiful bunk bed your Gingerlola dolls will love!
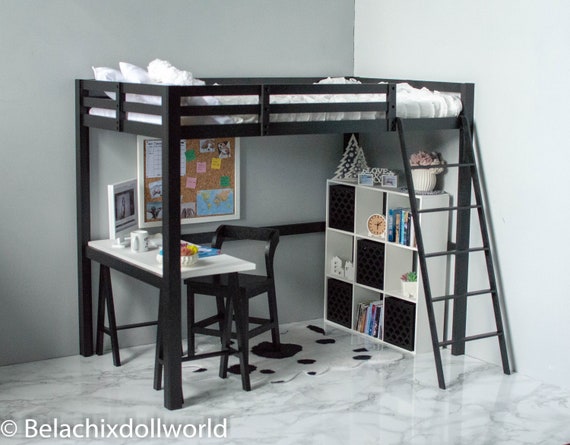
Credit: www.etsy.com
Materials Needed
Gathering the right materials is the first step in making a doll bunk bed Gingerlola. Using simple and easy-to-find items helps the project go smoothly. This section lists everything you need to prepare before starting.
Wood Or Sturdy Cardboard
Choose wood for a strong, lasting bunk bed. Thin plywood or craft wood works well. Sturdy cardboard is a lightweight, budget-friendly choice. Cut pieces to fit your doll’s size.
Glue And Tape
Use wood glue for wooden parts. It bonds pieces firmly. Hot glue works well for cardboard. Clear tape helps hold parts during assembly. It also adds extra support.
Paint And Brushes
Select non-toxic paint safe for kids. Choose colors that match your doll’s style. Small brushes give you control for details. Paint makes the bed look fun and real.
Sandpaper
Sandpaper smooths rough edges on wood. It prevents splinters and improves the finish. Use fine-grit sandpaper for the best results. Sand gently for a clean surface.
Measuring Tools
A ruler or measuring tape ensures correct size. Accurate measuring helps parts fit well. Mark cutting lines clearly before cutting. Precision makes building easier.
Decorative Items
Add small pillows, blankets, or stickers. These details make the bed cozy and cute. Use soft fabric scraps for bedding. Stickers add personality and charm.
Preparing The Wood
Preparing the wood is the first important step to build a sturdy doll bunk bed Gingerlola. Good preparation makes the bed strong and safe for dolls. It also helps the paint or finish look smooth and neat. Take your time with these steps to get the best results.
Measuring And Cutting
Start by measuring the wood pieces carefully. Use a ruler or tape measure for exact lengths. Mark the spots clearly with a pencil. Cut the wood with a saw along the marked lines. Cut slowly and straight to avoid mistakes. Proper cutting saves time and prevents weak parts.
Sanding The Pieces
After cutting, sand each wood piece to smooth rough edges. Use sandpaper or a sanding block. Sand in one direction to avoid scratches. Focus on corners and edges where splinters may appear. Smooth wood helps paint stick better and keeps the bed safe for play.
Assembling The Frame
Assembling the frame is the first big step in making your Gingerlola doll bunk bed. This part builds the strong base that holds everything together. Take your time and follow each step carefully. A solid frame means a safe and sturdy bunk bed for your dolls.
Building The Base
Start by laying out the bottom pieces on a flat surface. These are the bed’s foundation. Attach the horizontal boards to the side supports. Use screws or nails for a firm hold. Check that the base is square by measuring the corners.
Adding The Side Rails
Next, fix the side rails to the base. These rails keep the dolls safe and stop them from falling. Align each rail evenly along the bed’s length. Secure the rails tightly with screws. Make sure they stand straight and strong.
Constructing The Ladder
Finally, build the ladder for the top bunk. Cut the ladder steps to fit the height of the bed. Attach the steps to the side rails of the ladder frame. Fix the ladder firmly to one side of the bunk bed. Test it gently to ensure stability.

Credit: www.youtube.com
Painting And Decorating
Painting and decorating your Gingerlola doll bunk bed brings it to life. It adds personality and style to the simple wooden frame. This step lets you match the bed to your doll’s room or your personal taste.
Use colors and designs that make the bed stand out. Small details can make a big difference. Let’s explore how to pick paint colors and apply them neatly.
Choosing Paint Colors
Pick colors that match your doll’s theme or room decor. Soft pastels give a calm, cozy feel. Bright colors make the bed fun and lively. Think about using two or three colors for contrast.
Choose non-toxic paint safe for kids. Matte or satin finishes work best on wood. Avoid very dark colors; they hide details. Lighter shades show brush strokes and add texture.
Applying Paint And Finishing Touches
Start with a clean, dry surface for smooth paint. Use thin coats to avoid drips and clumps. Let each coat dry before adding the next. Light sanding between coats makes the finish smooth.
Add small decorations like stickers or stencils after painting. Seal the paint with a clear, child-safe varnish. This protects the surface and makes cleaning easy. Take your time and enjoy the creative process.
Adding Mattresses And Bedding
Safety is very important when making a doll bunk bed Gingerlola. This helps prevent accidents and keeps the dolls secure. Taking simple safety steps can make the project fun and worry-free.
Using safe materials and tools protects both the maker and the dolls. Careful assembly makes the bunk bed strong and steady. Below are key safety tips to follow during the process.
Choose Non-toxic Materials
Pick wood, paint, and glue that are safe and non-toxic. This protects children and pets from harmful chemicals. Always read labels before buying craft supplies.
Use Proper Tools Carefully
Handle saws, drills, and scissors with care. Use tools that fit your skill level. Wear safety glasses and gloves to protect your eyes and hands.
Secure Small Parts Firmly
Tighten all screws and nails well. Loose parts can cause the bed to fall apart. Check joints often to keep the structure strong.
Sand Edges Smoothly
Sand all edges and corners until smooth. This prevents splinters and scratches on hands or dolls. Use fine-grit sandpaper for best results.
Test Stability Before Use
Place the bunk bed on a flat surface. Gently press on each level to check for wobbling. Fix any loose areas before playing with the bed.

Credit: www.youtube.com
Frequently Asked Questions
What Materials Are Needed For A Doll Bunk Bed?
You will need wood, screws, nails, sandpaper, wood glue, paint, and brushes. These materials ensure durability and a smooth finish.
How Long Does It Take To Make A Doll Bunk Bed?
It usually takes 3 to 5 hours depending on skill level and drying time for paint. Patience ensures quality results.
Can Beginners Easily Make A Doll Bunk Bed?
Yes, this project is beginner-friendly with clear instructions and simple tools. It’s a great DIY craft for all skill levels.
What Size Is Ideal For A Doll Bunk Bed?
The ideal size fits most standard dolls, around 12 inches tall. This ensures compatibility and realistic play.
Conclusion
Making a Gingerlola doll bunk bed is fun and simple. You only need a few materials and clear steps. This project helps you create a special place for your dolls to rest. Kids will enjoy playing with the new bunk bed.
Try different colors or decorations to make it unique. Crafting this bed also improves your skills and creativity. Enjoy the process and share your work with friends. Keep making more fun projects for your dolls and yourself.