Looking for a simple way to organize your coats without taking up too much space? A free standing coat rack could be just what you need.
Imagine having a stylish, practical spot right by your door where you can hang your jacket, scarf, or hat the moment you walk in. You don’t have to spend a fortune or rely on bulky furniture. In this guide, you’ll discover easy steps to make your own coat rack that fits your style and space perfectly.
Ready to transform your entryway and keep your home clutter-free? Let’s get started!

Credit: reciclajesostenibleeuropa.com
Materials Needed
Gathering the right materials is the first step to build a free standing coat rack. Using quality supplies ensures your rack will be sturdy and last long. This section covers the wood types, hardware essentials, and tools needed for this project.
Wood Types And Sizes
Choose wood that is strong and easy to work with. Pine and oak are popular choices. Pine is light and affordable. Oak is harder and more durable but costs more. For the base, use a thick piece like 2×4 or 2×6 boards. The vertical pole can be a dowel or a 2×2 piece. The height depends on your needs, usually 5 to 6 feet tall works well.
Hardware Essentials
You need screws and hooks for assembly and hanging coats. Use wood screws that are 2 to 3 inches long. Hooks can be metal or wooden pegs. Make sure hooks are strong enough to hold heavy coats. A metal bracket can add extra support where the base meets the pole.
Tools Required
Basic tools make this project easier. A drill and drill bits will help you make holes for screws. A screwdriver or a drill with screwdriver bits is needed to fix screws. Sandpaper or an electric sander smooths the wood surfaces. A saw cuts the wood to size. A measuring tape and pencil help with accurate cuts and placements.
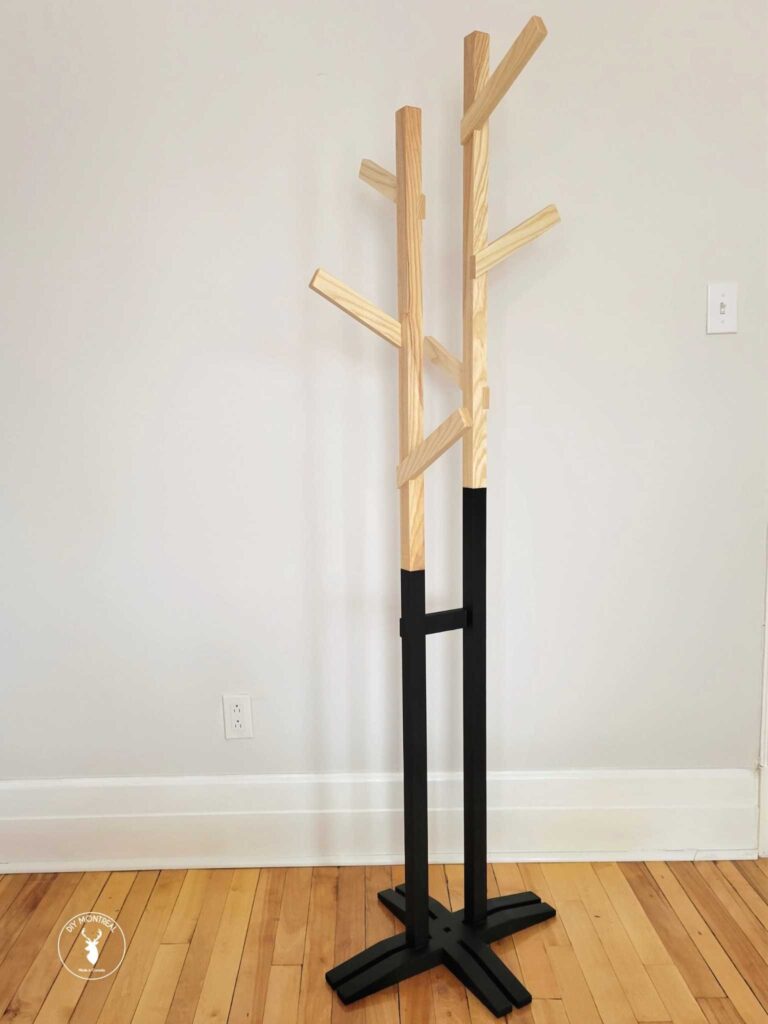
Credit: www.diymontreal.com
Design Planning
Design planning is the first step to build a free standing coat rack. It helps to create a clear idea of the final product. Good planning saves time and materials. It makes the building process smoother and more enjoyable.
Focus on three main points: style, size, and drawing. These guide your work from start to finish. This way, you build a rack that fits your space and needs perfectly.
Choosing The Style
Pick a style that matches your room. Simple racks with straight lines fit modern rooms well. Curved or ornate racks suit classic or vintage spaces. Think about materials too. Wood looks warm and natural. Metal gives a sleek, industrial feel. Choose a style you like and can build easily.
Measuring Dimensions
Measure the space where you will place the rack. Note the height, width, and depth available. Make sure the rack is tall enough for coats to hang without touching the floor. Leave some space around the rack for easy access. Proper measurements avoid problems during assembly.
Sketching Your Rack
Draw a simple sketch of your design. Include all parts like base, poles, and hooks. Label each part with its size. This visual helps you understand how pieces fit together. A clear sketch guides you while cutting and assembling. Keep the drawing simple but detailed enough to follow.
Cutting The Wood
Cutting the wood is an important step in making a free standing coat rack. It shapes the pieces you will assemble. Accurate cuts help the rack fit together well. Take time to prepare before cutting.
Marking The Pieces
Start by measuring your wood carefully. Use a pencil to mark where each piece will be cut. Double-check your measurements to avoid mistakes. Clear, straight lines make cutting easier. Label each piece to keep track of parts.
Safe Cutting Techniques
Wear safety glasses and gloves before cutting wood. Use a stable work surface to hold the wood steady. Choose the right saw for straight cuts. Cut slowly and follow your marked lines. Keep your hands away from the blade at all times.
Sanding Edges
After cutting, the edges may be rough or splintered. Use sandpaper or a sanding block to smooth edges. Sand in the direction of the wood grain. Smooth edges prevent splinters and give a clean look. Check all pieces to ensure they are safe to handle.
Assembling The Base
Assembling the base is a key step in building your free standing coat rack. A strong base keeps the rack steady and safe. This part of the process needs care and simple tools. Follow these steps to create a solid foundation for your coat rack.
Joining Legs And Stand
Start by placing the legs flat on the floor. Align each leg with the central stand piece. Make sure the legs fit snugly into their slots. Use a rubber mallet to tap legs gently if needed. Check that the legs sit evenly around the stand. This alignment helps the rack stand straight and balanced.
Ensuring Stability
Once the legs are in place, test the base’s balance. Press down on each leg to see if it moves. Adjust the legs until the base does not wobble. Adding small rubber pads under the legs can improve grip. Stability keeps your rack from tipping over easily. This step is important for safety and durability.
Securing With Screws
Use a drill or screwdriver to fasten the legs to the stand. Insert screws into the pre-drilled holes on each leg. Tighten the screws firmly but avoid over-tightening. Over-tightening can crack the wood or damage the base. Double-check that all screws hold the legs tightly. This will ensure your coat rack base stays strong for long use.
Adding The Hooks
Adding hooks is a key step in making your free standing coat rack useful. Hooks hold coats, hats, and bags securely. Place and attach them carefully. This ensures your rack looks good and works well.
Selecting Hook Placement
Choose spots that fit different coat sizes. Space hooks evenly for balance. Place some hooks higher for long coats. Add lower hooks for children’s items or bags. Avoid crowding hooks to stop clothes from overlapping.
Attaching Hooks
Use screws or strong nails to fix hooks. Mark spots before drilling to stay precise. Drill small pilot holes to prevent wood splitting. Tighten screws firmly but don’t overdo it. Check each hook is straight and steady before moving on.
Testing Hook Strength
Hang heavy coats or bags on each hook. Push and pull gently to check stability. Hooks should not wiggle or loosen. Fix any weak hooks by tightening screws or using stronger hardware. Strong hooks keep your rack safe and durable.
Finishing Touches
Finishing touches complete your free standing coat rack. They protect and improve its look. These steps help your rack last longer and stand out. Take your time to get them right.
Painting Or Staining
Choose paint or stain to match your style. Paint gives bold colors and hides imperfections. Stain shows the wood’s natural beauty and grain. Use smooth, even strokes for a clean finish. Let each coat dry fully before the next.
Applying Sealant
Sealant protects your rack from moisture and wear. It adds a layer that keeps paint or stain safe. Use a brush or spray to apply sealant evenly. Wait for it to dry completely before use. This step makes your rack stronger and more durable.
Final Inspection
Check your rack for rough spots or missed areas. Sand lightly if needed to smooth the surface. Make sure all parts are secure and stable. Test the coat rack by hanging a few items. Your free standing coat rack is now ready for use.
Maintenance Tips
Keeping your free standing coat rack in good shape is important. Proper care helps it stay strong and look nice for a long time. Simple maintenance can prevent damage and save you money. Below are some easy tips to keep your coat rack working well.
Cleaning Recommendations
Dust the coat rack often with a soft cloth. Use a damp cloth for sticky spots. Avoid harsh chemicals that can damage the finish. Dry the rack right after cleaning to stop water damage. Clean the rack at least once a month to keep it fresh.
Repairing Loose Parts
Check screws and joints regularly. Tighten any loose screws with a screwdriver. For wooden racks, use wood glue on loose parts and clamp until dry. Replace any broken hooks or parts immediately. This stops small problems from getting worse.
Extending Rack Lifespan
Keep the coat rack away from direct sunlight and moisture. Use felt pads under the base to protect floors and keep it steady. Avoid overloading the rack with heavy items. Rotate the load evenly to prevent bending. Regular care helps your rack last many years.

Credit: www.instructables.com
Frequently Asked Questions
What Materials Are Needed To Make A Free Standing Coat Rack?
You need wood, screws, hooks, a drill, sandpaper, and paint or stain. Choose sturdy wood for durability. Quality hooks ensure better support. These materials are affordable and easy to find.
How Long Does It Take To Build A Coat Rack?
Building a coat rack typically takes 2 to 4 hours. Time varies based on skill level and design complexity. Preparation and drying time for paint or stain may add extra hours.
Can I Customize The Coat Rack Design?
Yes, you can customize size, color, and hook style. Personalize it to fit your space and decor. Custom designs make your coat rack unique and functional.
Is It Necessary To Use Power Tools For This Project?
Power tools speed up the process but aren’t mandatory. Hand tools can also work for drilling and sanding. Choose tools based on your comfort and availability.
Conclusion
Building a free standing coat rack is simple and fun. You only need a few tools and materials. This project saves money and adds style to your home. You can customize it to fit any space or taste. It helps keep your room neat and organized.
Try making one today and enjoy a tidy, welcoming entryway. Small efforts bring big changes. A coat rack like this lasts for years. Give your coats a proper place to hang.