Looking to add a stylish touch to your home without spending a fortune? Making a hairpin leg console table could be the perfect project for you.
It’s simple, affordable, and gives you a chance to create something unique that fits your space perfectly. Imagine having a sleek, modern table that you built with your own hands—ready to hold your keys, display your favorite decor, or even serve as a mini workspace.
In this guide, you’ll find easy steps and helpful tips to make your own hairpin leg console table, even if you’re new to DIY. Keep reading, and you’ll be surprised at how quickly you can transform a few basic materials into a stunning piece you’ll be proud to show off.
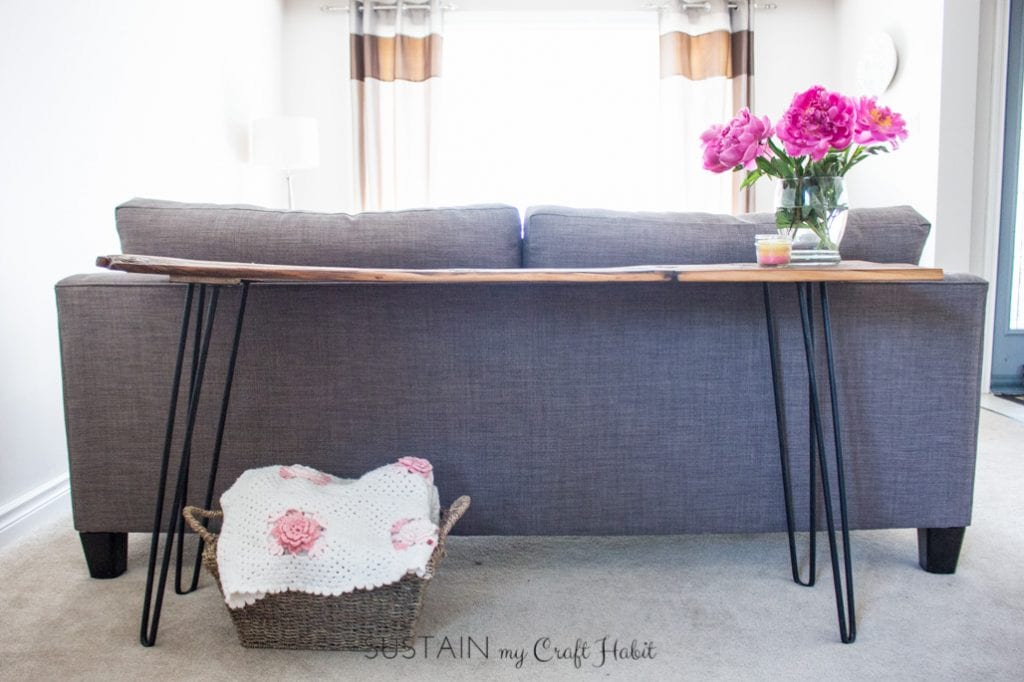
Credit: sustainmycrafthabit.com
Materials Needed
Gathering the right materials is the first step to build a hairpin leg console table. Choosing quality supplies makes the project easier and the final table strong. Prepare all items before starting your work.
Choosing The Right Wood
Select wood that is sturdy and looks good. Common choices include oak, pine, or walnut. Oak is strong and lasts long. Pine is softer but less expensive. Walnut has a rich color and is durable. Pick a wood plank about 1 to 1.5 inches thick. Make sure it is smooth and free of cracks.
Selecting Hairpin Legs
Hairpin legs give the table a modern, sleek look. Choose metal legs that hold weight well. Steel legs with a powder coating resist rust. Decide the height, usually 28 to 30 inches for console tables. Check if the legs come with screws for easy installation.
Essential Tools
Use basic tools to make the project simple. You will need a drill with drill bits to attach legs. Sandpaper or an electric sander smooths the wood surface. A screwdriver helps tighten screws. A tape measure ensures correct measurements. A pencil marks where to drill.
Preparing The Wood
Preparing the wood is the first step in making a hairpin leg console table. The quality of your wood affects the table’s strength and look. Take your time to measure, cut, sand, and finish the wood properly. Each step shapes the wood into a smooth and beautiful surface ready for assembly.
Measuring And Cutting
Start by measuring the wood pieces carefully. Use a tape measure and mark your cut lines clearly. Accurate measurements ensure the table parts fit together well. Cut the wood with a saw along the marks. Keep the cuts straight for a neat finish.
Sanding The Surface
After cutting, sand the wood to remove rough spots. Use medium-grit sandpaper first, then fine-grit for smoothness. Sand all edges and faces evenly. This step prevents splinters and helps the finish stick better. A smooth surface makes your table look polished.
Applying Finish Or Paint
Choose a finish or paint that matches your style and protects the wood. Apply thin, even coats with a brush or cloth. Let each coat dry fully before adding another. Finishing the wood enhances its color and durability. It also protects the table from stains and wear.
Attaching Hairpin Legs
Attaching hairpin legs to your console table is a simple step that changes its look and function. It gives the table a modern style and strong support. Follow these clear steps to fix the legs properly and make sure your table stands firm and looks great.
Positioning The Legs
Start by turning the table top upside down on a soft surface. Place each hairpin leg near the corners. Keep the legs about one inch from each edge. This position gives the table good balance. Check if all legs line up evenly. Adjust as needed before moving to the next step.
Securing With Screws
Use screws that fit the holes in the hairpin legs. Place the screws through the leg holes into the wood. Tighten each screw with a screwdriver. Do not overtighten to avoid damaging the wood. Secure all screws tightly for strong hold. This keeps the legs firmly attached to the table.
Ensuring Stability
Turn the table right side up. Check if it stands steady on a flat surface. Gently shake the table to test the legs. Tighten screws if you feel any wobble. Add small pads under legs if the floor is uneven. Stable legs keep your table safe and useful.
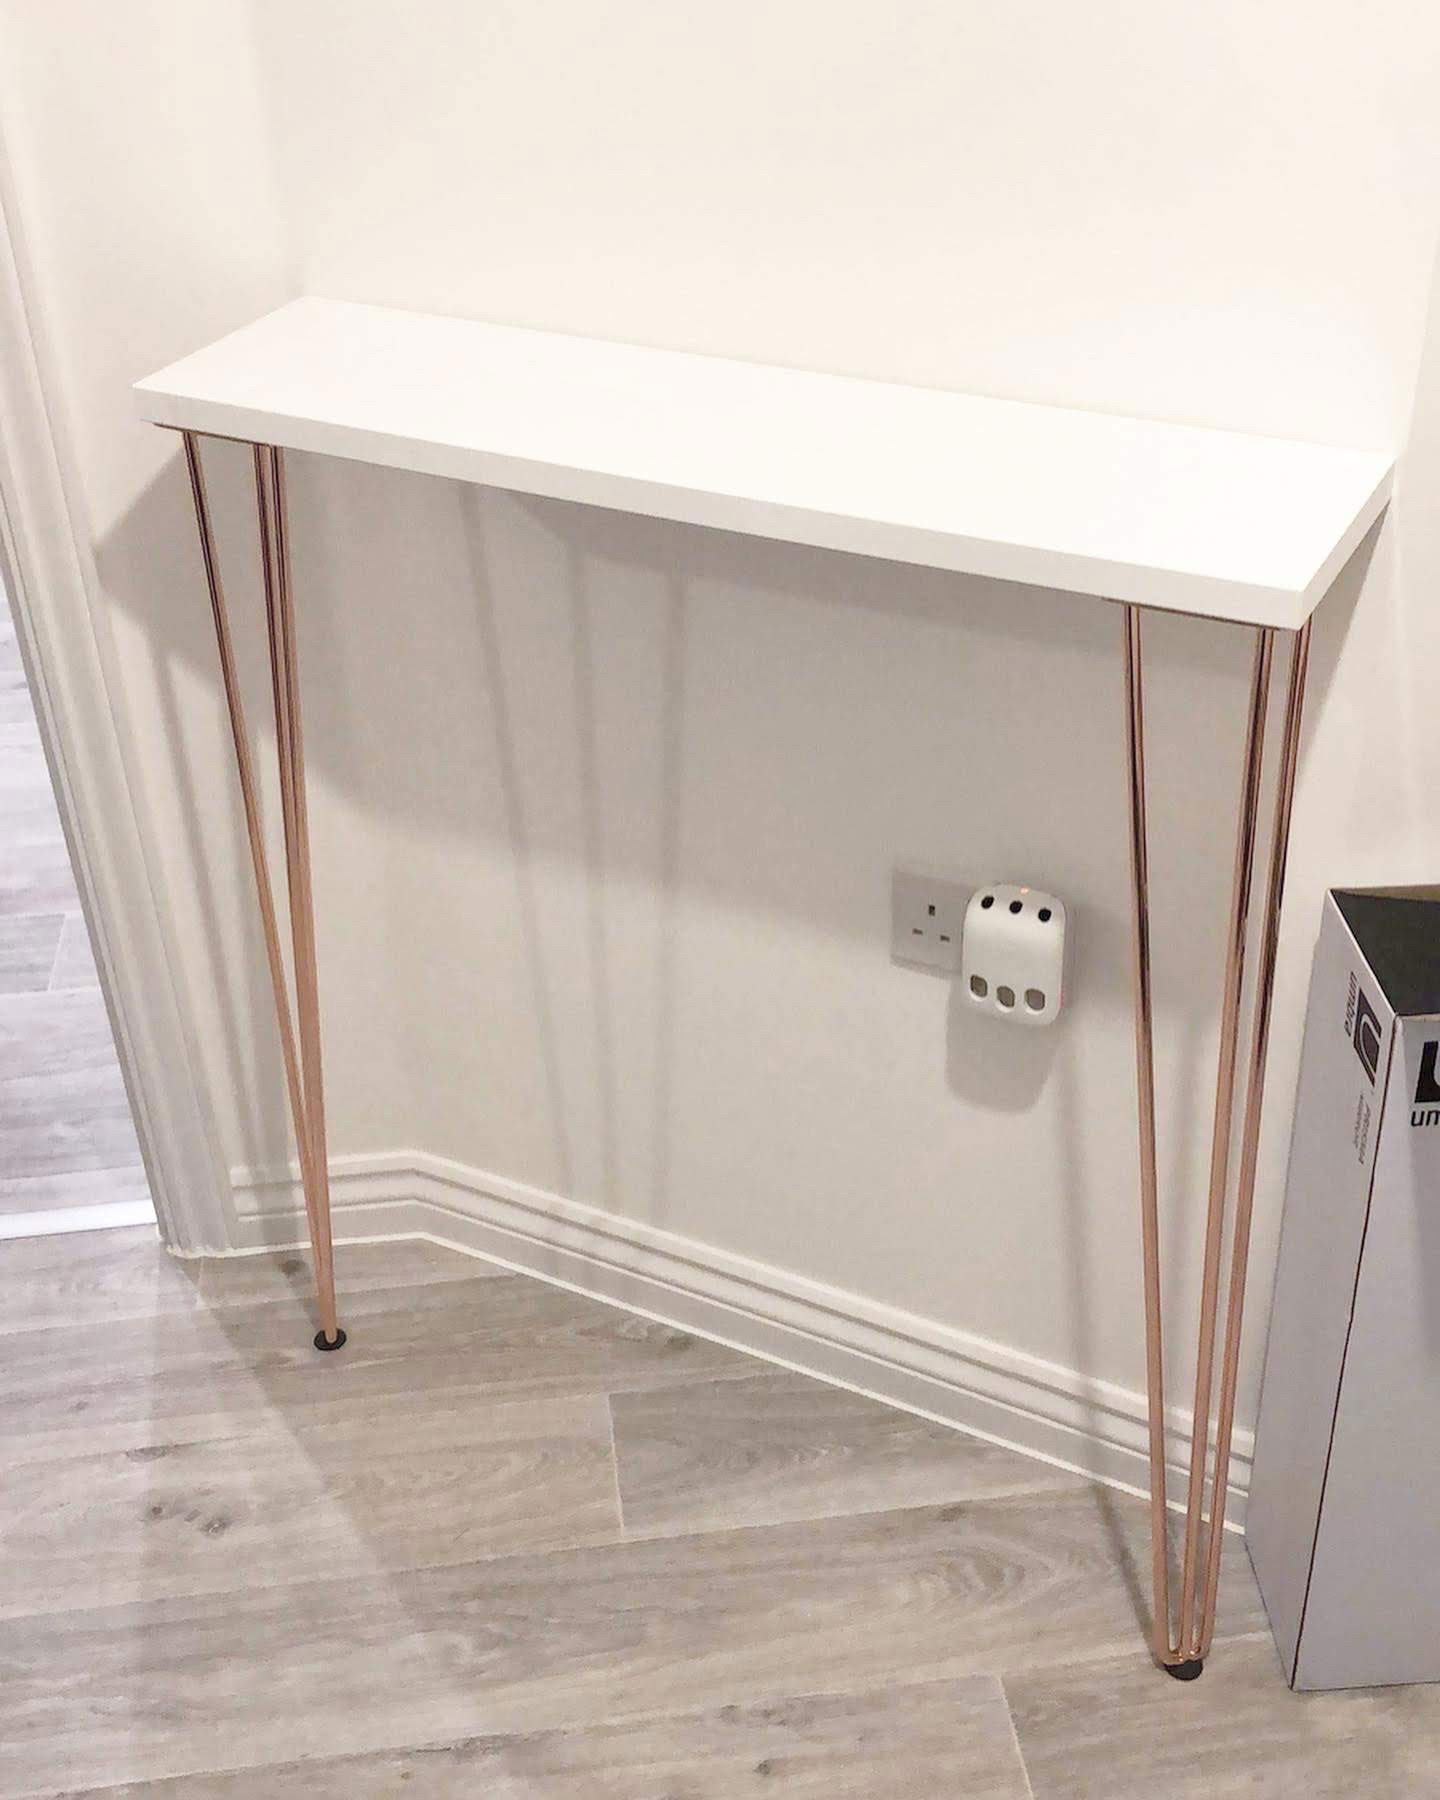
Credit: www.realhomes.com
Final Touches
After assembling your hairpin leg console table, focus on the final touches. These small steps improve both look and function. They protect your floors and keep the table clean. Taking time here ensures your table lasts longer and looks great.
Adding Protective Pads
Protective pads prevent scratches on your floors. Choose soft felt pads that stick under each hairpin leg. Cut pads to fit the leg size for better grip. Press firmly to secure them in place. These pads also stop noise when you move the table.
Cleaning And Polishing
Clean the table surface gently with a soft cloth. Use mild soap and water for dirt or stains. Dry the table completely before polishing. Apply a wood polish or wax to enhance shine and protect wood. Buff the surface with a clean cloth for a smooth finish. This keeps your table looking fresh and new.
Tips For Customization
Customizing your hairpin leg console table makes it truly yours. Small changes can change the look and feel. Focus on wood, leg height, and decoration. These tips help you create a unique piece that fits your style and space.
Different Wood Types
Choose wood based on color, texture, and strength. Oak offers a classic look with a strong grain. Pine is light and easy to work with. Walnut has a rich, dark tone for a modern touch. Each wood type changes the table’s character. Consider your room’s style and lighting before picking wood.
Leg Height Variations
Leg height affects the table’s function and style. Short legs create a low, modern look. Tall legs suit entryways or standing desks. Measure your space to find the right height. Hairpin legs come in many sizes for flexibility. Match leg height to your needs for comfort and design.
Decorative Elements
Decorations add personality to your table. Use metal brackets or corner protectors for an industrial look. Paint or stain the wood to match your decor. Add a glass or marble top for elegance. Small details like knobs or decals make the table unique. These touches show your style clearly.

Credit: www.youtube.com
Frequently Asked Questions
What Materials Are Needed For A Hairpin Leg Console Table?
You need wood for the tabletop, metal hairpin legs, screws, and wood finish. Choose durable wood like oak or walnut. Metal legs come in various heights and styles to fit your design.
How Do You Attach Hairpin Legs To The Table?
Position legs at each corner under the tabletop. Use screws to secure through pre-drilled holes in the legs. Ensure the legs are aligned evenly for stability and balance.
Can I Customize The Size Of The Console Table?
Yes, you can cut the wood to your desired length and width. Hairpin legs come in different heights to match your preferred table height.
What Finish Is Best For A Hairpin Leg Table?
Use a clear varnish or wood stain to protect and enhance the wood. Finish with a sealant for durability and a polished look.
Conclusion
Building a hairpin leg console table adds style and function to your space. It takes some effort but feels rewarding. You can choose wood and finish that fit your home. The hairpin legs give a modern and light look. This project suits beginners and DIY lovers alike.
Enjoy creating furniture that matches your taste and needs. Try this simple craft for a fresh home touch. It brings charm and a personal feel to any room.