Imagine turning your old snowboard into a unique coat rack that not only saves space but also adds a cool, personal touch to your home. If you love snowboarding or just want a creative way to organize your coats, this project is perfect for you.
You’ll learn simple steps to transform your snowboard into a functional and stylish piece that friends will admire. Ready to give your entryway a fresh, adventurous vibe? Keep reading, and I’ll show you exactly how to make your own snowboard coat rack with ease.
Materials Needed
Gathering the right materials is the first step to build a snowboard coat rack. You need parts that are sturdy and easy to work with. Choosing good quality items helps your rack last longer and hold coats well. This section covers the main materials you will need for the project.
Choosing The Right Snowboard
Select a snowboard that is no longer in use. The board should be strong and free from major cracks. A snowboard with a flat surface and minimal damage works best. Choose one with cool designs to add style to your coat rack. The size of the snowboard affects how many coats it can hold.
Tools For Assembly
Prepare basic tools for building your rack. A drill helps to make holes in the snowboard. Screws and a screwdriver are needed to fix parts together. A measuring tape keeps your work accurate. Sandpaper smooths rough edges to avoid splinters.
Additional Supplies
Extra items make the rack more useful and neat. Hooks or pegs hold coats securely on the board. Wall anchors keep the rack stable when mounted. Paint or varnish protects the snowboard and gives a nice finish. Clean cloths help wipe dust before and after assembly.
Credit: www.etsy.com
Preparing The Snowboard
Preparing the snowboard is a key step in making a snowboard coat rack. It ensures the board is clean, smooth, and ready for use. This process helps your coat rack look great and last longer.
Cleaning And Sanding
Start by cleaning the snowboard to remove dirt and grime. Use a cloth and mild soap with water. Wipe the entire surface until it looks clean.
After cleaning, sand the snowboard to smooth rough areas. Use medium-grit sandpaper to remove old paint or scratches. Sand evenly to create a good surface for painting or finishing.
Cutting And Shaping
Measure the snowboard to fit your space and design. Mark the spots where you will cut. Use a saw to cut the board carefully.
Shape the edges or ends to your liking. Sand the cut edges to remove splinters. This step makes the board safe and neat for your coat rack.
Design Ideas
Designing a snowboard coat rack can be a fun and creative project. You can choose styles that fit your space and needs. Each design offers unique ways to store coats, hats, and gear. Explore these ideas to find the perfect fit for your home or cabin.
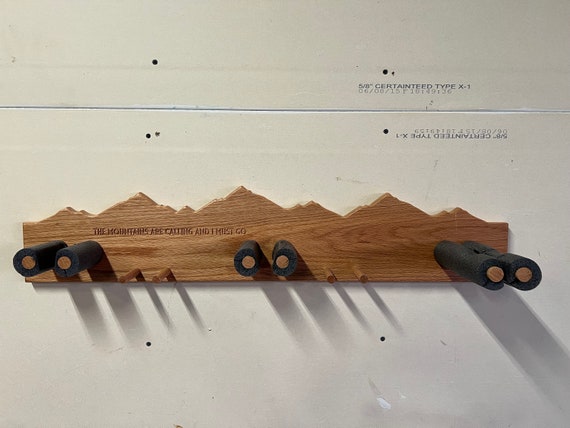
Wall-mounted Rack
Wall-mounted racks save floor space. Attach hooks or pegs to a wooden snowboard. Mount it on your wall for easy access. This style keeps coats off the ground. It works well in small rooms or entryways. Use weatherproof finishes for a rustic look. You can also add shelves for extra storage.
Freestanding Rack
Freestanding racks stand on the floor without wall support. Use a snowboard as the base and add vertical poles. Hooks or hangers can be attached to the poles. This design is portable and flexible. Move it anywhere you need. It fits larger spaces and offers more hanging room. Choose sturdy materials to hold heavy coats.
Combination Styles
Combine wall-mounted and freestanding features for versatility. Attach a snowboard to the wall with foldable arms. When needed, pull the arms down to hold coats. Or, build a base with wheels for easy movement. This style adapts to different spaces and uses. It gives you the best of both worlds.
Assembly Steps
Building your snowboard coat rack is easy with clear steps. Follow these simple assembly instructions to create a sturdy and stylish rack. Each step focuses on a key part of the build. Take your time and enjoy the process.
Attaching Hooks And Hangers
Start by selecting strong hooks or hangers. Measure equal spaces along the board for balance. Use a drill or screwdriver to fix each hook tightly. Make sure hooks face outward for easy access. Check if all hangers are secure before moving on.
Securing The Base
Place the base on a flat surface. Align it perfectly under the snowboard for stability. Use screws or bolts to attach the base firmly. Tighten all fasteners to prevent wobbling. Test the rack’s stability by gently shaking it.
Finishing Touches
Sand any rough edges for a smooth feel. Apply paint or sealant to protect the wood. Let the finish dry completely before use. Add felt pads under the base to protect floors. Your snowboard coat rack is now ready to use.
Customization Tips
Customization makes your snowboard coat rack unique. It shows your style and fits your space perfectly. Small changes can make a big difference. Focus on simple ways to add color, personality, and extra function.
Painting And Staining
Painting or staining changes the look of your rack quickly. Choose colors that match your room or gear. Use spray paint for smooth, even coverage. Staining highlights the wood grain and adds warmth. Always sand before painting or staining for a clean surface. Seal with a clear coat to protect the finish.
Adding Personal Touches
Add hooks shaped like snowflakes or mountain peaks for fun details. Use vinyl stickers or decals with your favorite logos or designs. Attach small nameplates or tags to label each hook. You can also carve or wood burn patterns into the rack. These touches make the rack truly yours and stand out.
Incorporating Storage
Include shelves or small bins for gloves, hats, and scarves. Add a top shelf to hold goggles or helmets safely. Use baskets or boxes under the rack for extra space. Hooks in different sizes can hold keys or bags too. Storage keeps your gear organized and easy to find.

Credit: www.youtube.com
Safety And Maintenance
Safety and maintenance are key to keeping your snowboard coat rack strong and useful. A stable rack prevents accidents and protects your gear. Regular cleaning keeps the rack looking fresh and working well. Simple care helps your rack last for many seasons. Below are tips to ensure safety and proper upkeep.
Ensuring Stability
Place the rack on a flat, even surface. This stops it from tipping over. Use screws or brackets to fix the rack to the wall. Check these fastenings often. Tighten any loose parts quickly. Avoid overloading the rack with heavy items. Spread out coats and gear evenly. Stability keeps the rack safe for daily use.
Cleaning And Care
Dust the rack with a soft cloth weekly. Wipe down with a damp cloth to remove dirt. Use mild soap for tougher stains. Avoid harsh chemicals that damage the finish. Dry the rack completely after cleaning. Check for cracks or damage each month. Repair small issues before they grow. Proper cleaning and care keep the rack in top shape.
Creative Alternatives
Creative alternatives make your snowboard coat rack unique and fun. They bring personality and style to your space. You can use different ideas and materials to create a rack that fits your taste and needs.
Using Other Sports Equipment
Try using skis, old hockey sticks, or skateboards. These items can become hooks or supports for coats. They add a sporty look and keep the rack strong. Sports gear also creates a cool, themed decoration for your room.
Mixed Material Designs
Combine wood, metal, and fabric for a stylish coat rack. Wood adds warmth, metal gives strength, and fabric softens the look. Use reclaimed wood for a rustic feel. Metal pipes or rods work well as hangers. Mix materials to match your home’s style and create a unique piece.

Credit: skichair.com
Frequently Asked Questions
What Materials Do I Need For A Snowboard Coat Rack?
You need an old snowboard, sturdy hooks, screws, a drill, and wall anchors. These materials ensure a durable and functional coat rack.
How Do I Attach Hooks To A Snowboard?
Mark hook positions on the snowboard, then drill pilot holes. Secure hooks with screws tightly for strong support.
Can I Make A Snowboard Coat Rack Without Tools?
Basic tools like a drill and screwdriver are essential for safety. Without tools, assembling and mounting will be difficult and unstable.
How Do I Mount The Snowboard Coat Rack On A Wall?
Use wall anchors for drywall or screws for studs. Measure and level the rack before securing it firmly.
Conclusion
Building a snowboard coat rack is a fun and useful project. It keeps your space tidy and shows off your style. You only need a few tools and simple steps. This project fits well in any home or cabin. Try making one yourself and enjoy the result.
It’s a great way to reuse old gear too. Start today and add a personal touch to your room. You’ll feel proud every time you hang your coat.