Are you tired of cluttered entryways and misplaced coats? A wall mounted coat rack could be the simple solution you need.
Imagine having a stylish and practical spot right by your door to hang jackets, hats, and bags. In this guide, you’ll learn exactly how to make your own coat rack step-by-step. Whether you’re a beginner or just looking for a quick project, this easy-to-follow plan will help you create something both useful and beautiful.
Ready to transform your space and stay organized? Let’s get started!
Choosing Materials
Choosing the right materials is key to making a wall mounted coat rack that lasts long and looks good. The materials affect strength, style, and ease of installation. Pick items that fit your space and needs. Focus on wood, hooks, and the tools you need for the job.
Selecting The Right Wood
Wood is the main part of your coat rack. Choose strong wood like pine, oak, or cedar. Pine is soft and easy to work with. Oak is hard and very durable. Cedar resists moisture and bugs. Pick a wood that matches your room’s style. Check for smooth, knot-free pieces for a neat finish.
Picking Hooks And Hardware
Hooks hold your coats, bags, and hats. Choose sturdy metal hooks with a good finish. Brass, black iron, or chrome are popular choices. Count how many hooks you want. Make sure the screws match the wood thickness. Pick hardware that stays tight and holds weight well.
Gathering Tools Needed
Have the right tools before starting. You need a drill, screwdriver, tape measure, pencil, and level. Sandpaper smooths the wood surface. A saw cuts wood to size. Gather all tools to work safely and fast. Good tools make the job easier and cleaner.

Credit: www.esseg.eu
Designing Your Rack
Designing your wall mounted coat rack is the first step. It helps you create a rack that fits your space and needs well. A good design makes your rack both useful and nice to see. Planning carefully saves time and effort later.
Think about the size of your wall, the number of hooks, and the style. These details shape the look and function of your rack. Start by measuring, then plan hook placement and style.
Measuring Wall Space
Use a tape measure to find the wall space for your rack. Measure the width and height where the rack will hang. Note any obstacles like light switches or shelves. This helps avoid problems when mounting the rack.
Make sure the space is enough for the number of hooks you want. Leave some room on the sides for a clean look. Accurate measurements keep your rack balanced and neat.
Deciding Hook Placement
Plan where each hook will go on the rack. Space hooks evenly for a tidy appearance. Leave enough space between hooks so coats do not overlap too much.
Consider the height of users to place hooks at a good level. A mix of low and high hooks works well for families. Mark spots lightly before drilling to check the layout.
Choosing A Style
Pick a style that matches your room’s look. Simple wooden racks suit rustic or classic rooms. Metal racks fit modern or industrial spaces.
Think about colors and finishes too. A painted rack adds a pop of color. A natural wood finish gives a warm feel. Choose a style that makes you happy every day.
Preparing The Wood
Preparing the wood is the first key step in making a wall mounted coat rack. This step ensures the wood fits well and looks good. It also makes the rack strong and safe to use. Follow clear steps to cut, smooth, and finish the wood properly.
Cutting To Size
Start by measuring the wood carefully. Mark the wood with a pencil where you need to cut. Use a saw to cut the wood along the marks. Cut slowly and steadily for clean edges. Make sure each piece matches your planned size.
Sanding For Smoothness
Sanding the wood removes rough spots and splinters. Use medium-grit sandpaper to smooth all surfaces. Sand along the grain, not against it. After that, use fine-grit sandpaper for a softer finish. Wipe the dust off with a clean cloth.
Applying Finish Or Paint
Choose a finish or paint that suits your style. Apply a thin coat with a brush or cloth. Let the first coat dry fully before adding another. This protects the wood and gives a nice look. Finish all sides, including edges and ends.
Attaching Hooks
Attaching hooks is a key step in building a wall mounted coat rack. Proper placement and secure installation ensure the rack holds coats safely. This part requires careful measuring and steady work. Follow simple steps for best results.
Marking Hook Positions
Start by deciding where each hook will go on the board. Space hooks evenly to hold multiple coats. Use a ruler or tape measure to find equal gaps. Mark each spot with a pencil. Double-check that marks line up straight. Accurate marks make hooks look neat and balanced.
Installing Hooks Securely
Choose screws that fit your hooks well. Hold a hook on its mark and drill pilot holes. Pilot holes prevent wood from splitting. Screw hooks firmly into the holes. Make sure hooks do not wobble or move. Tight hooks keep coats stable and prevent damage to the rack.
Mounting The Rack
Mounting the wall coat rack correctly is key to its strength and durability. A securely mounted rack holds coats, bags, and hats without sagging or falling. Proper installation prevents damage to your wall and keeps the rack in place for years.
Follow these steps carefully to ensure your rack is safely and neatly mounted. Use the right tools and materials for the best results. Let’s start with finding the perfect spots on your wall.
Locating Wall Studs
Studs are vertical wooden beams inside walls. They provide strong support for heavy items like coat racks. Use a stud finder to locate these beams behind your wall. Move the finder slowly across the wall surface. Mark each stud location with a pencil. Mounting into studs prevents the rack from pulling out.
Using Anchors For Support
If your rack does not line up with studs, use wall anchors. Anchors hold screws tightly in drywall or plaster. Choose anchors rated for the weight your rack will hold. Drill small holes where you want to place the rack. Insert anchors and tap them flush with the wall. Screw into the anchors to secure the rack firmly.
Leveling And Securing
Use a level tool to make sure the rack is straight. Hold the rack against the wall and adjust it until the bubble is centered. Mark screw holes with a pencil. Drill pilot holes to make screwing easier. Attach the rack using screws into studs or anchors. Double-check the level and tighten screws fully.

Credit: www.youtube.com
Styling Tips
Styling your wall mounted coat rack can enhance your room’s look and make it more useful. A well-styled rack fits perfectly and adds charm. Small touches create a big difference. Here are some tips to help you style your coat rack beautifully and keep it neat.
Adding Decorative Elements
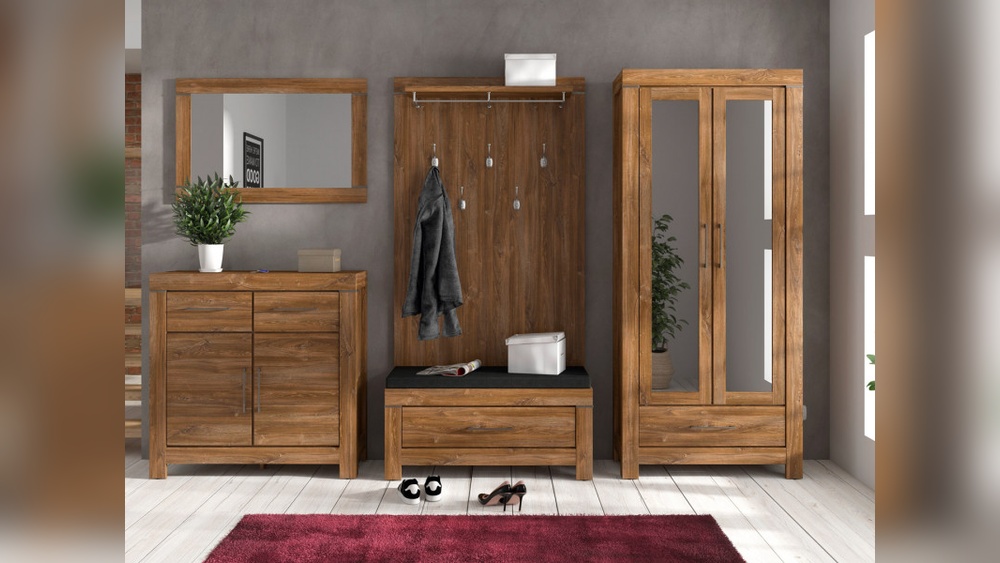
Use hooks with unique shapes or colors to add interest. Place small plants or framed photos nearby for a personal touch. Try hanging a small mirror above the rack. It makes the space look larger and brighter. Use baskets or trays below the rack to hold gloves or scarves. These extras make the rack both pretty and practical.
Coordinating With Room Decor
Match the rack’s color and style with your room’s theme. Use wood tones that blend with furniture or paint the rack in a bold color for contrast. Keep the rack simple if your room is busy with patterns. Let the rack stand out in plain, calm rooms. Balance is key to a neat and stylish look.
Maintaining Your Rack
Clean the rack regularly to keep dust away. Wipe hooks and shelves with a damp cloth. Avoid placing heavy items that can bend or break hooks. Check screws and mounts often to ensure the rack stays strong. A well-maintained rack looks good and lasts longer.
Credit: www.osons-a-stmalo.com
Frequently Asked Questions
What Materials Do I Need For A Wall Mounted Coat Rack?
You need wood planks, screws, wall anchors, hooks, a drill, a level, and sandpaper. Choose durable materials for strength and longevity.
How Do I Choose The Right Wall For Mounting?
Select a solid wall like drywall with studs or brick. Avoid weak surfaces to ensure secure mounting.
What Tools Are Essential For Installation?
A drill, screwdriver, level, measuring tape, and pencil are essential. These tools ensure precise and safe installation.
Can I Customize The Coat Rack Design?
Yes, customize by choosing different wood types, colors, and hook styles. Personalize it to match your decor.
Conclusion
Building a wall mounted coat rack adds style and function to any space. You save money by making it yourself. Plus, it keeps your coats and bags neat and easy to find. Choose sturdy materials and follow simple steps for best results.
Enjoy the satisfaction of a useful, handmade item in your home. Try this project to bring order and charm to your entryway. Easy, practical, and rewarding.