Are you looking to add a touch of elegance and style to your living space? A waterfall console table might be just what you need.
This stunning piece combines sleek design with practical use, making it perfect for your hallway, living room, or entryway. In this guide, you’ll discover simple, step-by-step instructions to create your very own waterfall console table. Whether you’re a beginner or have some DIY experience, you’ll find tips that make the process easy and enjoyable.
Ready to transform your home with a beautiful, modern piece you built yourself? Let’s get started!
Choosing Materials
Choosing the right materials is key to building a beautiful waterfall console table. The materials affect the table’s strength, look, and feel. Picking durable wood and the right finish makes your table last longer and look great in your home. Tools also play a big role in making the process smooth and safe.
Wood Types For Durability
Hardwoods like oak, maple, and walnut are strong and last long. These woods resist scratches and dents better than softwoods. Pine is easier to work with but less durable. Choose wood that matches your style and can handle daily use. Quality wood ensures your table stays sturdy and looks good for years.
Selecting Finishes And Paints
Finishes protect wood from water and wear. Polyurethane is a clear finish that keeps the wood’s natural look. Paint can add color and style but needs a smooth base. Use paint or finish made for furniture for best results. This step helps your table keep its beauty over time.
Tools Required
You need basic tools like a saw, drill, and sander. A measuring tape and square help make accurate cuts. Clamps hold pieces together while glue dries. Sandpaper smooths rough edges before finishing. Having the right tools makes building easier and safer.
Credit: www.homedepot.com
Designing Your Table
Designing your waterfall console table is the first step. It sets the foundation for a beautiful piece. Careful planning helps avoid mistakes and saves time. Focus on size, shape, and style that fit your space. Think about how you want to use the table. This will guide your design choices.
Each element should work together to create balance and function. Take your time to sketch and measure. This ensures the final product looks great and works well.
Dimensions And Measurements
Start by measuring the area for your console table. Note the length, width, and height limits. Consider the room’s flow and other furniture. Decide on table size that fits comfortably without crowding. Common console tables range from 30 to 48 inches long. Height usually falls between 28 and 36 inches. Keep proportions balanced for a neat look.
Sketching The Waterfall Edge
The waterfall edge is the table’s standout feature. It means the tabletop flows smoothly down the sides. Draw the top surface as a flat rectangle. Then extend the sides down in a continuous curve or straight drop. This design hides the table legs for a modern look. Use simple lines to show the edge shape clearly. A good sketch helps visualize the final style.
Planning Storage And Features
Think about adding shelves or drawers. They make the table more useful. Decide how much storage you need for keys, books, or decor. Place storage elements where they balance with the waterfall design. Keep openings easy to reach and clean in look. Plan features that match your daily needs and style. Simple storage adds function without clutter.
Cutting And Shaping
Cutting and shaping are key steps in making a waterfall console table. These steps define the table’s look and structure. Proper cutting and shaping create smooth, clean lines that highlight the waterfall effect. It also ensures the parts fit well together.
Cutting The Wood Panels
Start by measuring the wood panels carefully. Use a saw to cut the panels to the right size. Make straight, clean cuts to keep the edges neat. Cut the top panel and the sides with precision. This gives the table a sturdy base and smooth surfaces.
Creating The Waterfall Curve
The waterfall curve is the table’s signature shape. Mark the curve on the side panels using a template or freehand. Use a jigsaw or band saw to cut along the curve line. Take your time for a smooth, even cut. The curve should flow naturally from the top down the side.
Sanding And Smoothing Edges
After cutting, sand all edges with medium-grit sandpaper. Smooth the curve and straight edges to remove rough spots. Finish with fine-grit sandpaper for a polished feel. Check every edge to ensure no splinters remain. Smooth edges help the table look professional and feel safe to touch.
Credit: www.homedepot.com
Assembly Process
The assembly process of a waterfall console table is simple and fun. You will build the table step by step. Each part fits perfectly to create a smooth, elegant look. Follow these steps carefully to make sure your table is strong and beautiful.
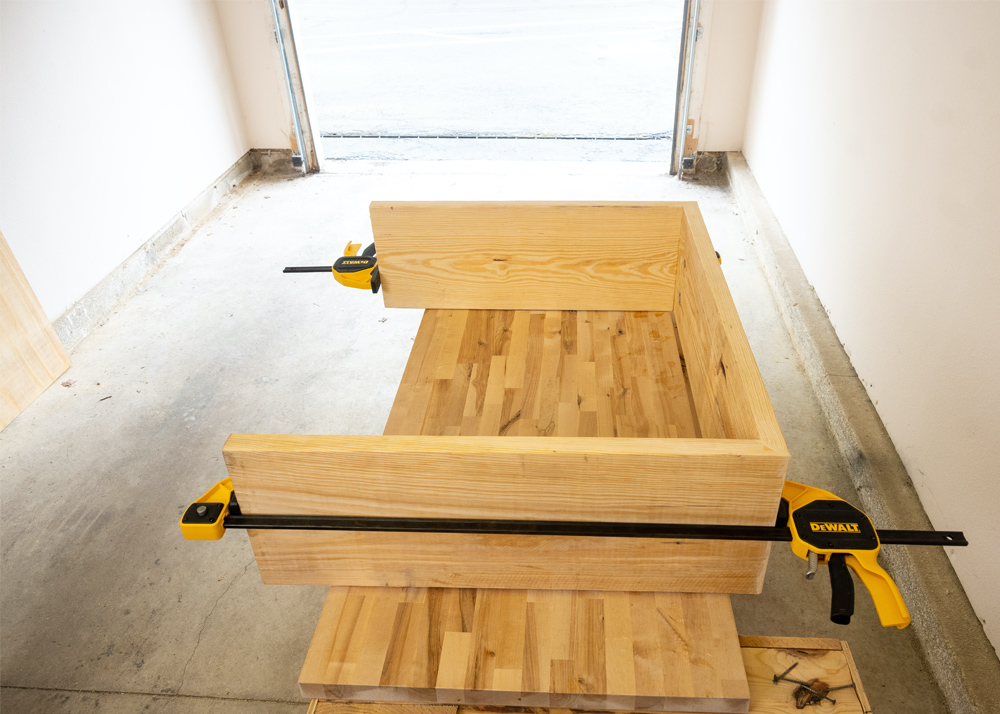
Joining The Panels
Start by aligning the waterfall panels. Use wood glue on the edges for a tight bond. Press the panels together firmly. Clamp them to hold in place while drying. This step ensures the smooth curve of the waterfall design. Take your time to avoid gaps or uneven joints.
Securing The Frame
Next, attach the frame to the joined panels. Use screws or nails to fix the frame securely. Make sure the frame is square and level. This creates a sturdy base for the table. Check every corner for stability. A strong frame supports the weight and maintains the shape.
Adding Support Braces
Support braces add extra strength to the table. Place them under the tabletop and along the sides. Screw the braces into the frame and panels tightly. These braces prevent wobbling or bending over time. They help keep the table steady and safe to use.
Finishing Touches
Finishing touches bring your waterfall console table to life. These final steps protect the wood and enhance its beauty. A good finish also makes your table last longer. Pay attention to each detail for a polished look.
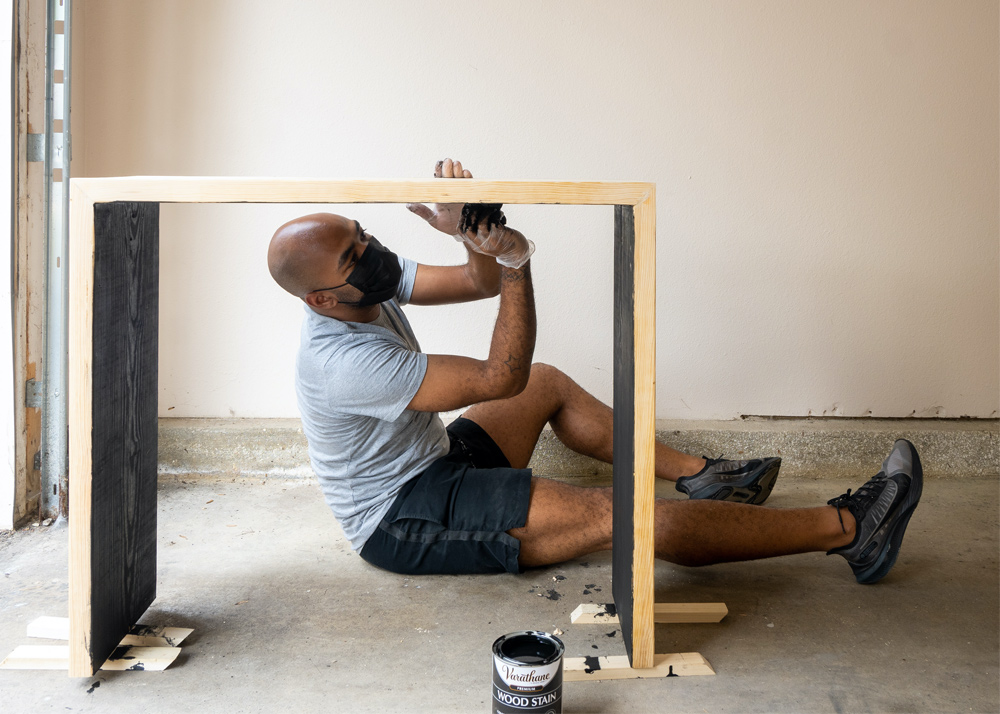
Applying Paint Or Stain
Choose paint or stain to match your room style. Use a brush or cloth to apply evenly. Apply thin coats and let each dry fully. This prevents drips and rough spots. Stains show wood grain, paint covers it completely. Pick the option that fits your design best.
Sealing For Protection
Seal the surface to guard against water and scratches. Use clear polyurethane or varnish for a hard coat. Apply with a clean brush, in smooth strokes. Let it dry fully before adding more coats. Two to three coats work well for most tables. Sealing keeps your table looking fresh for years.
Attaching Hardware And Accessories
Hardware adds style and function to your table. Choose handles, knobs, or metal legs for a unique touch. Attach pieces with screws or strong glue. Make sure everything fits tightly and straight. Hardware can change the whole look of your table. Pick simple or decorative styles to suit your taste.
Credit: www.hometalk.com
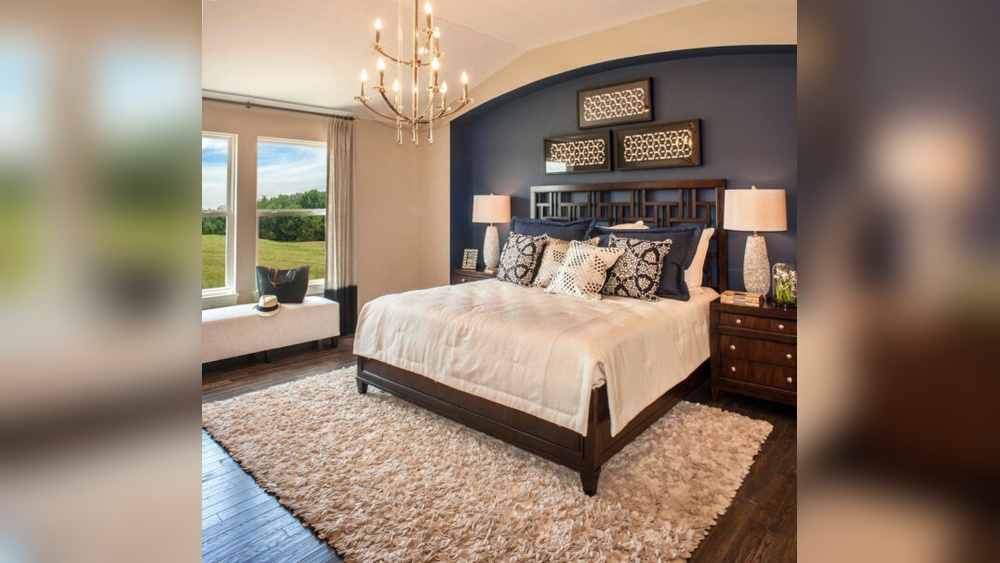
Placement And Styling
Placement and styling are key to making your waterfall console table stand out. The right spot shows off its unique design. Styling adds personality and charm to your space.
Think about the area where the table fits well. Style it with objects that match your room’s theme. Keep the look neat and inviting.
Choosing The Right Spot
Place the console table where it can be seen easily. Hallways, entryways, and living rooms are great choices. Avoid crowded spaces to keep it visible. Make sure it does not block walkways or doors.
Natural light near windows highlights the table’s smooth curves. A plain wall behind the table helps it stand out. Measure the space before placing the table. This keeps the room balanced and tidy.
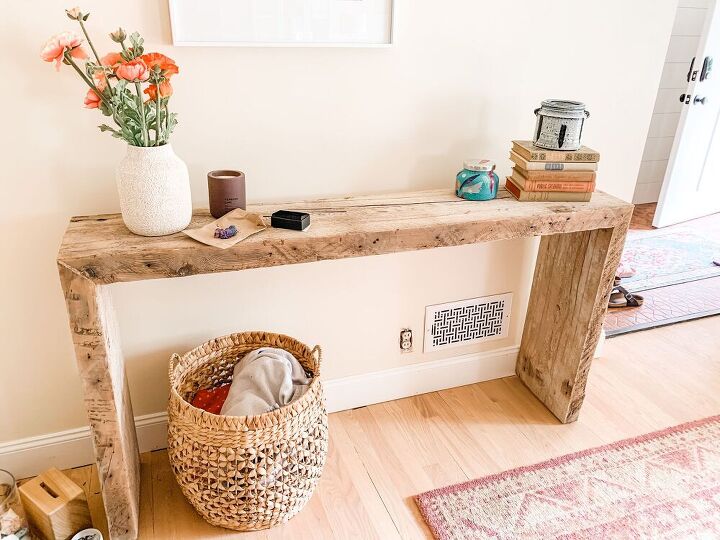
Decor Ideas For Console Tables
Use simple decor to enhance the waterfall design. A small vase with fresh flowers adds color. Books or a small lamp create a cozy feel. Mirrors above the table enlarge the space visually.
Keep decorations light to avoid clutter. Choose items with soft shapes to match the table’s flow. Personal touches like framed photos make it warm. Change decor seasonally for a fresh look.
Maintenance Tips
Clean the table regularly with a soft cloth. Avoid harsh chemicals that can damage the finish. Dust removes dirt and keeps the surface shiny. Use coasters to protect from water rings.
Check for scratches and fix them quickly. Keep the table away from direct sunlight to prevent fading. Proper care maintains its beauty for years. A clean table invites compliments and keeps your room neat.
Frequently Asked Questions
What Materials Are Needed For A Waterfall Console Table?
You need plywood, wood veneer, wood glue, clamps, sandpaper, wood finish, and tools like a saw and sander. Choose quality materials for durability and a smooth finish. Proper preparation ensures a professional-looking waterfall console table.
How Do You Create The Waterfall Edge Effect?
The waterfall edge is made by bending wood veneer over the table’s edges. Use flexible veneer and wood glue. Clamp firmly until dry. Sand the edges smooth for a seamless, flowing appearance that mimics a waterfall’s curve.
How Long Does It Take To Build This Table?
Building a waterfall console table typically takes 1 to 3 days. Drying and curing times for glue and finish affect the total time. Planning and preparation speed up the process. Patience is key for quality results.
Can Beginners Make A Waterfall Console Table?
Yes, beginners can build it with basic woodworking skills. Follow detailed instructions carefully. Start with simple tools and materials. Practice patience and precision for the best outcome. This project is great for learning woodworking techniques.
Conclusion
Creating a waterfall console table is a fun and rewarding project. You can add style and function to any room with this piece. Follow each step carefully and take your time. Use the right tools and materials for the best results.
This project helps improve your woodworking skills. Enjoy the process and the finished table. A handmade table brings a special touch to your home. Try this project and see how satisfying it feels. Keep practicing and building new furniture pieces.
Your creativity and effort will shine through every time.